
It is so satisfying to can and see the end result! I love it!
This post contains affiliate links and I will be compensated if you make a purchase after clicking on my links.
Blackberries and strawberries have been alternately on sale the past few weeks, so of course I have been canning them because I love to can and I love blackberries and strawberries! I usually just eat the blackberries, or make them into Blackberry-Lemon Marmalade, or turn them into cake, or Blackberry Lemon Bars. This time I decided to can some to keep on hand.
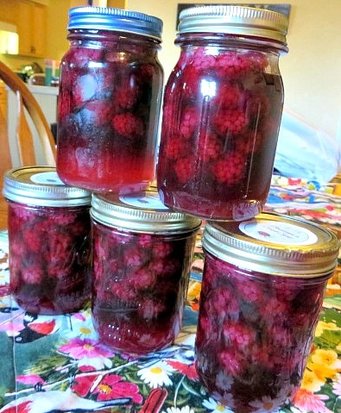
Blackberries!
Canning Blackberries is super easy because there is no peeling or coring. Here is how you do it in a nutshell.
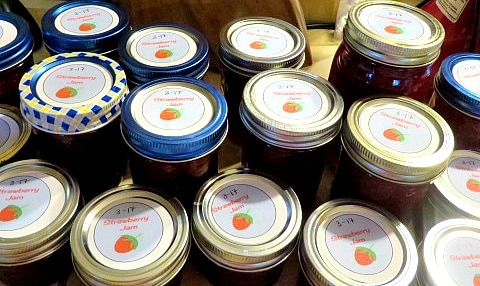
With the strawberries, I made a ton of Strawberry Jam. I gave you jam making tips on this post.
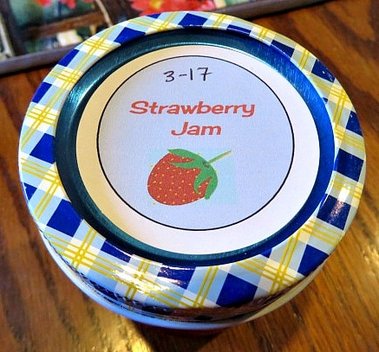
If some of my labels look crooked, it is because I didn't want to waste my trial prints! Yours should be more lined up. (I hope!)
One of the things that I have mentioned before is that instead of putting labels on the jars themselves, I like to put them on the lids that will be discarded anyway. That way you don't have to spend time peeling them off of the jars when the jam is all eaten and you want to use the jar again. I found some printable labels at Dollar Tree! They have round ones in the store, as well as square shipping labels. You can't beat the price on these, for just a dollar! I designed some simple labels to put on my jars and I decided to share them with you! This is a small way for me to say "Thank You!" for all of your support on our blog! This week we achieved over 31,000 views per month and it makes us so happy to think that the things we talk about have value to you.
To print the labels, click on the button to get the pdf file. Then click print. Make sure you click the "fit to page" option. There are some blackberry and many Strawberry Jam labels on one page. You may only need one or the other, but you can always cut them off and save the ones you don't use. These are designed to print on the Polaroid Round Adhesive Labels. You can also find them on Amazon here. jam labels jam labels 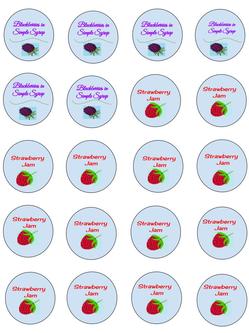
I have a lot of jam canned now! I was using up a lot of styles of rings, lids and jam jars!
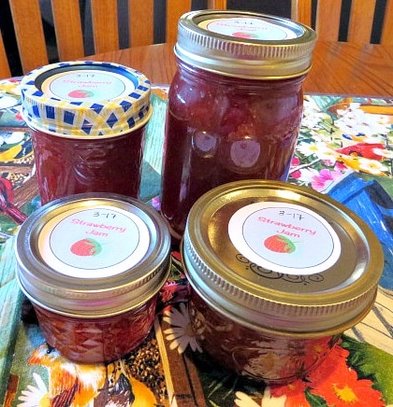
The little ones come in handy to give as quick gifts! It makes it a cuter gift with the label on it.
We have many more fun ideas to write about. I am having so much fun working on this blog with my girls. Thanks for your support. Keep coming back to see what else is in store!
If my labels are too simple, here is a link to some really sweet choices on Etsy! They aren't free, but if you want something a little fancier, there are some really cute things there.
8 Comments
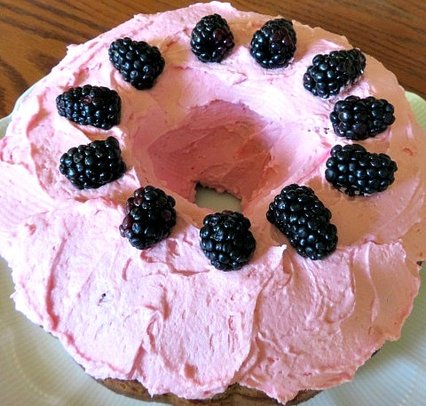
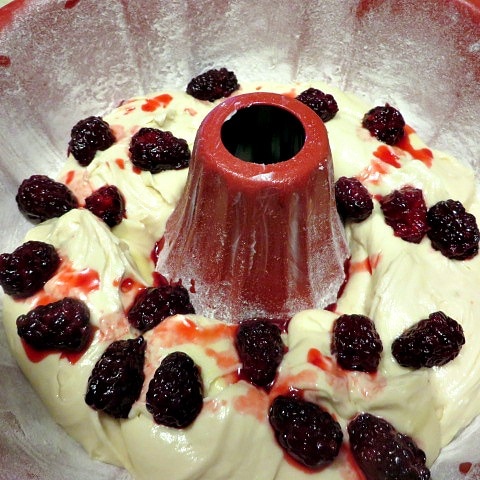
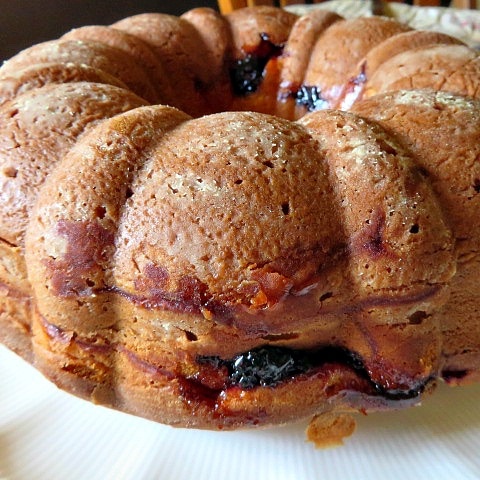
I am afraid I have a problem. Every time I find blackberries on sale, I can't resist them. They are little nuggets of juicy sweetness and when I find them I try to think of something new that I can do with them. Then, somehow, I always end up pairing them with lemons because I think that is a marriage made in heaven. I have given you recipes with those two ingredients here, in Blackberry Lemon Bars and here, in Blackberry Lemon Marmalade to name a couple. It has happened again, I found blackberries on sale and I was really in the mood for a special cake. I found a blackberry jam cake on Salt and Chocolate where she used preserves, but I wanted to use fresh berries. I adapted her recipe, using juice from the berries in the batter and the frosting, plus layering blackberries in the cake itself, to give me the biggest berry flavor I could get and BOY did the blackberries shine in this recipe!
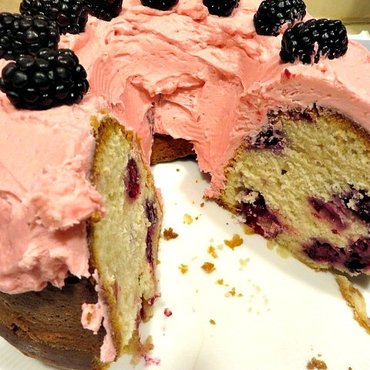
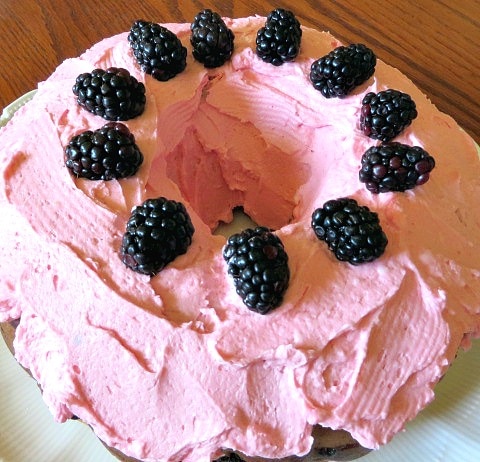
Do you see that pretty pink frosting? There isn't any food coloring in it to get that pretty pink color. That is because of the juice from the blackberries. It is so good you won't want to stop at one slice.
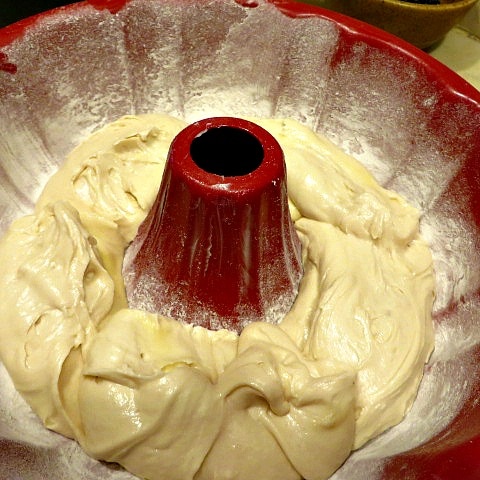
I recently picked up a new bundt pan and I decided it would be perfect for this cake. Here is a similar shape and size that you can purchase if you don't have one. This one is only $9.39. Click on the pictures below to see how I put the cake together, then click on the button for the full recipe.
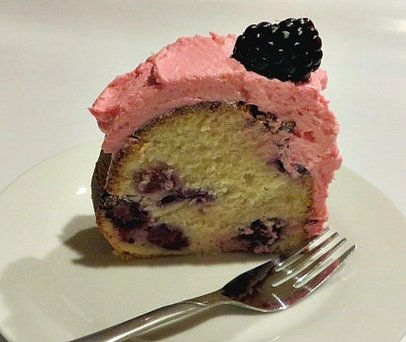
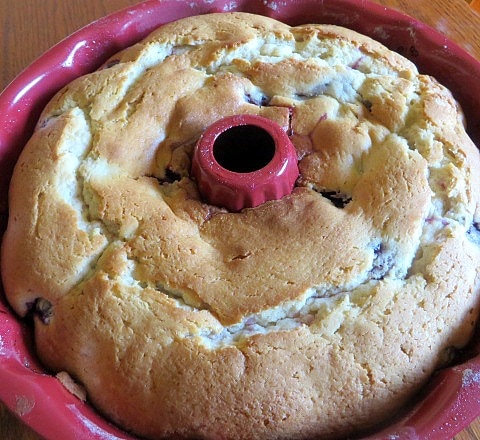
This cake is dense like a pound cake but extremely moist and flavorful! It is fun to get to those little bites of blackberry! I was surprised that when I added the blackberry liquid that the batter didn't turn pink or purple. But, the pretty pink blackberry frosting is enough pink for this cake, I think. No problem there! I hope you will enjoy it!
Shop this post:

Do you like trying special desserts? Go to Panna and learn from the best chefs!
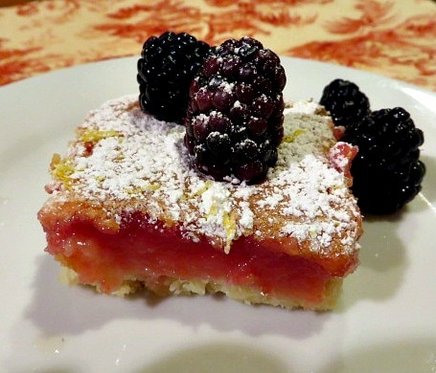 I have a dear friend who has a tree that is loaded with lemons and she lets me grab some whenever I need a couple. This past week, blackberries were on sale again and I picked up quite a few. As you know, I love the combination of blackberries and lemons. In the past, I came up with a Blackberry-Lemon Marmalade that is so delicious that if you haven't tried it, you should. This time I came up with the idea of putting together lemons and blackberries into a twist on the traditional lemon bar. As you can see, they came out so lovely with a tart sweetness that everyone enjoyed. The color would make them a pretty Valentine's Day treat as well! Here is the recipe! A couple of Fridays ago, I shared on Friday Faves that I love my new zester! I still do! (Here is one like it.) I also love this new little juicer that I got from a Princess House Party recently. It allows you to measure the juice as you juice it. Also, the reamer is removable, so it is very easy to clean. 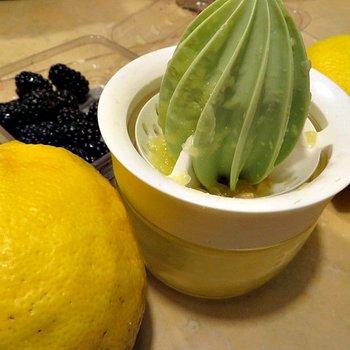 I couldn't find it on Amazon, but there are similar ones here and here. This type of juicer comes in handy when you only have a couple of lemons to juice and you don't want to pull out the electric juicer. If I don't need to measure, I use the citrus squeezer, but this kind with the reamer is great when you need to measure a specific amount of juice. This recipe calls for the juice of 1 lemon. But, since lemon sizes vary so much, (these were huge!), you should measure. This recipe needs about 5 T. of lemon juice, along with the juice of the blackberries. When you mash the berries through the sieve, be sure to reserve some for the garnish. That means you will only mash about 2/3 of the container. When the pan came out of the oven and after it had cooled a bit, I sprinkled on confectioners sugar, a little more zest and added some blackberries. 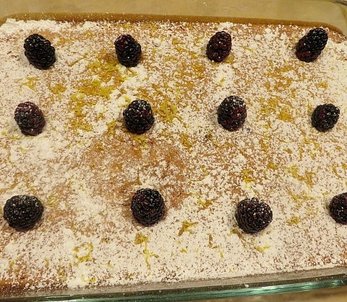 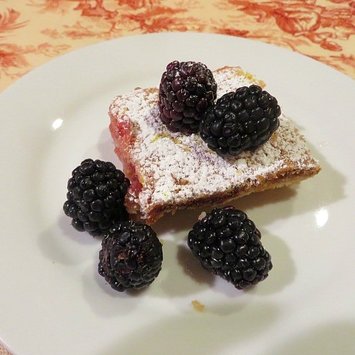 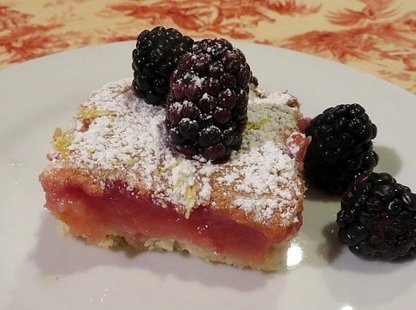 I love the pretty pink color of the filling! These were so good and easy to make. A good use of lemons if you are experiencing an over abundance! Hope you try them and enjoy!
 Ready to go in the oven! You may have guessed from this post and this one, that I really love blackberries. Lucky for me, they have been on sale for some really good prices lately! I decided that showing you how to make blackberry pie would be a great idea because making a fresh fruit pie is a special skill to have! When you work with blackberries you need to take extra care because they are a tender fruit. I always precook my fruits for fruit pies because:
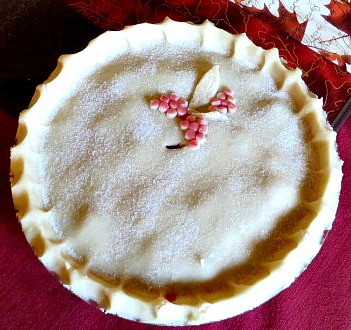
My mom always taught me to put 3 three slits in the top of the pie to let the steam escape. I usually do that, but sometimes I feel like getting a little fancy, so on this pie I only put one slit to leave room for a some decorations. 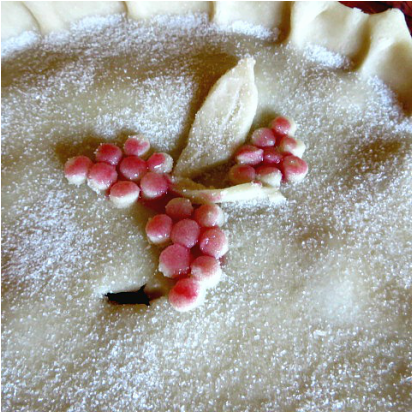 I used a straw to cut circles to form the blackberries. I used a little soft butter to stick them in place. Then, I used some of the reserved blackberry juice to add the color. I cut out the leaf and stem with a knife and just left them their natural color. Sprinkle the entire pie with sugar. It gives the top crust a little sweet crunch. 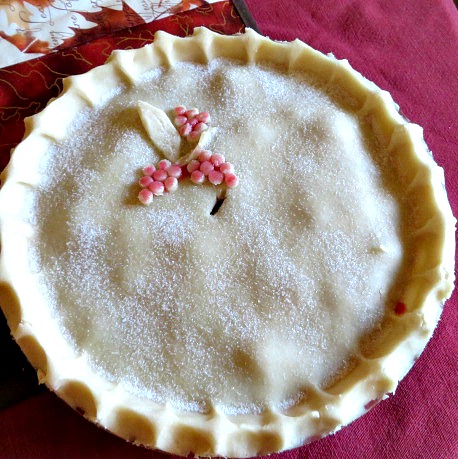 Here it is again, already to go into the oven! 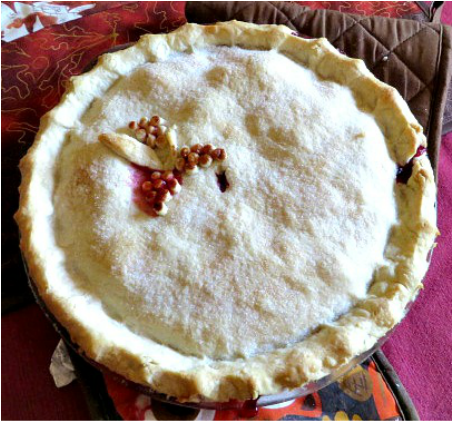 Here it is fresh out of the oven, juices bubbling! It is too hot to cut right now. As a fruit pie cools, the juices thicken, then when you slice it the fruit won't all spill out leaving parts of the pie fruitless. When it is just warm, you can slice it and serve it with ice cream. The crust recipe is available here, or I will soon put it on the printables page. In our next post of the Pie Series, I will show you a picture of the blackberry pie sliced! We have a lot of great recipes to look forward to. I hope you are following along and planning to try some of them out. Remember, Cyber Monday and Black Friday are coming. I am posting some great gift ideas at the end of each of my blog posts. I hope you will click through and check them out!
|
Creators of Hot Cocoa Bombs! (copyrighted)

Author
Helen Reynolds: Mother of six children , grandmother to eleven! I love to cook, craft and create things and I especially love doing that with my family, So, when my lawyer daughter, Lindsey, my artist daughter, Madalynn, and I came up with the idea of Hot Cocoa Bombs, this blog was born. Then, one more daughter, with her technical and science skills, plus creativity has joined in to round us out! Read more about us here! 
Click this link and visit 3WinksDesignShop on Etsy. Find our Hot Cocoa Bomb Idea Book, our For the Love of PIe e-book and more of our creations!

Amazon Gift Cards are the Perfect Gift!
    Archives
April 2024
|

 RSS Feed