|
This post contains affiliate links. We will be compensated for purchases made through those links at no extra cost to you. All views expressed are our own. We hope you enjoyed your Thanksgiving weekend and that you were able to take advantage of our great deals in our Etsy shop. If you’ve been following us for awhile you know how much we love Christmas, so we’ve planned such an exciting month of posts for you guys. We’ve decided to do BLOGMAS!  BlogmasWe’ll be posting everyday until Christmas (except one weekend)! And we’ve planned a fun take on “The Twelve Days of Christmas.” To celebrate we decided to give you this free “Oh by golly” printable. Based on one of our favorite Christmas songs. Just click the button below to download it.  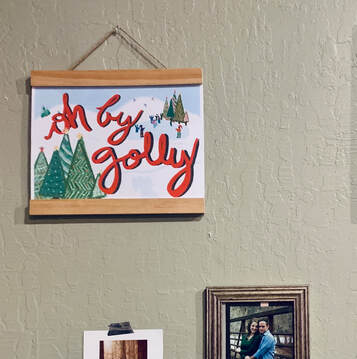 I hung mine in a magnetic poster frame. I love it because I can easily switch out pictures for the seasons. We have a tutorial on how to make one of these frames here. Or I found some on Etsy if you don’t feel like making your own.
Merry Christmas! Happy Holidays! Come back everyday for awesome holiday ideas!!
1 Comment
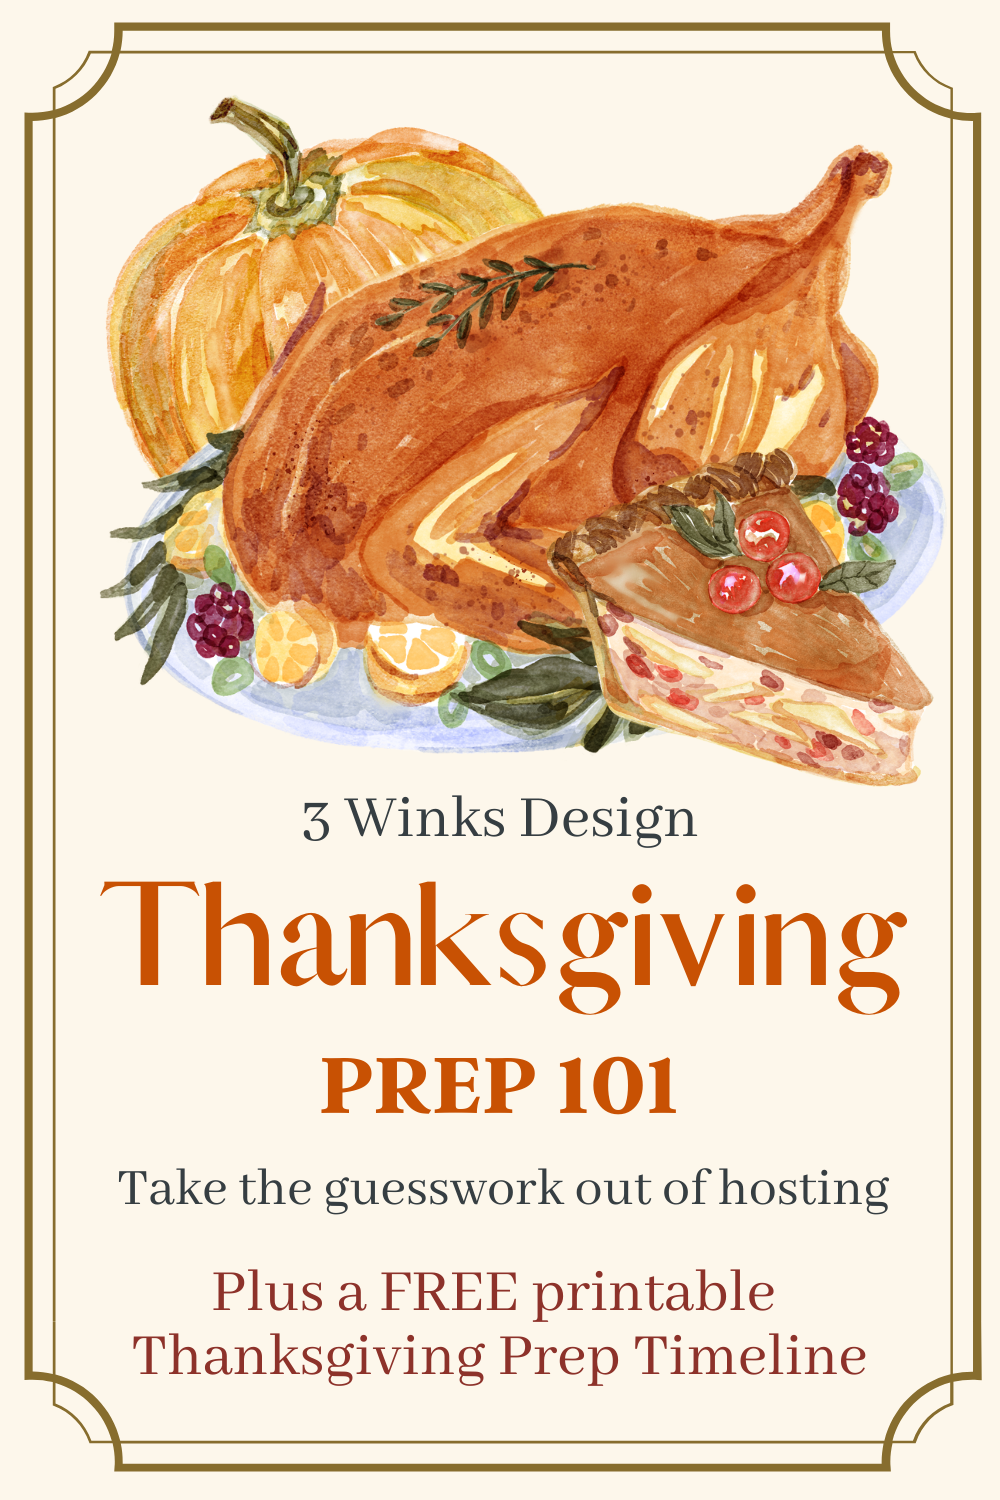
This post contains affiliate links. I will be compensated for purchases made through those links at no additional cost to you. Thank you for your support.  Have you ever been browsing Pinterest and been overwhelmed with trying to recreate on there? Or by the cost of trying to get the look you want? Honestly that's how I was feeling with this post. So I decided to set some limits for myself. Sometimes working within limitations can help get the creative juices flowing. I decided I wanted to spend no more than $10, and that it would be something I could put together in no more than 15 minutes. Because, let's be honest, with everything going on Thanksgiving Day, who wants to spend tons of time getting the table ready? And in the end I think my centerpiece ended up being beautiful! (If you're worried about timing for Thanksgiving be sure to check out our 'Thanksgiving Prep 101' post which gives you a timeline from a month in advance on how to prepare for Thanksgiving with a printable checklist to hang on your fridge!) 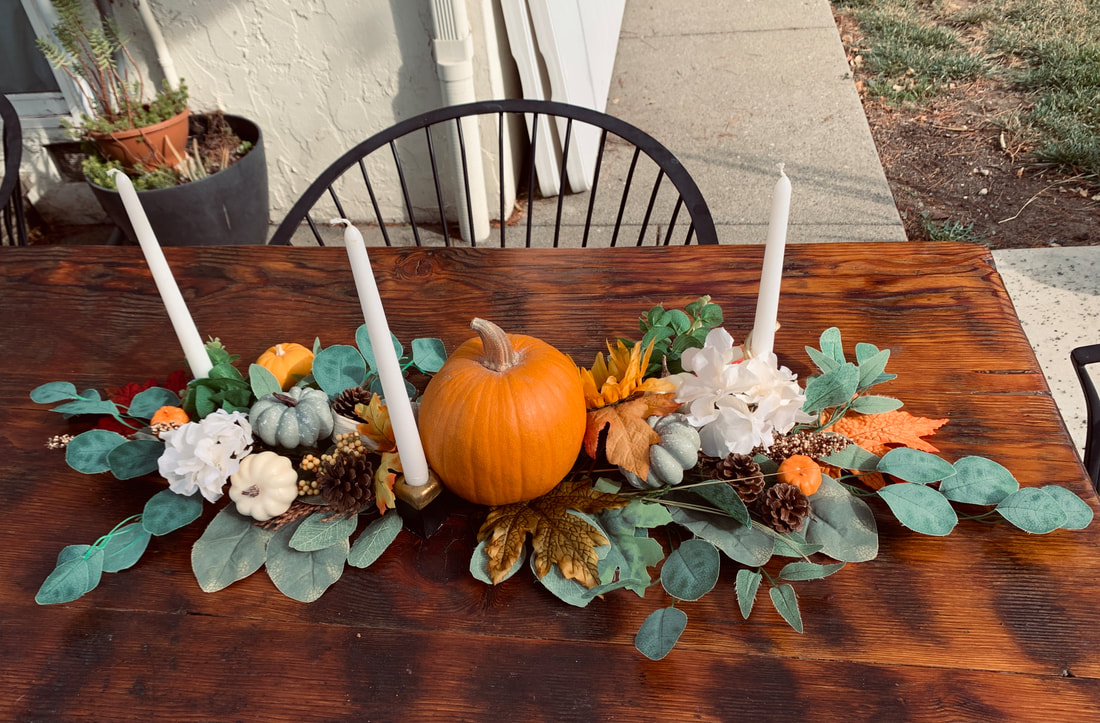 Easy & Affordable Thanksgiving CenterpieceI made this little video showing you how I put my centerpiece together. It's really that simple! Feel free to pause it if it goes too fast for you. Below I'll list the supplies I used.
Tips for Making a Thanksgiving CenterpieceIf you're wondering how I got all these for less than $10 the answer is after Halloween Clearance! Once Halloween is over stores basically start moving on to Christmas and heavily discount their fall merchandise. The 3 picks were $2 each! And my pack of leaves, pinecones, and little pumpkins were $0.25 each. So check out your bargain bins. If you can't find any around you here's some similar I found on Etsy. I already had some of the supplies in my home. I had some extra greenery from an old wreath I used to fill in gaps. We grew pumpkins in my garden this year so my centerpiece pumpkin and one of the mini orange pumpkins are from my garden. I know most people don't grow pumpkins so a pie pumpkin or two from the grocery store would also look cute in the center. You could also go on a pinecone hunt outside to help decorate your table. Just be sure to clean them off before using them. 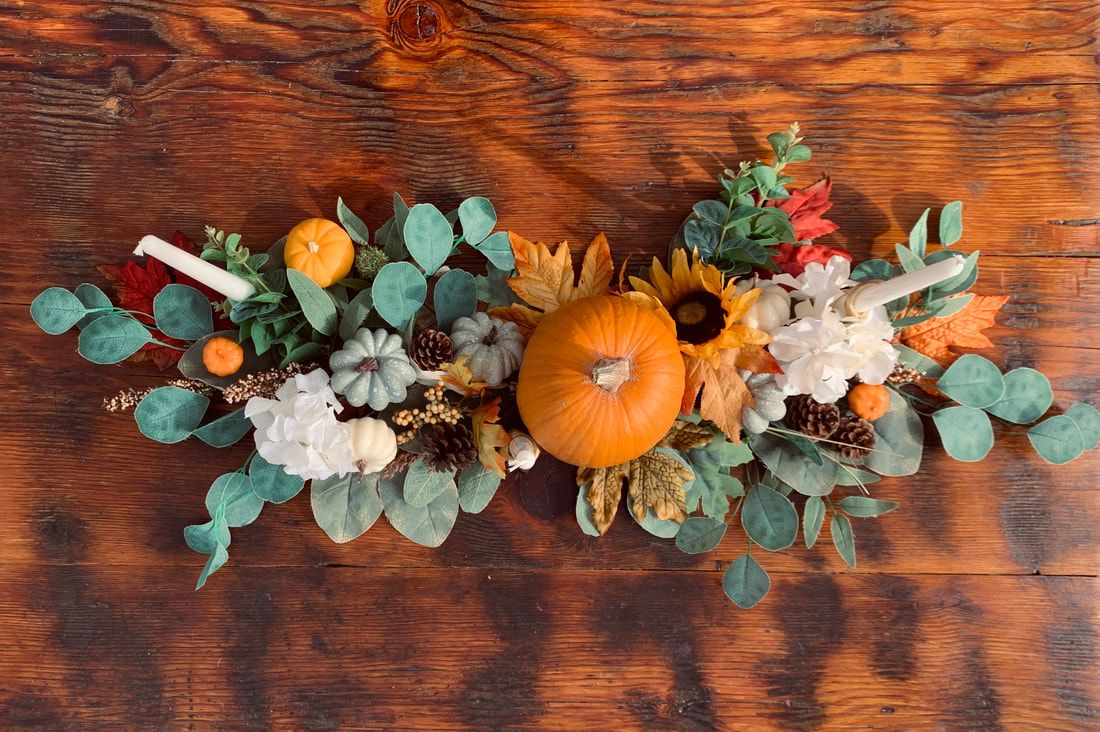 Here's some more tips for making your easy and affordable Thanksgiving centerpiece:
I hope that these tips and tutorial can help you to create your own beautiful Thanksgiving centerpiece. Don't let Pinterest overwhelm you, if you do use our tips to make your own centerpiece, tag us in your picture so we can share! Other Thanksgiving Posts you Might Enjoy
This post contains affiliate links and we will be compensated for any purchases you make at no additional cost to you. Thanks for your support!
Ready for the Fall season and Halloween? Here is an updated post from Maddy to get you inspired!
Fall is arguably the best season. It's cozy, but not freezing cold, there are beautiful colors everywhere you go, and it's the start of the holiday season. And now at the end of September, it's finally socially acceptable to get totally immersed in it. We thought we'd kick off October with 3 easy crafts to bring a little Fall into your home.
This post contains affiliate links. We will be compensated for purchases made through those links at no extra cost to you. All views expressed are our own.
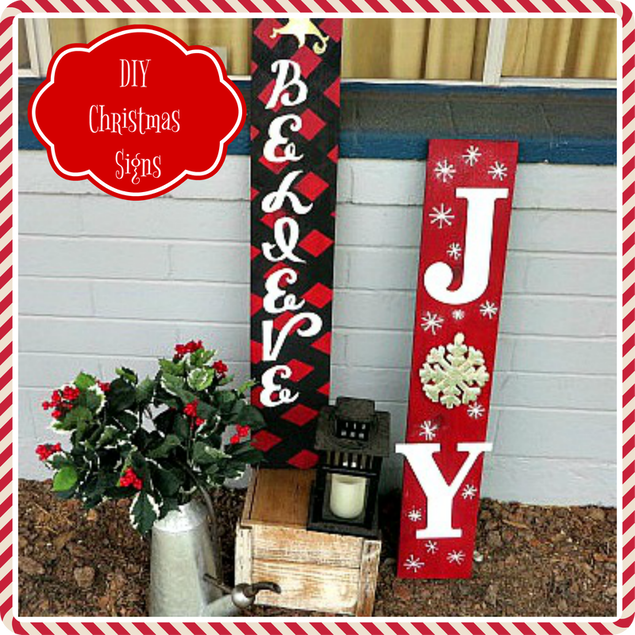
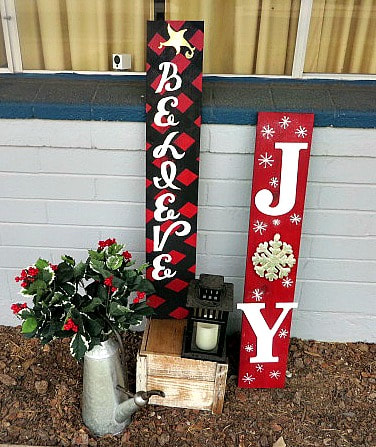
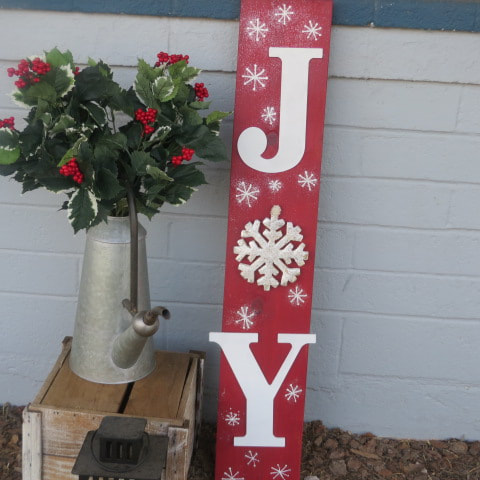
I love all of the word art signs that spell out Christmas messages and I really wanted some for the front of my house. I found one similar to the JOY sign at a retailer, but it was in excess of $17 and of course I thought, I can make that for much less! So, I did!
The JOY Sign: Step 1: Go to your husband and tell him how good you were about not spending that much money on a sign you can probably make yourself. Ask him if he happens to have some scrap wood that you can use to make your own signs. He is so proud of you for not spending the money, he goes right out and finds you a board that he cuts in half so that you can make 2 signs! (If he doesn't have a board, you could always go to Home Depot or Lowe's and look in their reject pile for an inexpensive board. They are pretty cheap and you don't want a perfect board for this anyway). Step 2: Find some leftover red paint and paint your boards your base color. If you don't have leftover paint, you can use a bottle of acrylic craft paint, but it will take a lot. Step 3: Go to Hobby Lobby or Michael's and find wooden letters in the size you want for your board. For the "O" in Joy, I found a snowflake ornament at Hobby Lobby that worked great. I was a little worried about the fact that may "Y" extended over the sides of my board, but now I love the interest it adds to the board. Step 4: Paint the letters white. Glue them on with 2 kinds of glue. Gorilla glue or E6000 will hold them for the long haul and a glue gun will keep them in place until the stronger glue dries. Step 5: Use white paint to make snowflakes and sprinkle them with glitter! Now you're ready to put your sign it its festive place!
The Believe Sign
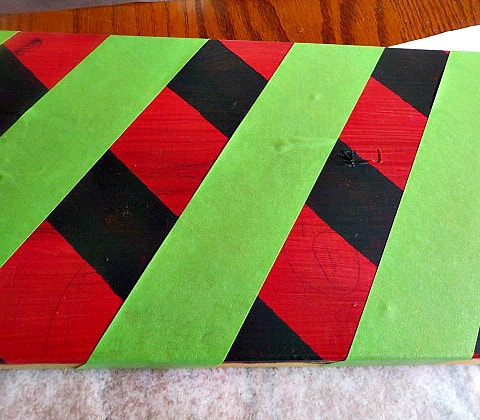
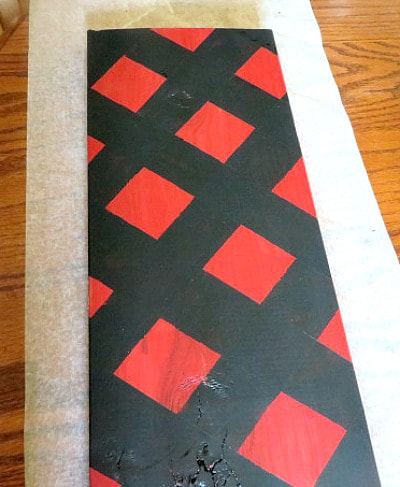
Repeat steps 1 & 2 above. Step 3: Use painter's tape to create a diagonal buffalo plaid design. Use left over black interior house paint or acrylic paint. I used house paint for the red and acrylic for the black.
Step 4: Use your Cricut machine to cut out letters and a star in a size that looks pleasing on your board. I used 4.5 inches.
Step 5: Place your letters and star. Then decide that you don't want the letters to be gold like the star and paint over them with white acrylic paint. Step 6: Arrange your signs where you want them and add some Christmas foliage to set them off, as well as a few other accessories! Take a picture and admire your work! Easy Peasy! 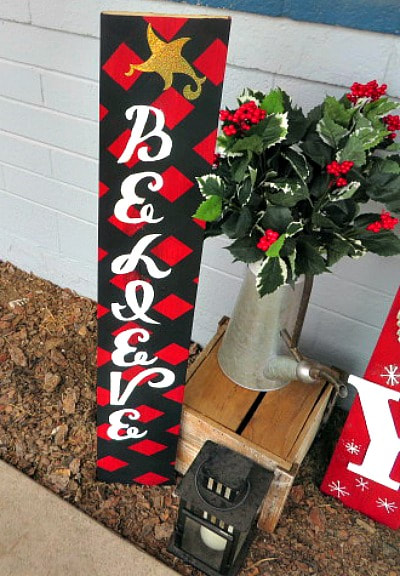
|
Creators of Hot Cocoa Bombs! (copyrighted)

Author
Helen Reynolds: Mother of six children , grandmother to eleven! I love to cook, craft and create things and I especially love doing that with my family, So, when my lawyer daughter, Lindsey, my artist daughter, Madalynn, and I came up with the idea of Hot Cocoa Bombs, this blog was born. Then, one more daughter, with her technical and science skills, plus creativity has joined in to round us out! Read more about us here! 
Click this link and visit 3WinksDesignShop on Etsy. Find our Hot Cocoa Bomb Idea Book, our For the Love of PIe e-book and more of our creations!

Amazon Gift Cards are the Perfect Gift!
    Archives
April 2024
|

 RSS Feed