|
This post contains affiliate links. I will be compensated for purchases made through those links at no additional cost to you. All views expressed are my own. Thank you for your support!  My grandchildren enjoy watching the TV cooking competition called Nailed It. If you haven't heard of it, it involves contestants who have no skills trying to make and decorate desserts that look like a professionally prepared example. The results are often funny (or alarming)! Thinking of ways to stay connected with our family, we had the idea of doing our own cupcake decorating competition in our own family by decorating cupcakes and taking pictures and putting them up for you, our readers, to vote on! Here were the rules of the competition:
So, please, do us a favor and in the comments vote for your favorite cupcakes! The kids group has a number on each picture and the adults have a letter. We appreciate your participation! Kid's Challenge (you may be surprised at the ages of who did what! I am so impressed with all of them.)  Adult Challenge (We all joined the fun!) 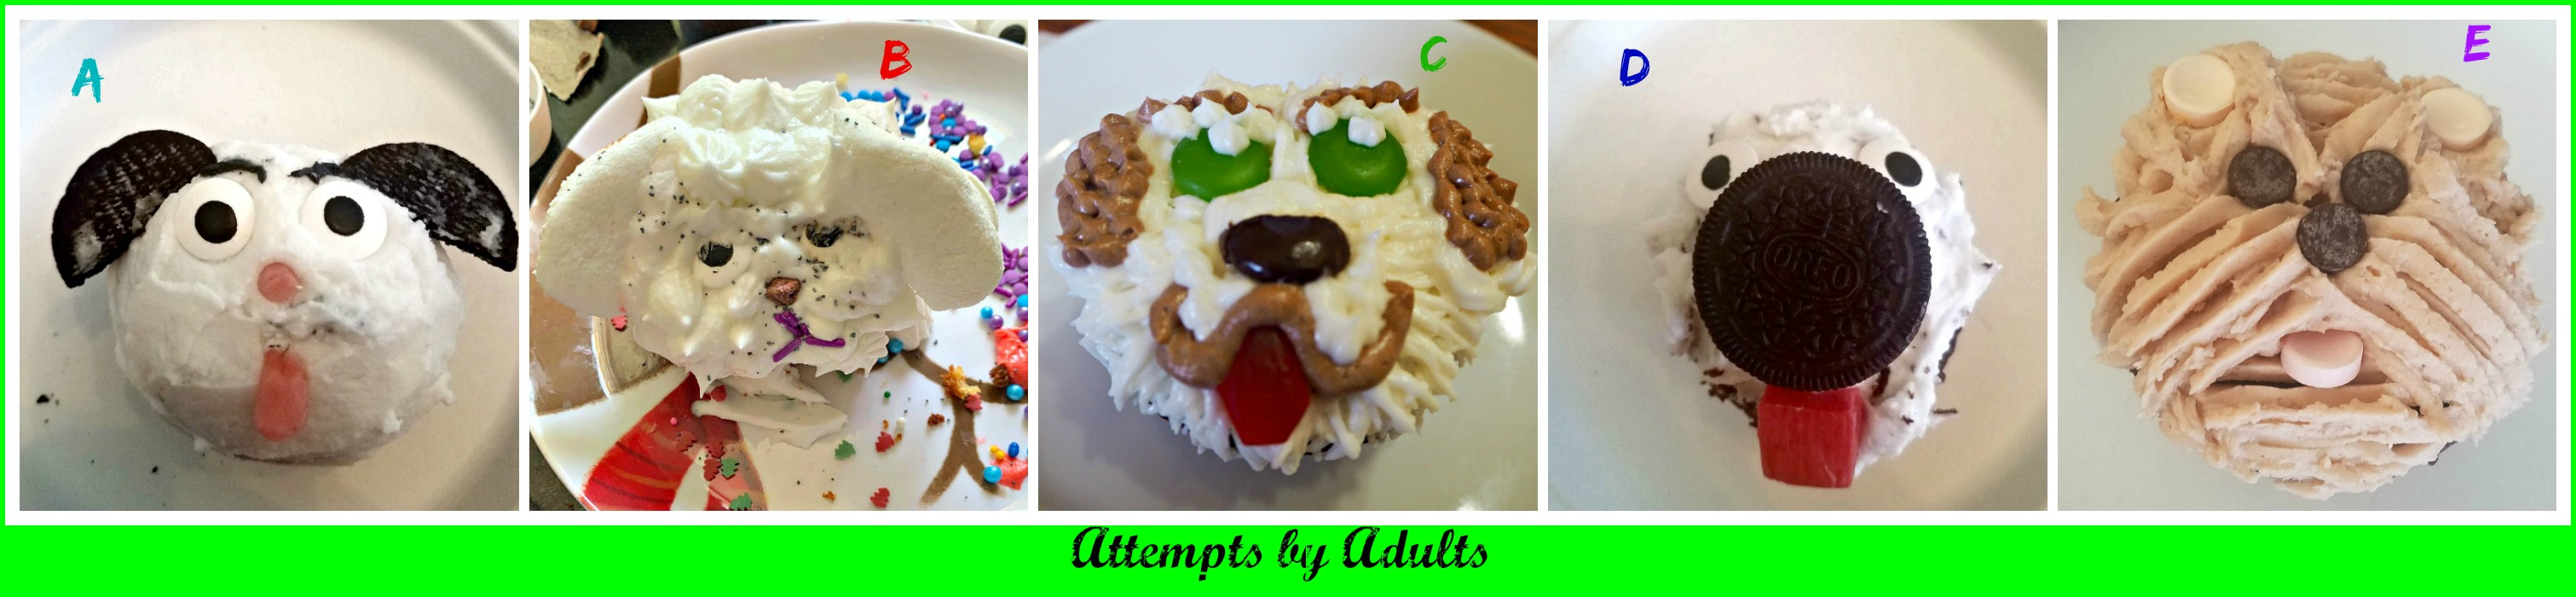 Staying Connected This was a fun way for our family to stay connected even though most of us have to stay apart. I also think it would be a lot of fun to do with a youth group which has to meet on line instead of together or with a group of friends who can't meet for lunch right now. You could do it with whole cakes or cookies, too. The best part of the challenge was after we decorated them, we ate them! Thanks for your votes! I hope you give this virtual activity a try! Other treat decorating ideas:
9 Comments
This post contains affiliate links. I will be compensated for purchases made through those links at no additional cost to you. All views expressed are my own. Thank you for your support! Taco Bell is one of my husband’s favorite places to eat. Yes, we know it’s not real Mexican food, and it is not the healthiest option, but that doesn’t change that’s it’s tasty! One of our favorite things to get there is the Crunchwrap. So we thought we’d try to make it at home. It seemed simple enough and it was! The result turned out delicious, simple, and had the potential to be healthier (that’s not the route we went with but it could be). 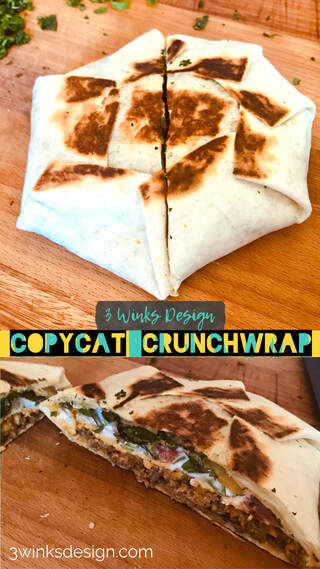 The CrunchwrapThe Crunchwrap is like a burrito but it’s layered and inside is a tostada shell, the wrap ends up having a disc shape. It then gets grilled to hold it shut. This actually makes it easy to eat and less messy. Making it at home is so easy, we’ll probably add it to our menu more often. Our kids love it too. Making the CrunchwrapI don’t know that I will put together a recipe in the same way I usually do but, I’ll tell you about each layer and different possibilities I’ve imagined for them. I also made a video that shows the process. Check it out below and on Youtube. (Did you know we have a YouTube channel?) 1. Large flour tortilla- you really want a large tortilla for the base because it needs to be able to fold up around the top of the Crunchwrap to secure everything in place. 2. Main protein- we used cooked ground beef, but I imagine beans (refried or otherwise) would be delicious too! I can also see a breakfast version with egg or potato. You’ll want to spread it into a circular shape that will fit underneath the tostada shell. 3. Nacho Cheese- I love the Fritos Jalepeño Cheddar dip. My tip is to spread this on the bottom of the tostada, rather than try to put it on the meat directly. This cheese is too spicy for our kids so we just used regular shredded cheese for them on this layer. I can also see guacamole being delicious right here. 4. Tostada Shell- this is where the crunch comes from for the Crunchwrap. 5. Sour cream- again spread this onto the top of the tostada shelf. This is another layer that would be delicious as guacamole. This is also a great place to add hot sauce! 6. Vegetables and herbs- Lettuce, diced tomatoes, onion, cilantro, diced peppers. Take or leave whatever veggies you wish. 7. Shredded Cheese- a final layer of shredded cheese is added. 8. A small circle of flour tortilla- this may not be needed if your base tortilla is large enough to completely close over the top. Mine weren’t, so this circle helped to keep things secure in my Crunchwrap as I “grilled” it. 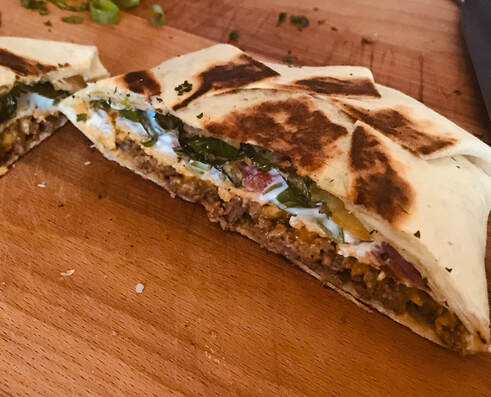 To fold the wrap take the bottom tortilla and fold it over the top. Pleat it around the edge until the whole tortilla is up around the edge.
Carefully place it plated side down on a hot pan or griddle over medium to medium high heat. Let it cook about 3-5 minutes until it’s browned. Flip and repeat. Now your Crunchwrap is ready to enjoy. I’d love to know if you make it and what variations you try! Let us know in the comments below.
This post contains affiliate links. I will be compensated for purchases made through those links at no additional cost to you. All views expressed are my own. Thank you for your support!
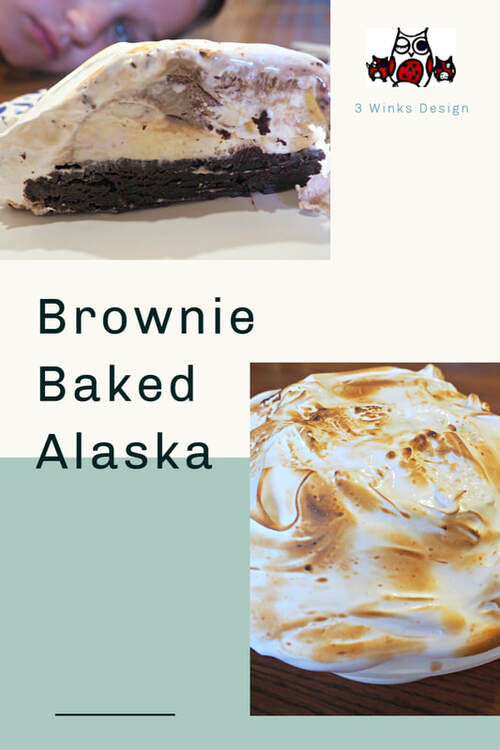
Last week, when I told you about making Chocolate Chip Cookie Ice Cream Sandwiches, I promised to tell you what I did with the ice cream "scraps". This Brownie Baked Alaska is the happy outcome!
Traditionally, Baked Alaska is made with a white cake as the bottom layer. The recipe is vintage, created by a restaurant to celebrate the purchase of the Alaskan Territory. Since that time, there have been many variations to the recipe. The amazing part about the Baked Alaska is that ice cream gets baked in order to brown the meringue on the outside of the dessert. It is a delight to cut through the layers of meringue, ice cream and in this case, brownie. I liked using the brownie instead of cake because 1-who doesn't love brownie and ice cream together? 2-The brownie is more firm than cake to use as a base and comes out of the pan easily, and 3-a small batch of brownies makes the perfect size to fit without a ton of cake leftovers. (Then, I would be writing a post about what to do with leftover cake!) For this recipe I did something new! I made Swiss Meringue, something I had never done before! It was so easy and the results were amazing! It was like a marshmallow cream without gelatin. I don't know why I had never tried it before, but I think I will be going back to this recipe again and again.
Assemble:
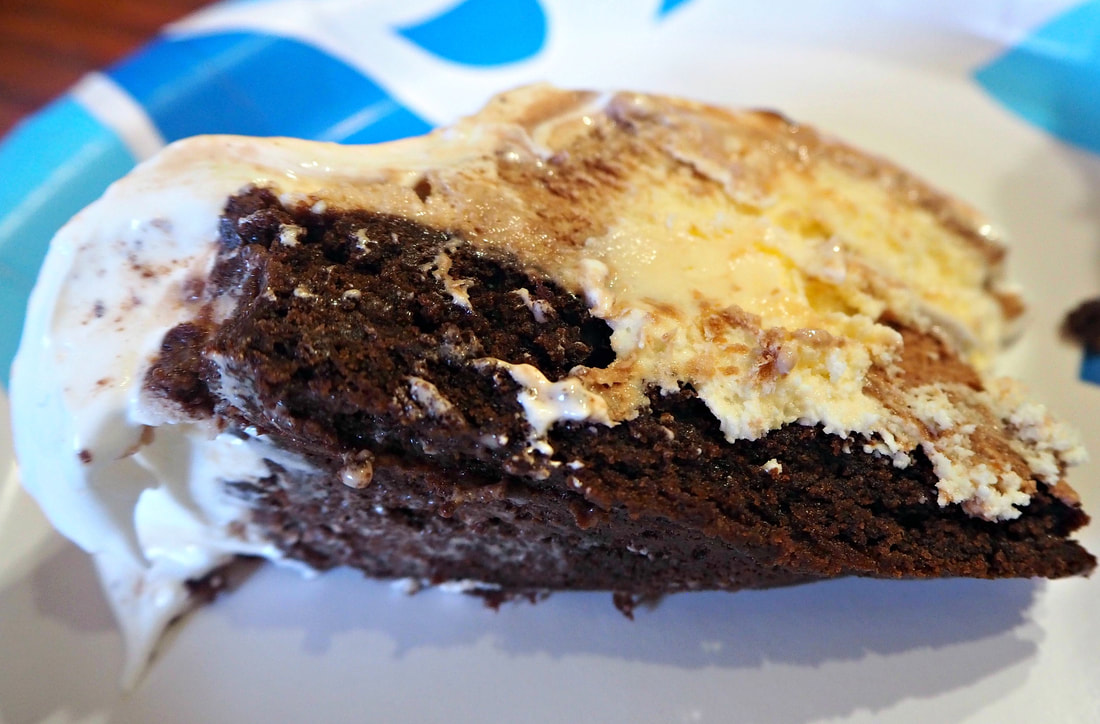
You can use any flavor of ice cream that you wish. Ours was Neapolitan, which gave the nice surprise of not knowing what flavors might be predominant in each slice. But, mint chocolate chip is a favorite or anything that you may love.
This recipe was much easier than I imagined it was going to be and got lots of oos and ahhs from the kids. I hope that you will give it a try! |
Creators of Hot Cocoa Bombs! (copyrighted)

Author
Helen Reynolds: Mother of six children , grandmother to eleven! I love to cook, craft and create things and I especially love doing that with my family, So, when my lawyer daughter, Lindsey, my artist daughter, Madalynn, and I came up with the idea of Hot Cocoa Bombs, this blog was born. Then, one more daughter, with her technical and science skills, plus creativity has joined in to round us out! Read more about us here! 
Click this link and visit 3WinksDesignShop on Etsy. Find our Hot Cocoa Bomb Idea Book, our For the Love of PIe e-book and more of our creations!

Amazon Gift Cards are the Perfect Gift!
    Archives
April 2024
|


 RSS Feed