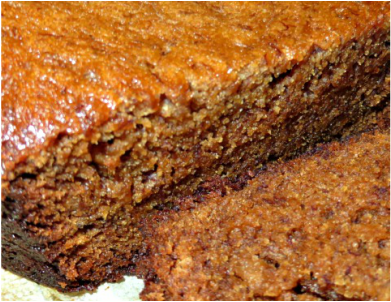
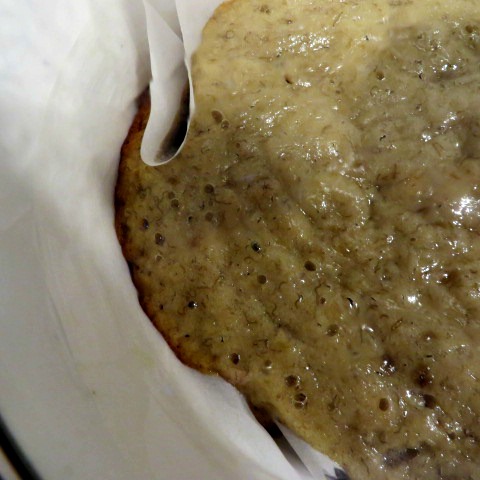
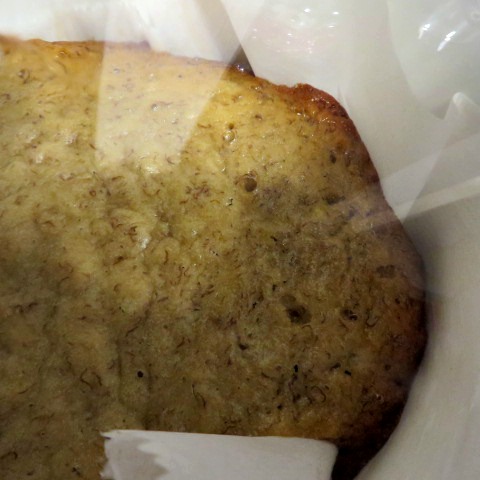
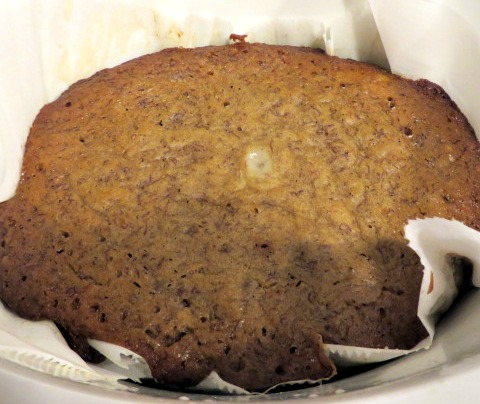
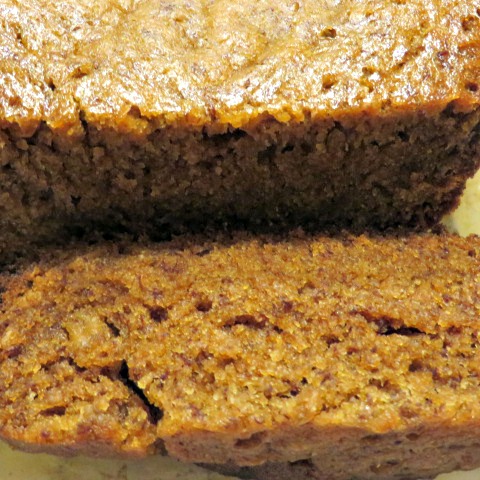
 The other day, one of our local markets had bananas on sale for 4 lbs. for .98! Such a great deal! I picked up some bananas for our family and a friend's. My son walked in the door from school and saw them all and said, "When did we become Donkey Kong?". (He can be quick with the wit, that one.) Of course, I froze some bananas for smoothies, and some will become po'i. But, after Tina's post on Artisan Bread in a Crock Pot, I have been wanting to try banana bread in a crock pot. The only problem is, every recipe I see for crock pot banana bread on Pinterest looks very dry. I have a great recipe for Super Moist Banana Bread that I make in my oven, so I thought with a couple of tweaks, I would try it in the crock pot! I must confess here that I actually turned on my oven and did a loaf in there as well as the one in my crock pot because the recipe makes two loaves and I wanted to be able to compare the outcomes. Luckily, it was cloudy outside, threatening rain, so the temperatures weren't quite as intense as they had been, (high 90s to low 100s). So, here is how it all turned out: 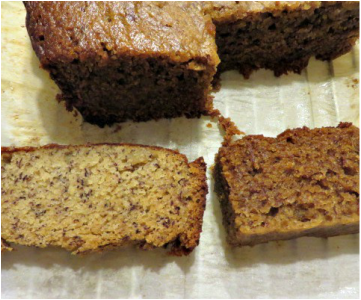 The slice on the right is the crock pot loaf, and the one on the left is the one I cooked in the oven. You can see that the one from the crock pot is darker and more moist that the one from the oven! While it takes longer to bake in the crock pot, the outcome was delicious! My family loved and devoured both loaves of bread! I will give you the baking instructions for the oven and for the crock pot. That way, in the winter, when you want to warm up the house, you can use our oven. In the summer, when you want to keep things cool, the crock pot method will be great! Super Moist Banana Bread
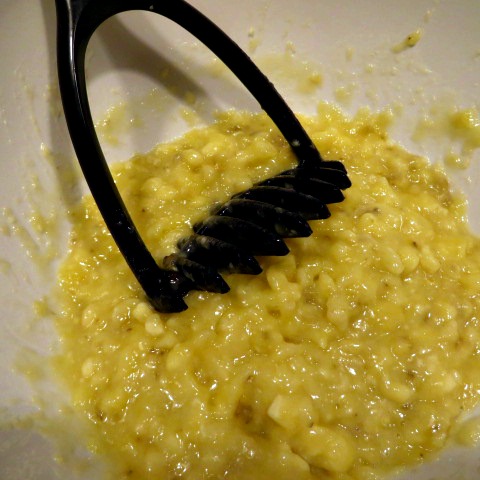
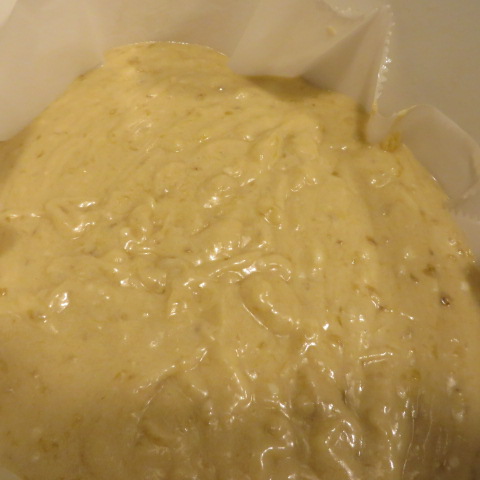
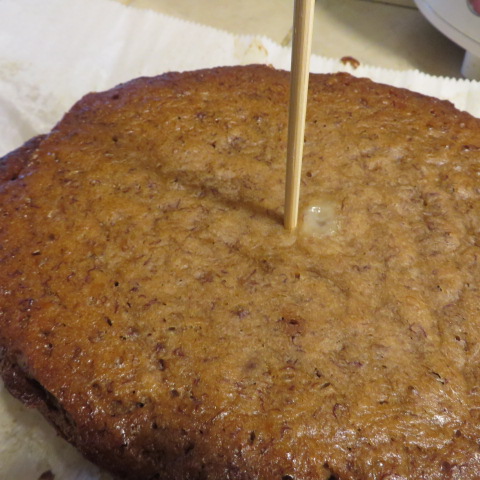
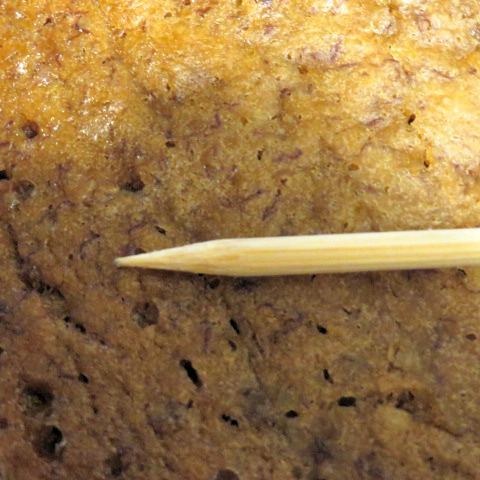
(Crock Pot Method) Spray your crock pot with cooking spray, then line it with a sheet of parchment paper, then spray again. Set your crock pot on low heat. 2 c. sugar 1/2 c. shortening 1/2 c. butter (softened) 6 ripe bananas 4 eggs 2 c. +4 T. flour 1 tsp. salt 1 tsp. baking soda nuts are optional. I didn't use any. Mash the bananas with a potato masher, then blend in the sugar, shortening and butter. When blended well, beat in the eggs. Sift in the dry ingredients and mix well. This recipe makes two large loaves, so you can use two crock pots to bake the bread, or bake one loaf and then the other later if you only have one crock pot. Or, do it like I did and do one in the crock pot and one in the oven if it isn't too hot for you. Bake in the crock pot for approx. 4 hours. It should look firm all across the top and a toothpick or skewer should come out clean when poked in the middle. Oven Directions: The only differences are that you grease your loaf pans, (I didn't use parchment paper). Pre-heat the oven to 350 degrees. Mix as directed, pour into pans and then bake for 1 hour. It makes two large loaves and is so moist it feels sticky when you take it out of the pan. This bread freezes well I hear, but ours never lasts long enough to find out!  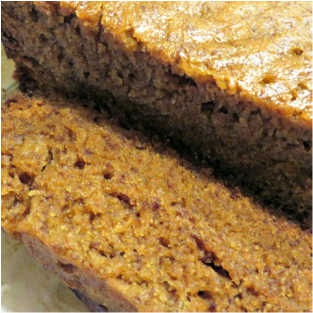
4 Comments
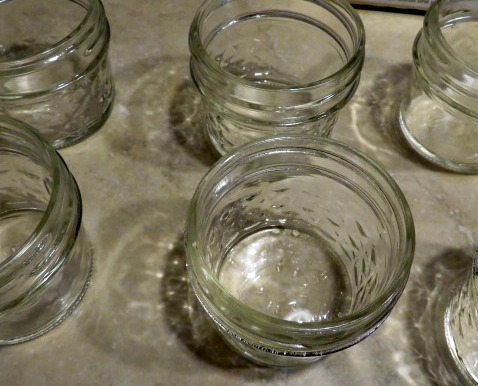
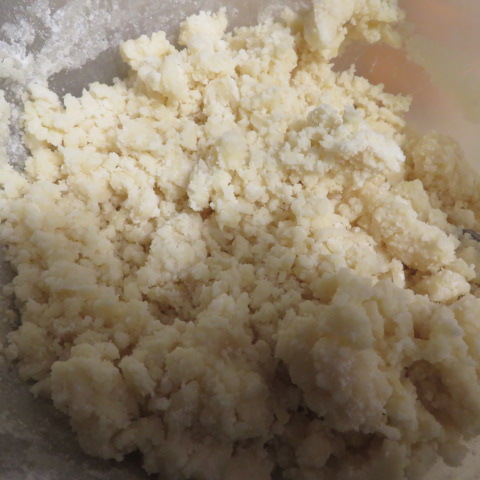
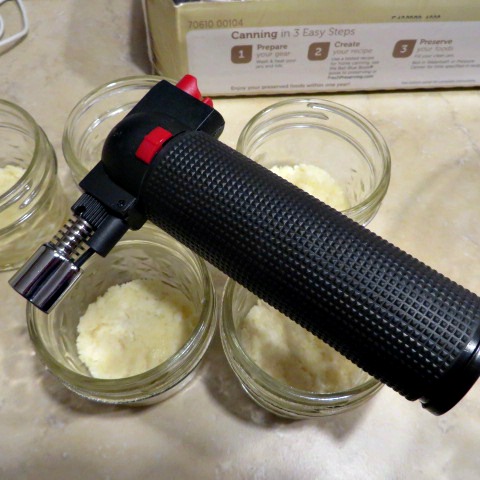
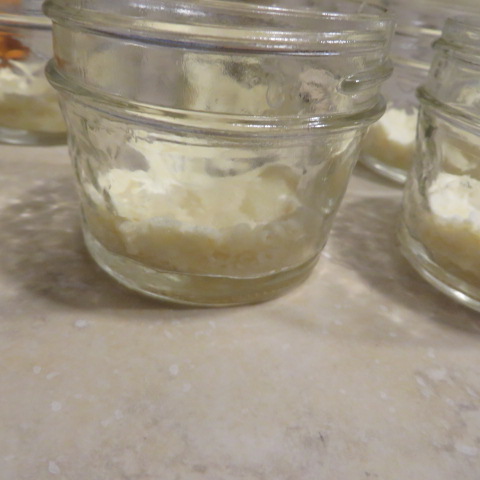
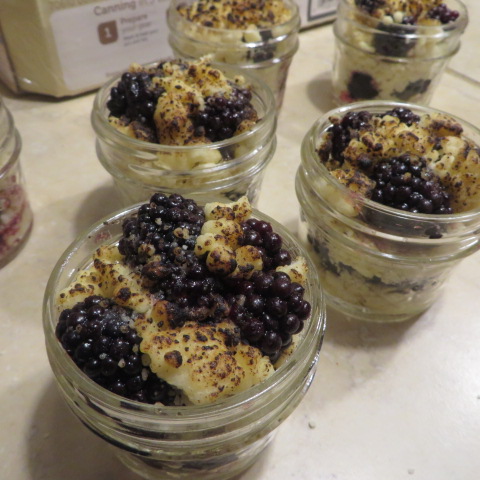
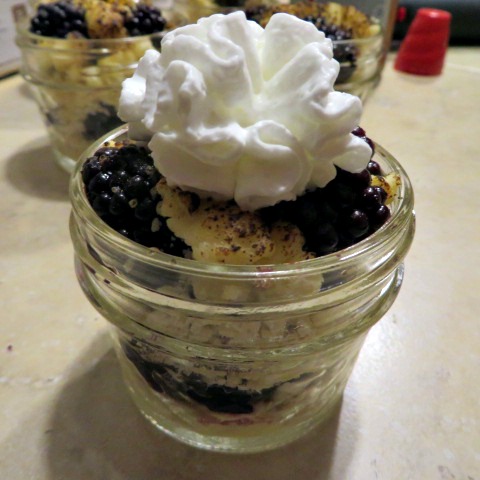
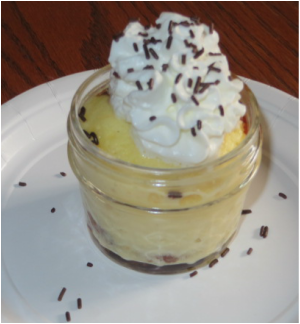 Sometimes I get an idea in my head, and there is a lot of trial and error before I finally can execute what I want to create. Sometimes, it just doesn't come together at all and I have to scratch it. Then I am left with the leftover pieces of my attempt and I hate to waste anything, so happily I can usually make something good happen with what I have left. This is exactly what happened to me this week. I went to the store and I found these cute little jelly jars on sale for $3.99! That is a really good price, so I had to buy them. I was going to link you to a source online to purchase jars, but they are so much more expensive. You are better off keeping an eye on the prices in your grocery store. 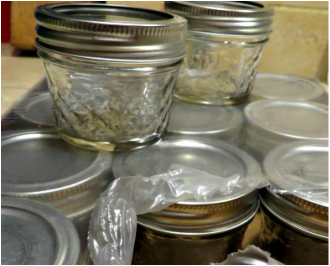 You know of my desire not to turn on my oven during these hot summer months, so I thought that I would come up with a deliciously cute no-bake dessert to put in these little jars for my family, then later I could use them as gifts to give away blackberry-lemon marmalade. I also had more blackberries, which have been selling at a pretty good price all summer, and I love them. I thought how delicious would a blackberry cobbler be, but how would I make the ooey, gooey, crunchy crust? Wow! My little torch that I use on Creme Brulee should be just the thing! Failed! Here is a quick synopsis of my failure. Remember to click on the pics. Well, after putting my family through that trauma, I still had half a bowl of cake mix left. So, I turned to Pinterest and found this pin. I thought, "Hmm, I think I can do something like that in my jars!" So, I did! 1st- I mixed 1 egg into the second half of the mix and enough water to give me a slightly thicker than cake batter consistency. If you make these with a box of cake mix without making the failed cobbler first, just make the recipe on the box, substitute butter for the oil and put a little less water than it calls for to make a little thicker batter. 2nd- Put 2 T. of the batter into the jar. No more, or it will overflow in your microwave. 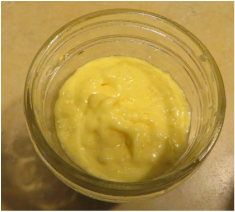 3rd- Put a dollop of canned frosting in the center of your batter. 4th-I put them in the microwave 2 jars at a time for 1 minute each and they came out just right. But, every microwave varies, so watch them! Let them sit for just a minute. 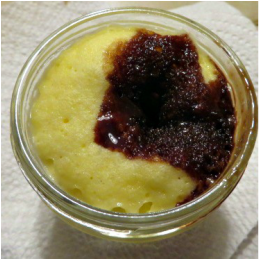 They come out looking like this, with ooey, gooey goodness on the bottom. 5th- Add whipped cream and sprinkles and you have a simple dessert that the kids will love. I think this would be a fun activity for young girls to make together at a party or get together. Eat them right away because they are best served warm. Or zap them for a few seconds if you serve them later to warm them up. 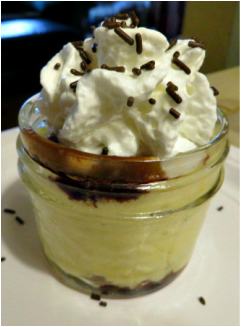 I guess that this just goes to show that good things can come from our mistakes! "If at first you don't succeed...", and all of that! Wouldn't this be good with a chocolate cake? Maybe a larger jar!


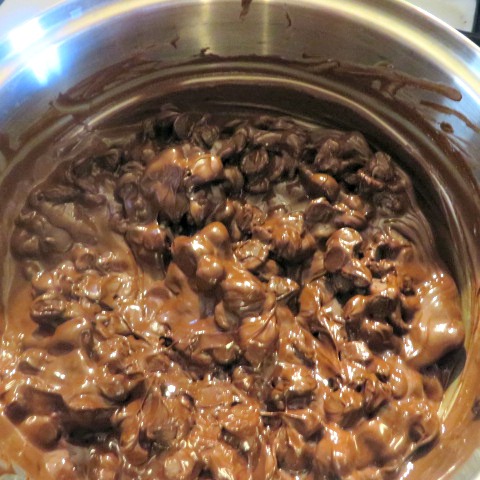
I went outside this morning and it was only 89 degrees out there! There were sprinkles of rain coming down and I was in Phoenix, AZ Heaven! I know the time is right to begin to make the Cocoa Bombs!
Actually, I have already made one batch this month. I am giving them away as thank yous to all of the people who helped with my daughters wedding. I made a couple salted caramel, some cherry cordial and the original marshmallow chocolate flavors. Maddy smelled the chocolate melting and said, "Ah, the smell of Cocoa Bombs!" If you want to remember how to make them,here is the tutorial! At the bottom of this page there is a link to purchase the molds I use! You get 2 molds for only $10.99! That is a really great price!
It really is time for me to get busy making the Hot Cocoa Bombs seriously because I have gotten the word that theUgly Sweater Express is back on this year! I have posted about our success at this event here and here. My daughter-in-law and her family host this event, and since she just had my grand baby number 7 a few months ago, we weren't sure if the tradition was going to carry on this year. But it is, and we are so excited about it. If you are a crafter in the Phoenix area, go to the Facebook page and find out how to get involved before all of the spots are taken. If you just like handmade items, go to the Facebook page and find out about when and where it is so you can come and see us. 3 Winks will be there and you can try a Hot Cocoa Bomb for yourself! Or, buy some for gifts! They make great Teacher Gifts for Christmas!


So, here is a question for you. I have considered offering Hot Cocoa Bombs for sale, just during the Holiday Season. Do you think I should? I would only be able to offer them within my state of AZ because of interstate commerce laws which vary and then fall under the rules of the Federal Government. So, AZ people, what do you think? Should I do a few months of online trade? Give me your opinion please!
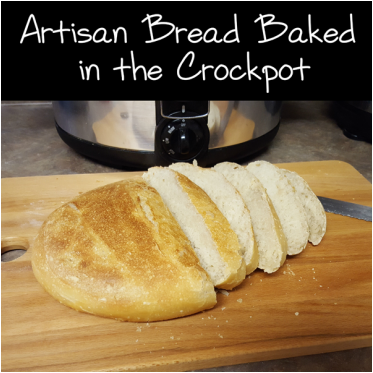
I am so excited to bake this bread in my crock pot! Here is my good friend Tina from Sweet T Verbena guest posting to tell us how to do it! Thanks Tina!
Hi! This is Tina from Sweet T Verbena guest-blogging for you today. I was reading Helen's posts about not being able to bake in the summertime, and let me tell you, the struggle is real! My counter-top convection/toaster oven, pressure cooker and my crockpot are my best friends for not heating up the kitchen during the summer. But who would think that you could bake bread in a crockpot?
A friend of mine gave me a link to a recipe to make artisan bread in 5 minutes a day. My husband and I loved the bread so much that he bought me the cookbook. I think I got the instructions for baking in the crockpot on their blog. 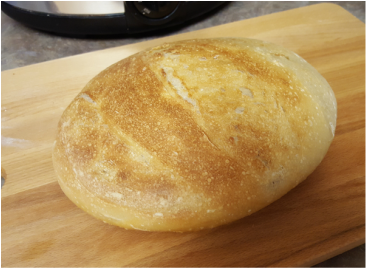
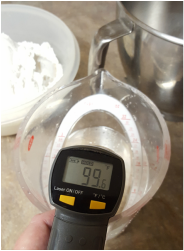
This is a dense, chewy bread with a crisp crust and you'll love the yeasty smell that fills the house while it is baking. And it is so easy too! Only four ingredients; flour, water, yeast and salt, and no kneading! This recipe makes four, one-pound loaves of bread. The dough can stay in the refrigerator for up to two weeks so you can have fresh bread ready with only five minutes of prep work. You can easily double the recipe and store the one-pound balls of dough in the freezer too.First, measure 3 cups of lukewarm water that is about 100° Fahrenheit. I use my infrared thermometer on the water as it comes out of the tap. Once it is the right temperature I fill the measuring cup. Because our water never cools off this time of year it doesn't take long to get it the right temperature.
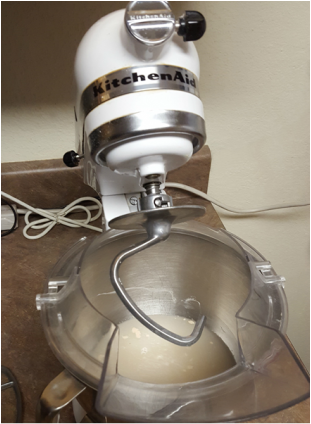
Pour the water into a mixing bowl. I use my KitchenAid mixer with a dough hook but you could also mix it by hand with a wood spoon. Add 1 tablespoon of yeast.
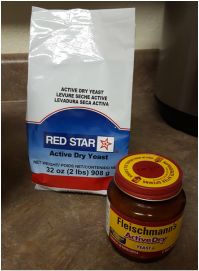
Yeast tip: I've found the best price for yeast is at Costco. I buy the 2 pound bag and keep it in the freezer. For convenience, I fill an empty Fleischmann's jar and keep that on hand in the refrigerator.
Stir water, yeast and salt until combined. If using a mixer, I suggest adding the pouring shield at this point before adding the flour. I always make a mess when the flour comes out! Also, if you don't have a dough hook, I have used the paddle before and it worked just fine.
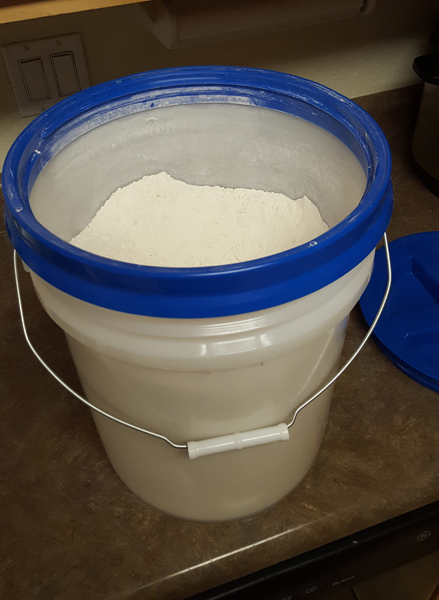
Now, for a tip about flour. For my food storage, I buy 25 pound bags of flour from Winco and store them in a 5 gallon bucket with a screw on lid. Of course that can get heavy and I'm sure my husband doesn't want to lug that around for me all the time, so I transfer it to a Tupperware canister in my pantry as needed. If you fall in love with this bread you'll be making a lot of it and go through a lot of flour!
One more tip… You can also use other flours in this recipe like whole wheat flour or oat flour. When I made it with 50% oat flour and 50% white flour it was a little denser but had a great oat flavor. I just ground old-fashioned oats in a food processor until it looked like flour.
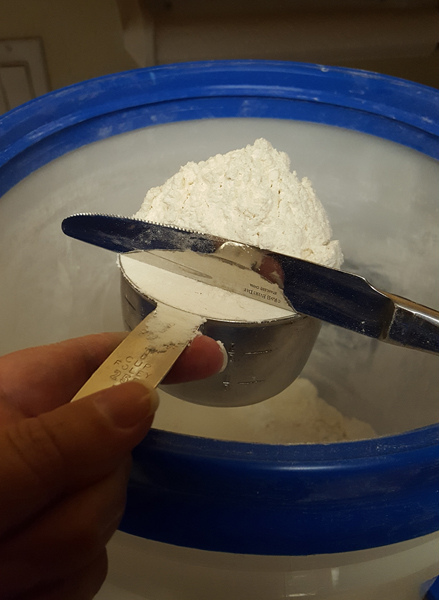
Another great thing about this recipe is that the flour doesn't need to be sifted. I give the flour a stir with a butter knife to loosen it up a bit and then scoop a cup out at a time, scraping of the excess with the back of the butter knife. You'll need 6 ½ cups.
With the mixer on low, add the flour slowly and let it mix until it is all incorporated. The dough will be lose and sticky. It doesn't look like regular bread dough that you would knead.
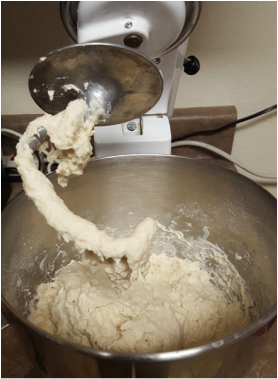
Transfer the dough to a large bowl and cover loosely. Let rest 2-5 hours until it begins to collapse. I have let it rest for as little as 1 hour when I made 16 loaves in one day for a Cub Scout Blue and Gold dinner. Leaving it out longer won't hurt either. I've heard you can leave it out overnight so don't panic if you forget it. It really is very forgiving!
Note from Helen: Tina had some really great before and after photos of the rise here, but for some reason, the after photo would not download. Sorry Tina. But trust me, it did rise a lot!
If you are in a hurry, you can start the baking process now but I recommend refrigerating it overnight. Refrigerated dough is less sticky and easier to work with than room-temperature dough. You should refrigerate the dough at least three hours before shaping a loaf but it can be used right away. You’ll find that even one day’s storage improves the flavor and texture of your bread. This maturation continues over the two-week period. Again, the dough can also be frozen in 1-pound portions in an airtight container and defrosted overnight in the refrigerator prior to baking day.
When you are ready to bake your bread, prepare a piece of parchment paper by dusting it with flour. You can also sprinkle it with corn meal but I don't care for it so I don't use it. Remove the dough from the refrigerator and sprinkle the top with flour and scrape down the sides of the bowl with a rubber scraper. Use kitchen scissors to cut the loaf. I am going to use a two-pound portion (half of the dough) for this loaf. 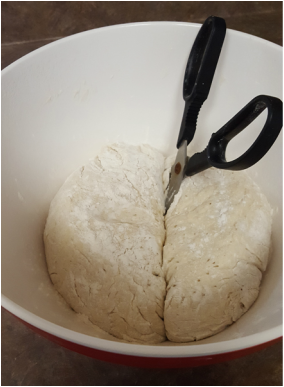
Dust your hands with flour and pull out the dough, shaping it into a ball or football. Use more flour on your hands when the dough starts getting sticky. Place the dough on the parchment paper and cut three slits, about ¼ inch deep.
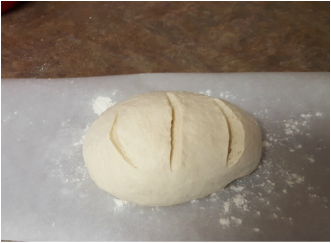
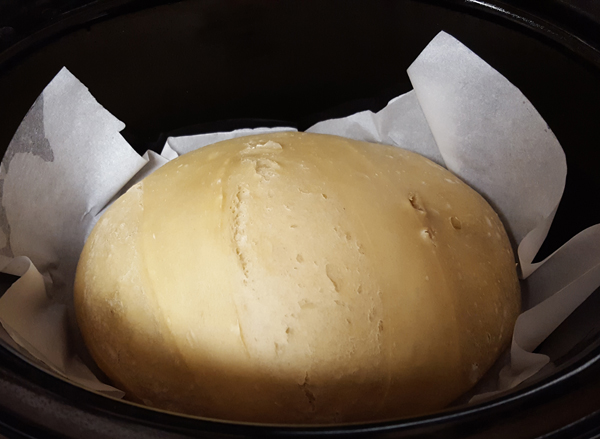
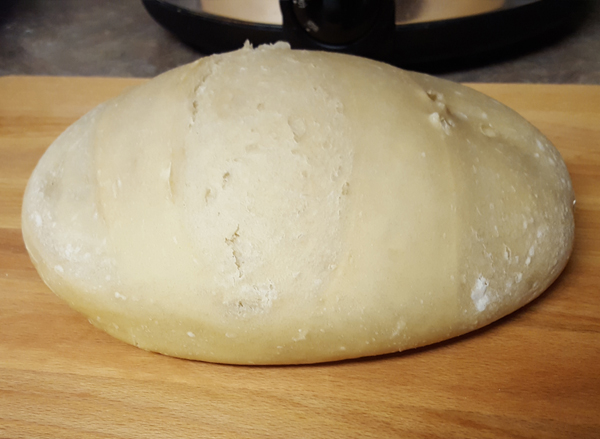
Lightly spray the sides of the crockpot with cooking spray. Place the dough into the crockpot lifting it by the paper. Do not turn on the crockpot. Let rest for 40-60 minutes. The picture below shows what it looked like after 40 minutes. I probably should have let it rest and raise longer but I was trying to hurry it along so we could have it with dinner.
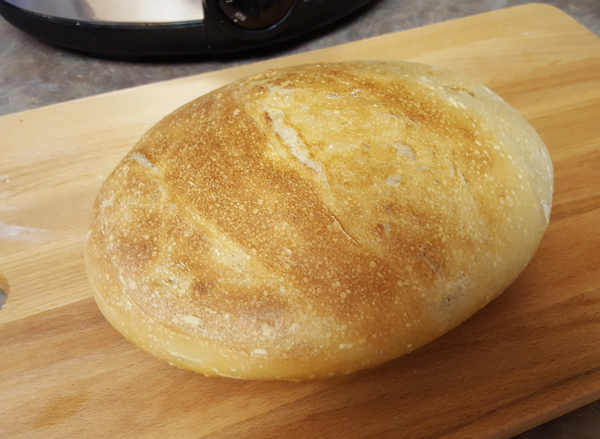
Now turn your crockpot on to high and cover it. Bake the bread for about an hour to an hour and a half or until it reaches 190° to 200° F. It will be very pale with a soft crust.
If you want a darker or crisper crust, you can put the bread under the broiler, with the rack positioned in the middle of the oven, for 5 minutes or until it is the color you like. I like to turn the loaf over and brown the bottom as well. Watch it carefully so it doesn't burn (unless you're like my mom and like your toast well done).
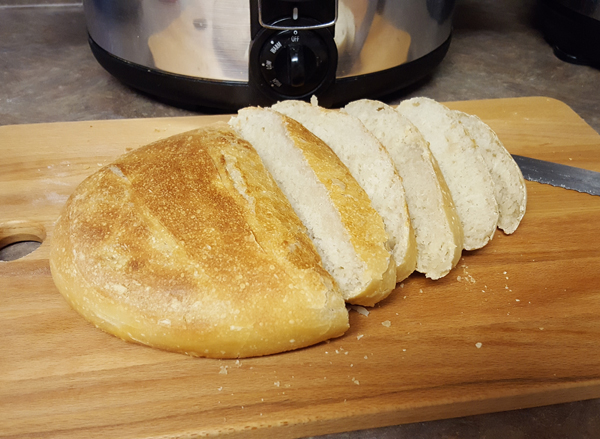
Cool completely on a wire rack before cutting.
The condensed recipe is below with instructions for baking in the oven on a pizza/baking stone or in loaf pans. If you don't have a pizza stone, try turning your cast-iron skillet upside down and baking your bread on that.
The Master Recipe: Boule
Makes 4, 1-pound loaves 3 cups lukewarm water (100° F) 1 1⁄2 tbsp granulated yeast (1 1⁄2 packets) 1 1⁄2 tbsp coarse kosher or sea salt 6 1⁄2 cups unsifted, unbleached, all-purpose white flour 1. MIXING: Add yeast and salt to the water in mixer with dough hook. Turn on low and add flour. Mix until combined. Dough should be wet and loose. 2. RESTING: Cover loosely and sit at room temp until it begins to collapse (approximately 2-5 hours). Refrigerate the dough in a lidded (not airtight) container and use it over the next two weeks. Refrigerated dough is less sticky and easier to work with than room-temperature dough. We recommend refrigerating the dough at least three hours before shaping a loaf but it can be used right away. You’ll find that even one day’s storage improves the flavor and texture of your bread. This maturation continues over the two-week period. The dough can also be frozen in 1-pound portions in an airtight container and defrosted overnight in the refrigerator prior to baking day. 3. PREPARE FOR BAKING: Sprinkle a piece of parchment paper and the surface of the dough with flour, then cut off a 1-pound (grapefruit-sized) piece. Form into a ball and place on parchment paper. Make 3 to 4, 1/4-inch-deep, slashes into top. Let it rest uncovered for about 40 minutes. 4. PREHEAT: 20 minutes before baking, preheat oven to 450 degrees with a baking stone (or upside-down cast-iron skillet) on the middle rack. Place an empty broiler tray for holding water on bottom shelf. 5. BAKING: Slide the loaf onto the baking stone. Quickly pour about a cup of hot water into the broiler tray and close the oven door to trap the steam. Bake for about 30 minutes, or until the crust is brown and firm to the touch. 6. COOLING: Allow to cool completely, preferably on a wire rack. BAKING IN CROCKPOT: Prepare dough in step 3, but instead of letting it rest, place the dough and parchment paper, directly into the crock-pot. Turn the temperature to high and put on the cover. Bake for 1 hour. Check for doneness (190° to 200° F). You will have a fully baked loaf of bread, but the crust is very soft. If you want a darker or crisper crust, stick the bread under the broiler, with the rack positioned in the middle of the oven, for 5 minutes or until it is the color you like. BAKING IN A LOAF PAN: Use 2 pounds of dough. Let the dough rise in a well-greased non-stick 8 ½ x 4 ½- inch loaf pan, covered loosely with plastic wrap for 1 hour and 40 minutes. 20 minutes before baking time, preheat the oven to 375 degrees. (Do not use steam pan.) Bake the loaf for about 60 minutes. Flip the loaf out of the pan and allow to cool before cutting it.
* For those of you who would like a printable version of this recipe, Tina has posted one on her blog here.
|
Creators of Hot Cocoa Bombs! (copyrighted)

Author
Helen Reynolds: Mother of six children , grandmother to eleven! I love to cook, craft and create things and I especially love doing that with my family, So, when my lawyer daughter, Lindsey, my artist daughter, Madalynn, and I came up with the idea of Hot Cocoa Bombs, this blog was born. Then, one more daughter, with her technical and science skills, plus creativity has joined in to round us out! Read more about us here! 
Click this link and visit 3WinksDesignShop on Etsy. Find our Hot Cocoa Bomb Idea Book, our For the Love of PIe e-book and more of our creations!

Amazon Gift Cards are the Perfect Gift!
    Archives
April 2024
|


 RSS Feed