|
Hey guys Alicia here with a DIY that is easy and fast!
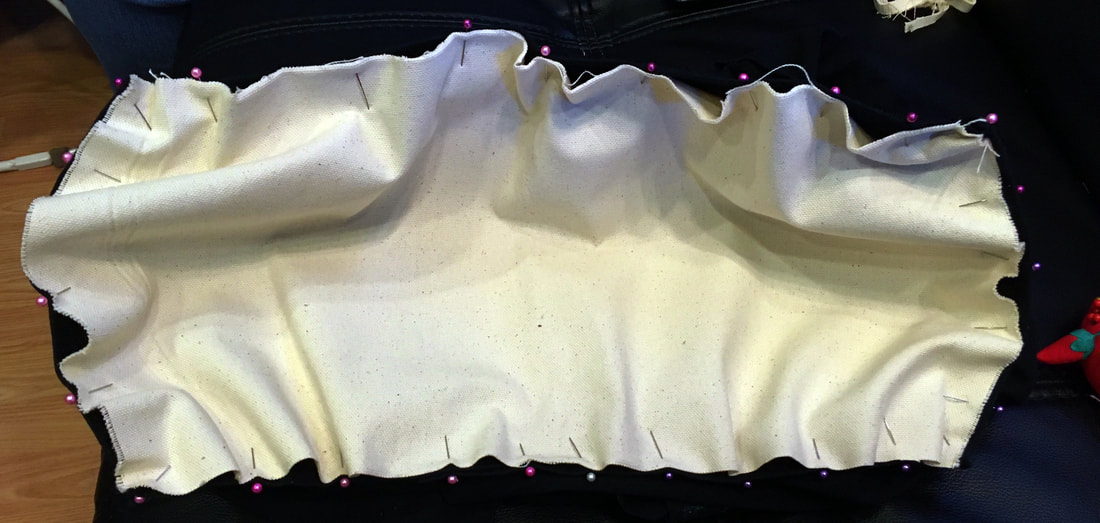
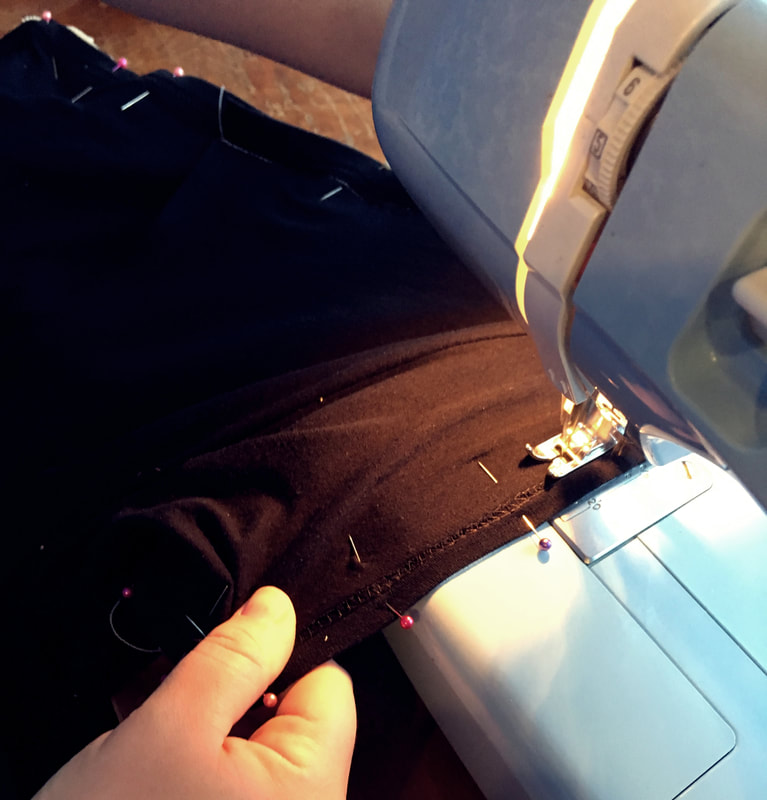
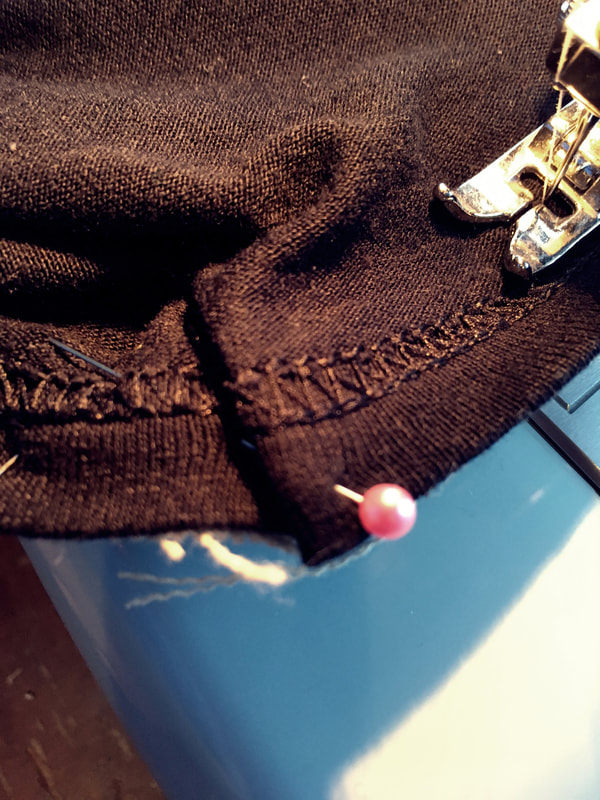
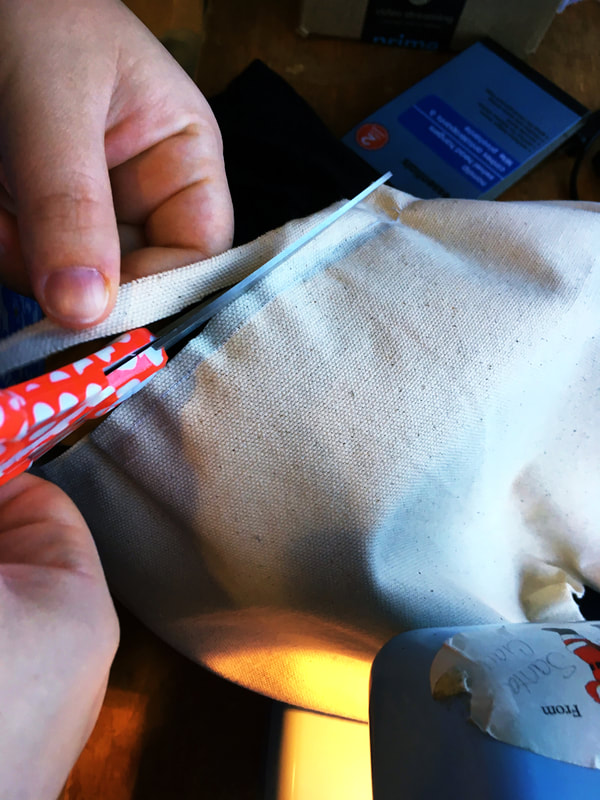
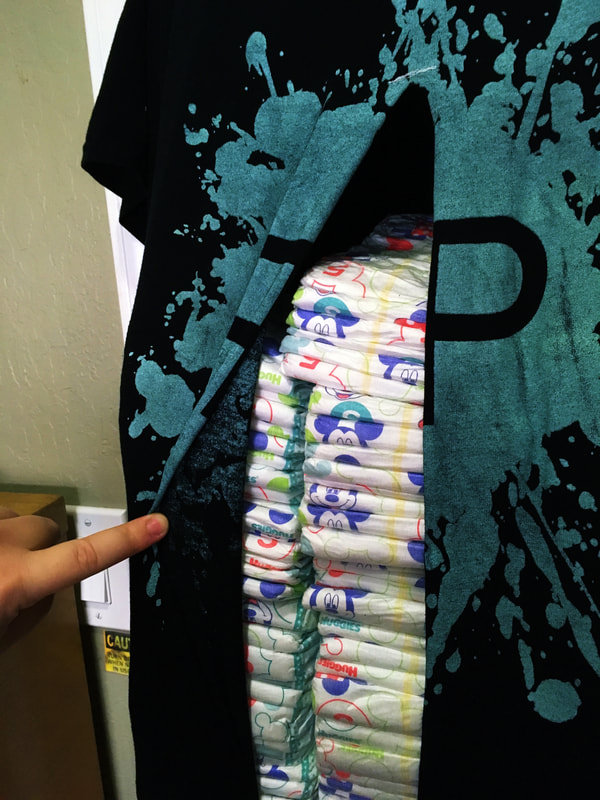
As my due date approached for my second little one (who you met here) the realization hit me that we would have two kids in diapers, and not a lot of space for storage. We live in a very small home with very limited storage space (no closets!), so I needed something that would keep me from tripping over boxes of diapers. I looked online and saw these cute diaper stackers, they could hang from a door hook or on the side of a changing table. But they only hold around 60 diapers! We buy huge boxes of diapers, with at least 200 diapers in the smaller size so I knew I would need something bigger. They also weren’t machine washable. That’s when I came up with this idea of making my own diaper stacker from an old t-shirt. Because it’s from a t-shirt there’s very minimal sewing involved and it’s easy for a beginner 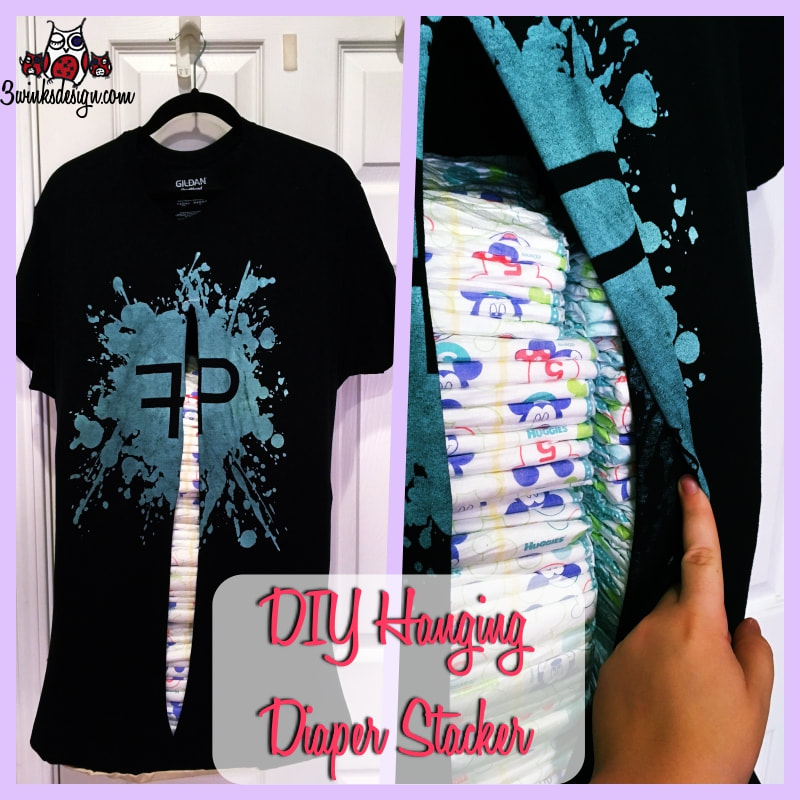
DIY Hanging Diaper Stacker
Materials:
Instructions:
5 Comments
This post contains affiliate links. I will be compensated for any purchases made through those links at no additional cost to you. Thank you for your support!

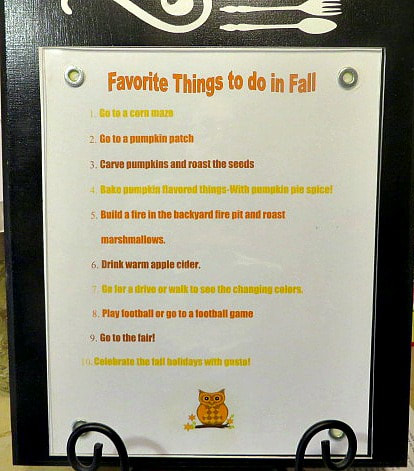
Friday Faves is a little late today, but I hope it is worth the wait! Many of you are already experiencing great fall weather, but here in Phoenix we are anxiously awaiting some crisp days for the brief time that we get them. The girls and I have come up with a list of our favorite activities to do in the fall and actually made you a Bucket List that you can print out and post! I posted mine in my changeable kitchen board that I told you about in this post. I figure if I keep it in plain sight, it will remind me to get out and do some of the things I love to do during this season. Sometimes life gets so busy, we forget to stop and take the time to really enjoy it!
Friday Fave Bucket List of Favorite Fall Activities
Just click on the photo and you will get a pdf to print of our list of 10 favorite things to do in the fall.
My girls all mentioned the pumpkin patch and pumpkin carving. I love sitting by the fire pit, roasting marshmallows and drinking cider. My husband built our pit from bricks in our backyard, but there are many varieties to purchase on Amazon. Like this one:

It is so much fun to sit around the fire on a Fall evening and just talk and enjoy each other's company. It is also a great time to use those Stuff 'em sticks I told you about this past summer on this post!
What are your favorite things to do in the Fall? Let us know in the comments section. And, if you subscribe to our blog, here is a special print to get you ready for Thanksgiving! We will send you an email with the special subscriber's link to our free printables after you subscribe!
The pdf I send you won't say 3 winks design all over it!
Here are some other fall prints that you may have missed. Click on them for the pdf. Or, you can check these and more out on the printables page.
This post contains affiliate links. I will be compensated for any purchases made through those links at no additional cost to you. Thank you for your support! I haven't really cooked any food in like a week. I've either made PH do the cooking, gone to my parent's house for a meal, or we have gone out to eat. We lived off the appetizer leftovers from my post last week for a few days too. (Those mummified smokies were just so good!) The fact of the matter is, sometimes we all get in a food rut where we are too busy/tired to cook anything and we just want to eat something fast and easy. The moments that this happens increases exponentially when you are pregnant. Making a good meal takes planning, and sometimes I just don't have the energy to plan anything. For a week. Or month. Or until the baby comes. 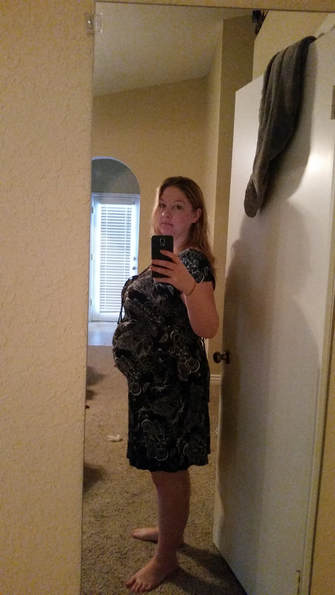 Does that look like the face of someone that wants to cook? So last night for dinner I made myself a peanut butter and jam sandwich. I used the Strawberry Jam my mom and I made in this post. I love eating the jam we made! Plus I have a lot of it because I made another batch after the one we made for you in those videos. If you are still wondering how to make your own jam go to the link and follow our videos!
I started thinking about what some other great go to pregnancy foods are. So I asked around to my mom, my sister, and my sister in law. Here are there answers. My mom: I loved popsicles and oranges. Both of those sound great because they're sweet and refreshing. Especially because pregnant women tend to get overheated! I personally am a fan of Otter Pops, but you could also get a mold and make your own popsicles! Alicia: Pie and pizza. And her husband threw in that she'd eat a lot of tomatoes. One day she just ate 8 tomatoes. Those mini pumpkin pies I made last week really hit the spot for me. I LOVE pumpkin pie. We have a lot of great pie recipes on this blog, so you should go back and check them all out! Jessica: Jessica said she never really had any cravings, but she would eat apples with peanut butter, carrots, and broccoli. She said she doesn't usually eat very healthy so all those really healthy choices stood out to her. I am impressed that her go to snack would be veggies, because I am just not wired that way. Fruit yes, but just snacking on a bowl full of veggies is hard for me. The apples and peanut butter does sound really great to me right now. So those are our go to pregnancy eats. What is your easy thing to whip up when you're tired and hungry (and maybe also pregnant!)
This post contains affiliate links. I will be compensated for purchases through those links, but they will be no extra cost to you. Thank you for your support.
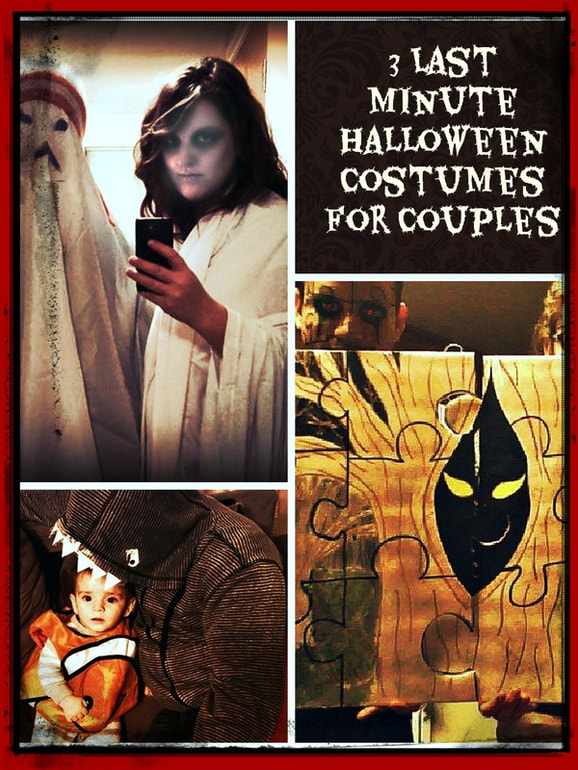
Hey Alicia here with some fun costume ideas for ya!
Every year I think about what my husband and I should be for Halloween. I can come up with some pretty elaborate or expensive ideas. But most of the time money and life gets in the way of actually pulling these off. So we end up having to do something last minute. Most of these costumes were made within an hour before we had to leave and go to the party we were dressing up for. So I’ve decided to share these ideas with you in case you end up in a similar situation this Halloween. 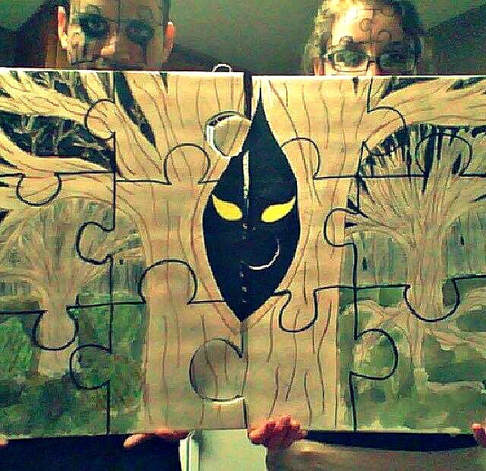
Evil Puzzle
You may be giving this costume idea a skeptical side eye but we actually won “Scariest Costume” at a party with this one. To make this costume you will need:
First draw your picture on the foam board. We did a haunted forest. It doesn’t have to be anything too involved. This picture took us about 15 minutes to finish this picture. Then use your black sharpie to draw over your picture the outlines of puzzle pieces. We just did 12 pieces so they can be pretty big. Make sure to have a center line. It’s on this line you’ll use your exacto knife to cut along. You can see in our picture that our two halves fit together like a puzzle. Use your knife or scissors to punch two holes in the top of each half of the “puzzle.” Tie your yarn through the holes measuring enough to have it hang comfortably around your neck. Lastly, use the black eyeliner to draw puzzle pieces on your face. If you’re feeling up to it, fill in Black all around your eyes. This is what my husband did, a la Alice Cooper. Now you’re ready to freak people out as a haunted puzzle. 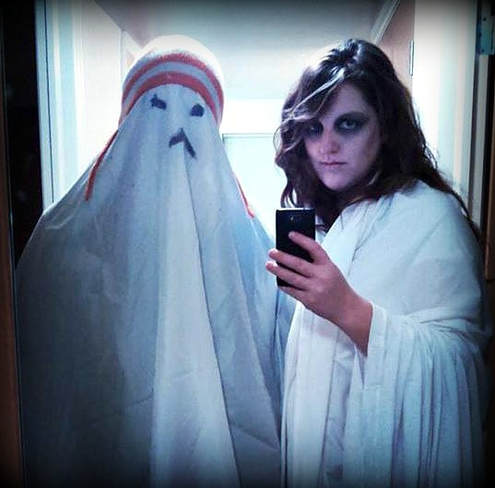
Literally the easiest costume and I have two options for you.
You will need:
For option 1 use the white makeup to make your face pale. Use the black makeup to make your eyes look sunken in by basically just putting black all around your eyes. Wear all white clothes and drape the sheet around your shoulders and wear it like a huge shawl. For option 2 just wear the sheet over your head making sure it hangs evenly around your body. Using the black makeup draw a face on the sheet where your face is under the sheet. As you can see from our picture a simple face works great. Additionally, wearing a beanie over the sheet adds to the comedic effect and helps your sheet stay on. It is difficult to see with this costume so you may want to cut some eye holes.
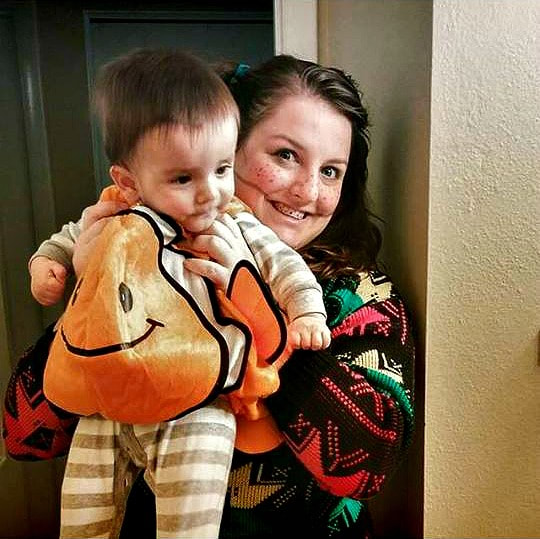
Knock-off Finding Nemo Characters
For our son’s first Halloween, I bought him this little clownfish costume. It wasn’t licensed by Disney so it was just a generic clownfish. So I decided we could go as a knock-off version of Finding Nemo. I called it Looking for Ahab. I went as the off brand Darla, the crazy little girl that terrifies the fish in the tank at the dentist office. To pull this off I wore a crazy sweater, and my hair in pigtails. On my face I drew dental headgear with eyeliner. I even drew dots on my teeth to look like braces. My husband went as a shark. He wore his grey hoodie, which we taped cardboard triangles to as to look like teeth. We also taped some cardboard eyes to his hood. One addition we didn’t have was a fin on his back, which I think would make the costume. Everyone may not be able to tell what you are but at least you’ll have fun. So there you have it, 3 last minute couples costumes for Halloween! What do you think? Do you procrastinate as much as we do for Halloween?
You might also like:
|
Creators of Hot Cocoa Bombs! (copyrighted)

Author
Helen Reynolds: Mother of six children , grandmother to eleven! I love to cook, craft and create things and I especially love doing that with my family, So, when my lawyer daughter, Lindsey, my artist daughter, Madalynn, and I came up with the idea of Hot Cocoa Bombs, this blog was born. Then, one more daughter, with her technical and science skills, plus creativity has joined in to round us out! Read more about us here! 
Click this link and visit 3WinksDesignShop on Etsy. Find our Hot Cocoa Bomb Idea Book, our For the Love of PIe e-book and more of our creations!

Amazon Gift Cards are the Perfect Gift!
    Archives
April 2024
|


 RSS Feed