|
This post contains affiliate links. I will be compensated for purchases made through those links at no additional cost to you. If you click on the link you will be taken to a separate website and cookies may be used in the process. Thank you for your support!

I am excited to share today's post with you because it was the first time I got to make a cake for someone in a long time (like really decorating a cake) and I enjoyed it! It was also my first time making a pinata cake, and it was a lot of fun!
About a month ago a girl I go to church with said she was looking for a cake maker for a cake she needed rather quickly. I told her I could probably do it for her if she didn't need anything too elaborate. That's when she told me she wanted a pinata cake for her gender reveal. I was so excited because I didn't even know she was pregnant! Babies are so wonderful and exciting, and this is such a fun way to do a gender reveal! She dropped offer her little piece of paper for me, and it was a weird feeling knowing that I knew what she was having before she did! Well, she is having a baby boy so I went and found some blue chocolate sixlet candies to fill the cake with. She and her husband were doing the gender reveal with her family in Spain, so there were only going to be two people eating the cake, so I decided to do six inch rounds. I felt like this would be the best size since the cake was going to be three layers. It was fun to make and I was so happy when she sent me the picture of the cut cake with the little chocolates spilling out! 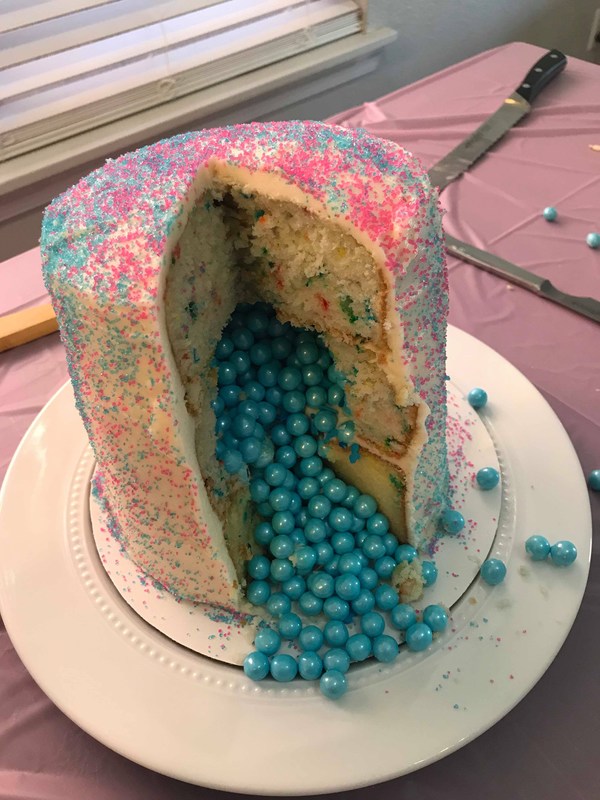
To make a pinata cake you can use whatever cake recipe you like the best, or even a box mix if you want! (I have a great chocolate recipe I intend on sharing with you soon!) Since this was a gender reveal cake I decided to do a funfetti cake, since it would have colorful candy chips in the batter.
To Assemble Your Cake:
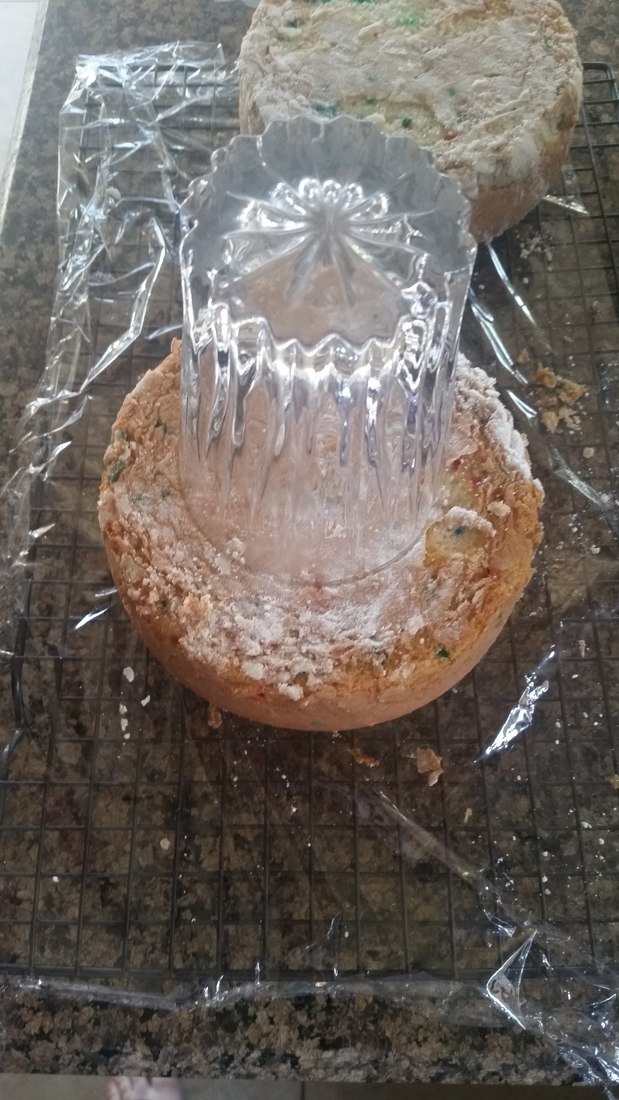
Now I feel like a minimum of three layers is bet for a pinata cake. You could probably do two, but having a layer underneath really helps the candy pop out! I used a small glass to cut a hole out of the center layer of the cake. Start with your bottom cake, spread a thin layer of frosting all around the cake, then place the center layer with the middle cut out. Spread another thin layer of frosting around the outside and top of the cake. Fill the center with your candy. Place the top layer on top, and do another crumb layer. 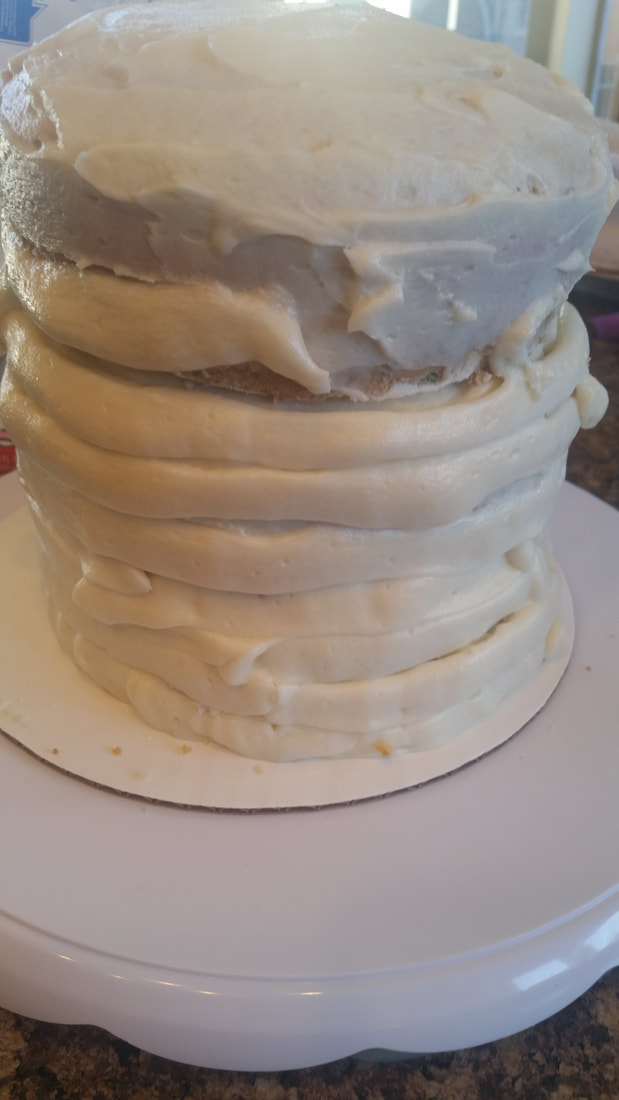
To frost the cake I put my frosting in a piping back and pipe it on with a flat tip. I have a round cake decorating tray. Once the frosting is all piped on so your cake looks like this you can use a frosting smoother make it look beautiful. Place the smoother on the cake at a 45 degree angle and spin the cake . You'll have to stop periodically to remove excess frosting, but eventually the side of your cake will be nice and smooth. you can then carefully smooth the frosting over the edges and smooth it on the top.
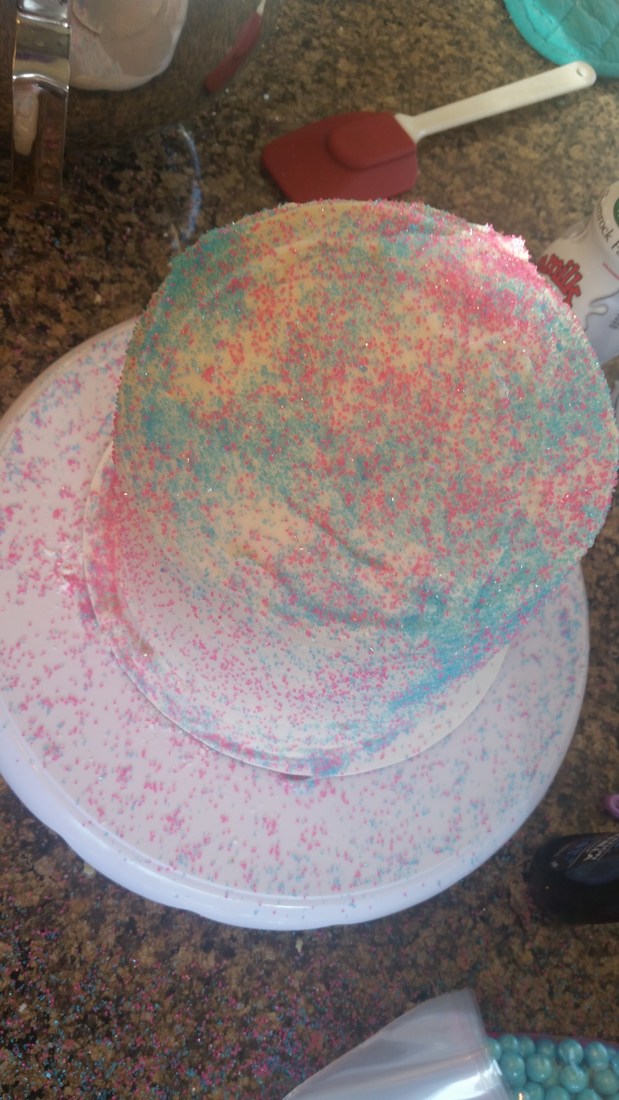
To decorate the cake I just used pink and blue sprinkles. It was simple and sweet, but I knew she didn't want to spend much time looking at the cake, she wanted to cut into it and find out if she is having a boy or a girl! So I just tried to make it look nice, but add a little fun with the sprinkles.
Cake making and decorating is something I really enjoy. It's hard to find the time with an infant to really spend on it, but there is something so satisfying about looking at a beautiful cake!
2 Comments
This post contains affiliate links. I'll be compensated for purchases made through those links. Thanks for your support.
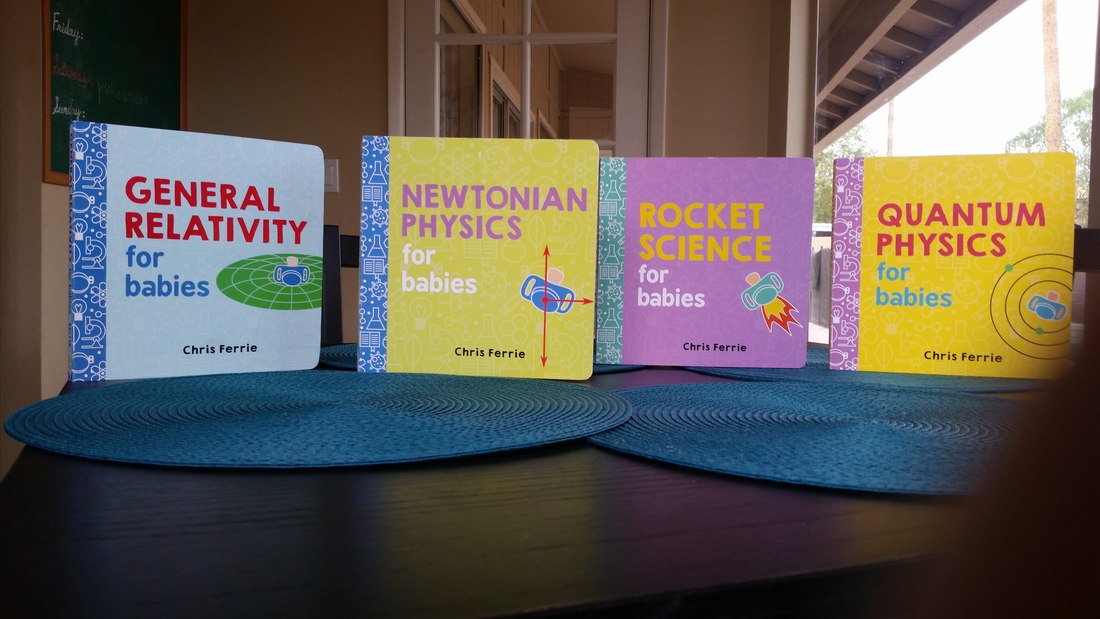
Lindsey here, back with another review! Today I want to tell you about these books that I found on Amazon when I was creating my baby registry. Chris Ferrie is the author of these science books for babies. Remember when we did that video showing you all the STEM toys you can find at Dollar Tree to put in your kid's Easter basket? Well these books go hand in hand with that post. When I was creating my registry the Rocket Science for babies book came up and I just had to have it! My little one loves when I read to her, and these books are so great. They explain these concepts simply and really they break down the subject so well that they're helpful for all ages to understand these subjects. 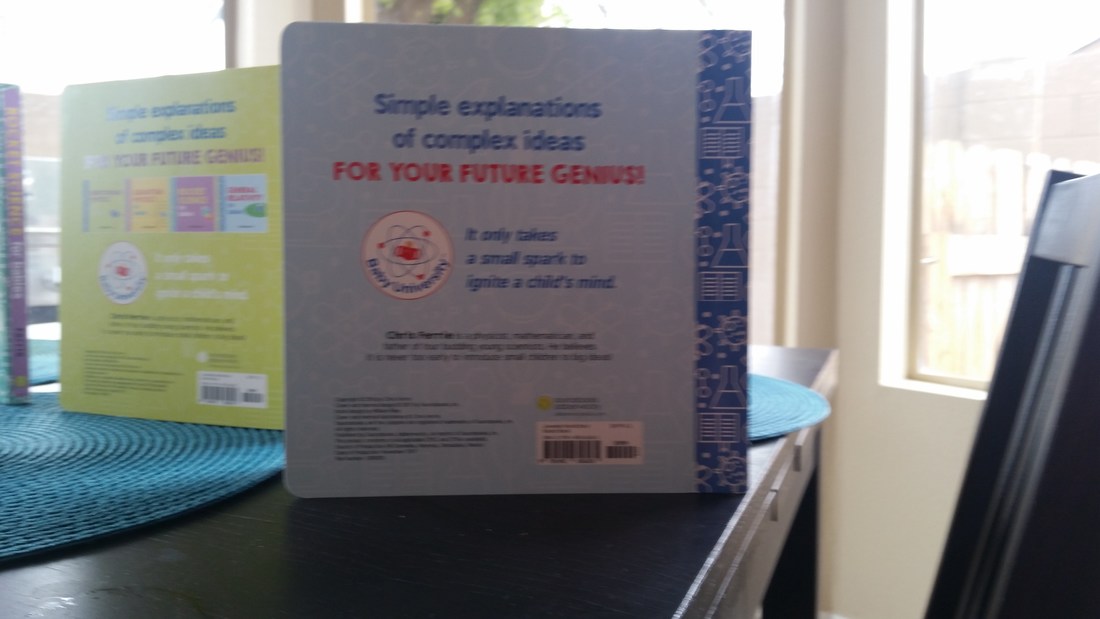
I highly recommend these books, and you can find them on Amazon to read to your little ones! Help prepare them for these concepts early on, you won't regret it!
This post contains affiliate links. We will be compensated for purchases made through those links at no additional cost to you. Thank you for your support.
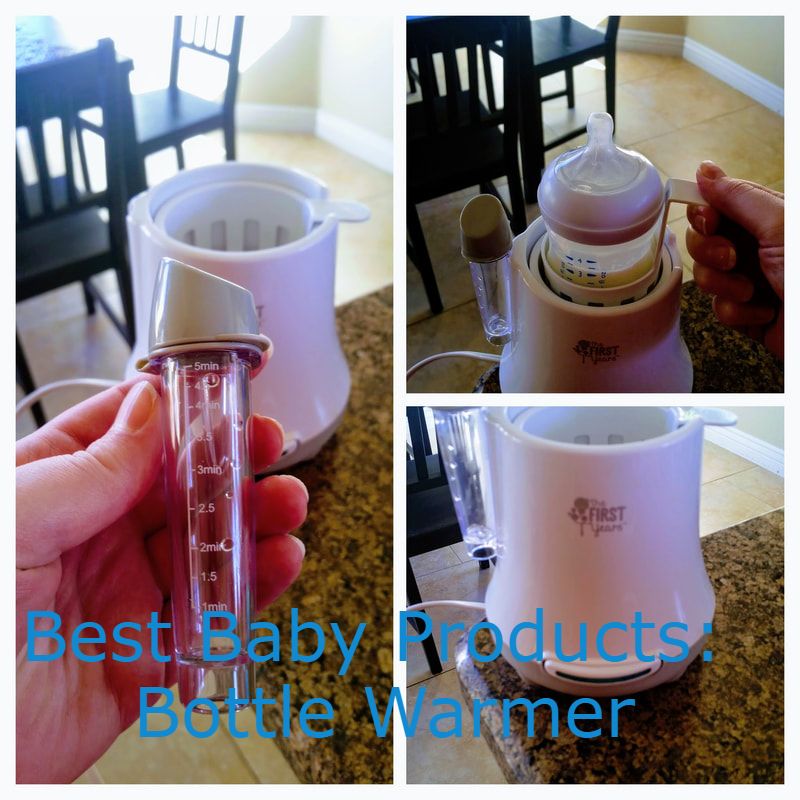
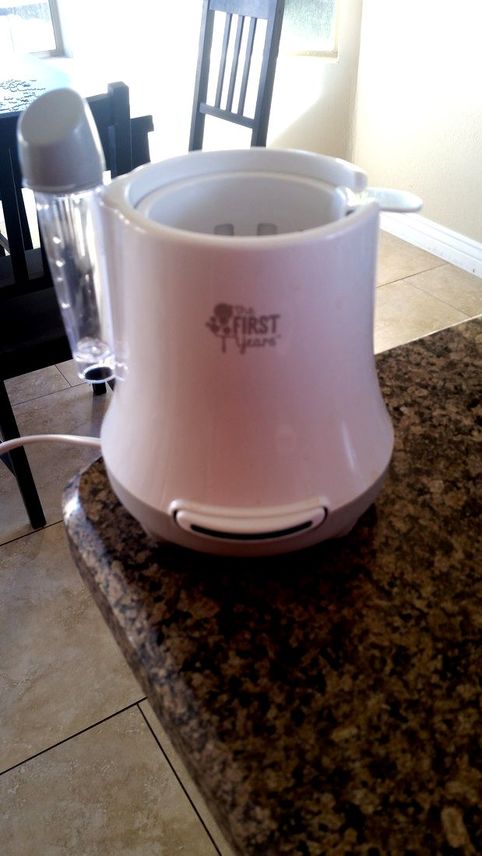
Hey there everyone! Lindsey here with a new series: Baby Blinks! that name come from my husband, who thinks its funny to call our blog 4 Blinks instead of 3 Winks. Anyway, as a new mother there are millions of products thrown at you and you're told it's a must have. Well, I am here to review once a month baby products that I am actually happy I have, which have been very useful to me. This month I am telling you about our bottle warmer!
Fun fact, you should never microwave breast milk. It can kill off the good bacteria that should be going into your baby's little tummy. For us, this bottle warmer has been a huge help. If you remember from my lactation cookie post, our daughter has had a hard time latching when I nurse. this has resulted in me doing a lot of pumping and feeding her with a bottle. So we have lots of bags of breast milk in our refrigerator and freezer and we use this bottle warmer every time. It's so easy!

The warmer comes with this nifty little vial. You fill it with water to whichever fill line is appropriate and then pour the water directly into the warmer. Put the bottle in the bottle carrier and set it in the warmer and push the on button. The warmer will heat the water which will in turn, heat the bottle. If you fill to the 2 minute fill line, the warmer will heat for 2 minutes.
It also comes with a handy sterilizer. 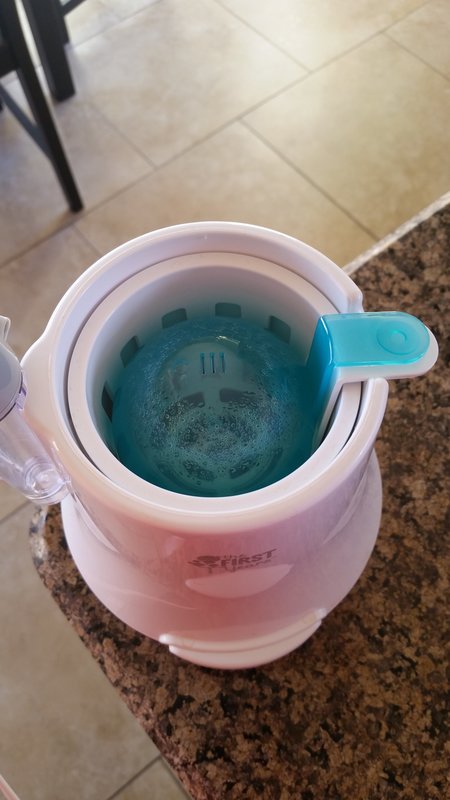
When you need to sterilizer your pacifiers you stick them in the carrier. Fill the water vial to the five minute mark. After setting the carrier in the warmer, cover with the blue sterilizer cap. Five minutes later your pacifiers will be sterilized!
Here are some handy links to a few bottle warmers for you to choose from!
Those two (and many others) can be found on Amazon. You can also purchase from Target. Like these two options.


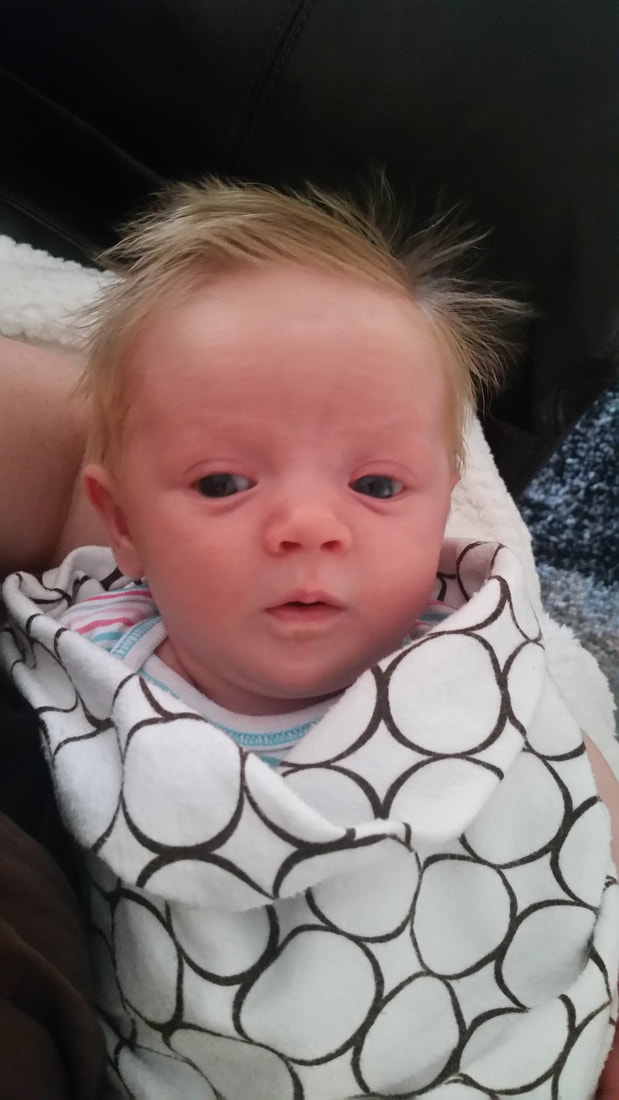
I love having a bottle warmer. It's made warming up our bottles so much more efficient. Don't take my word for it, ask the little baby puppy herself.
This post contains affiliate links. I will be compensated if you purchase through our links at no additional cost to you. Thank you for your support!
Our baby girl (PH calls her Baby Puppy, which my mom doesn't like, but she doesn't understand how much he loves dogs, and therefore, it is a term of endearment) is three weeks old today. Every day I stare at her in wonder. She is changing so quickly and it makes my heart hurt a little because these precious days are going so fast. On the other hand I'm also grateful because breastfeeding has been a battle royale for us.
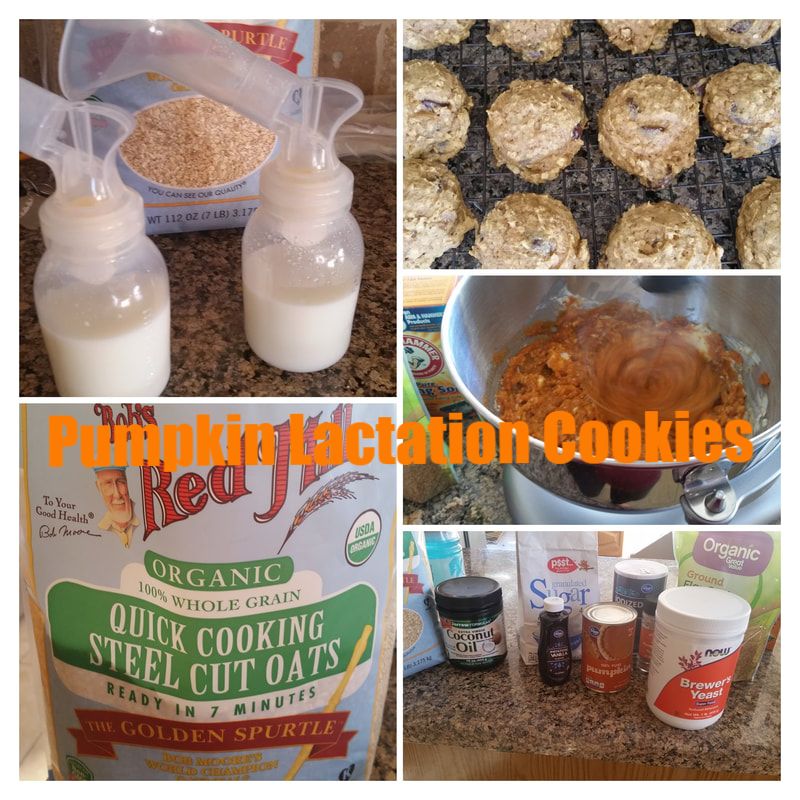
I have been experiencing the joys of having flat nipples and nipple shields don't work. At least they don't for me. they move around and come off so she ends up with a shield in her mouth and nothing else. I also tried a nipple everter, which works except it expresses milk that gets everywhere and that is annoying. However, on those rare occasions she has latched she tries once and then gives me a look that says, "why have you done this to me?" then she goes to sleep and doesn't eat. Most nursing sessions have ended with us both in tears. Her crying because she is still hungry, and me crying because I am in pain, and feel like a failure as a mother. I personally am not ready to give up the ghost and switch to formula. (I am not judging anyone in a similar situation who has switched, or if you just started with formula from the get go. Although I know the nutritive properties of breast milk are better for baby, I am from the fed is best camp. You have to do what is right for you and your baby, and it is none of my business what that decision is. Just as long as you are feeding your little one.) This flu and RSV season have been horrible. We just heard on the news last night about two more deaths from the flu, and three children who live in our same county have died from the flu. So I am determined to give her breast milk at least through this RSV season, while I keep us quarantined in the house. Because of this struggle I have become a pumping warrior. Every time she eats (from a bottle) I pump. I have been trying so hard to do everything I can to increase my milk production so I can start storing breast milk and get ahead of our little eater. I take my daily vitamin every morning along with two fenugreek capsules. I eat oatmeal with flax seed, and I put brewer's yeast in my morning shake and chug it. Of course, I am trying hard to stay hydrated. In all of this effort I have been able to get back into baking a little more with lactation cookies. I mean, I don't know if you've ever had brewer's yeast, but it tastes like vomit. I personally do not enjoy that flavor, and somehow, when I put it into these cookies the vomit taste goes away, and I have something that will increase my milk production, AND taste delicious! Of course, I had to come up with a version that included pumpkin. 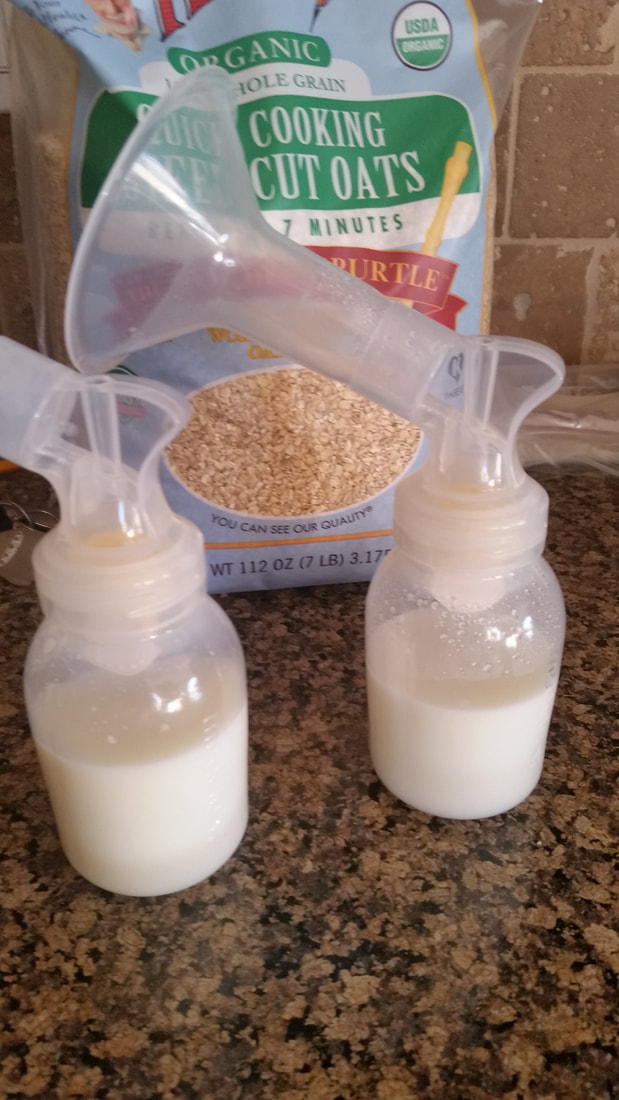
Pumping goals.
These cookies are moist, soft, and pumpkiny. They don't taste a thing like brewer's yeast, they taste like fall, and happiness. If you're looking for a way to boost your lactation, these cookies are the perfect solution. Pop a couple every day and watch your milk production increase!
|
Creators of Hot Cocoa Bombs! (copyrighted)

Author
Helen Reynolds: Mother of six children , grandmother to eleven! I love to cook, craft and create things and I especially love doing that with my family, So, when my lawyer daughter, Lindsey, my artist daughter, Madalynn, and I came up with the idea of Hot Cocoa Bombs, this blog was born. Then, one more daughter, with her technical and science skills, plus creativity has joined in to round us out! Read more about us here! 
Click this link and visit 3WinksDesignShop on Etsy. Find our Hot Cocoa Bomb Idea Book, our For the Love of PIe e-book and more of our creations!

Amazon Gift Cards are the Perfect Gift!
    Archives
April 2024
|
 RSS Feed