|
This post contains affiliate links. If you make a purchase after clicking them, we will be compensated, but there is no additional cost to you. All opinions expressed are our own. Thank you for your support.
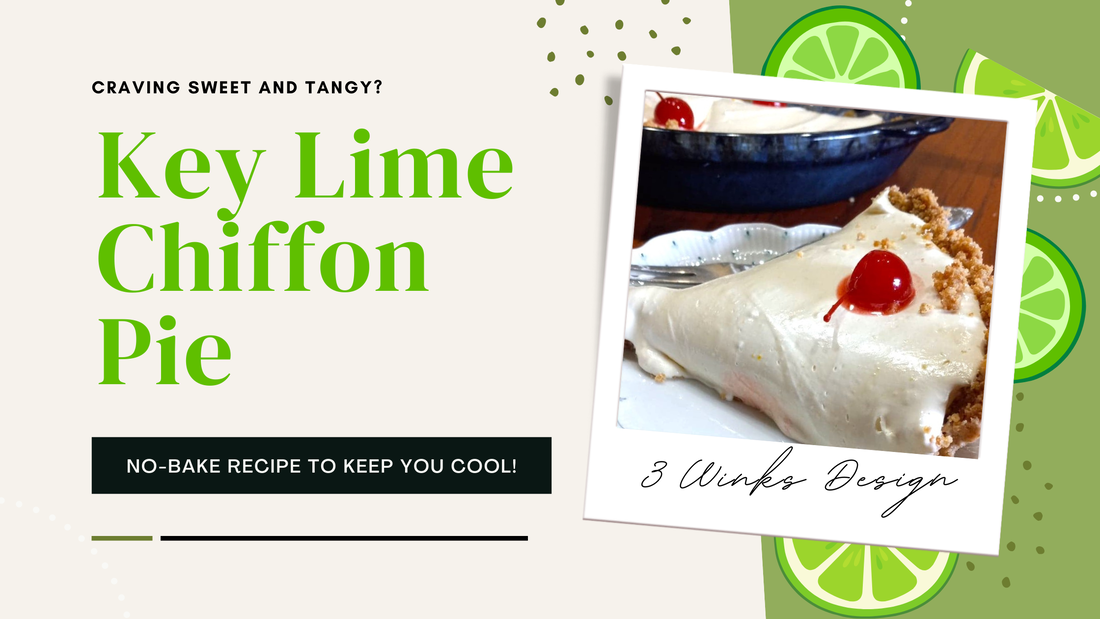
Hi everybody!
Here is what happened. I had some key limes that I needed to use up. I didn't have any avocados to make my favorite Avocado Key Lime Pie, so I decided to dream up something a little different. I have always loved Lemon Chiffon Pie, so I thought, "Why not a Key Lime Chiffon Pie?" Whelp! This is how I did it!
This recipe is something you can probably whip up from basic pantry items, as long as you have the limes. I did use actual key limes, but I am starting to think that I like regular limes better than key limes, so I I think that you could use either/or.
Key limes seem more tart to me, so if that is your taste, you are going to love this pie that is creamy, without the cream and sweet and tart all at once. I say without the cream because the only dairy in this pie is 4 Tablespoons of butter! To get that fluffy, creamy texture, I used Swiss Meringue. I describe in the recipe how to make it, but I also gave you instructions in the Baked Alaska post. 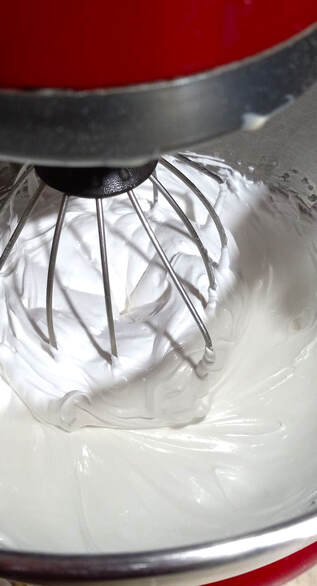
Swiss meringue after it is whipped! It is so marshmallowy!
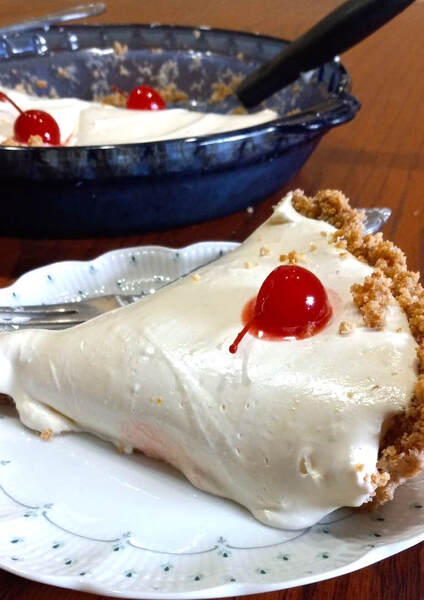
Even though the pie itself doesn't have a ton of dairy, I think the next time I make it, I will put on a layer of Whipped Cream because it will help with the tartness. I prefer the sweetness!
Since I didn't have any whipping cream when I made this recipe, I added a few maraschino cherries on top just to give it a little something. See the before and after below:
After you put the pie all together, be sure to refrigerate it long enough to let it set. Um, we didn't wait that long, but it was still delicious!
Other No Bake Desserts:
No-Bake Blackberry Cheesecake
Lemon Chiffon Pie in a Sugar Wafer Crust Cutest Little Cheesecakes Ever No-Bake Blueberry Cheesecake
1 Comment
This post contains affiliate links. If you make a purchase after clicking them, we will be compensated, but there is no additional cost to you. All opinions expressed are our own. Thank you for your support.
I recently have seen ads for Cracker Barrel restaurant advertising their Cinnamon Roll Pie. That sounded intriguing to me, so I got on line and checked out just what this thing is. Surprisingly, it turns out that their pie is actually cinnamon rolls baked in a pie crust. Interesting and probably good but it sounds very starchy to me. The idea got my wheels turning though and I thought, "What if the Cinnamon Rolls were the crust of the pie?"
Well, obviously, I didn't want to go to all of the trouble of baking a batch of cinnamon rolls just to mash them into a pie crust. I went to the store and bought some canned cinnamon rolls and smooshed them into the bottom of my pie dish. It took 2 tubes of them to cover the bottom and the sides. Sometimes you have to cut the cinnamon rolls in half to fit them around the sides of the dish. 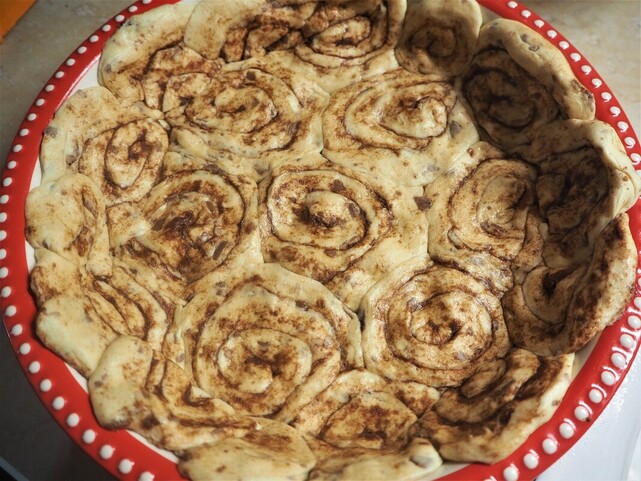
The scalloping of the rolls on the sides actually looks pretty nice when all is said and done.
I prebaked my cinnamon roll crust by placing another pie dish in the center and adding weight. You a can get pie weights, or use beans or something. I didn't want my cinnamon rolls to rise up and get puffy. They did puff a bit, but that was okay, they still had the crust shape with room to add a filling. I baked it at 400 degrees for 20 minutes.
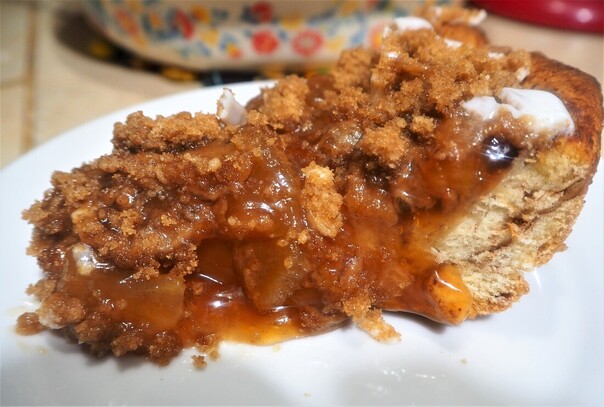
When the crust was out of the oven, I filled it with some of my home canned pie filling, just one jar. 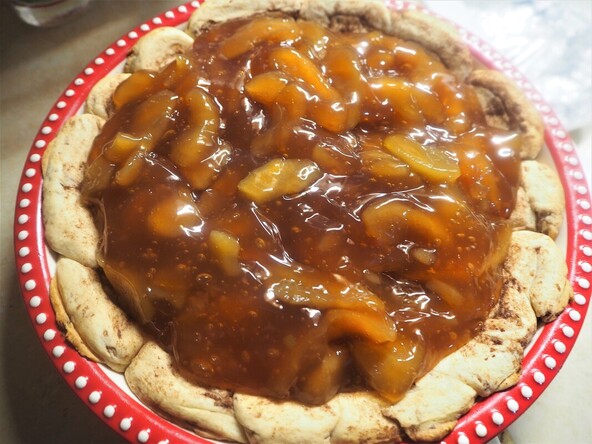
See how the puffy cinnamon rolls look nice on the edges?
Then, I topped the pie filling with a cinnamon streusel topping!
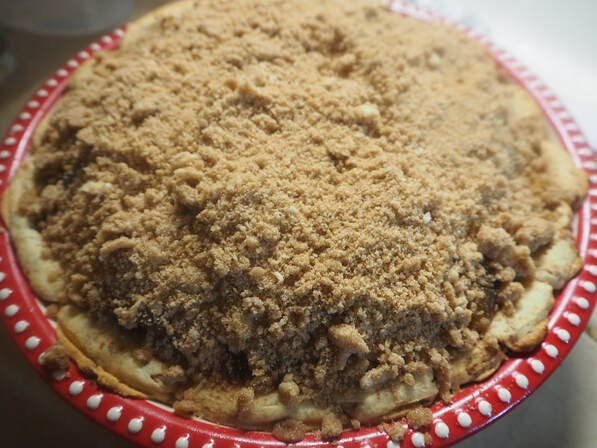
Next, I popped the pie back into the 400 degree oven for another 15 minutes until the streusel was brown and toasty.
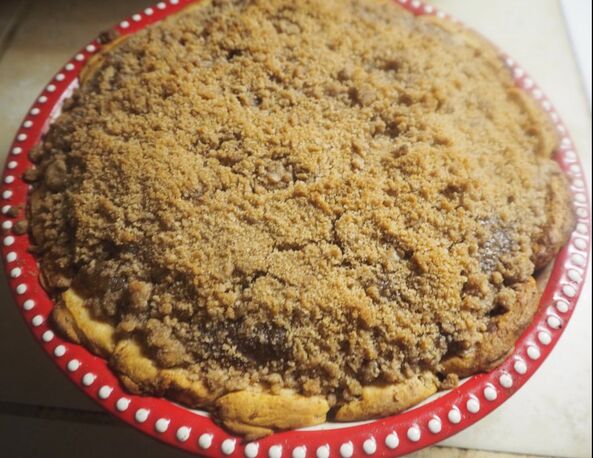
But, there was one thing missing! You can't have cinnamon rolls without the ooey, gooey frosting! So, I used the frosting from the cinnamon roll tubes to drizzle on top of the pie!
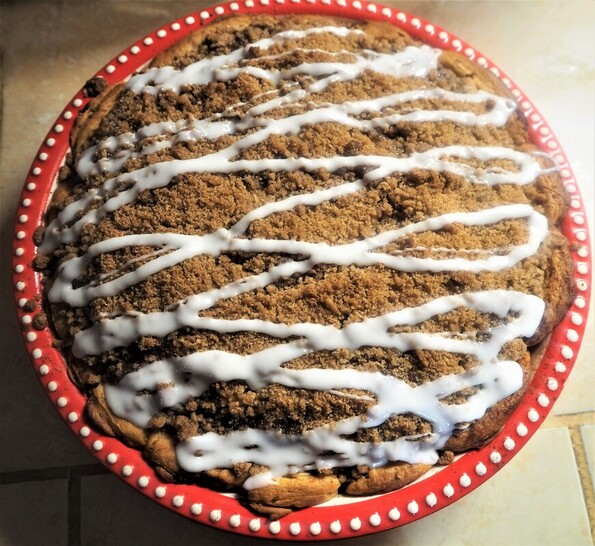
Such a pretty pie and the cinnamon roll crust is delicious!
Finally, we ate it for dessert after a great chicken dinner with roasted vegetables! This seems like such an All American Meal to me and the pie was the perfect ending. Everyone pronounced the pie a success! I think it will be a terrific breakfast pie as well! It is kind of like a breakfast apple streusel or coffee cake. it would be perfect on Christmas morning.
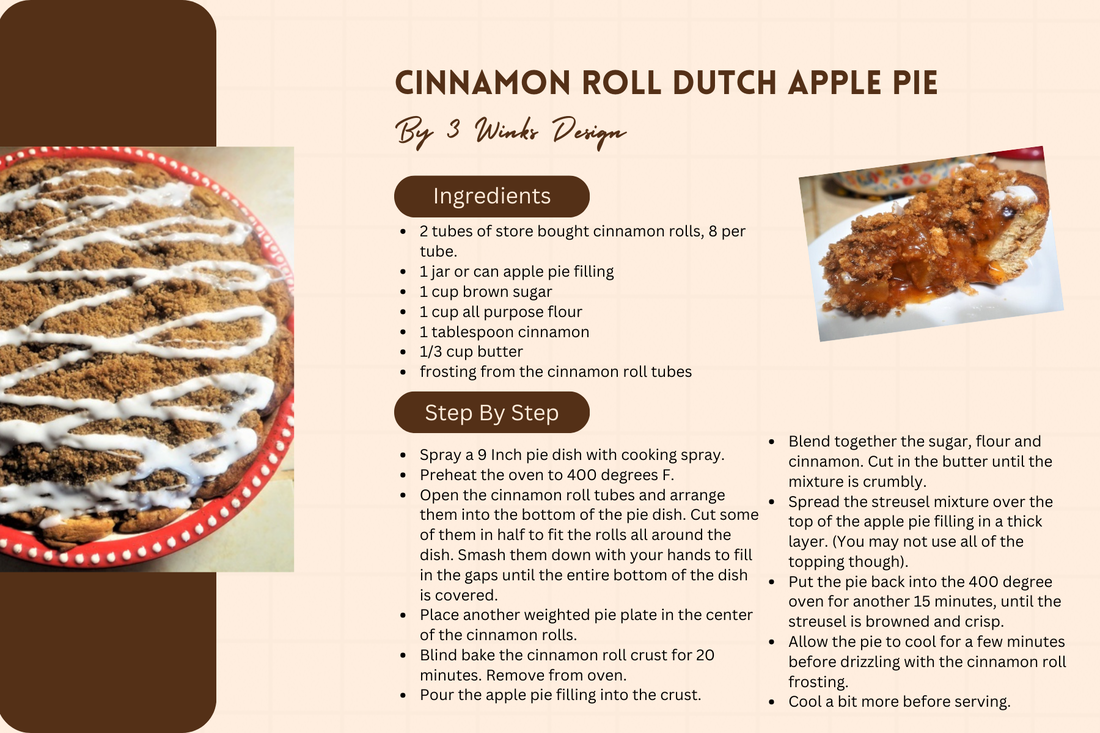
Let me know if you give this pie a try! I hope you love it!
This post contains affiliate links and we will be compensated for any purchases you make at no additional cost to you. Thanks for your support!
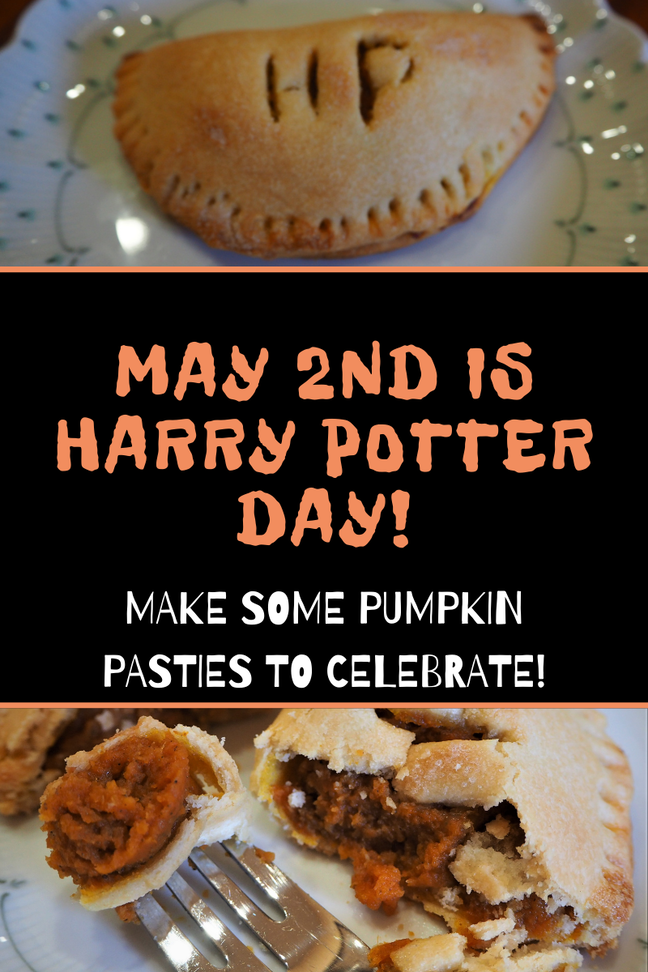
Sometimes I just feel the need to have a bit of Harry Potter in my life. So, I might watch one of the movies or reread one of the books. Then, I heard that May 2nd is International Harry Potter Day, so that excited me because I knew exactly what I wanted to do!
This post contains affiliate links. If you make a purchase after clicking them, we will be compensated, but there is no additional cost to you. All opinions expressed are our own. Thank you for your support. 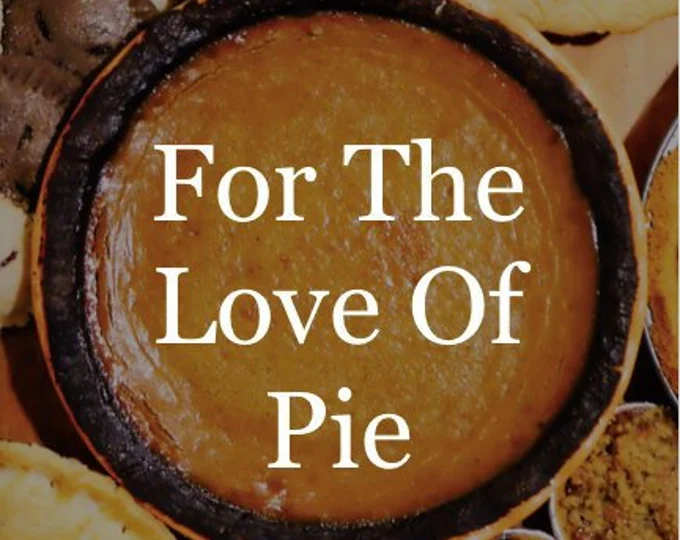 It is hard to believe that a day so close to the holidays is claimed as National Pie Day, (not to be confused with March 14th.) But, if you love pie, then it is just fine! Pie is a big part of our food traditions in our family. Here on the blog, we have posted a number of posts about all kinds of pies! Just type "Pie" in the search bar, and you will find them all. Or, you can purchase our downloadable e-book, For the Love of Pie, from our Etsy shop and have most of the recipes at your fingertips! For the Love of Pie usually sells for $10, but for the next few days only, we are slashing the price in half and only charging $5! Yes, we love pie that much and want everyone to be able to celebrate Pie Day with us! (It seems to me that there are a number of Pie Days throughout the year, so you can be prepared for all of them!) Here are a few of my favorites from the blog: What is your favorite pie? Will you make a pie for National Pie Day? It could be an easy way to add a little celebration to your family's lives! Let me know if you celebrate with us!
|
Creators of Hot Cocoa Bombs! (copyrighted)

Author
Helen Reynolds: Mother of six children , grandmother to eleven! I love to cook, craft and create things and I especially love doing that with my family, So, when my lawyer daughter, Lindsey, my artist daughter, Madalynn, and I came up with the idea of Hot Cocoa Bombs, this blog was born. Then, one more daughter, with her technical and science skills, plus creativity has joined in to round us out! Read more about us here! 
Click this link and visit 3WinksDesignShop on Etsy. Find our Hot Cocoa Bomb Idea Book, our For the Love of PIe e-book and more of our creations!

Amazon Gift Cards are the Perfect Gift!
    Archives
April 2024
|


 RSS Feed