|
This post contains affiliate links. I will be compensated for purchases made through those links at no additional cost to you. All views expressed are my own. Thanks for your support!
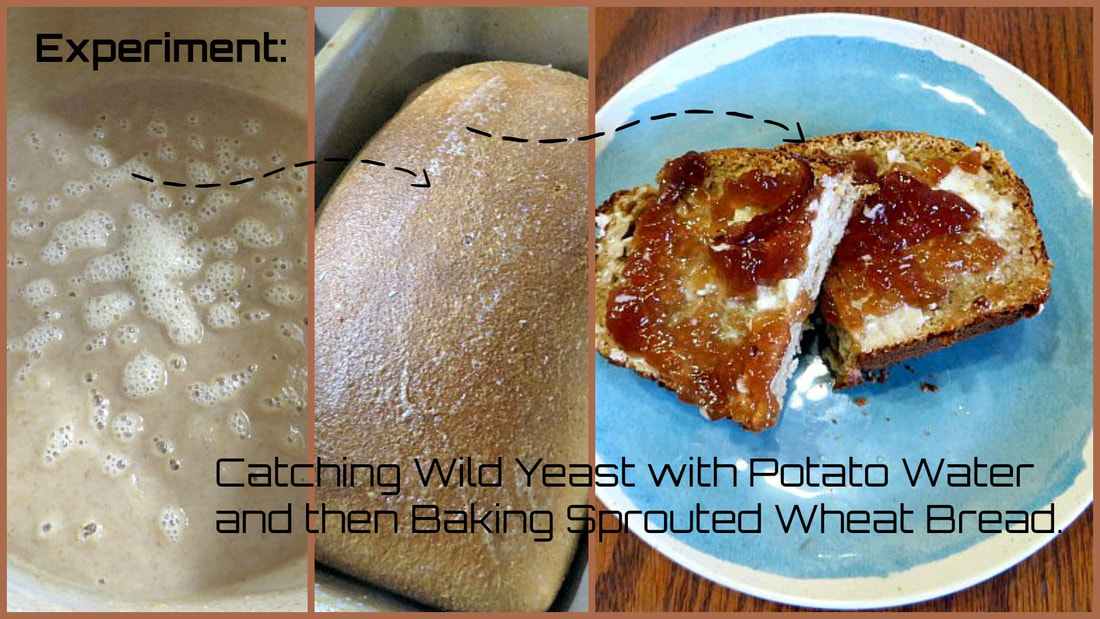
One of the things that I have noticed during this pandemic is that yeast has been in short supply on store shelves. Fortunately, I have plenty of yeast to see us through the next few months if bread should become harder to get in the stores. The question is, what if I were to run out of yeast, what would I do? This pandemic is certainly making me rethink my state of preparedness. One family member, (Anita), sent me a link about how to make yeast with potato water and suggested I give it a try. Since I had already been thinking about it, and because I had just sprouted wheat and ground some new flour, I decided to try to catch some wild yeast with potato water and bake some potato, sprouted wheat bread.
The recipe Anita’s friend had given her, and she passed onto me looked something like this:
1-1/2 c potato water
1 c flour 1 Tbsp sugar Mix together and leave over night in a warm spot. The next morning it will be bubbly and smell like yeast.
Simple, right!? So, I boiled some potatoes and reserved the water. I also reserved the mashed potatoes for the bread itself. I mixed it all together (I used sprouted wheat flour) and lightly covered it and set it out over night. Next morning, no bubbles, no smell.
I decided to Google it and see what I was missing. Some of the things I found used the potato as well as the water. (People making Vodka said this worked great…) I did find methods using only the water, but the result looked thicker than mine. Hmmm. I decided that I needed more flour and sugar, so I fed my first mixture. I added about ½ of a cup of flour and another Tablespoon of sugar. Success! The next morning I had bubbles! 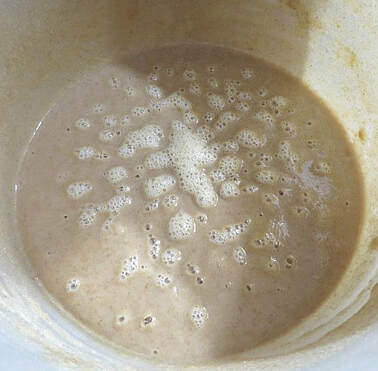
It still didn’t look as bubbly as the ones I saw on YouTube though, so I decided to let it sit and catch more yeast for another day. I fed it a little more, adding some warm water, too, so that it wouldn’t get too thick. The next day, the bubbles were back, but they seemed about the same as before. Maybe a few more, but less bubble than the ones I had seen on other sites.
I must interject here that it appears that I am not a very patient person. I didn’t think that I was going to have to wait 3 days to be able to bake bread with this method. So, at this point, I decided to go for it and try a small batch of bread. I am not giving you a printable recipe like I usually do because it is by no means perfected. But, I will give you what I have done so far. If you see where I need to improve to make this bread better, please let me know in the comments.
Sprouted Wheat Potato Bread made with Wild Yeast
(That is the best title I can come up with) In a mixing bowl, put together: 1 cup potato yeast starter ¾ c warm water 1 c sprouted wheat flour 1 c mashed potatoes Mix these ingredients together and let them sit for about 4 hours or overnight. (Overnight would be best, but I couldn’t wait any longer.) Stir down the sponge and add: 1/3 c warm water 1 tsp salt ¼ c coconut oil 2 Tbsp honey 4 c sprouted wheat flour Mix with the dough hook for about 10 minutes. If the dough is too sticky add more flour. I also turned the dough out onto a floured board and kneaded it for 10 minutes more by hand. I added about 1 c more flour throughout this process making the total amount of flour about 5 cups. Place the dough in the bowl and allow to rise for about 2-3 hours. (Mine didn’t rise very much, but I pressed on. Hopefully yours will double!) Divide the dough into 2 well greased loaf pans and allow to rise again. This time I let them rise overnight! In the morning, they had actually risen quite a bit! Not as much as I would have liked, but an acceptable amount. Bake the bread in a 375 degree oven for about 45 min. I baked mine for 40 at first. They weren’t quite done. I put one back in for 10 min. The crust was crunchy, but the inside was soft and dense. 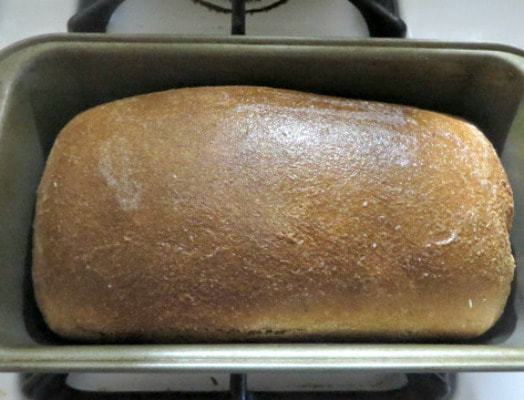
I had read one baker who said not to use sprouted wheat in this type of bread because it would likely be doughy. Mine was a little too doughy, but I think if I had put a slice in the top of each loaf like you do sourdough, it would have help with that, letting steam out and perhaps getting a better rise while baking. Any thoughts on that?
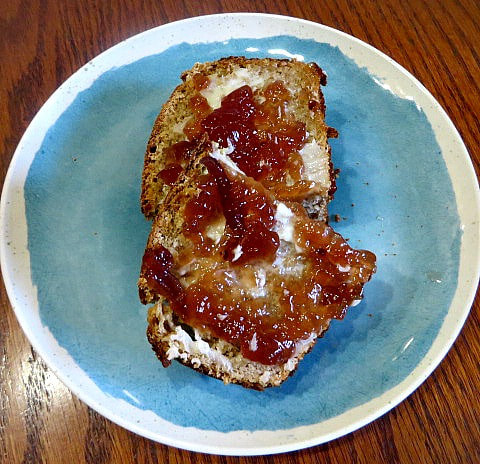
Doughy bread like this is best toasted or made into french toast.
The bread does have a little sour sharpness to it. I toasted it because it seemed too doughy. Then with butter and Blackberry Lemon Marmalade, it tasted really good.
Here are my notes of ideas for improvement:
Here are things I learned:
Stay healthy! 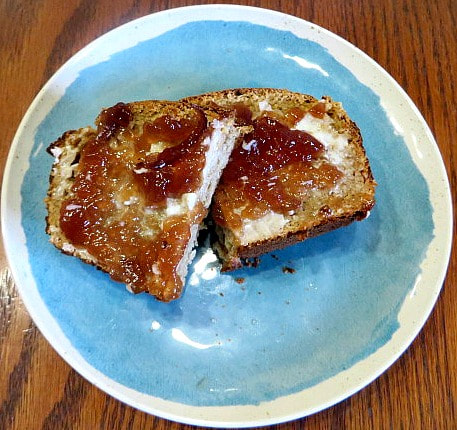
3 Comments
**This post contains affiliate links and I will be compensated if you make a purchase after clicking on my links. But, all opinions expressed are my own.
Alicia back with another International Heritage recipe for you guys. This month we're doing Spain and so far it has been delicious! I was worried because I've not had much Spanish food in my life, and when I asked for suggestions I received ideas for dishes from other Spanish speaking countries but not Spain. But in the end my friends came through! Today's dish was the first suggestion I'd never heard of or tried. But I'm so glad I did, it will definitely be making its way onto our regular menu.
Today's recipe is Spanish tortilla, which is nothing like a Mexican tortilla (which I also love). No, the Spanish tortilla is a whole meal in itself.
If you know Spanish you'll know from the title of this section that it's a potato dish (papas=potatoes). And honestly when I first read the ingredients I thought I knew what this was going to taste like. But I was so wrong, in the best way! This is really one of my favorite things I've made so far for this experiment. There was almost a melt in your mouth quality to this. And although everything was fried in oil it wasn't too greasy! Just so, so, so good. I do have a couple tips though. This is the first thing I made in my cast iron skillet and I think it added to the flavor. So if you have a skillet use it. Mine is 10.25 inches and I use it almost everyday now. I love it. So you need a skillet that's about 10 inches wide and 1.5 inches deep. And at one point you have to flip the tortilla out of the skillet. It's pretty easy but be sure to use oven mitts/pot holders to avoid burns. 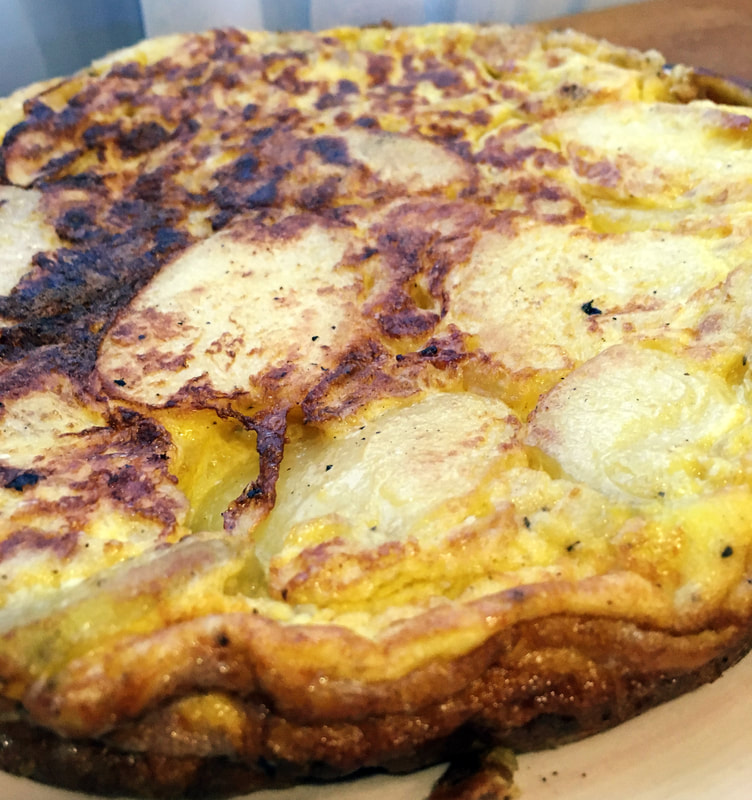
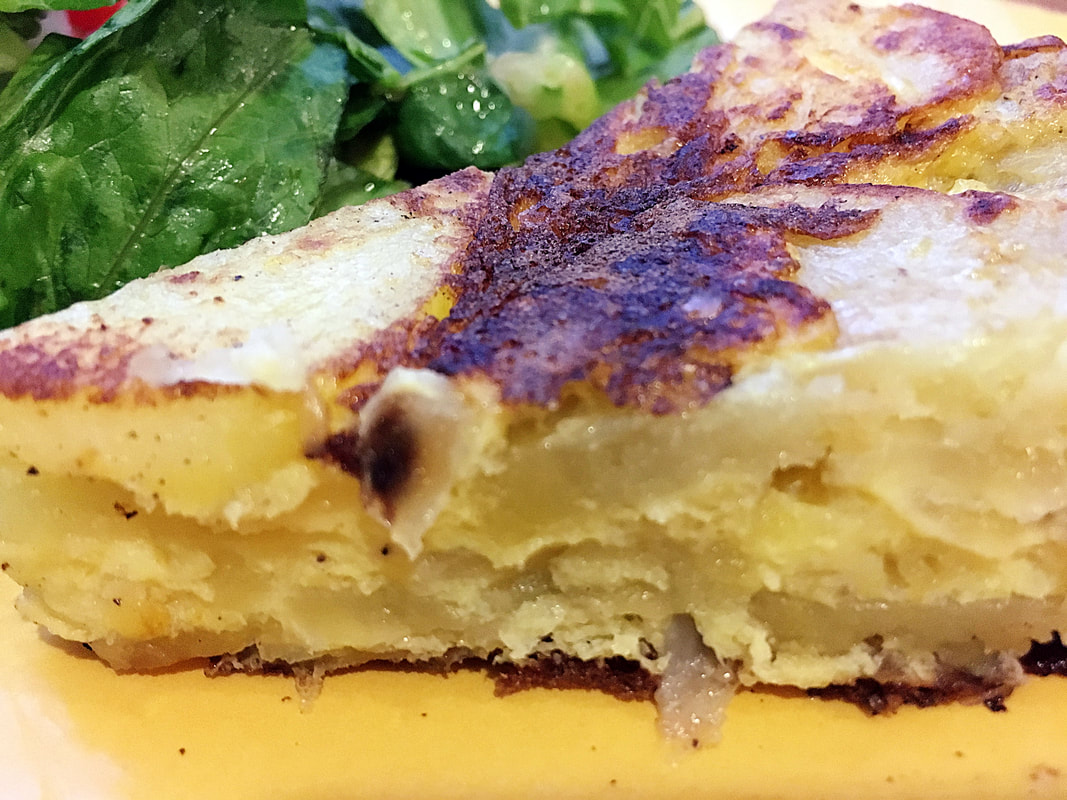
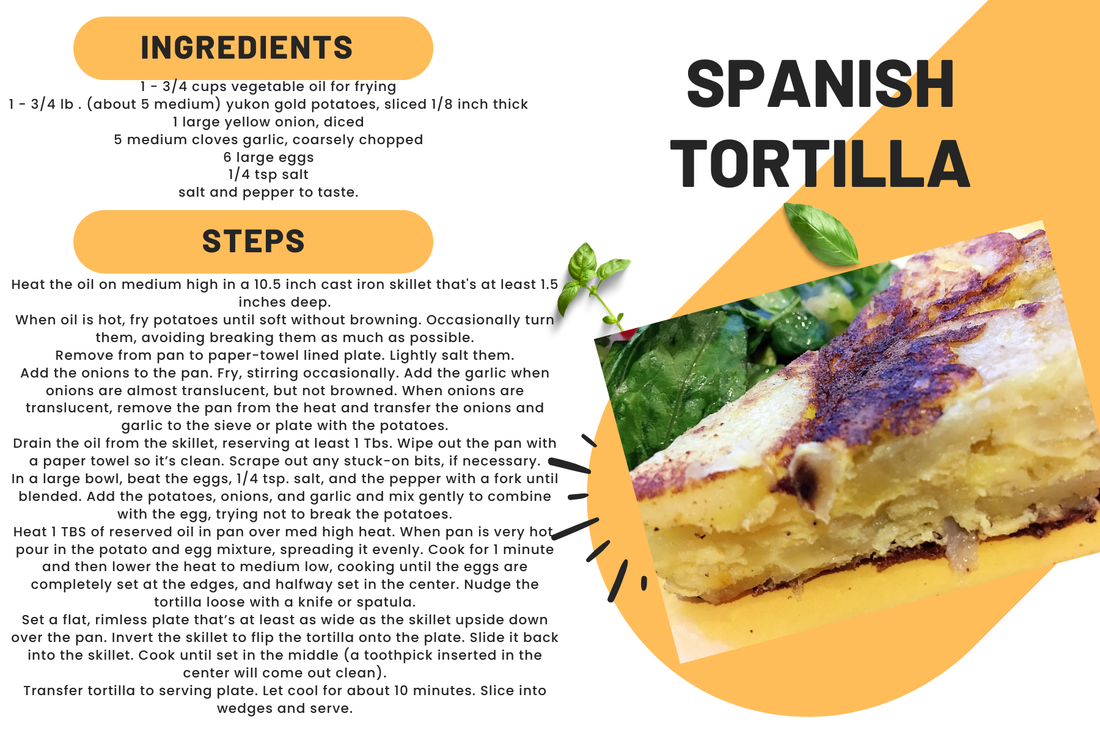
Please make this for dinner some day. You will not regret it.
This post contains affiliate links. If you make a purchase after clicking them, we will be compensated, but there is no additional cost to you. All opinions expressed are our own. Thank you for your support.
Alicia back with another American recipe! This year my family is picking a country from our ancestry and trying to make foods from that country once a week. Then I share the recipes here. This month we're doing American.
When asking my friends they're favorite American foods my husband replied that he thinks "barbecue is the most American flavor." Then a whole bunch of people agreed with him. There's so many different, and delicious, styles of barbecue across the United States, it's impossible (for me) to choose my favorite. Slow cooking the meat makes it fall off the bone tender without drying it out. Unfortunately, we don't have a barbecue that can slow cook our meat, so we have to use our crockpot. But it still results in a very delicious and tasty rack of ribs. Today's meal is ribs, baked beans, cornbread, and potato salad. A meal suggested to me by my friend Shirley, who lived in Texas for awhile, so I trust her barbecue opinions. I made everything from scratch and it wasn't that intense or difficult despite being a full plate. The sides were delicious and a perfect compliment, especially the potato salad, a recipe which I'll share with you today as well. Slow Cooker Ribs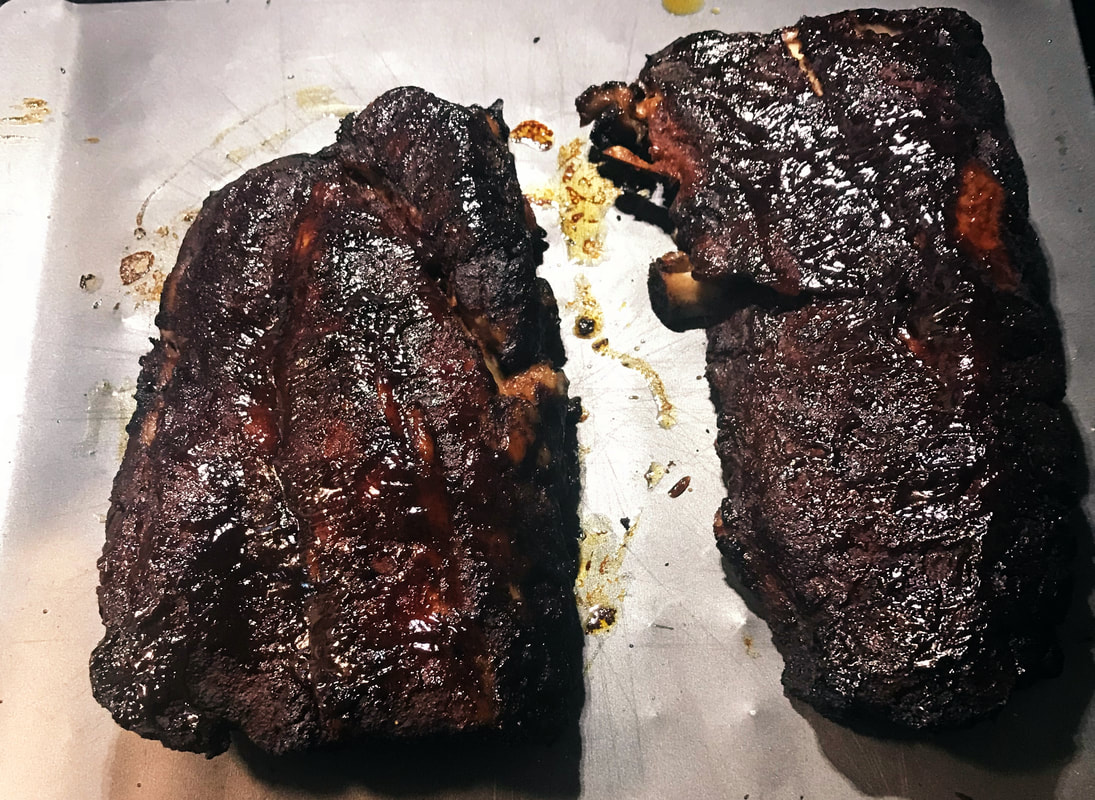
These ribs...THESE RIBS! They're so good! Oft requested by friends for gatherings, these ribs do not last long. Leftovers are unheard of. They're so delicious.
The rub for the ribs can be made in advance and kept in a container, ready for every time you want to make some delicious ribs. We always have some made up and sitting in our spice cabinet. Ideally we would smoke them or cook them on indirect heat on the grill, but since we don't have that option right now, we just do it in the CrockPot. (I love my crockpot!) And lining the crockpot with parchment paper makes clean-up a breeze! Make these, you will not regret it. Best Ever Potato Salad
When I knew we were going to make potato salad, I called my mom. She has always made the best potato salad and I was amazed she hadn't posted it yet. So here it is in all it's glory. The great thing about it is you can customize it to your tastes. I used red and golden potatoes because that's what I had on hand, but russet potatoes work just as well. Sweet or dill pickles, either one is great. I used a dressing that was slightly creamy instead of the regular Italian dressing. I was still so good! Play around according to your tastes and it's always sure to be amazing. I honestly love this stuff.
Although, if you don't like pickles, this may not be the potato salad for you. Otherwise, you can't go wrong. 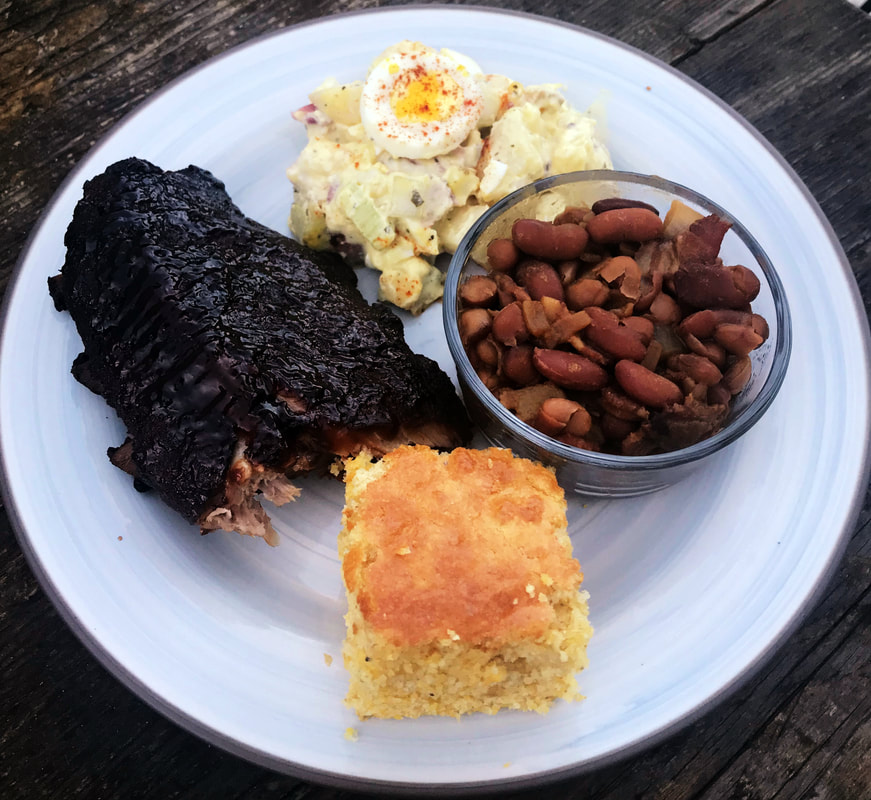
I didn't want to overwhelm you with recipes so I'll post the baked beans and cornbread another day. Until then, dazzle your family and friends with these recipes.
This post contains affiliate links. If you make a purchase after clicking them, we will be compensated, but there is no additional cost to you. All opinions expressed are our own. Thank you for your support
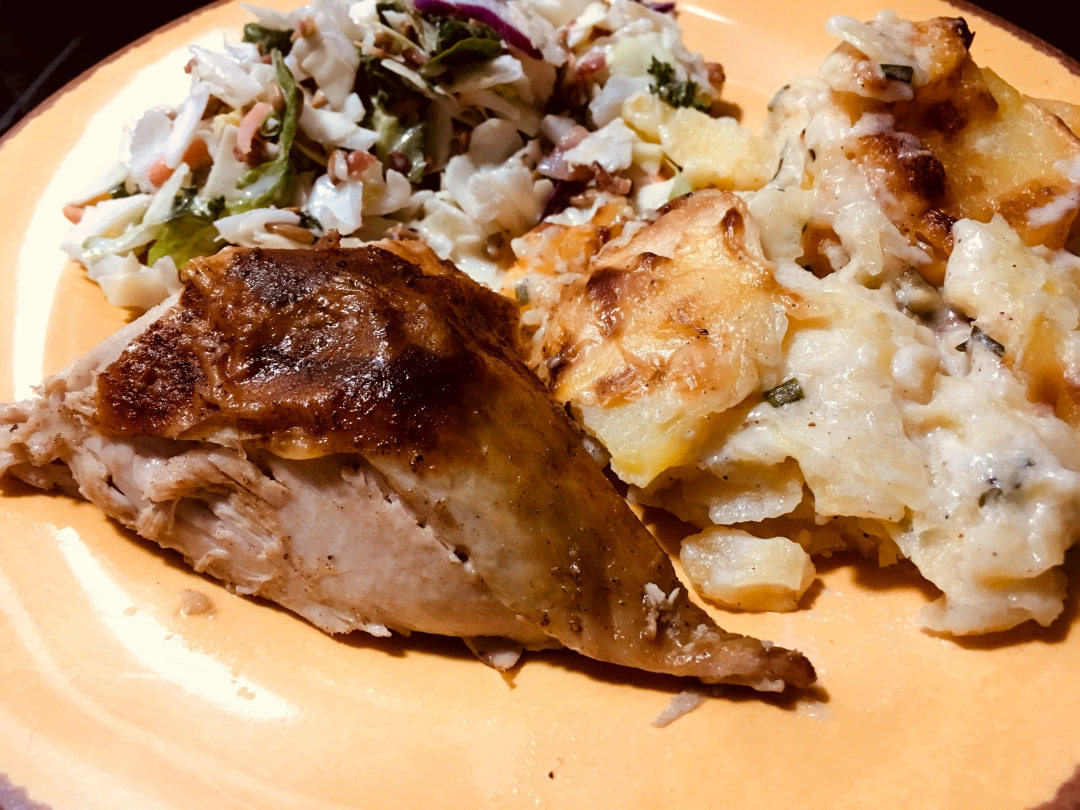
So today, in our French ancestors honor we made Gratin Dauphinois (French scalloped potatoes) and roasted chicken.
Gratin Dauphinois (French Scalloped Potatoes)
Usually when I think of scalloped potatoes I think of cheese and potatoes. But to make true Gratin Dauphinois, you DON'T USE CHEESE! I know! I was skeptical at first, but really this turned out so delicious! You still get a crispy brown top from the starch in the potatoes.
Some tips for make Gratin Dauphinois
Just look at that beauty. Gratin Dauphinois was so wonderful! And the leftovers are great too. And it was really easy to make. If you con't have cream on hand, I saw some recipes where it could be made with just milk. So if you're craving scalloped potatoes, try Gratin Dauphinois, you won't regret it. 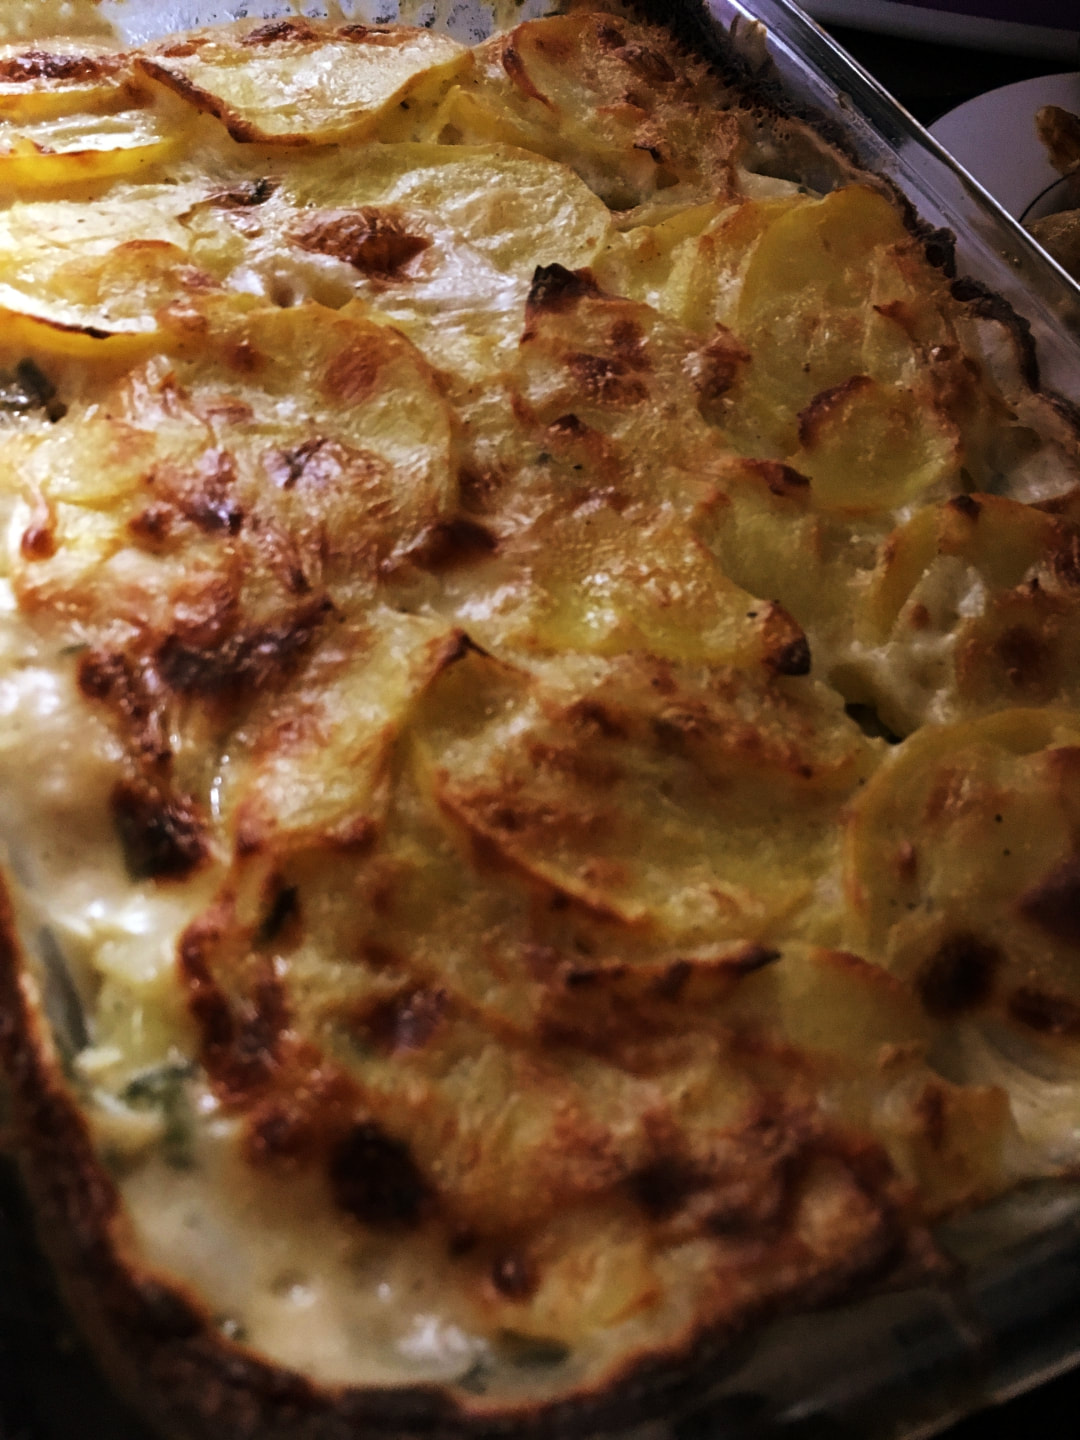
Roasted Chicken
To go with the Gratin Dauphinois, I thought a roasted chicken would be delicious. I was just going to buy a rotisserie chicken from the store but then thought it would be fun to try my hand at roasting a chicken. It was so good too!
I did look up how the French roast chickens but I didn't have time nor ingredients for Julia Child's recipe. So I'll just say the flavors are French inspired though not classically French at all. I don't have a recipe for you, but I rubbed my chicken with butter, and sprinkled it with thyme, salt, and pepper. A squeeze of fresh lemon juice and some extra pats of butter finished up the outside of the bird. I rubbed up under the breast skin with butter and stuck some cloves of garlic up there. Inside I stuffed it with lemon, garlic, and bay leaves. I meant to grab some rosemary from the plant outside but I forgot. I tied the legs together with some baker's twine. Then roasted it at 400F for 20 minutes. After that I reduced the temperature to 375F for another 90 minutes. I had a 5 pound bird that came out with nice crispy skin and beautifully moist meat. It was so delicious. With the leftovers we made chicken tacos the next night.That's the great thing about this chicken the flavors are subtle enough that the leftovers can easily be transformed. 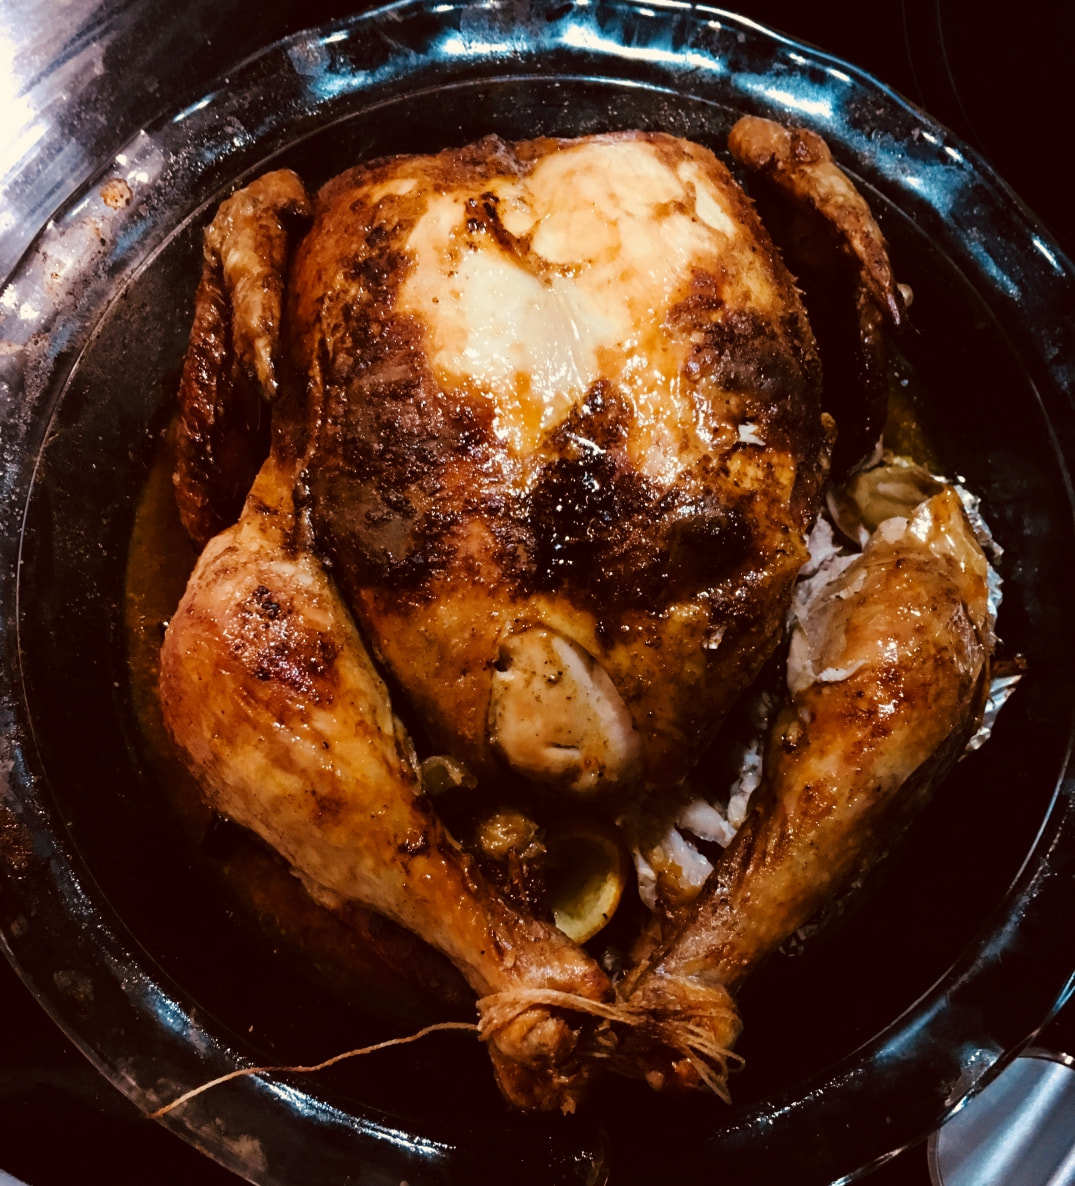
So I hope you give those Gratin Dauphinois a try. They're so delicious! Best scalloped potatoes I've ever had. If you do let us know in the comments how you liked it!
|
Creators of Hot Cocoa Bombs! (copyrighted)

Author
Helen Reynolds: Mother of six children , grandmother to eleven! I love to cook, craft and create things and I especially love doing that with my family, So, when my lawyer daughter, Lindsey, my artist daughter, Madalynn, and I came up with the idea of Hot Cocoa Bombs, this blog was born. Then, one more daughter, with her technical and science skills, plus creativity has joined in to round us out! Read more about us here! 
Click this link and visit 3WinksDesignShop on Etsy. Find our Hot Cocoa Bomb Idea Book, our For the Love of PIe e-book and more of our creations!

Amazon Gift Cards are the Perfect Gift!
    Archives
April 2024
|
 RSS Feed