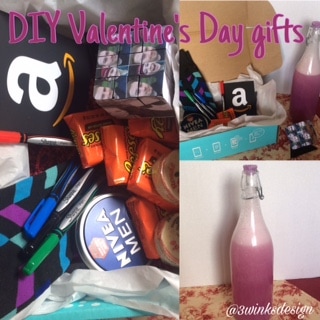
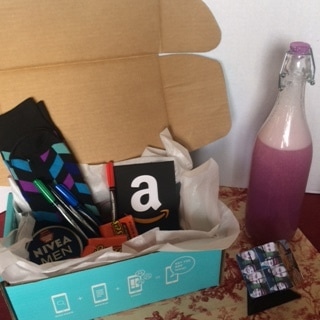
 So. It's the weekend before Valentine's Day and you still haven't gotten a gift for that special someone like you've been meaning to, eh? Luckily, I have put together a list of three super easy DIY gifts that will not only make awesome presents, but not look like you threw them together last minute. And the great news is that each of these gifts can be easily tailored to fit whomever you are gifting them to, be it a boyfriend, parent, or a friend. Bubble Bath 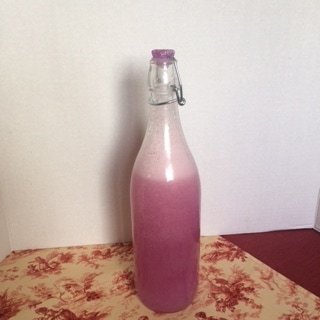 The first gift we have is diy bubble bath. Now, there are plenty of great from-scratch recipes out there. I honestly was too lazy to do that. The easiest thing to do is to buy a body wash that you like (pay attention to the color and scent) and add castile soap to it. I use Dr Bronner's. The ratio I used was about 2:1 body wash to soap. I also added in a bit of warm water. Mix it all together and then funnel it into a jar. I used this cute jar and painted the lid with pink glitter. This is the perfect gift for a gal pal or sister. Rubik's Cube Photo Set 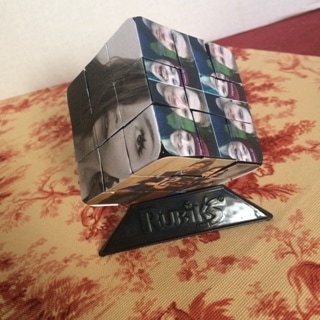 This one is super cute for someone who might be a bit nerdy. It's also really simple. All you need is a rubik's cube, six photos of you and the recipient (or if you don't have six together you can be like me and just do one of your face), and some mod podge or Elmer's glue. Make sure the photos are square (Instagram photos work well for this) and cut each one into nine smaller squares. Then glue the photos into place on each side of the cube. This gift is versatile as it is both sentimental and can be used for entertainment purposes! Boyfriend in a Box 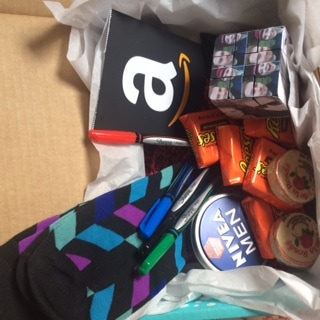 I call this last one Boyfriend in a Box, but obviously you can call it whatever you desire. The concept of this one is just fitting small, random gifts that remind you of a person into a box for them. It's sort of like a care package. I just used a box I got from Influenster (if you want to see what I've gotten, you can check out my personal Instagram where I will be posting about the products) and filled it with tissue paper and confetti strips. In it I placed some fun socks, lotion, a Rubik's Cube with photos of us, pens, an Amazon gift card, and Reese's Cups (his favorites) with a few De La Rosa Mazapan (my favorites). I'm also including a little love letter. There really is no "theme" to this box, it's just little things that made me think of him. However, if you're having trouble coming up with gifts, here are some themes you can use to help yourself:
 I hope you found this list of last minute Valentine's gifts helpful and I hope you give some of them a try! Good luck out there! Shop this post:

1 Comment
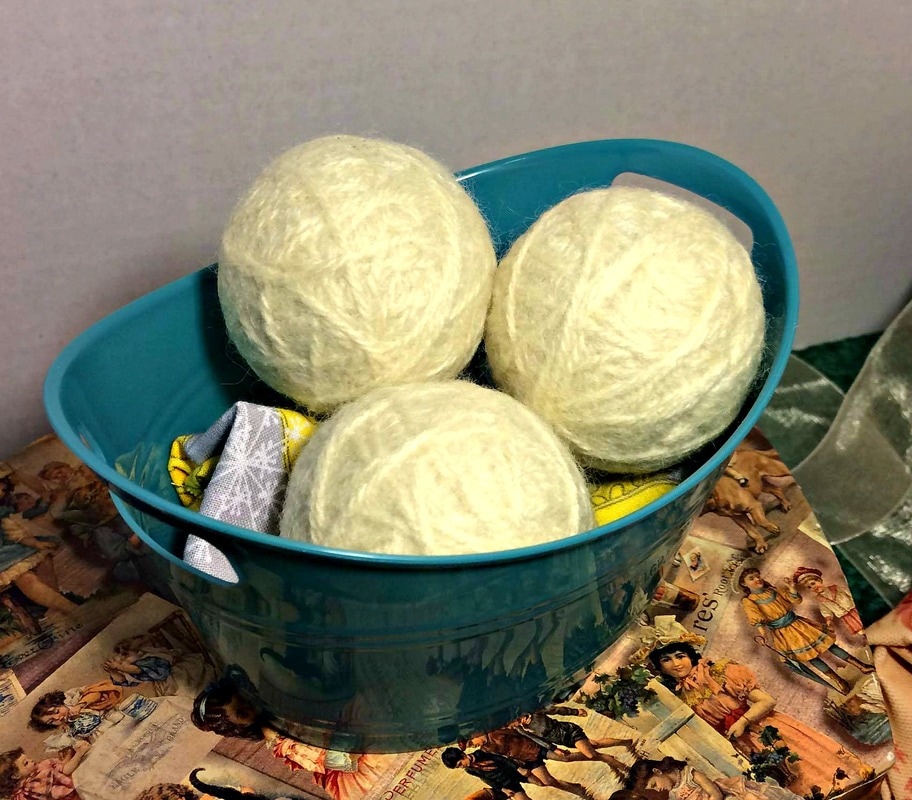 Hey y'all, it's Madalynn and today I am going to teach you how to make Dryer Balls. If you've never heard of dryer balls before, they are a cost effective and eco-friendly replacement for dryer sheets. They are made out of wool and last for years. Many people also prefer dryer balls because they are more natural than conventional dryer sheets and are softer on your clothing, but provide the same outcome. Dryer balls keep your clothes soft and static free. They're also super easy to make. So if you want to save some money on laundry this year while also producing less trash, keep on reading! 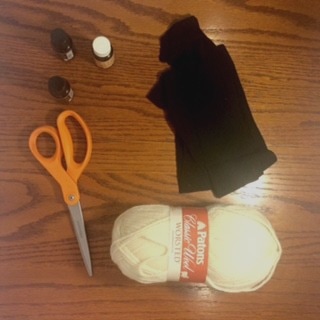 For supplies, all you will need are:
Right, so let' s get started. You will begin by wrapping the yarn around two or three fingers about ten times. Then you will slide that off your fingers and wrap the yarn around the middle of the loops, so it looks like a bow. 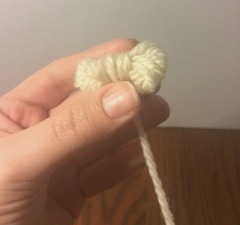 Then you pretty much just keep wrapping the yarn all around until it forms a ball. Be sure to keep spinning the ball as you go so that it will come out as an even ball. You can make these as big as you want. I made mine to fit right in the palm of my hand, a little bit smaller than a tennis ball. Any size from about there to around the size of a softball will work. When you feel happy with how big it is, just snip off the end of yarn and tuck it under a few other layers of the wool.  Out of one skein of yarn, I made three balls, with a little bit of yarn left over. Three to four is about all you need for one load of laundry, so that was perfect! At this point, you can add essential oils to your wool balls if you wish for them to be scented. 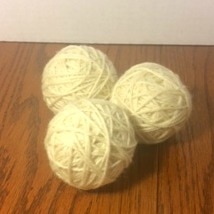 Next you will grab those tights and cut off the legs. Drop the dryer balls in there one at a time, knotting the tights in between each one. You can also tie them off in between each one with some thread, but don't use any of your wool yarn to do this as it will felt that way. At the end of the line I double knotted the tights to make sure that none fell out during the felting process. Putting them in the tights is important because a) it keeps them all in one place and b) it keeps them from unraveling.  Now that you have them all knotted up in there, throw them in the wash. I would recommend doing them in a load with towels. The way that works best for this is to run them through with a cold water cycle, then a hot water cycle. Then when you throw them into the dryer, run it on the highest heat setting. You may need to repeat this process two or three times to get them to felt, so this will be a great project for laundry day! You can tell when they are felted because the individual strands of yarn wont come apart from the rest when you run your fingers over them. 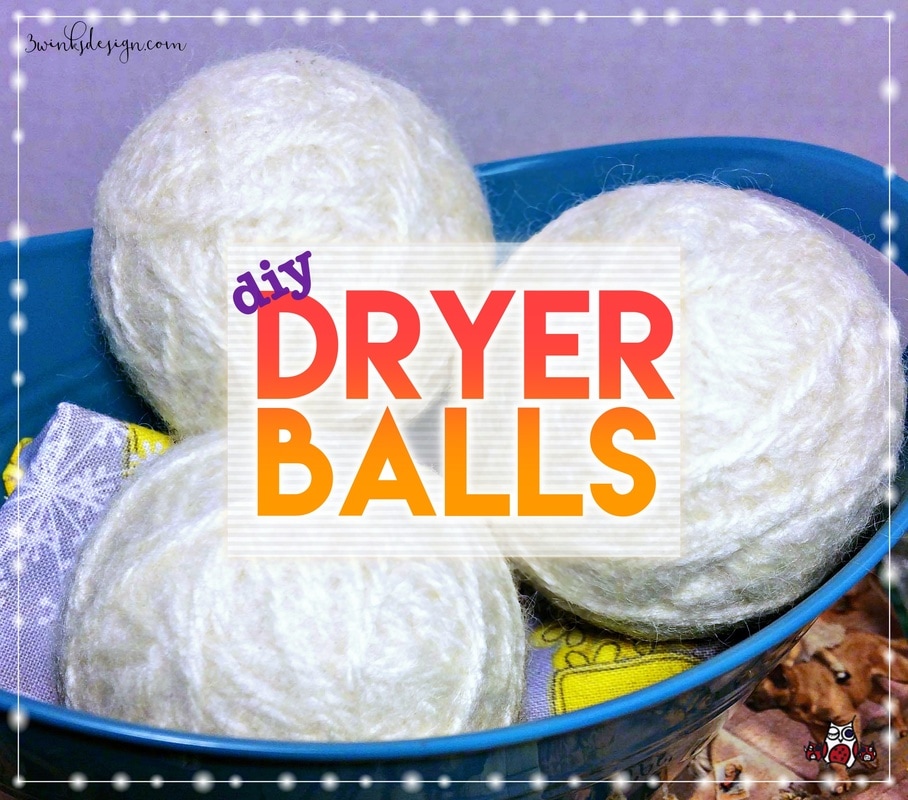 So I hope that you enjoyed this tutorial and found it helpful. Try these out and let us know how you like them! I have a feeling that you'll never go back to dryer sheets after using these. Happy Monday and I'll be back on Friday with my Friday Fave!
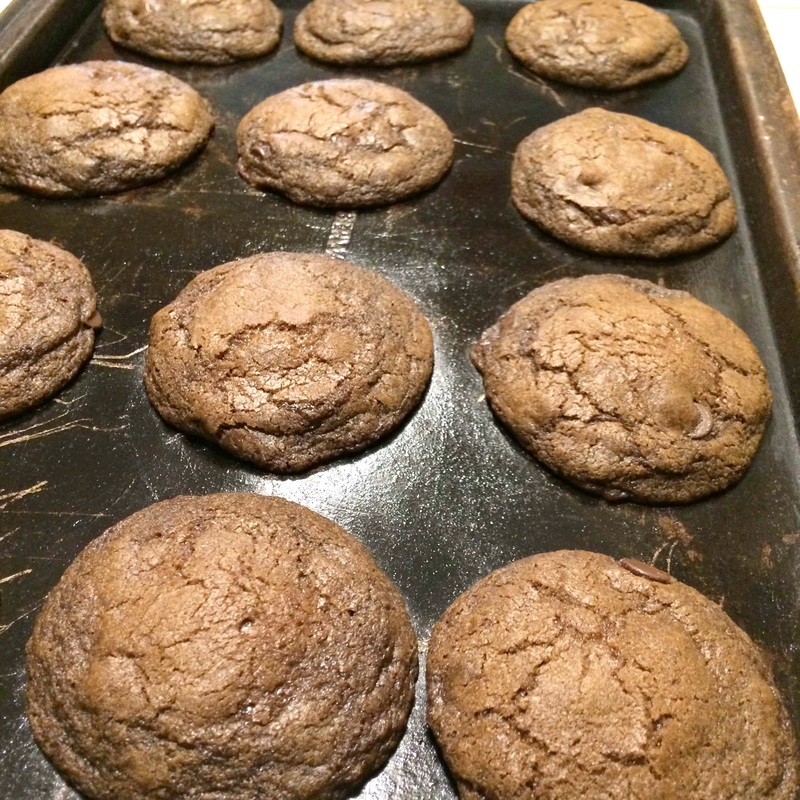
We have been eating so much pie at our house lately because of my pie series that today I thought we should take a little break from eating pie and add a little whimsy. So here it is: 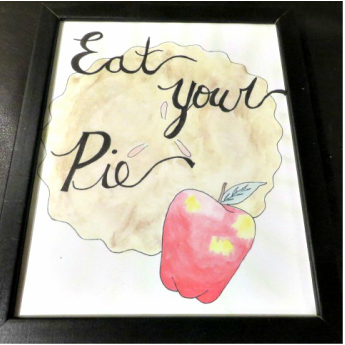 Madalynn did the watercolor painting and I added the words. Trying to get through the pie feels like I have to encourage people to eat it like I would their veggies! I hope we don't have pie burn out before Thanksgiving even gets here. (My husband says that is impossible!) I thought this saying would be fun for this time of year. Madalynn's artwork alone is adorable. I need to work on my decorative writing skills to keep up with her. But, I have been practicing after reading this blog about writing with fake calligraphy. As you know from this post, and this one, I have been enjoying trying my hand at printables. This piece is one that you might want to put up on Thanksgiving as you enjoy the fruits of your pie baking labors. 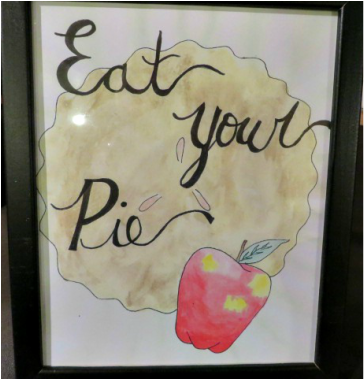 You can grab a little fun right here by clicking the button. And here is one more thing, just for fun! Maddy and I went to Hobby Lobby yesterday. All of their Christmas stuff was 50% off! I found this beautiful owl ornament that I couldn't resist! There were actually a number of owl ornaments to choose from, but this one was the most beautiful! Here is a similar one on Amazon. 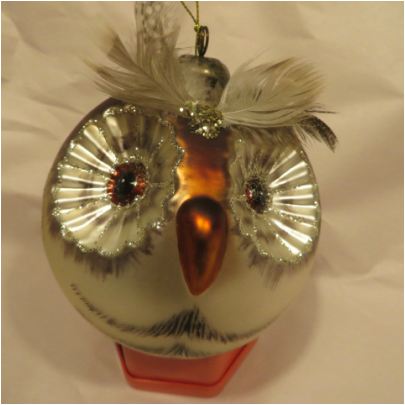 There! Now didn't that feel nice to take a little break? Come back tomorrow for a new pie recipe! You won't regret it. It is going to be one of my most requested pies, PECAN. I know that I already did the Upside-Down Pecan Apple version, but this one will be the real deal. See you then, and EAT YOUR PIE! Hey guys. It's Madalynn. I haven't contributed to the blog in forms of a post yet, but you may recognize me from my work on our Instagram, or our owl logo I drew with the first three Sharpies I saw while my mom was creating the blog. (Spoiler Alert: We may be updating that soon, so stay tuned.) Anyway, my mom went out of town this weekend, so I figured I would finally make myself useful around here and make some cookies. But not just any cookies. Vegan cookies. 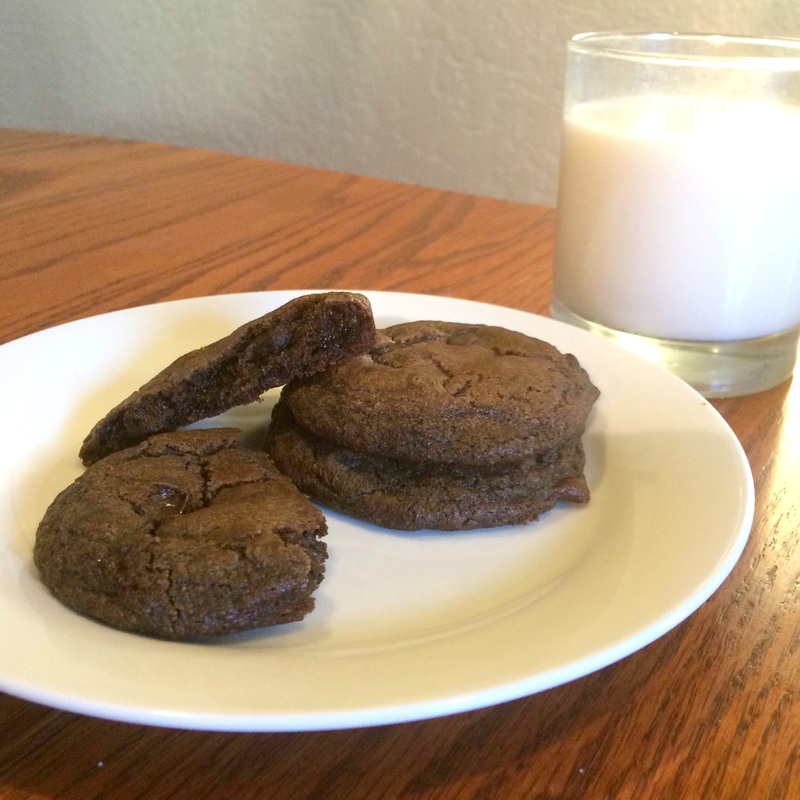 Now, I'm not really a vegan, but I like to try and eat a lot of vegan meals because 1) I'm pretty sure I'm lactose intolerant, 2) I like meat, but not for every meal, and 3) I don't really like to support factory farming, so depending on what brand the meat is or which meat supplier a restaurant uses, I will avoid it. So, this is a recipe I found by a vegan vlogger on Youtube called Liv's Healthy Life. I did things just slightly differently than the way she does them in that video, but oh my heck they are so good and so easy and so fast. Usually I dread making cookies because it can take a while, but these were done in like twenty minutes, if not less. Here are the ingredients you will need:
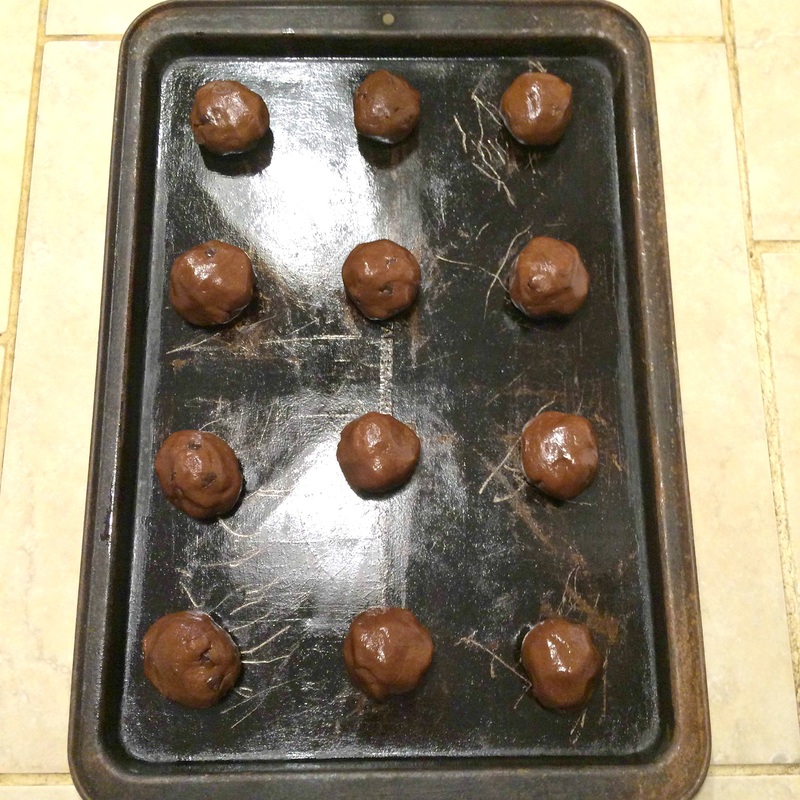
So I mean, most of that stuff will already be in your home. The only thing I had to pick up was some more almond milk and some chocolate chips. Once you have all of your ingredients, preheat your oven to 350 degrees Fahrenheit. Then you can start mixing things. Now, I greased a baking sheet before putting these in the oven, but you don't necessarily have to since they have the oil inside them. I didn't with the second batch I put in and they came out perfectly fine. If you do want to grease the sheet, I just used a little bit of coconut oil and wiped it around with a paper towel. So yeah, they came out looking awesome and they also tasted really good. I know there is this stigma surrounding vegan food that it's super gross, but I can assure you it is not. You might think this is biased, but I didn't tell people the cookies were vegan until after they tried them and they said they would have never known. I went out with my friend Charly (who also thought they were delicious) and when I came home later that night, they were practically all eaten. So I mean, the evidence speaks for itself. Let me know if you try this recipe and whether or not you'd like to see more vegan recipes! I have a ton that I would love to share. If you want to download this recipe, I have prepared that for you as well. Enjoy! |
Creators of Hot Cocoa Bombs! (copyrighted)

Author
Helen Reynolds: Mother of six children , grandmother to eleven! I love to cook, craft and create things and I especially love doing that with my family, So, when my lawyer daughter, Lindsey, my artist daughter, Madalynn, and I came up with the idea of Hot Cocoa Bombs, this blog was born. Then, one more daughter, with her technical and science skills, plus creativity has joined in to round us out! Read more about us here! 
Click this link and visit 3WinksDesignShop on Etsy. Find our Hot Cocoa Bomb Idea Book, our For the Love of PIe e-book and more of our creations!

Amazon Gift Cards are the Perfect Gift!
    Archives
May 2024
|


 RSS Feed