|
**This post contains affiliate links and I will be compensated if you make a purchase after clicking on my links. But, all opinions expressed are my own.
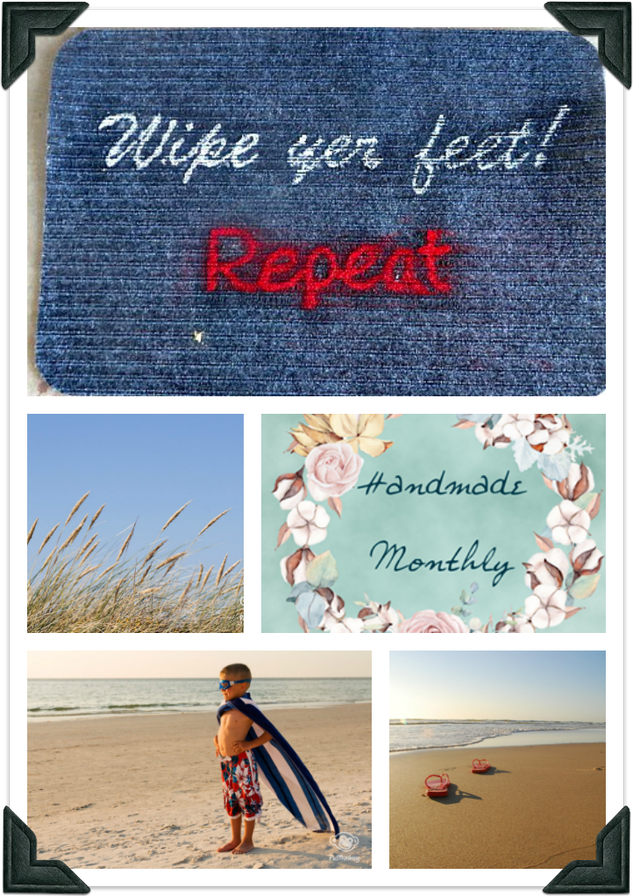
These aren't pictures by my house, but just examples of what can be stuck to shoes and feet of people entering your house!
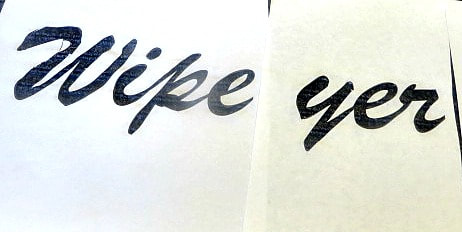
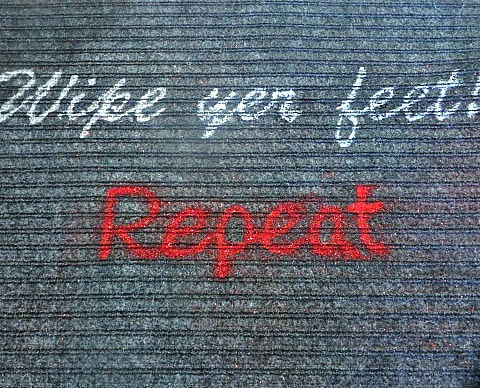
There are so many things in the summer that get tracked into the house! Grass, sand, mud, the list goes on. This month for Handmade Monthly I decided that I would share something that I needed for my backdoor! I had a doormat out there, but it seemed like everyone barely used it. I was constantly sweeping up dry grass and whatever else got tracked in. So, somewhat tongue in cheek and somewhat seriously, I took my cue from a shampoo bottle and made this mat that says, "Wipe yer feet! REPEAT."
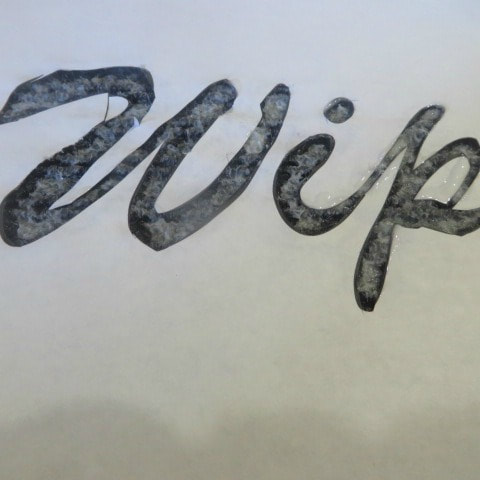
I think these mats would make great gifts as a housewarming gift for people with kids. Or, change the words and they would be suitable any time of year for the front or the backdoor! Or, how about for an RV , camper or cabin? I found the mat I used at Dollar Tree! That's right! A doormat for $!.00! They have them on their website to order in bulk, and they have a bunch in their store. I decided to use embossing powder with my heat gun to create my design. It was pretty much a learning experience as I figured out what to do. I'll show you what I did and tell you what I learned! Supplies: plain doormat paint paint brush or foam brush embossing powder stencil Heat Gun
That was the basic overview. Here are the things I would do to make it easier.
In the end, I like the look of this mat by my backdoor. I think that the embossing will hold up better than just paint, but of course, using just paint is a definite possibility. I hope you will take some of my tips to heart, to make your mat less labor intensive!
I had fun trying to come up with good messages for my backdoor mat. If you have anymore cute sayings or ideas, let me know! 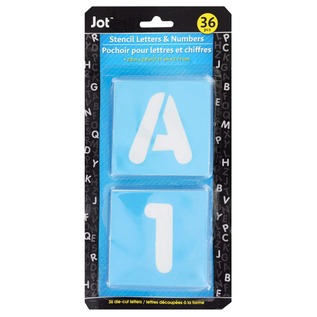
These stencils are available at Dollar Tree.
2 Comments
This post contains affiliate links. I will be compensated for purchases made through those links at no additional cost to you. All views expressed are my own. Thank you for your support.

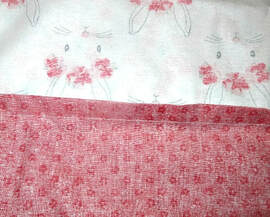
I love those little packs of fat quarters that you can pickup at Walmart for about $1.00. I sometimes find packs of them with such cute prints, that are all coordinated together, and I buy them thinking I will do something with them later. I have used them for quilts here and here, for these bow ties, these little owl purses, and there are a myriad of other ideas out there, I'm sure. Well, I fell for some cute Easter prints earlier this year, but I hadn't figured out what I wanted to do with them. Then, just before Easter, when we had decided to do the brunch, I realized I needed 2 tablecloths with a springtime feel and I thought about that package of fat quarters! It came in a coordinated pack of pinks and blues. I thought, why not sew them together into one big tablecloth! Of course, I was going to need more of the fat quarter packs. Unfortunately, the packs like the one I had purchased were all gone! But, there was some of the exact fabric on the bolt and other coordinating prints!

I loves this sweet bunny print! They had it on the bolt!
So, I purchased the fabric from the bolt and cut out my own quarters! It would have been much easier if I had purchased the correct number of quarter packs to begin with, so if you know that you are going to make a tablecloth, buy the right number from the start! For my table, it takes about 4 packs of quarters.
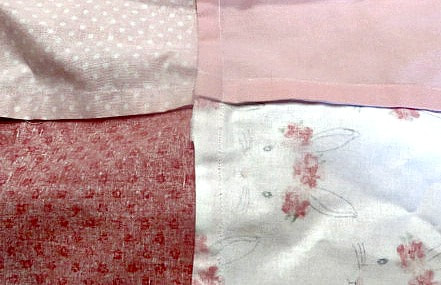
Most of the fabrics in my original pack had the pinks like you see above. One of the prints was a coordinating blue. I have plates that were going to look great on the pink, and others that were going to go well on blue. Since we were putting up 2 tables, and I was going to use both sets of plates, I decided to make one cloth in each color, so I purchased blue prints to go with the original blue bunny print. I placed that print right in the middle of the cloth. 
The bunny with the glasses print is the original fabric.
The tablecloths came together pretty quickly. I played with how I wanted the placement of the various fabrics. I started from the middle of the cloth, then built around that. I sewed the fat quarters together with french seams so that there wouldn't be messy fraying on the back of the cloth. I once showed you how to do french seams on this pillowcase tutorial.
That's all there is too it! My tables looked sweet and they were perfect for our brunch! Unfortunately, I FORGOT TO TAKE PICTURES OF MY TABLES! Trust me, they were sweet.
You can make tablecloths like this for any time of year and for any event! If you don't want to make an entire tablecloth, try a table runner! Have fun picking out those fat quarter! That's the best part.


This post contains affiliate links. If you make a purchase after clicking them, we will be compensated, but there is no additional cost to you. All opinions expressed are our own. Thank you for your support. We thought that for today, April Fool's Day, we would share this great post from Alicia again! Enjoy! Raise your hand if you hate how quickly your laundry piles up and your dishes. Or how even though you just cleaned the shower it needs another cleaning. It's not that I hate cleaning, I hate how little time I get to spend enjoying the fruits of my labor. That's why I've got these easy, almost no-effort tips to help you keep your abode looking pristine. Tip #1 Say No to the Dishes Isn't it the worst to have dirty dishes in your sink and on your counters? I have two options for you here:
 Once your kitchen is this clean, you don't want to mess it up with dishes or food. Tip #2 Make No Walk Zones You know how there are no fly zones? Keep your freshly cleaned rooms of your house clean by banning people from entering them.
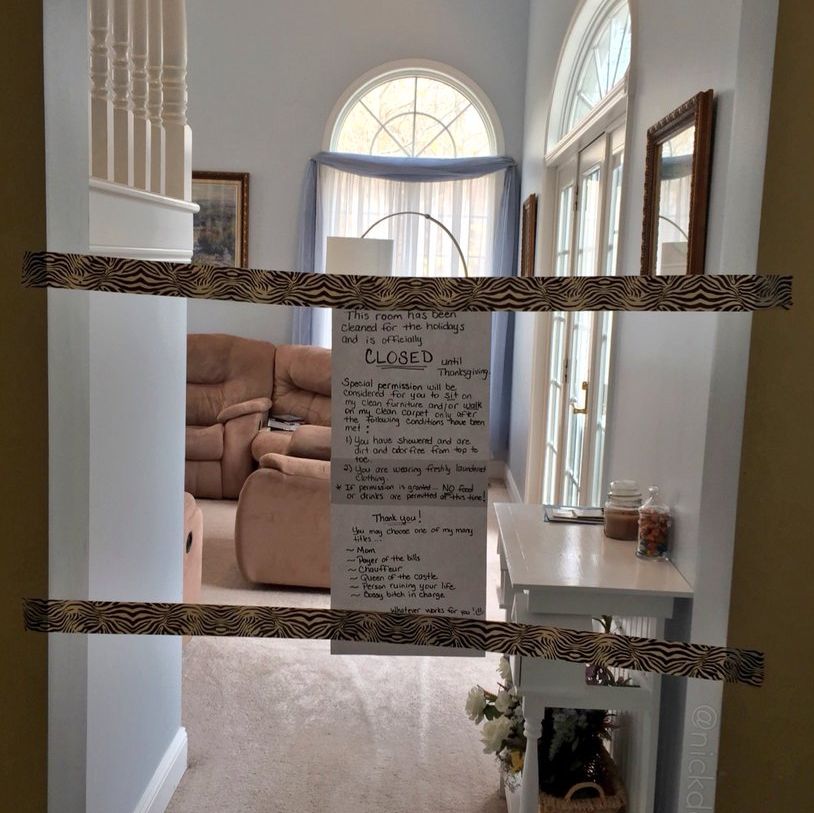 This mom closed her living room down until Thanksgiving to keep it clean. What a great example! Tip #3 Keep Your Showers Fresh ...And your tubs! Soap scum is the devil and it sneaks up on you if you aren't careful, but it won't be a problem if the soap never touches the surface to make scum on...
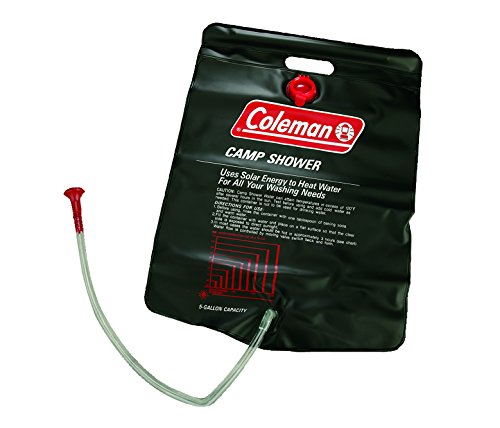 I've used this camping shower on week-long camping trips before and it's great. It would be an easy fix to soap scum on your shower walls, because it doesn't have any walls! There you have it, three no effort tips to help you keep your house sparkling clean!
Let me know how these work for you and I hope you all have an amazing April Fool's Day.
This post contains affiliate links. If you make a purchase after clicking them, we will be compensated, but there is no additional cost to you. All opinions expressed are our own. Thank you for your support.

My husband and I accomplished a lot this past weekend. it was so great! It all started on Friday. I had been off doing a church assignment that morning and when I got home, he had left for work. But, before he left, he had gone on a shopping spree which is very unusual for him. He had been to Harbor Freight and sitting in the middle of my family room was a camp chair and a flashlight with a note that said "Happy Birthday!" He knew I needed a new chair for Girl's Camp this summer, so he picked me up one like he has, which is a favorite! (He had a coupon that made it cheaper!) Then, on the dining table, there was another package with a note that read, "Merry Christmas!" It was a heat gun! I am so excited because I had told him about a craft that my daughter-in-law is doing and I want to give it a try. It requires a heat gun and the one he got me is really nice, with variable speeds and temperatures! (Once again, a coupon!) More to come on that project!
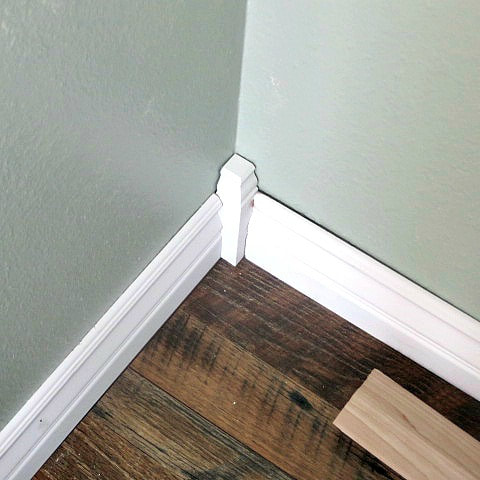
Well, I don't really know what has gotten into him, but later that evening, after Awesome Husband was home from work, we were talking about various projects around the house, I mentioned that I wanted to get some tomatoes and basil planted in one of the garden boxes that we have out in our backyard. Well, the next morning he went out there and dug up the soil in that box and got it ready to plant in and we went off to the home improvement store and purchased the plants that we needed. They are now planted and growing and looking good so far. I hope you will later be seeing some recipes with the produce from that garden box! You got to love a man who does something to make one of your wants come true so quickly! The fun didn't stop there! This man of mine then went into my craft room and finished putting up all of the moldings, miter cuts and all, and even along the top of my sewing desk! All there is left to do is the caulking and paint touch-ups. It is looking so wonderful! Meanwhile I was doing some fancy cooking for him that I will blog about on another day, and the not so fancy laundry. But, today I will show you how the craft room is coming along at this stage of the game!
You can see my last updatehere. On that post I made a list of the things that still need to be done. We can just about cross off the trim moldings because all we have left to do is caulk and paint! Look how beautiful they are!
Another thing that I have started on, but have by no means completed, is the organization process. Since I have shelves in there that are available for use and it won't be in my husband's way if I start to fill them, I have begun going through things and putting them on these shelves.
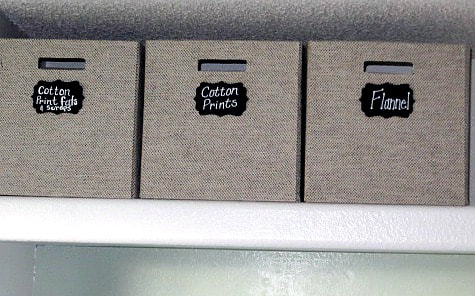
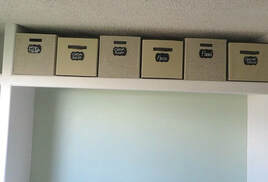
A few years ago, I found some fabric boxes that are 13 x 13 inches on clearance at Target and they fit on my long shelf just right! I was able to get a super good deal on them at the time, so keep your eyes open for those clearance sales and weekly ads. I only had 3 and I needed 6 in all, so I ordered these from Amazon. But, there are a number of options available. My husband is going to add another long shelf below the original one for me and I will store my fabric boxes on that shelf when it is finished, saving the top shelf for less used items.
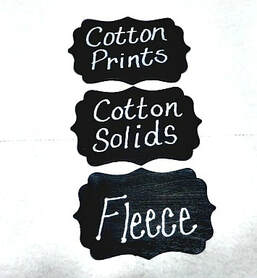
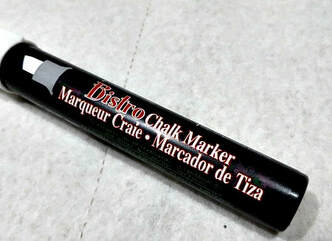
I decided that I needed a way to label the boxes with the type of fabrics that they are holding. I had some little wooden shapes that we had decorated with chalkboard paint at our Christmas in July party this past year. I thought they would look great on my boxes and I do really like them. I simply painted them with black chalkboard paint and used a chalk marker to hand letter them with the types of fabrics that I have.

I am loving the look, but looking forward to the lower shelf so that they will be easier to reach!
All in all, it was a pretty productive weekend that left us feeling satisfied with life around here! How about you? What projects are you working on? I would love to hear about them. Of course, I may end up giving my husband something else to do for me if I like them too much, ha ha! Thanks for stopping by! |
Creators of Hot Cocoa Bombs! (copyrighted)

Author
Helen Reynolds: Mother of six children , grandmother to eleven! I love to cook, craft and create things and I especially love doing that with my family, So, when my lawyer daughter, Lindsey, my artist daughter, Madalynn, and I came up with the idea of Hot Cocoa Bombs, this blog was born. Then, one more daughter, with her technical and science skills, plus creativity has joined in to round us out! Read more about us here! 
Click this link and visit 3WinksDesignShop on Etsy. Find our Hot Cocoa Bomb Idea Book, our For the Love of PIe e-book and more of our creations!

Amazon Gift Cards are the Perfect Gift!
    Archives
May 2024
|
 RSS Feed