|
This post contains affiliate links. If you make a purchase after clicking them, we will be compensated, but there is no additional cost to you. All opinions expressed are our own. Thank you for your support.
I know, I know! You can get on Pinterest and find loads of recipes for meals in a jar. If you haven't looked, meals in a jar are shelf stable meals or desserts put together in canning jars. They are generally shelf stable for about a year (or more) and they are a great way to have something quick to fix in a pinch AND meals in a jar make terrific gifts! All the preparer has to do is add water and any other perishables that the recipe may call for.
Last week, I taught a back to basics jam making class to our church women's group. Each class that was taught had optional crafts associated with them. I decided that for my class I would also offer a meal in a jar as the optional "extra!" Well, the class went really well, we made a batch of strawberry jam, and I handed out samples of blackberry jam in these tiny jars! They were adorable as well as delicious! But, I digress...
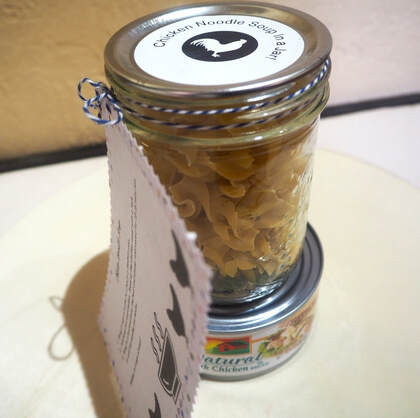
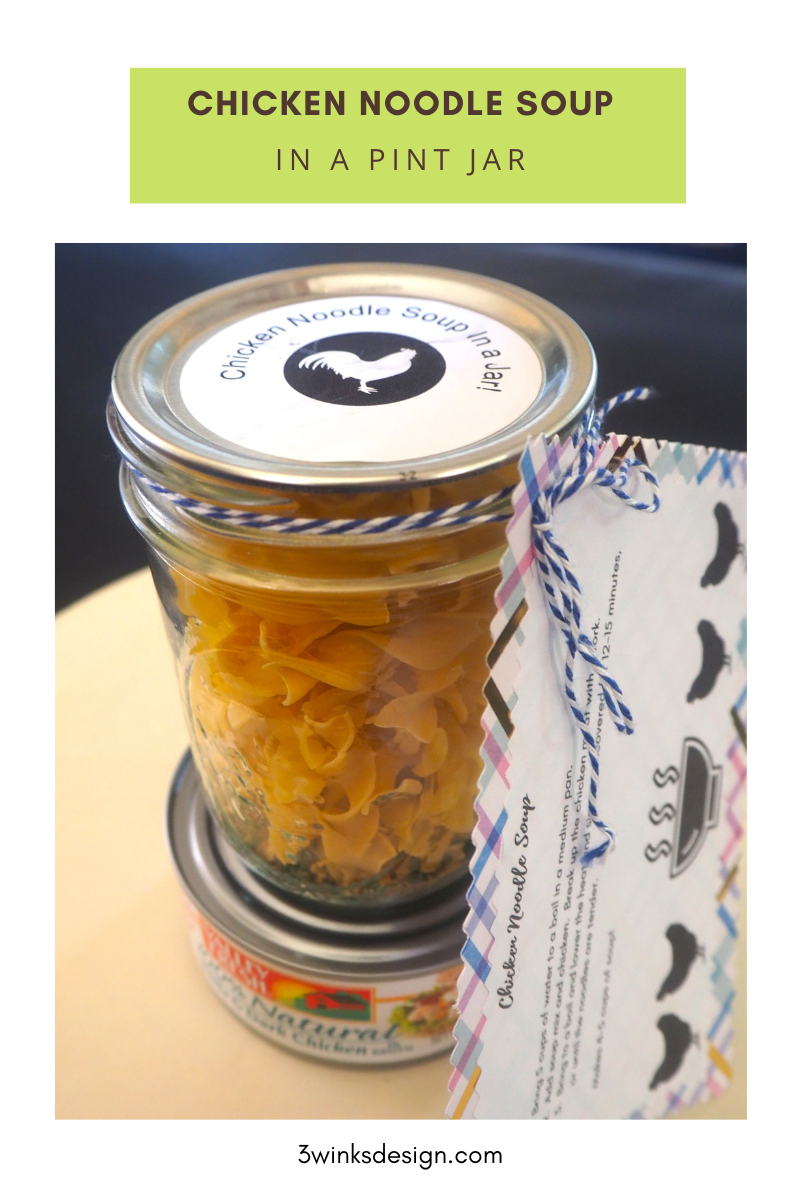
This soup in a jar recipe is one that I have had for a long time and I have tweaked it to be more to my family's taste. The original recipe didn't even have garlic in it! I mean, how can you have chicken noodle soup without garlic? The ingredients are ones that you probably already have in your pantry, and if not, they are super easy to find and inexpensive. And yet, when the soup all comes together, it tastes great! My son and my husband both go back for seconds! Sure, it isn't your homemade noodle, grandma's handed down recipe, but it isn't bad at all for something really quick and convenient to make. As you can see in the picture, I include a can of chicken with my gift, or pair the chicken with the jar in my pantry. After that, all you need is 5 cups of water!
When you put the ingredients together in a jar, you will want to seal it to preserve the freshness of the noodles and the herbs and spices. I used my Food Saver with an attachable jar sealer to do that. I love this machine and sealing the jars is quick and easy! I purchased my Food Saver at Costco. Be sure that you get one that is compatible with the jar sealer attachment. 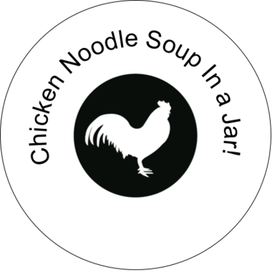
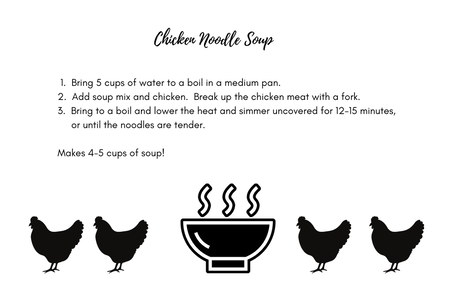
I also made a recipe card that you can print, trim and attach to your jar. It tells you how to prepare the soup from the jar. Just click on it, open it and save it to print.
Here are the directions for putting the soup mix together. Isn't it great that it is in a pint jar? I love to use a wide mouth pint jar in order to hold enough noodles. As you put your noodles into the jar, be sure to shake them down so that you fit in as close to 2 cups as you can. Honestly, I shopped all over to find wide mouthed pint jars at the best price that I could for my class. The best price I found was at Target, in store, not online! They were pretty hard to find though. I bought the last boxes at two of the Targets that I shop at. So, good luck!
If you don't have a Food Saver, you could simply put on the lid and use it within 6 months. Or you could put in an O2 packet to help keep it fresh longer. 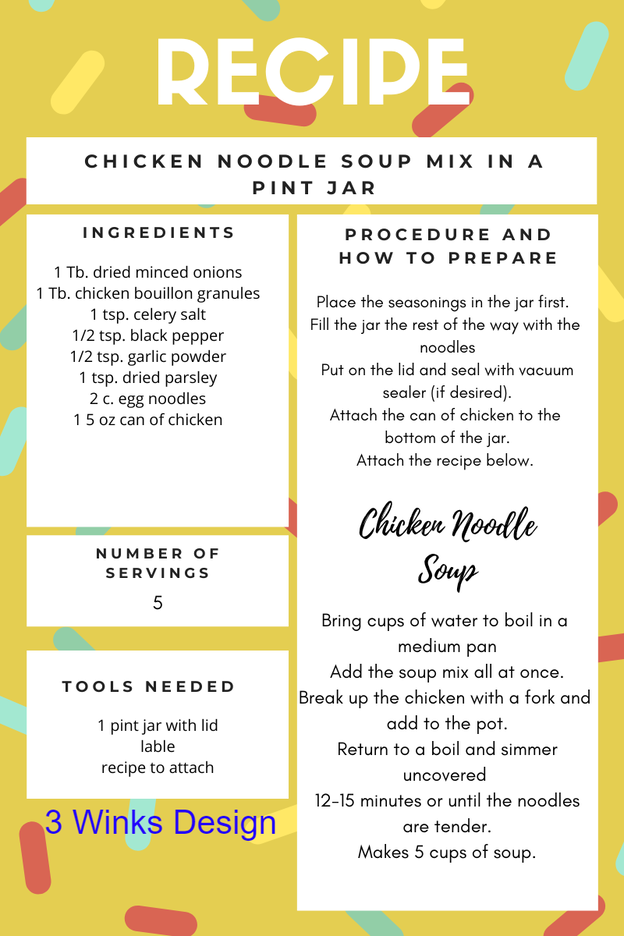
Click on this form for a printable pdf!
I mounted the soup recipe onto some decorative cardstock and trimmed it with decorative edged scissors and tied it to the jar with Baker's Twine. I went old school! Sometimes that still works best!
Everyone in the class had a great time and I was so pleased with how everything turned out. Do you have favorite "recipes in a jar" that make great gifts or quick meals? Send me the link to your favorites in the comments below!
2 Comments
This post contains affiliate links. If you make a purchase after clicking them, we will be compensated, but there is no additional cost to you. All opinions expressed are our own. Thank you for your support. 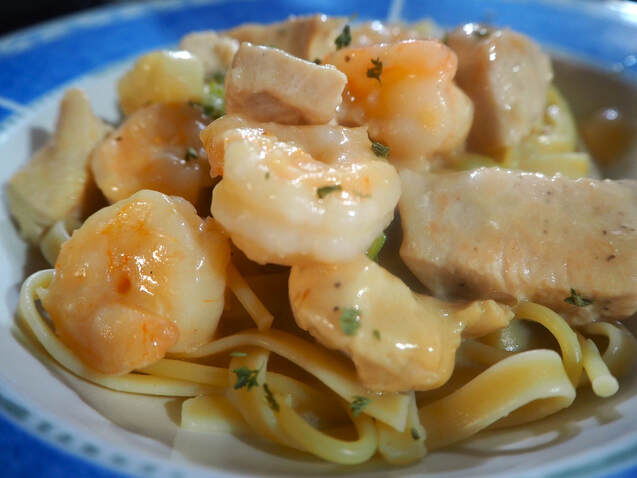 Let me begin by saying, that this recipe was inspired by my friend Rhonda who brought me a jar of preserved lemons. We have a mutual friend with a lemon tree. We were both the lucky recipients of many of those lemons this year. Rhonda decided to try her had at preserving some in salt and lemon juice, a process that I had never heard of and I am fascinated by it! But, now that we have the lemons, we need the recipes to use them in.
This post contains affiliate links. I will be compensated for purchases made through those links at no additional cost to you. Views expressed are my own. Thank you for your support! 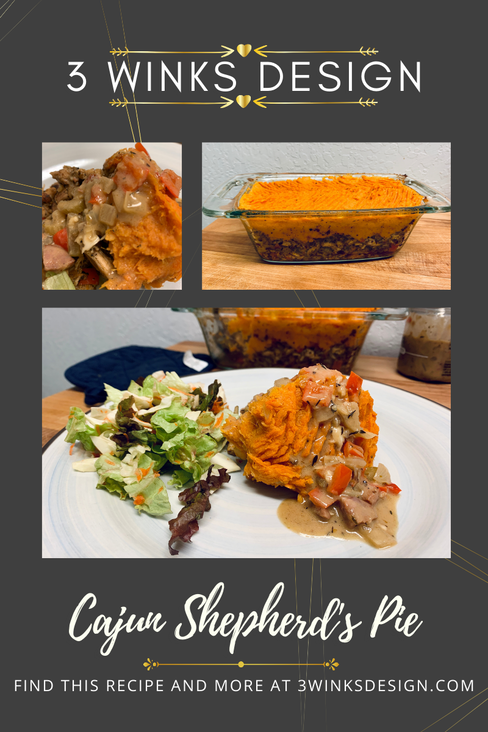 On the fourth day of Christmas my true love gave to me 4 calling birds...which inspired me to make this Cajun Shepherd's Pie. When we were thinking of what to do about 4 calling birds we looked up what calling birds were. Turns out that's what black birds used to be called. This reminded me of the nursery rhyme "4 and 20 blackbirds baked in a pie." So immediately I thought of blackened chicken pot pie. But after doing much research and being inspired by Tiffany-Anne Parkes recipe for Jerk Chicken Shepherd's pie, I decided a Cajun Shepherd's Pie would be the best approach.  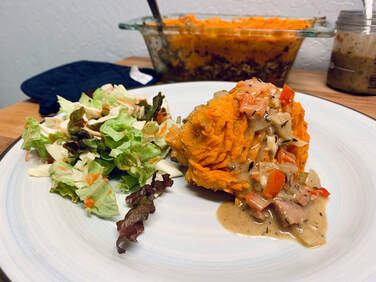 The recipe I came up with is so delicious. And although it's not true shepherd's pie because it uses chicken instead of lamb, it's still shepherd's pie-esque. The spice level from the Cajun Spice mix had the perfect amount of heat for me. The sweetness of the sweet potato mash pairs so well with the spicy flavor of the chicken. But my favorite part of the dish is the andouille cream sauce. It is amazing and was largely inspired by chef Antony Field, though my recipe does differ a bit. Tips For Making Cajun Shepherd's PieI hope you guys enjoy this! It was so fun to come up with and even a better thing to eat. Here's some tips for making it:
This post contains affiliate links. I will be compensated for purchases made through those links at no additional cost to you. Views expressed are my own. Thank you for your support!
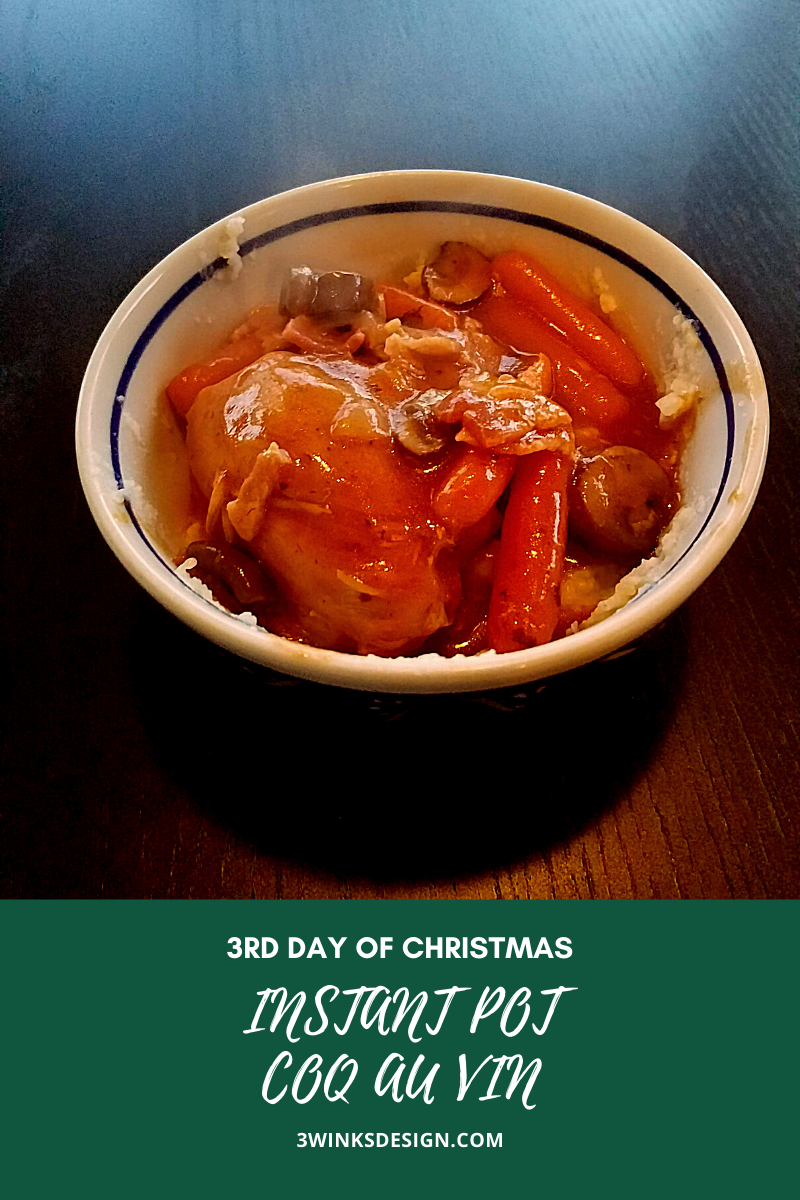
On the third day of Christmas my true love gave to me: Three French Hens, and so I made a pot of coq au vin!
Here is your language lesson for the day. Coq is actually the French word for rooster. Coq au vin directly translates as "rooster in wine." But it is hard to find a rooster to cook these days, so really any chicken will do. However, for our 12 days of Christmas recipes, the third day calls for Three French Hens, so I knew we would have to make a French dish, and Coq au Vin is just perfect for the season! It is warm and comforting. You serve this Instant Pot Coq au Vin atop a bed of mashed potatoes. Does anything sound more wonderful on a cold winter day? When I was tasked with doing a coq au vin recipe I knew I wanted to use my Instant Pot! I got it as a gift from my husband for my birthday, and I love it! Not only does everything cook faster in an Instant Pot, but it really cuts down on dishes! For this Instant Pot Coq au Vin you use the saute function and the pressure cook function. 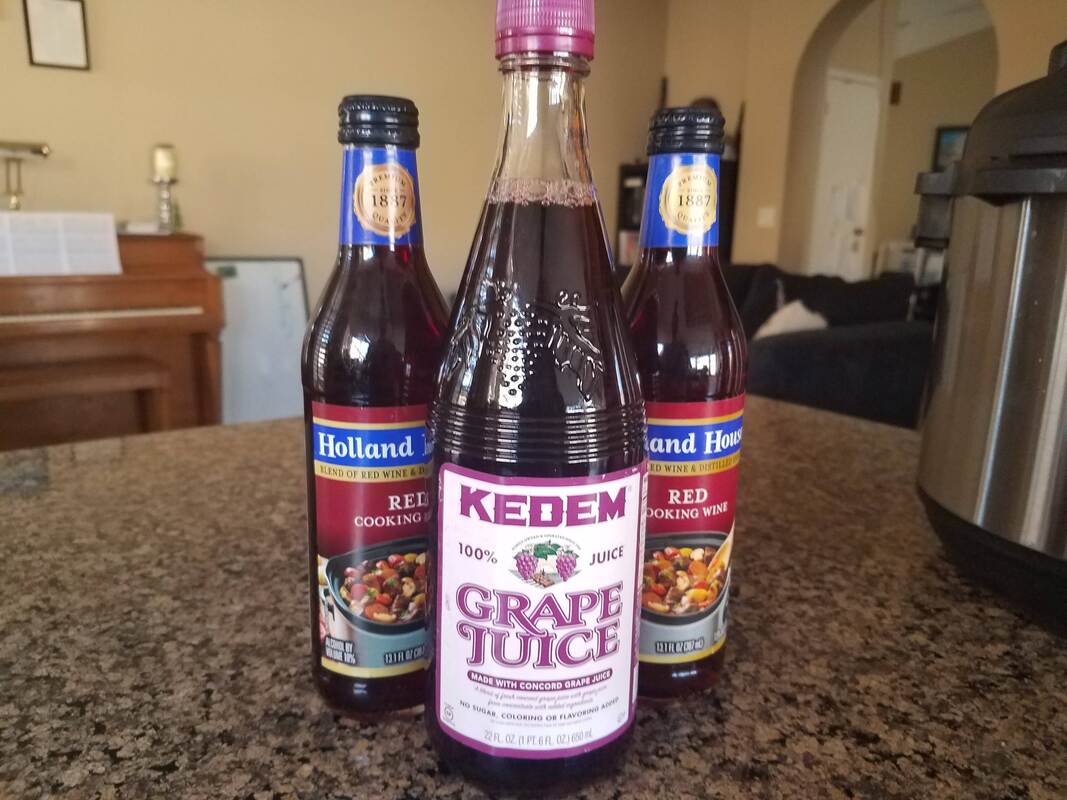
A word on the wine used. We are not wine drinkers in this house. Or alcohol drinkers at all. Red wine is a central feature of coq au vin (remember vin= wine) but I didn't want to buy an expensive bottle of wine for one dish. I used Holland House Red cooking wine which is much less expensive. You could also use grape juice if you really don't want to use alcohol at all (the alcohol cooks out, but you do you. No judgement here!) then grape juice would work, but it is probably a little sweeter so you would likely want to adjust your grape juice/chicken broth ratio so your coq au vin sauce won't be too sweet.
I think you are really going to enjoy this Instant Pot Coq au Vin. We devoured it! Merry 3rd day of Christmas! 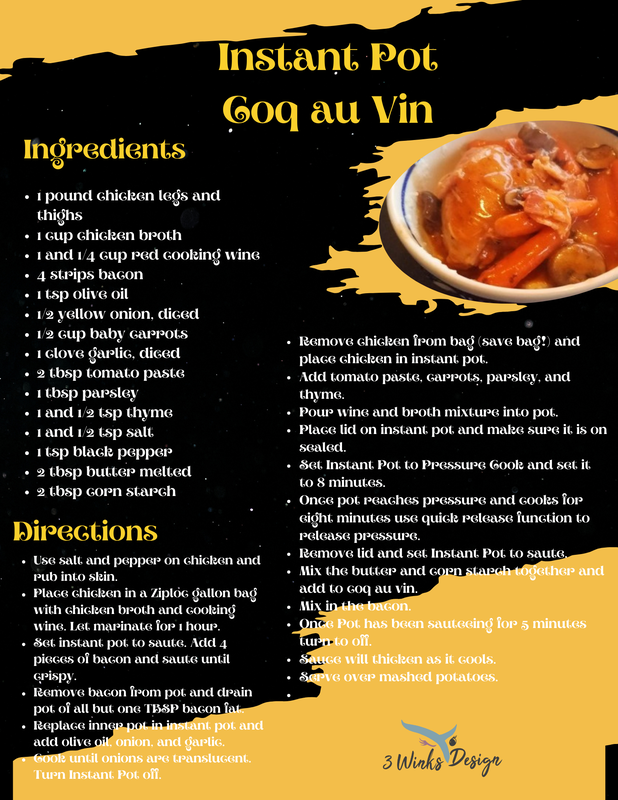
|
Creators of Hot Cocoa Bombs! (copyrighted)

Author
Helen Reynolds: Mother of six children , grandmother to eleven! I love to cook, craft and create things and I especially love doing that with my family, So, when my lawyer daughter, Lindsey, my artist daughter, Madalynn, and I came up with the idea of Hot Cocoa Bombs, this blog was born. Then, one more daughter, with her technical and science skills, plus creativity has joined in to round us out! Read more about us here! 
Click this link and visit 3WinksDesignShop on Etsy. Find our Hot Cocoa Bomb Idea Book, our For the Love of PIe e-book and more of our creations!

Amazon Gift Cards are the Perfect Gift!
    Archives
April 2024
|
 RSS Feed