|
THIS POST CONTAINS AFFILIATE LINKS. WE WILL BE COMPENSATED FOR PURCHASES MADE THROUGH THOSE LINKS AT NO ADDITIONAL COST TO YOU. ALL VIEWS EXPRESSED ARE OUR OWN. 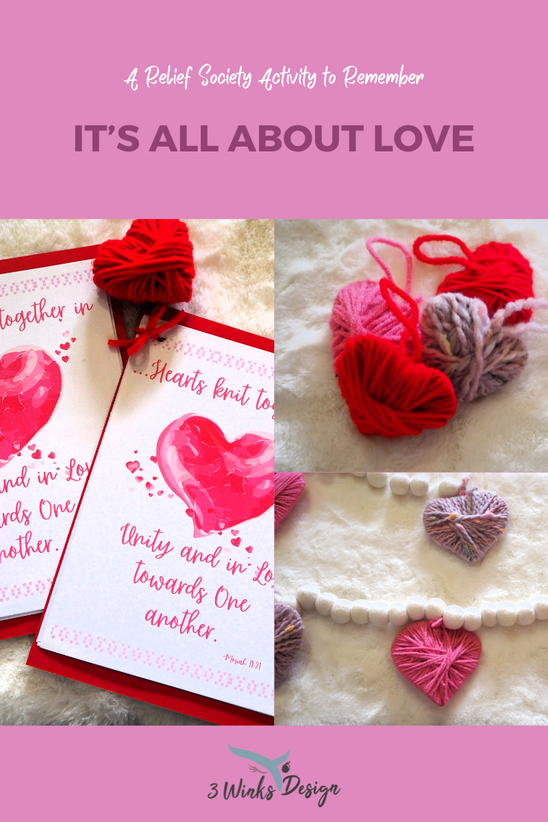 I am on the Relief Society Activity committee at my church. Relief Society is the Women's Organization and we try to have uplifting, self-improvement type activities throughout the year on one weeknight per month (give or take). I am blessed to work with some wonderful women on this committee and it is so much fun to sit and plan these activities together. We peruse the internet for ideas, we pray about what the women in our group may need, we bounce ideas around and get goosebumps when we come up with a really good plan.
I generally share ideas for our activities with you after the fact, such as this Alice in Wonderland themed activity, but since we are getting so close to Valentine's Day, I figured someone out there might need an idea in a pinch, so here is one that I think will be really good.
2 Comments
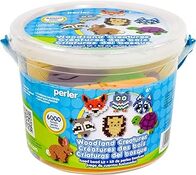
THIS POST CONTAINS AFFILIATE LINKS. WE WILL BE COMPENSATED FOR PURCHASES MADE THROUGH THOSE LINKS AT NO ADDITIONAL COST TO YOU. ALL VIEWS EXPRESSED ARE OUR OWN. Our 6 year old daughter is really into arts and crafts. I can always guarantee the toys she is going to play with everyday are her Legos and her arts and crafts bin. If she has a spare moment she will pull out paper and pen and draw. So when she had a Daddy Daughter Date night they decided to pick out a craft project they could do together. She got really excited about Perler Beads, and so did her creative dad. They spent the night making cute scenes of unicorns and rainbows to decorate her new room with! 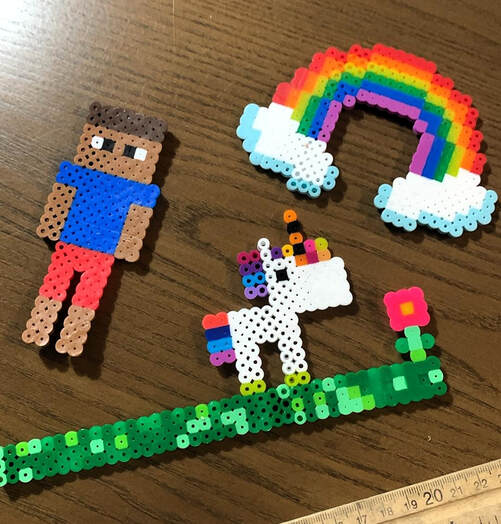 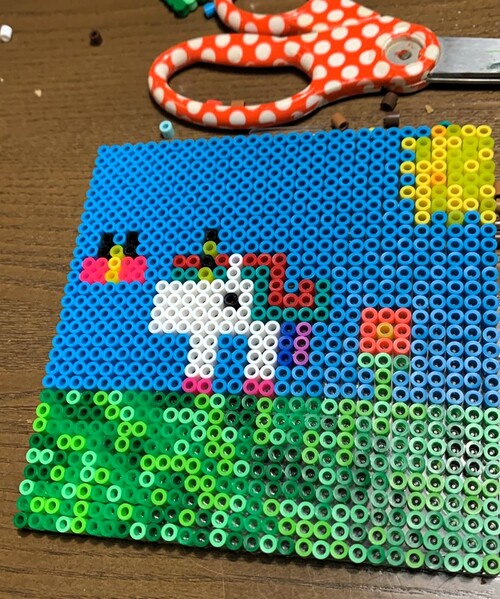 Then the Perler Beads came out to be used everyday for the whole of the next week. Many MineCraft characters, more unicorns, Godzilla, and even a big Megaman made their appearance. But I was hitting a creative block of what to make to join in on the fun. That’s when my daughter said she was going to make her own bracelet. 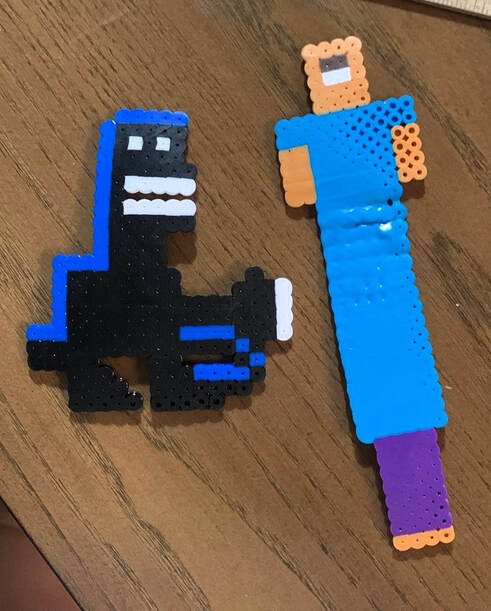 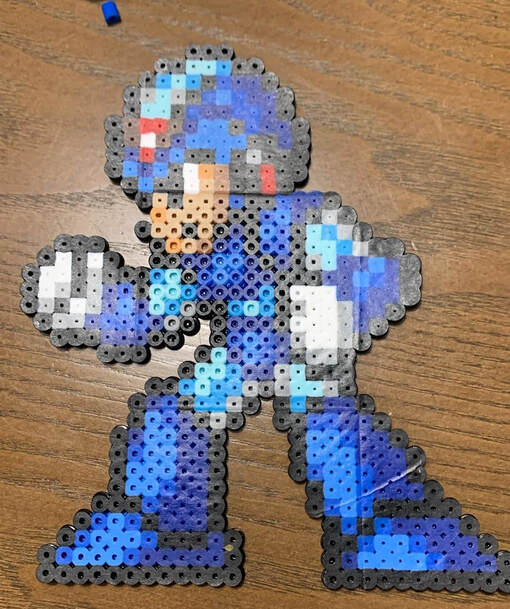 She designed a very cute simple square bracelet for herself and it reminded me of the fun earrings I used to wear in high school. My freshman year of high school those large chandelier earrings were in vogue and I loved to wear them. (Side note: One of the reasons I loved them was the nostalgia they provided from this picture book we had about getting pierced ears. Lots of fun earring designs in there!) And so I decided to design and make little, funky, colorful earrings. It was so easy and fast. I made three pairs for myself and then used a jewelry making kit my cousin gave me to attach them to hook earrings. Here is a kit I found on Amazon. And here is a kit specifically for jewelry! To make the earrings I used a square base plate and whatever Perler Beads I liked to make cute designs on the plate. If you decide to do this, make sure the beads are adjacent to each other so they will melt together. After you have the design you like, use a hot iron and a piece of parchment or wax paper over your beads. We found it worked best to Let it melt the beads for a few seconds before trying to move the iron around. Otherwise the beads would come loose and your design could be ruined. Once the first side is done flip the base plate over and remove your designs. Put the melted side down on another piece of parchment. Replace the parchment over your design and melt the other side. When that’s finished, set something heavy over your earrings to keep them flat (if that’s the look you’re going for. I accidentally melted the hole away in my peeler beads so I just heated up a needle and melted a new hole in the top bead. You could also attach post earring backs or clip on earring backs with glue or by melting the plastic and pushing the post into it, though I have not tried that method. 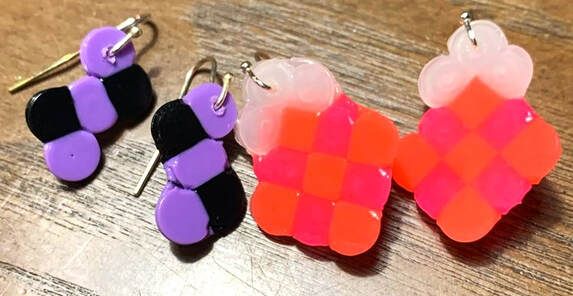 The earrings came out so cute and fun! My daughter decided to make me more and we’re going to get some clip-on backs to add to some of the earrings for her to wear.To make the earrings I used a square base plate and whatever Perler Beads I liked to make cute designs on the plate. If you decide to do this, make sure the beads are adjacent to each other so they will melt together. This would be a fun activity to do at a birthday party. I love the kind of party favors that will last more than a week and will be something the party goer can use over and over again. Or do it for a Girls Night with your friends! It would be an awesome Galentine’s Day Activity. Or just on your own, the possibilities are endless! We've found other sources of ideas for Perler Earrings, too! Check these out: Maker Mama The Thinking Closet Here are some great Perler Kits to help you with designs:
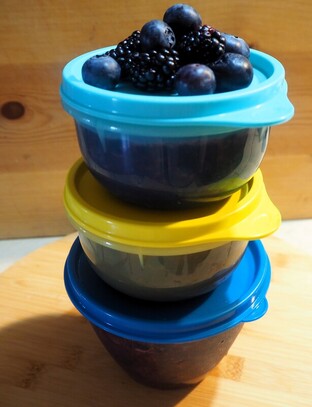
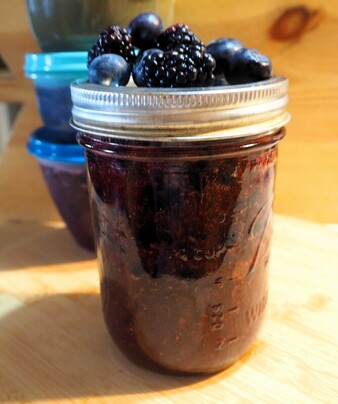
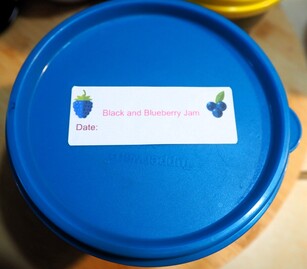
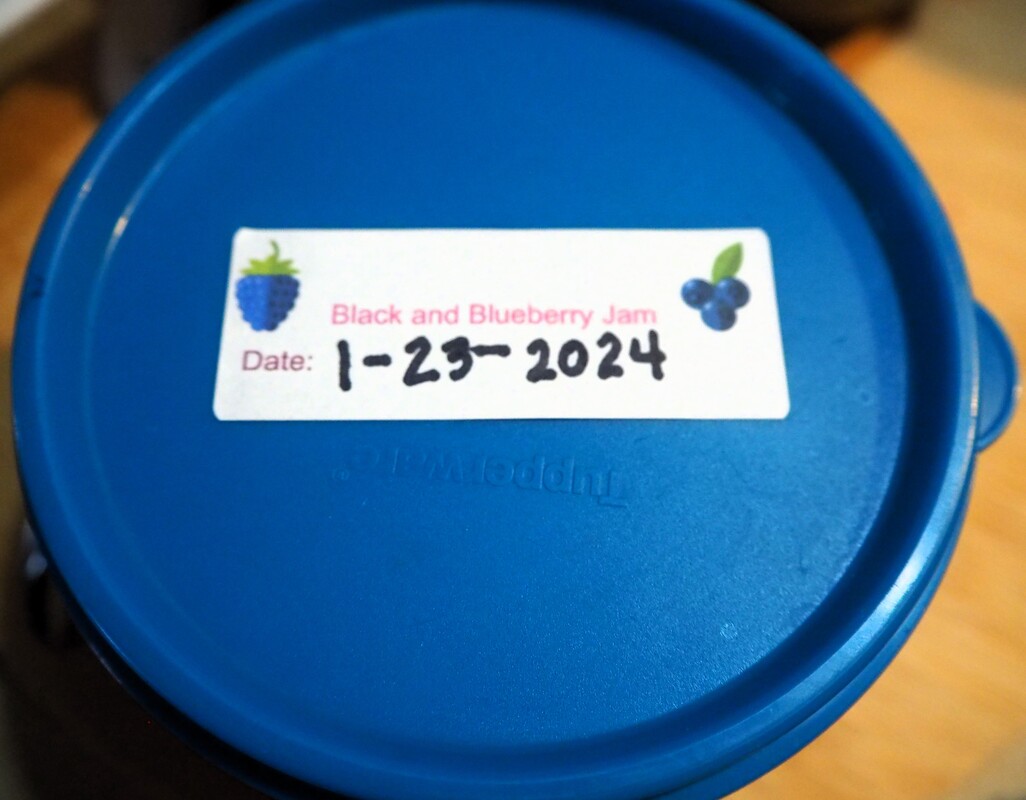
 THIS POST CONTAINS AFFILIATE LINKS. WE WILL BE COMPENSATED FOR PURCHASES MADE THROUGH THOSE LINKS AT NO ADDITIONAL COST TO YOU. ALL VIEWS EXPRESSED ARE OUR OWN. 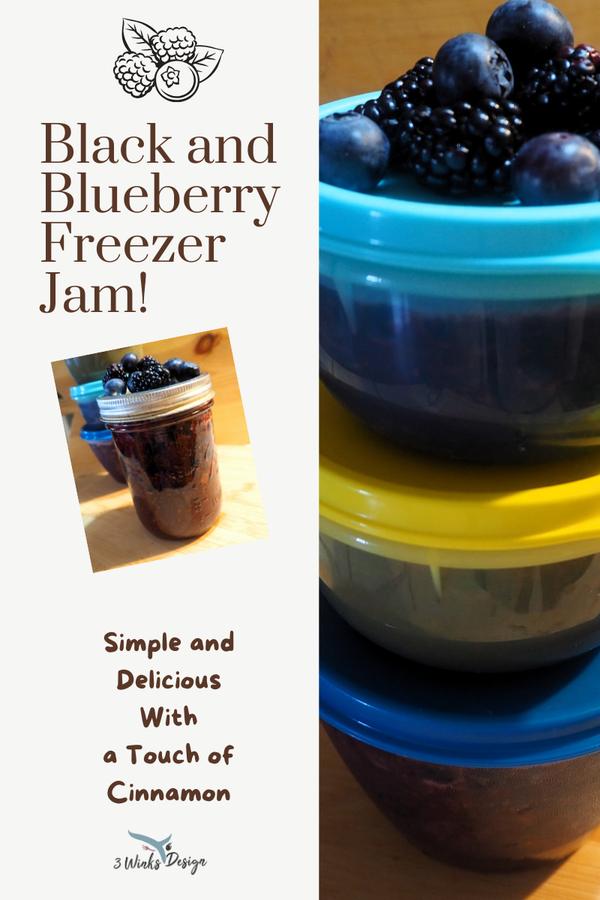 I haven't really delved into the world of freezer jam before, but let me tell you how this recipe evolved! For the past week or so , I've been experimenting in the world of pomegranates! In the midst of that, I picked up a couple of containers of blackberries at the grocery store. (You all know how much I love blackberries!) I hadn't decided what I was going to do with them and I even considered making a pomegranate-blackberry jam combo. As good as that sounded, I ended up needing all of the pomegranate juice for my regular pomegranate jelly, so the marriage of blackberries and pomegranates never happened. Then, there was a great deal on blueberries and I thought to myself that I hadn't ever made a jam with a combination of blackberries and blueberries! I started looking through Pinterest to see how much it had been done. (Not too much) And, I also came across a lot of freezer jam recipes as I scrolled. I decided that now might be the time to try a freezer jam. I have EATEN freezer jam before and I liked it very much! But, one of the cons of freezer jam to me is that I don't have a ton of freezer space to devote to jam. Somehow, this seemed like the right moment to give it a try. Speaking of the Pros and Cons of freezer jam versus canned jam, here is a list that I have come up with:
Of course, the pros and cons for me personally may vary for you. If you have a huge freezer, your space in there may not be a factor like it is for me. If you have solar energy, the cost of running appliance to keep your food cold may not matter to you like it does to me. I mean, I have to run my freezer anyway and a full freezer is more efficient than an empty one, so that point is actually kind of silly now that I think about it. But anyway, you get the picture. I feel like there is room in my life for both methods of jam making, especially now that I've tasted this great Black and Blueberry Jam! (I thought I was pretty clever coming up with that name, but then I saw that others have used it before me :/ 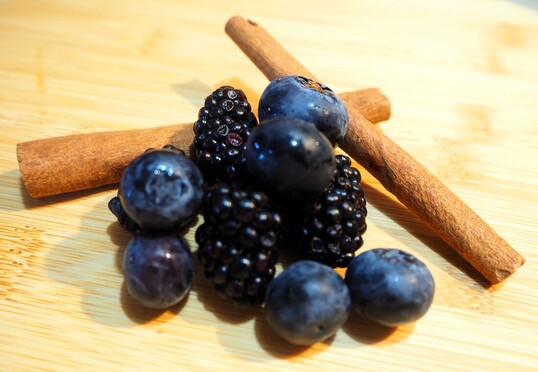 Lets get to the tips on how to make this particular freezer jam recipe!
And now, here is the fast and easy recipe for Black and Blueberry Freezer Jam! I hope you enjoy it! Remember, if it doesn't set as much as you would like, it will make a delicious sauce for pancakes, waffles or ice cream! 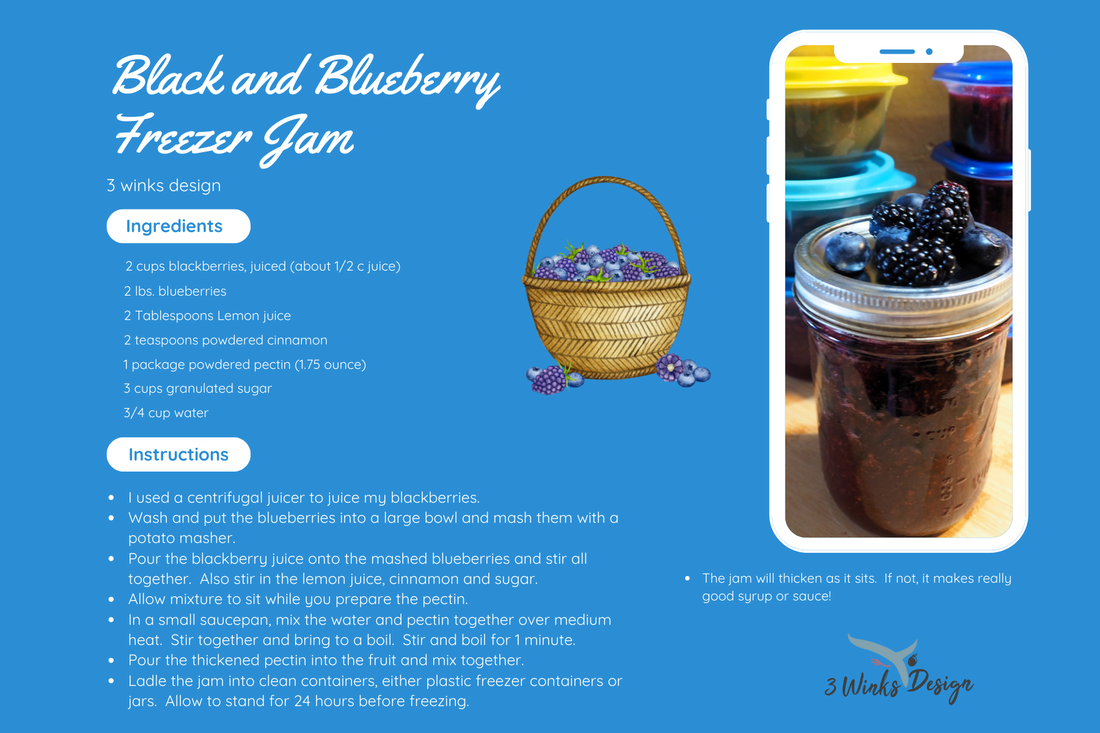 *Update after 24 hours! My jam is set beautifully! Just stuck it in the freezer! Well, I mean all but the jar that we did a taste test on, it is in the fridge so that we can continue to eat it! If you love Blackberries and Blueberries like we do, here are a few more great recipes!
THIS POST CONTAINS AFFILIATE LINKS. WE WILL BE COMPENSATED FOR PURCHASES MADE THROUGH THOSE LINKS AT NO ADDITIONAL COST TO YOU. ALL VIEWS EXPRESSED ARE OUR OWN. 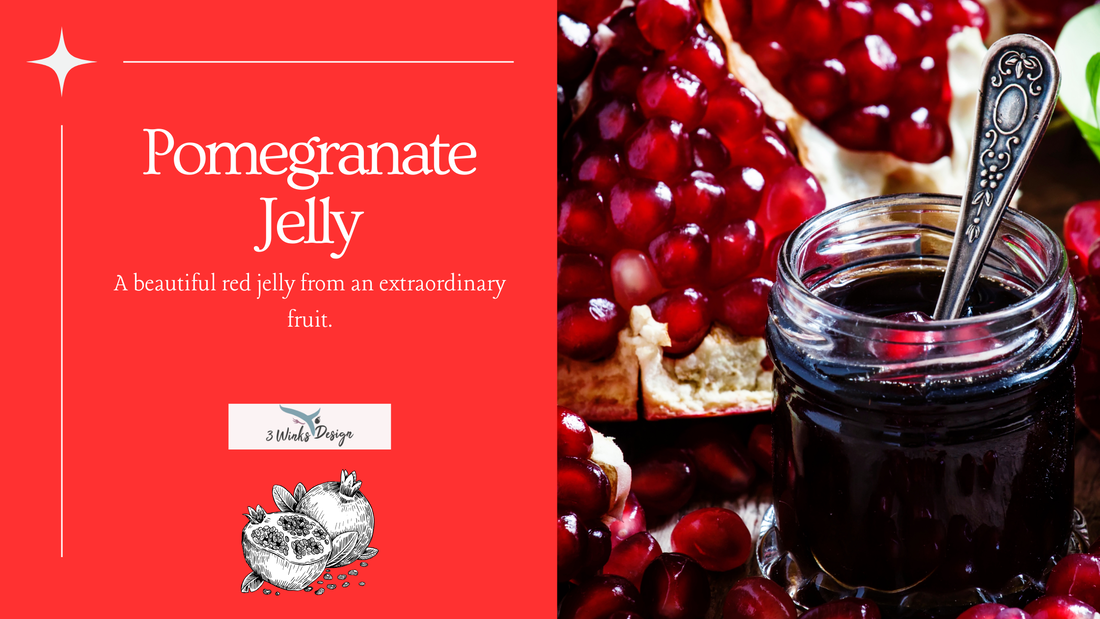 I recently wrote a post about my experience with juicing pomegranates. You can read it here if you missed it. Of course, the reason I was juicing pomegranates was to end up with the beautiful product of pomegranate jelly!
If you follow this blog, you know that I love making jams and jellies. But, I had never made pomegranate jelly before, so this was a learning experience for me! |
Creators of Hot Cocoa Bombs! (copyrighted)

Author
Helen Reynolds: Mother of six children , grandmother to eleven! I love to cook, craft and create things and I especially love doing that with my family, So, when my lawyer daughter, Lindsey, my artist daughter, Madalynn, and I came up with the idea of Hot Cocoa Bombs, this blog was born. Then, one more daughter, with her technical and science skills, plus creativity has joined in to round us out! Read more about us here! 
Click this link and visit 3WinksDesignShop on Etsy. Find our Hot Cocoa Bomb Idea Book, our For the Love of PIe e-book and more of our creations!

Amazon Gift Cards are the Perfect Gift!
    Archives
July 2024
|
 RSS Feed