|
This post contains affiliate links and we will be compensated for purchases made through our links. Thank you for your support!

My Grandbabies!
We have been talking a lot about babies this week on the blog. After all, Alicia just brought home her new little baby Sofía and Lindsey only has 3 months left until her baby girl arrives. I am going to have to change my "About" page to 9 grandchildren instead of 7! Hurray!
Bringing home a new, tiny, sweet baby always opens our hearts and brings out fears and worry over this new bundle of joy. We can't bear to imagine anything harming her and all we want is for her to have good health and happiness. The entire household is taken over with care when a new little one arrives. Appropriately for us, September is Baby Safety Month! For Friday Faves, we decided to share some important baby/child safety products that you may or may not have thought about. Baby Safety Products
Madalynn used to nanny for a couple of her older sibilings' children. She loves her nieces and nephews so much and is really good with them. One of the boys loves to climb and one day nearly pulled his dresser over on himself! Madalynn's choice for a safety product are Anti-Tip Furniture Straps! This is an item that people may not always think about, but is so important when trying to keep little ones safe. Not only do you want to protect your toddlers from their own exploring, tugging and climbing, but these straps also can help protect you furniture during an earthquake, or from someone stumbling and knocking into furniture that may be unsteady on a carpet.

Alicia, who now has a 2 year old who loves to get into things, needed something to keep him out of cupboards that held items not safe for a toddler. She also rents, so she needed something that wasn't permanent that wouldn't damage the cabinets. She loves these child-proof locks by Sure Basics that are so easy to use.

LIndsey's new house that she and her husband just moved into this year has a pool. Shortly after moving in, the 5 nieces and nephews from Kansas were coming for a visit! They knew that they needed a fence up pronto! Lindsey said that she tried to make appointments with several companies for quotes and the company she chose, Pool Fence AZ, was the only one in Phoenix that would work on a Saturday. She said that they were willing to answer all of their questions and they asked about the ages of the children in order to recommend the right height of fence, plus gave them a money saving option. They had the fence installed in about half an hour, and they didn't leave a mess. So, if you live in Phoenix and need a pool fence, give them a try. This is not a sponsored endorsement, it is just that Lindsey and Austin are very happy with their fence and the company's service and the kids made it through their visit unscathed.
Of course, pool fence companies will vary from city to city and state to state, so you will have to check locally. But, having a fence around your pool when you have children is so important. There are drownings every year in Phoenix that could be avoided with a proper fence and supervision. The type of fence Lindsey and Austin had put in was like this one. The cost is around $100 for a 10 foot section that is 4 feet tall if you purchase this one from Amazon and install it yourself. It seems like in this case a professional installation may be the way to go. 
When my kids were little, we took a trip to Disneyland with friends. My youngest child at the time was only 2 years old and I was worried about losing her in the crowds, not keeping her confined in her stroller all day and not having to carry her around too much. I got her a wrist leash for kids and it was so great. She could walk and run around sometimes, within limits, and I could keep an eye on her without so much worry.
A couple of weeks ago, my son Tyler and his wife went to Disneyland with cousins. Child harnesses have really come a long way! But, they enjoyed the one they got for Spencer just as much as I did many years ago. Look at these options:
And, there are many more options!
5 Baby Safety Rules to Live By:
The best rule that I can leave you with is to love your babies unconditionally, have fun with them, cuddle them and you will keep them safe because you will be with them enjoying your time as a mother, aunt or grandmother! Now, get in there and enjoy those kids! And, if you have any products that you love because they help to keep your kids safe, please let us know! -Helen 
4 Comments
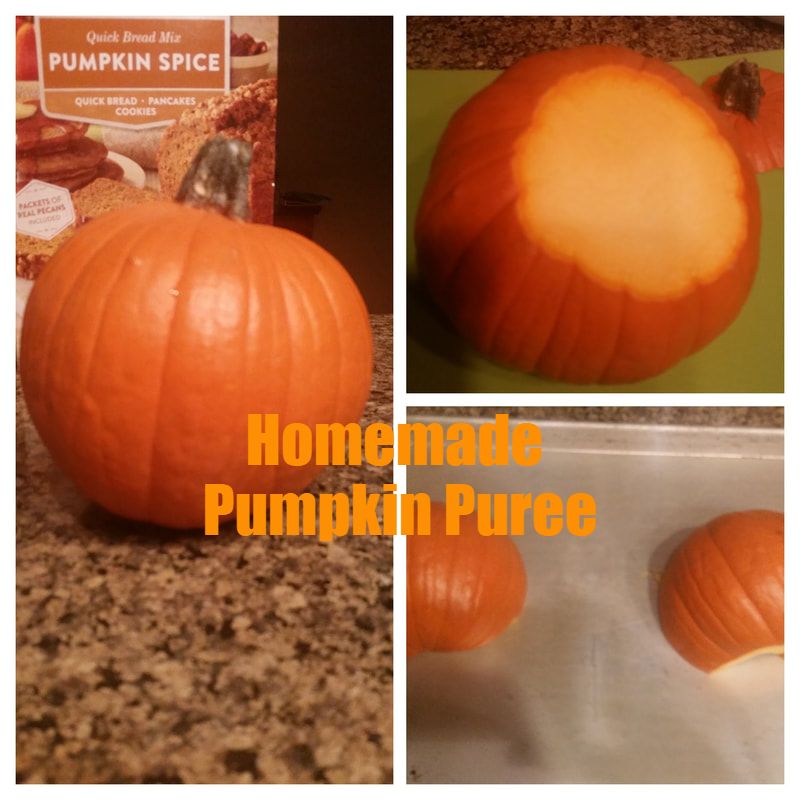 It is fall, and fall is the time for all things PUMPKIN! Honestly, I know everyone is like "pumpkin spice" this and "pumpkin spice" that, which is fine, but pumpkin spice is just... spices. There is no actual pumpkin in it. Personally, I love pumpkin. I love squash generally, but pumpkin is my favorite. You can buy canned pumpkin, but I enjoy making my own pumpkin puree. It's really so easy, and I feel like it gives my pumpkin dishes a different flavor than the canned stuff. 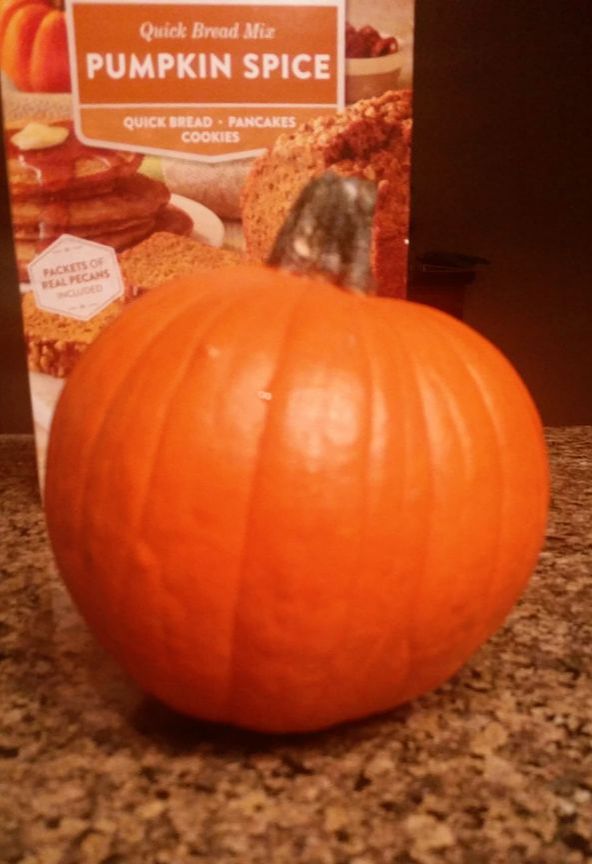 So I am here this week to show you how to make your own. It is so easy! I only used one pumpkin for this demo, but you can definitely use more than one at a time. First, get your pumpkins. The pie pumpkins they sell in the store are typically the best, and the ones I always use. Although I plan on planting pumpkin in our garden so next year I'll have an abundance of pumpkin to choose from! 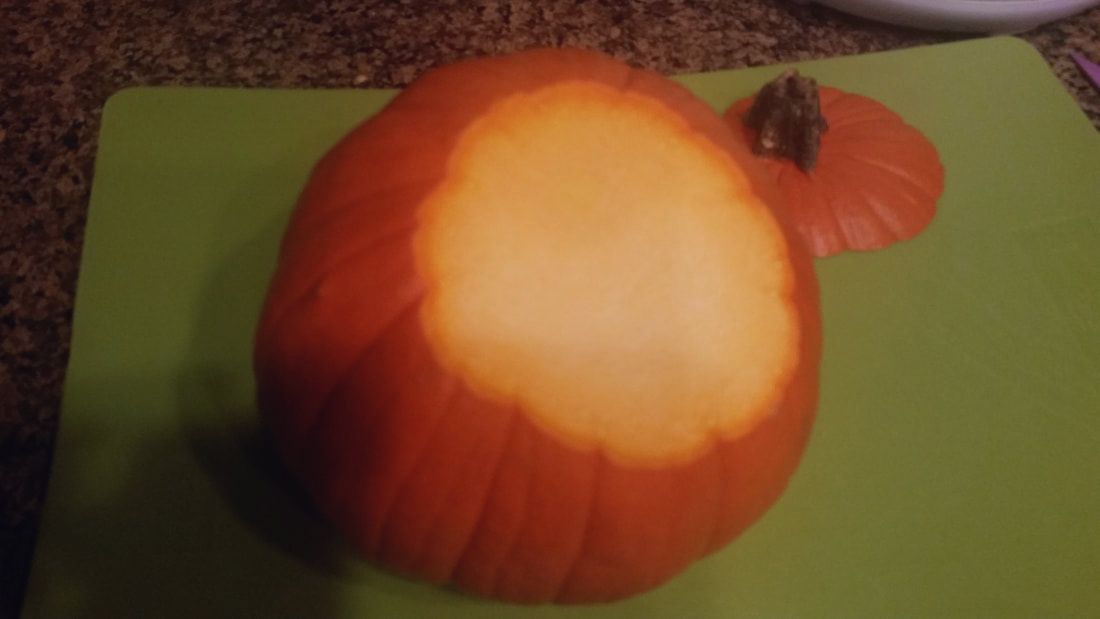 Heat your oven to 350 degrees Fahrenheit and place a metal pan with water inside on the bottom rack. Using a large, sharp knife, cut your stem off the top like in the picture above, then cut the pumpkin in half. Scoop out the seeds from the inside using a metal spoon. I like using metal because it scrapes the stringy parts out better. 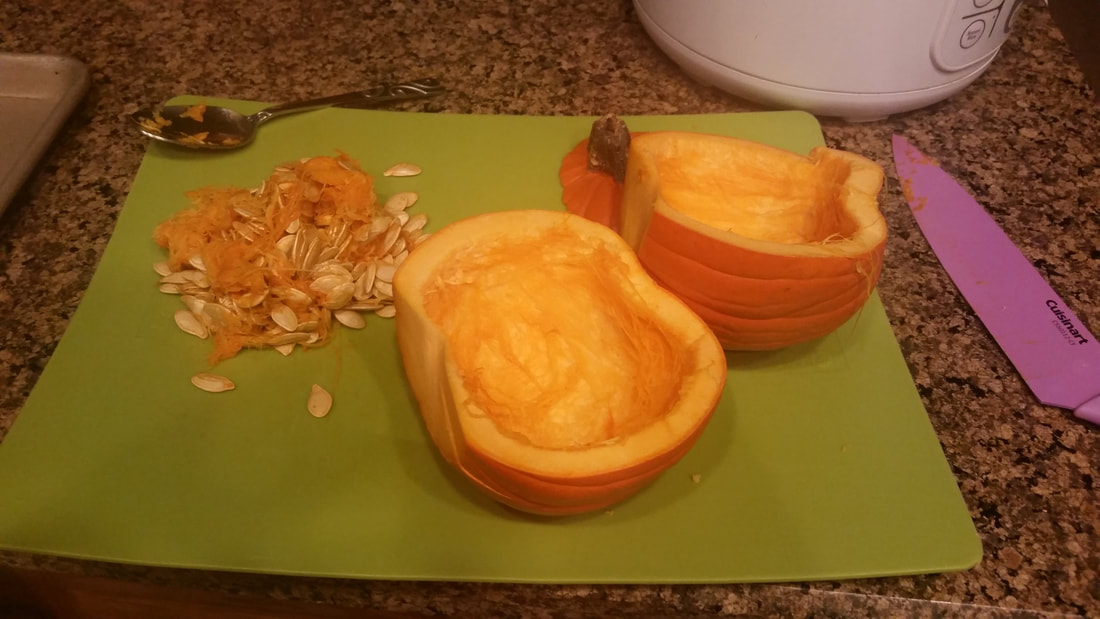 You can save the seeds for toasting if you'd like! Toss on some seasoned salt for something savory, or a little cinnamon and sugar for something sweet. Once your pumpkins look like the picture above place them cut side down on a large baking sheet. Then put them in the oven and roast them for about an hour. If you do more than one pumpkin at a time you may need a little longer, just keep track and take them out when the rind is soft to the touch and squishes in a little when poked. Take them out of the oven and LET THEM COOL! (Or you'll burn your hands.) Then you can use a spoon to scoop out the insides. 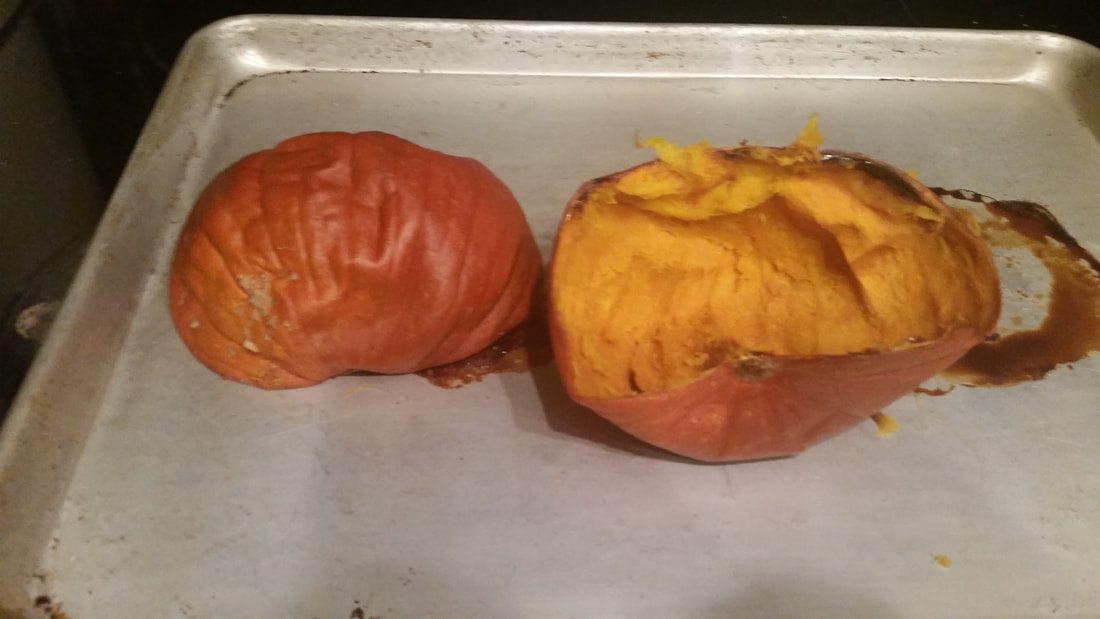 The half on the left is the one I haven't done yet. The half on the right is the empty shell after I scooped the filling out. Now, when it's scooped out you can put it in a blender, or use an immersion blender. When I did this pumpkin I used my Ninja. It worked pretty well but I had to stop from time to time to scrape the pumpkin off the sides and I think I like my immersion blender for this the best. If you feel like the pumpkin is too thick you can add a little water. Just blend the pumpkin until it's a smooth puree. If you think the puree is a little too runny for your taste you can drain out the water. Just take a colander and place a linen towel inside. Scoop your puree into there. You can press down, or wrap the towel and squeeze depending on how much you want out. I usually don't add or take away water because having the pan of water in the oven helps them stay as moist as I want them. 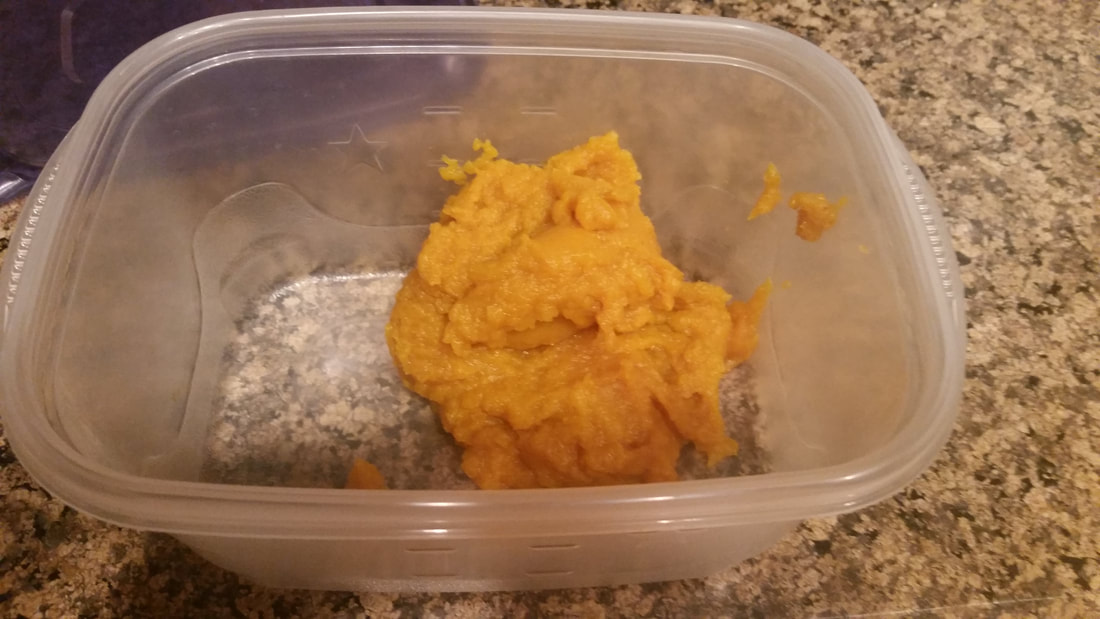 This is my finished product after one small pie pumpkin. I'd say it made somewhere between 1 and 1/2 to 2 cups of pumpkin. So if you did several pumpkins you can get a good idea of how much puree you can make at one time!
I am planning on using this pumpkin this weekend when I make my pumpkin cinnamon rolls for our church's General Conference. I will probably also make more for when I make my pumpkin chili for our ward's (like a congregation) Trunk or Treat Halloween Party in October! See, there are so many wonderful uses for pumpkin!
I was compensated for this post. This post also contains affiliate links and I will be compensated if you make a purchase after clicking on my links.
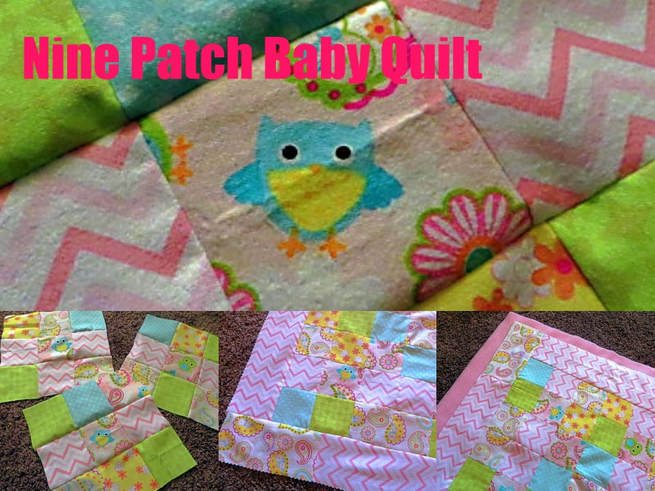
I am not a quilter really, I have taken a couple of classes and made a couple of quilts, but I am not good at it and I need simple patterns. And even though they are simple, I am not good at matching corners and points very well. But, since I have new granddaughters coming, and because I love fabric, I am trying my hand at quilting again. You may remember this quilt that I made for my grandson a couple of years ago. I decided to try a 9 patch for his baby sister!
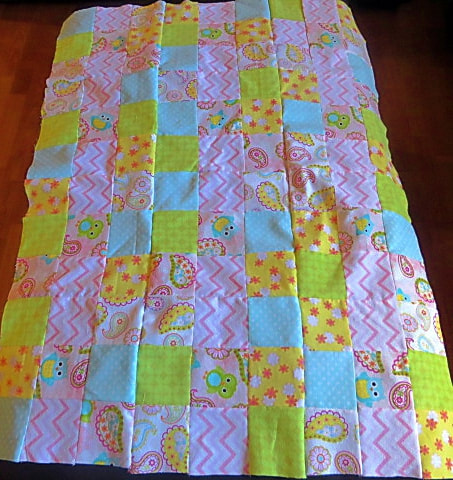
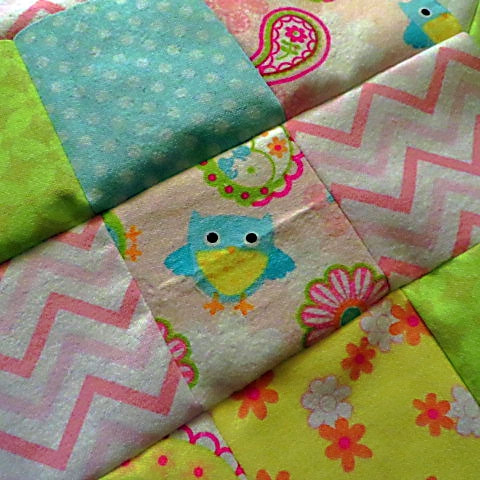
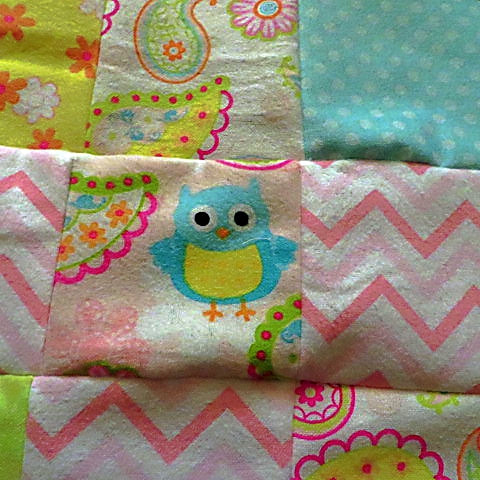
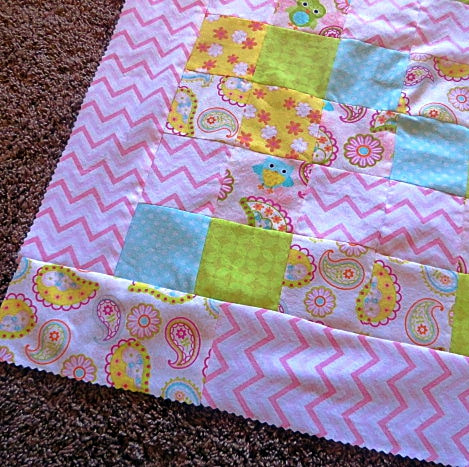
My mother is a quilter, and on my bed I have a quilt that she made for my husband and I that is a 9 patch. In the center of each block is a bird flying. I took inspiration from that quilt when I found some fat quarters at Walmart with owls in the mix! (That is a link to all of our owl themed posts!) I used 7 fabrics to make my blocks. I had to place a template over my owls to cut them into my squares. They don't all fall right in the middle, but that is okay. I used the rest of that fabric as one of the other colors as well. Here are how the blocks turned out. There were 3 different types of owls.
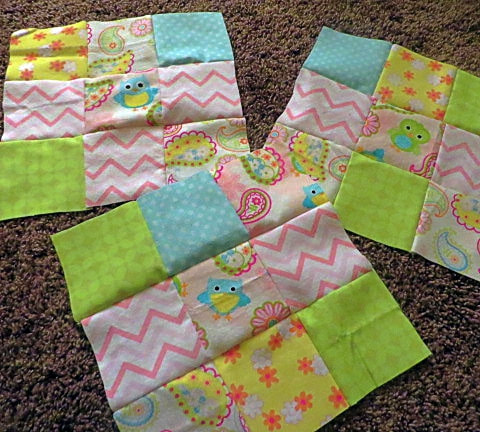
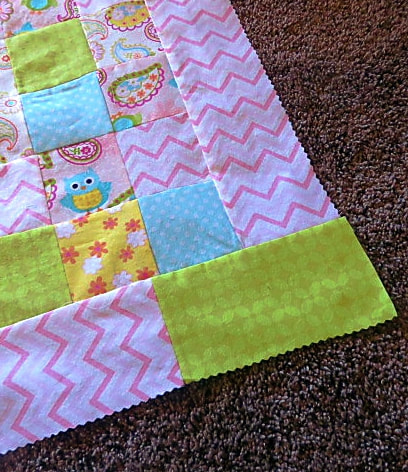
As you can see, the common thread in each block is the owls in the middle of the blocks and the pink zig-zag fabric on either side of the owl piece. I made 12 blocks. After I sewed the blocks together, I arranged them on the carpet into a pleasing pattern to my eye.
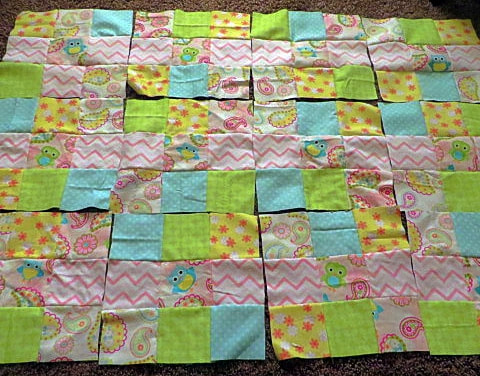
When sewing the blocks together, I felt it was important to make sure that the zig-zag pieces all faced the same way.
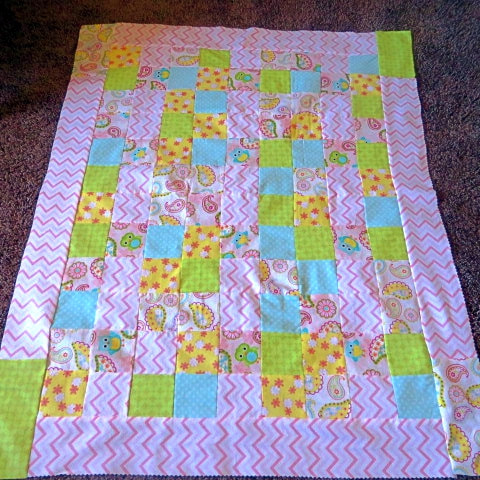
After finding a pattern I liked, I sewed the squares together first in rows, then in strips together.
I liked it, but I decided it needed a border to finish the look and to make it a little larger. (Don't forget to press it flat.)
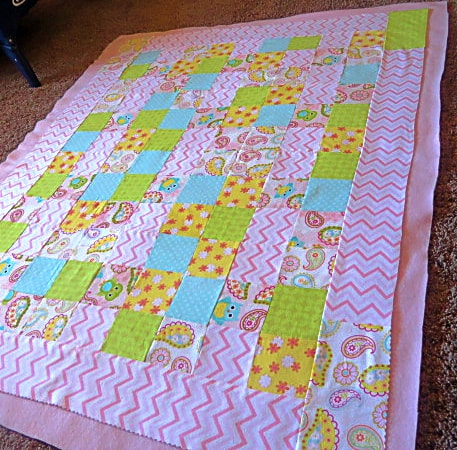
I didn't have enough fabric of any one pattern to make the border, so I pieced it using the zig-zag pink with a green and paisley in the corners. I fell in love with it.
Instead of using batting in this quilt, I used fleece as the backing and tied it together The fleece is so soft and warm. Tied with the top on it, I didn't feel it needed any batting. This baby going to live in California, not Alaska.
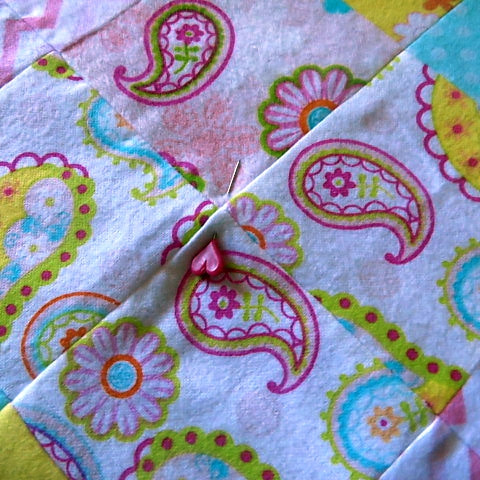
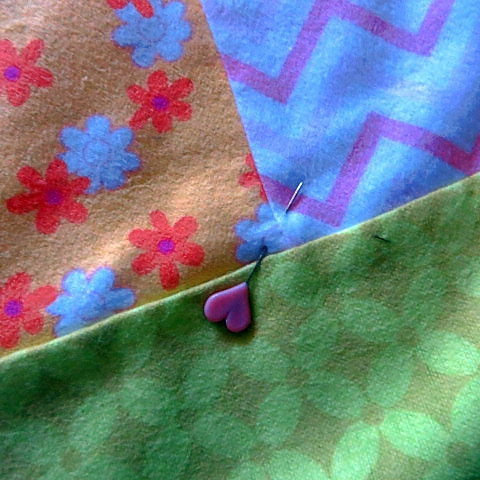
I decided that I would self finish the edges by turning up the backing to the front of the quilt. So, I cut the backing wider all around. Then, I pinned it into place, placing the pins where I wanted to tie it.
I love my little heart shaped pins against the sweet flannel fabric. It just adds to the joy I find in making projects like these.
I tied the quilt with 6 strand embroidery floss. I used a light pink. Of course, You will use whatever matches your fabric choices. 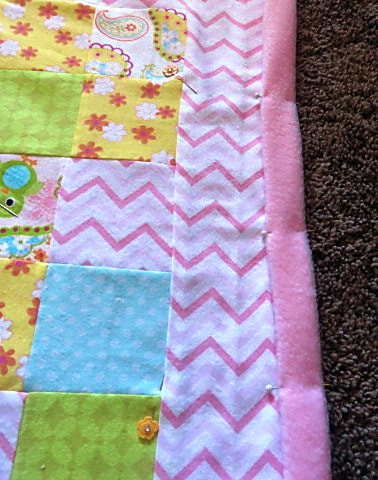
This photo was taken before the quilt was tied. I just wanted to see how it would look. I can hardly wait to see little Sofia in it!
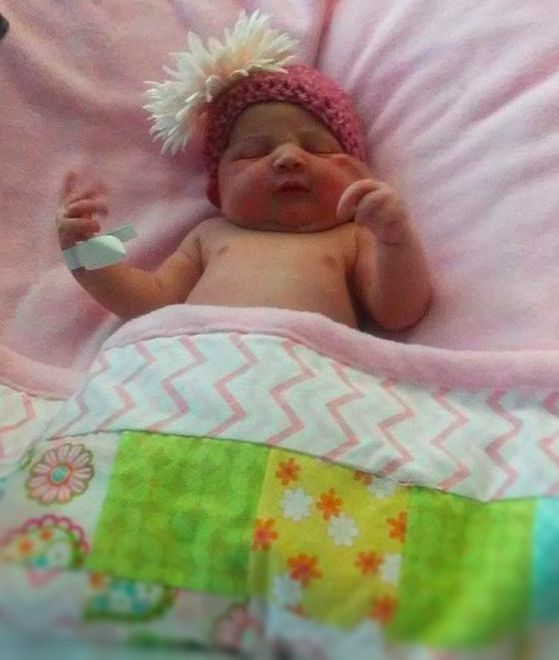
And here she is! Sorry about the photo quality, I had to take it with my phone! But, she is a beauty.
I was compensated for this post. This post also contains affiliate links and I will be compensated if you make a purchase after clicking on my links.
What do you do when you are waiting for a new baby to make her appearance? The showers are over, the due date is past, everything needed to welcome your baby is in place, but she still isn't coming? Well, what I do is crochet!
When Alicia had her first baby, she was early, but I still spent a lot of time waiting while her son was being born. So, I crocheted little booties (not very successfully) and little hats (more successful) for him. So, this time, while waiting for Sofia to make her appearance, I decided to make her some little hats and headbands. I may attempt booties again, we shall see.
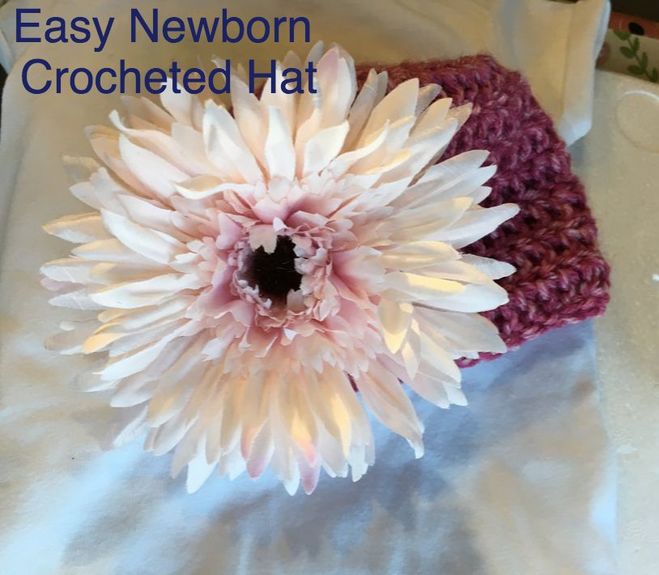
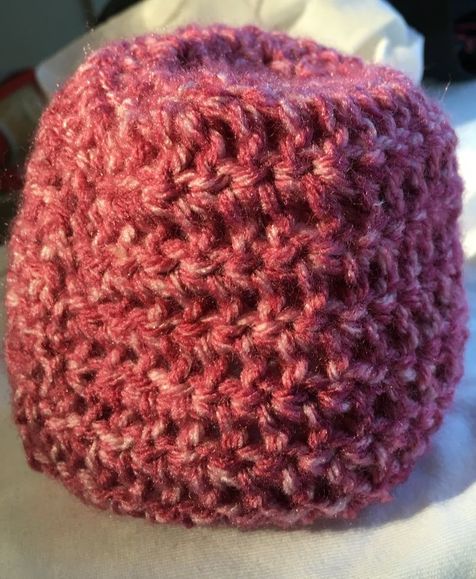
I found a cute pattern on Kelley's Yarns that was so simple, and mostly double crochet. The pattern is called Lickity Split Crocheted Newborn Hats. Alicia and I picked out a nice pink variegated yarn and a big flower to decorate it with. (We used Lion's Brand, it is so nice.) This little cap worked up in about half and hour or less and was super easy. I had plenty of yarn in one skein to make some headbands with crochet flowers (a latter post) and another hat for Lindsey's baby. So, we decided to make a little video that shows the simple double crochet that creates this hat! You can check out our YouTube channel (3 Winks Design) here and subscribe and watch all of our videos whenever you want to do that! (Our famous Hot Cocoa Bomb video is on there, and this is a great time of year to start making those as holiday gifts.)
What did you think? Let us know.
Now that we have this little pink cap, let's make it even more girly!
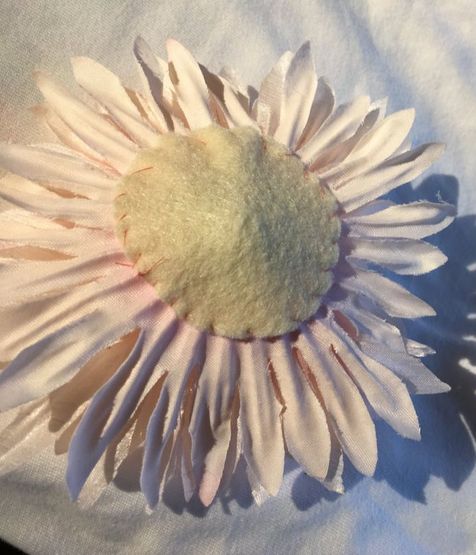
I cut the stem off of this big flower and then stitched a felt patch on the back for extra protection. I don't want anything poking the baby's head! Be sure to stitch threw all of the layers of petals so the flower doesn't fall apart.
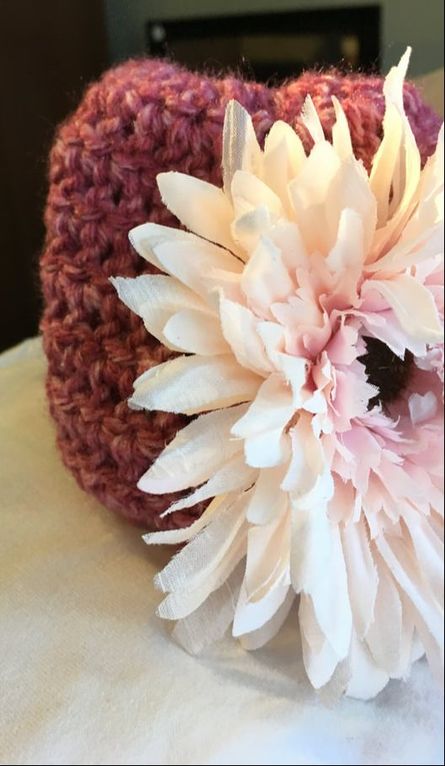
I stitched the flower right onto the hat. We can't wait to see it on the baby!
Update!!! She is here! Watch for Pictures on the next post!
|
Creators of Hot Cocoa Bombs! (copyrighted)

Author
Helen Reynolds: Mother of six children , grandmother to eleven! I love to cook, craft and create things and I especially love doing that with my family, So, when my lawyer daughter, Lindsey, my artist daughter, Madalynn, and I came up with the idea of Hot Cocoa Bombs, this blog was born. Then, one more daughter, with her technical and science skills, plus creativity has joined in to round us out! Read more about us here! 
Click this link and visit 3WinksDesignShop on Etsy. Find our Hot Cocoa Bomb Idea Book, our For the Love of PIe e-book and more of our creations!

Amazon Gift Cards are the Perfect Gift!
    Archives
July 2024
|


 RSS Feed