|
This post contains affiliate links. I will be compensated for purchases made through those links at no additional cost to you. Thank you for your support
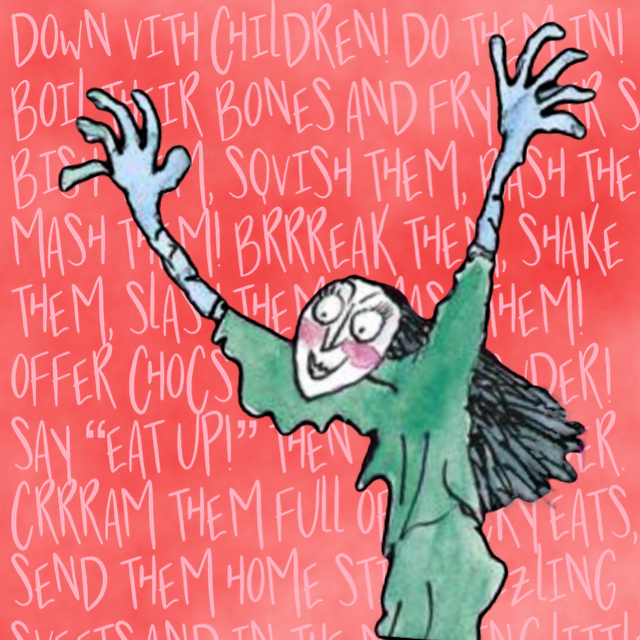
For today’s What to Read Wednesday I have another classic children’s book that will even scare adults: The Witches by Roald Dahl.
The Witches by Roald Dahl
If you’ve never read The Witches it’s time to correct that. It’s about a young boy who lives with his grandma and she warns him about witches. Witches aren’t like their stereotypes with pointy hats and green skin, no, they appear to look just like any other lovely woman. But things aren’t always as they appear. Witches are bald and must wear wigs to cover their baldness, they always wear gloves to cover their claws, they don’t have toes so they wear boxy shoes to hide that, and they can smell children. To them children smell like dog droppings and they want to rid the world of all the children!
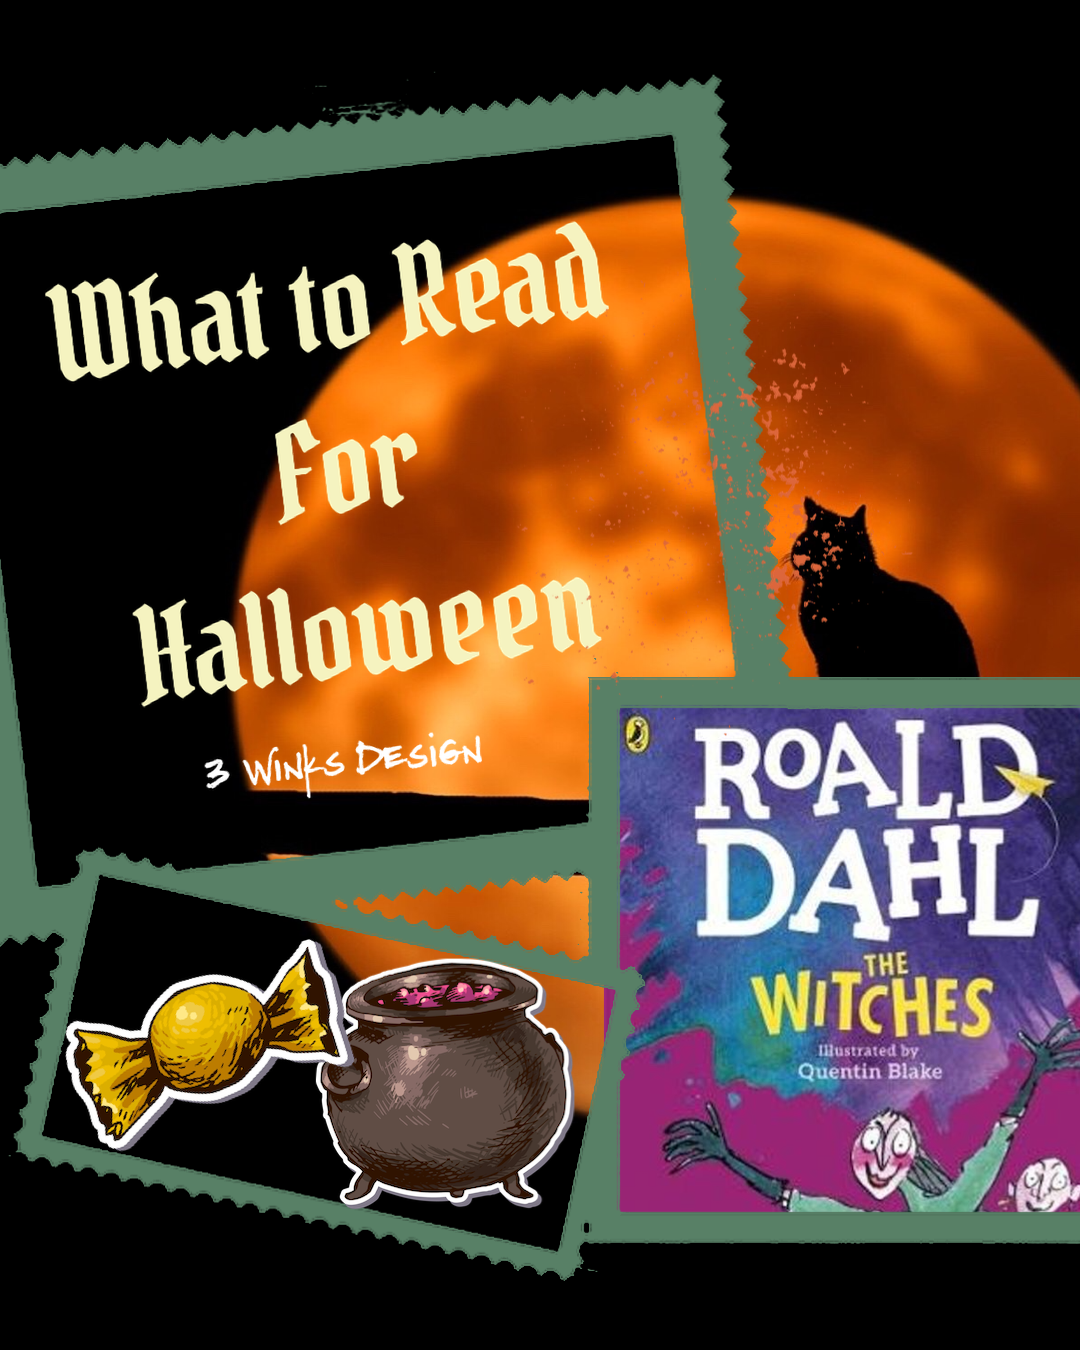
Well imagine the surprise of the boy when he comes across not just one witch but a witch convention! He learns their plans to turn all the children in the world into mice! What will he do?
Roald Dahl has an amazing way with words and storytelling. His books, like Goosebumps, don’t always have the traditional happy ending we expect but somehow you walk away from his books happy. The Witches is no different.(I hope I haven’t given too much away). It will lead you on a suspenseful journey of heroic proportions and have you on the edge of your seat. It’s a perfect quick read for Halloween.
And once you finish the book, check out the movie starring Anjelica Huston. It’s an amazing movie. We even did a podcast episode for From Cover to Reel.
Happy Halloween! Happy Reading!
0 Comments
This post contains affiliate links. I will be compensated for purchases made through those links at no additional cost to you. Thank you for your support!
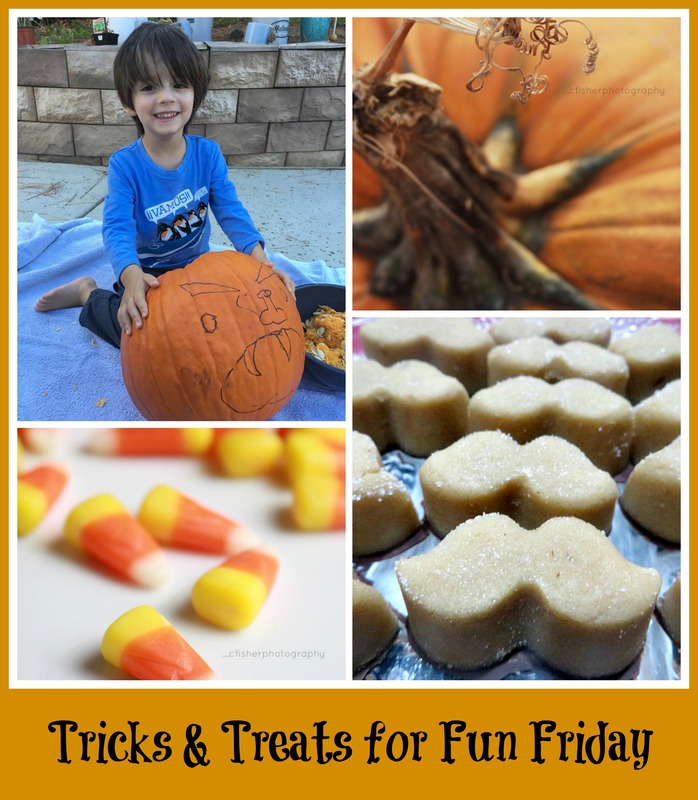
Two fun things for Fun Friday, and for a fun weekend! This is the weekend before Halloween. When Alicia shared pictures of my grandson designing his own jack-o-lantern, I had to include the picture in this post! He is such a sweet, good, handsome boy! And I can't forget smart and talented! I am not biased at all! She carved the pumpkin for him after this. I love his happy smile. Here in Phoenix, we have to wait until the last minute to carve pumpkins or the heat will make them get moldy too fast. (Then they look really spooky!) For those of you who live in cooler climates, like Alicia and her family do, have you carved your pumpkins yet? How detailed do you get? If you haven't carved one yet, this would be a great weekend for it and that would take some of the pressure off getting all of the Halloween things done this week.
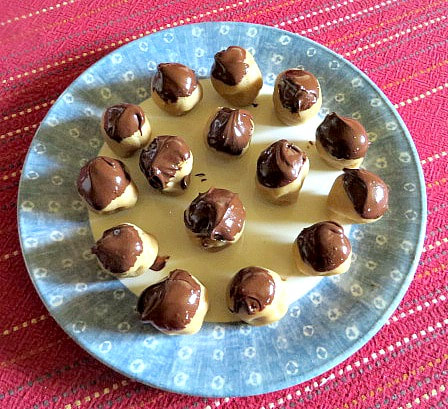
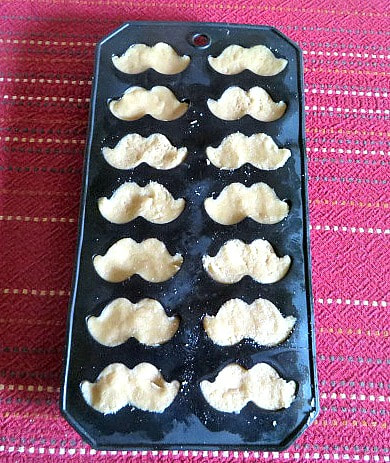
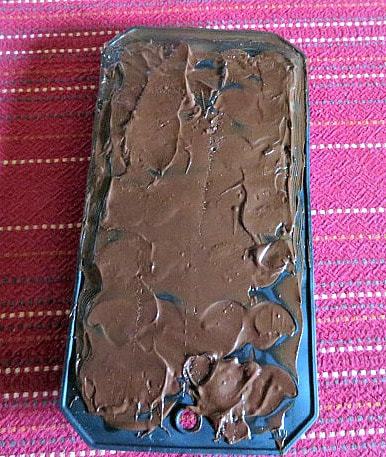
Thing #2 was inspired by a gift from my friend, Rhonda. She loves to shop yard sales and last week she found this candy mold and thought of me.
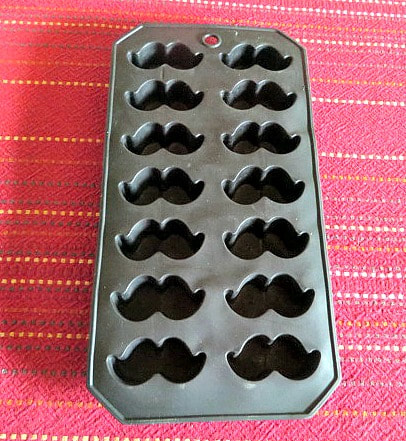
She didn't think of me because I have a mustache. I don't. But, I teach the children aged 3-11 music in our church. Sometimes I use mustaches as a gimmick as I get them to sing. Knowing that, Rhonda thought of me when she saw these mustaches. I was so excited to think of something to do with the mold.
First, I thought of doing some kind of mints or fondant chocolates. Then, out of the blue a nickname for a mustache came to my mind. Have you ever heard of a mustache being called a cookie duster? That made me think of cookies, which led to the thought of cookie dough and I thought, "How about Cookie Dough Cookie Dusters?" And that is how this treat was born! If you don't have a friend to find you a mold like this at a yard sale, here and here are a couple of similar molds that I found on Amazon.
Cookie Dough Cookie Dusters
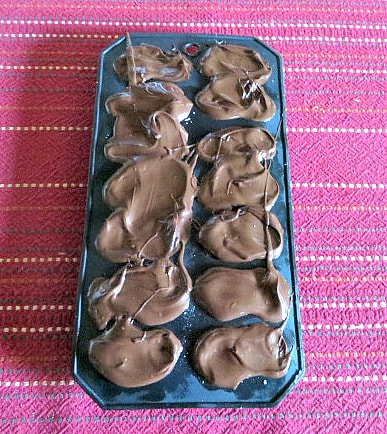
To make the egg-less cookie dough, I used this recipe from Simply Bakings. All I did differently was to leave out the chocolate chips. I felt like for the mustache mold, they would add too much bulk, so I decided to put a layer of chocolate on them instead. So, I melted chocolate chips to do that. Click the photos to get better directions:
Now, pop the tray into the freezer to harden the chocolate. When it is hard, take the tray out of the freezer and pop the mustaches out of the tray!
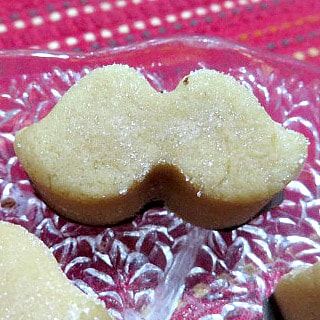
So cute! And, they taste great!
I wasn't patient enough to wait for the tray to be ready for another batch, so with the rest of the dough, I formed balls and dipped the top of them in chocolate. They are pretty sweet, too! Just not as cute as the Cookie Dough Cookie Dusters!
You can also find gluten free versions of cookie dough recipes as well, I just didn't use one of those this time.
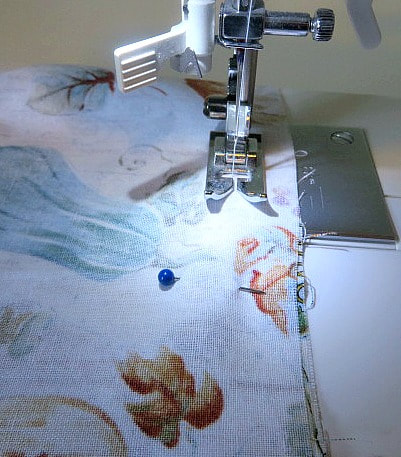
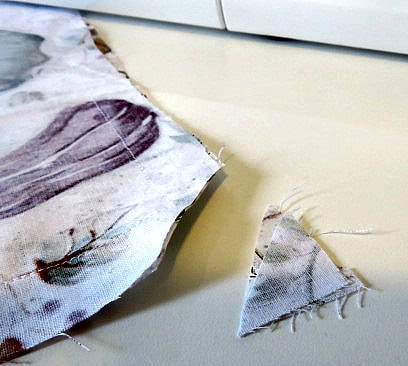
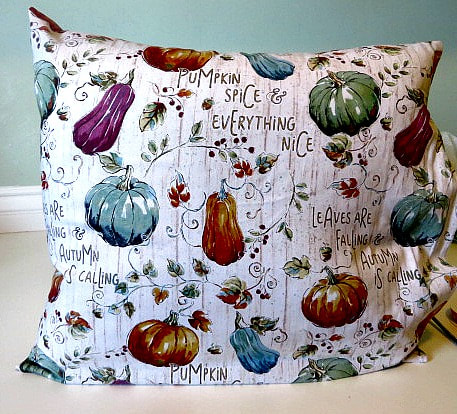
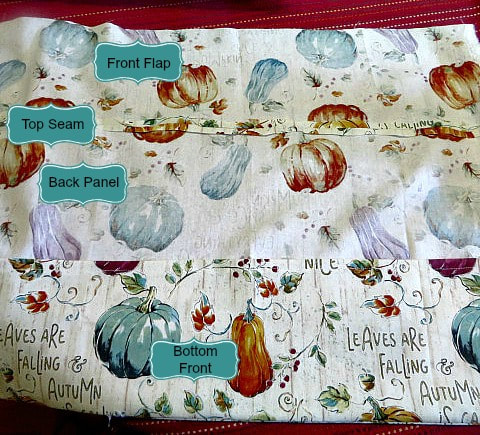
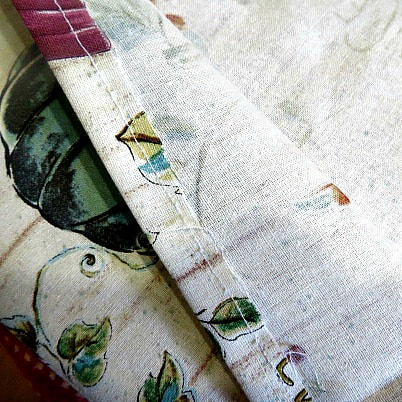
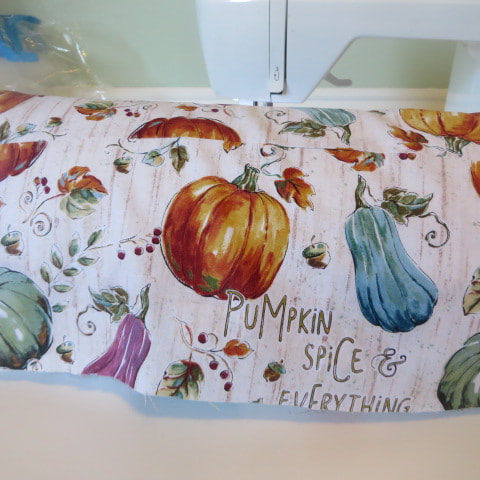
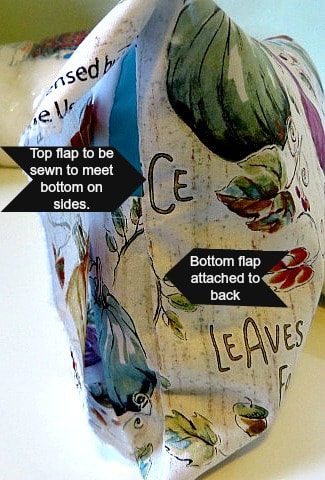
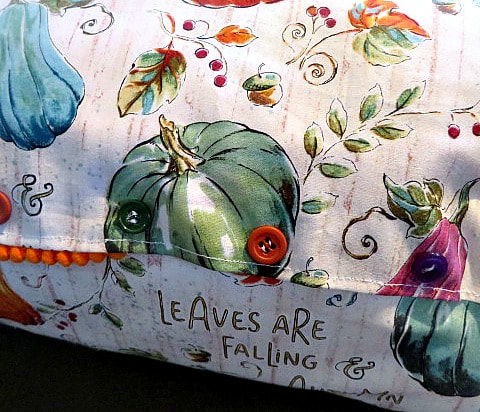
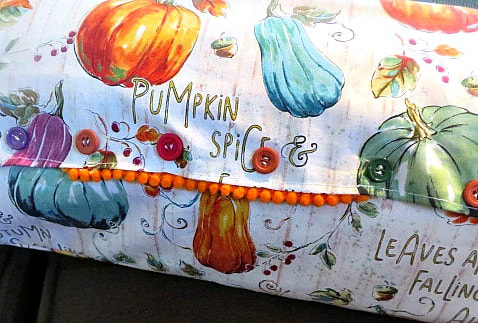
his post contains affiliate links. I will be compensated for purchases made through those links at no additional cost to you. Thank you for your support!  When my husband and I took off on our road trip to Wyoming this past summer, we left without any bedding or pillows! We knew that we were going to be spending one night in our son's new apartment in Kemmerer, WY sleeping on the floor, so this was bad. When we got to Kemmerer, our son took us to one of the few stores in that little town, Family Dollar, where we purchased a blanket and a couple of $6.00 pillows. We survived the night, but I knew that the pillows wouldn't get much use after that trip and I started wondering if I could turn them into sofa pillows. As you can see from the collage of pictures above, I did it! Sofa pillows are pretty simple to make, they cost much less than department store prices when they are handmade, and you can make them for any decor. So, if you know the taste and colors of your recipient, they can make a lovely gift as well. I decided to make some seasonal pillows for the Fall. The pumpkin print fabric that I found at Walmart would be perfect to gift to Lindsey anytime of the year! I love that the colors of pumpkins and gourds on this fabric match many colors and can be easily integrated with the pillows that I already have. For today's Handmade Monthly, you will actually be getting 3 different sets of instructions. These include how to make the forms, How to make a square pillow with trim and a cute idea for a coordinating neck roll pillow. Making the Pillow Forms: From one pillow I made an approximately 19" square pillow and one neck roll. You will have to measure your pillow and decide the size you want your sofa pillow to be. I used a quilter's erasable marker to draw a cutting line. 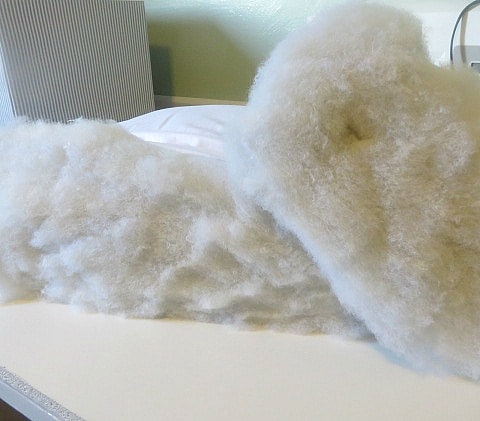 Here they are, cut apart! Very fluffy! Once the pillows are marked, cut them apart. You will have to cut them a layer at a time because they are so thick. Next, push the fluffy insides into the pillow covering and pin the open side closed. Then, sew the open ends together. 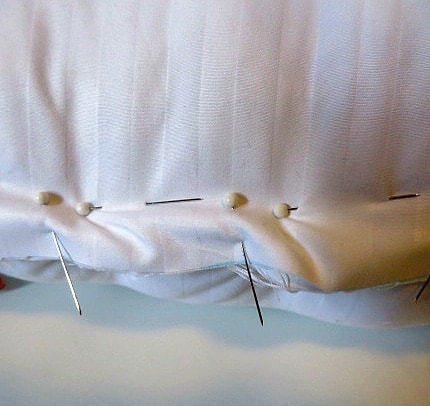 This is how I pinned them closed. I removed the pins as I sewed along. 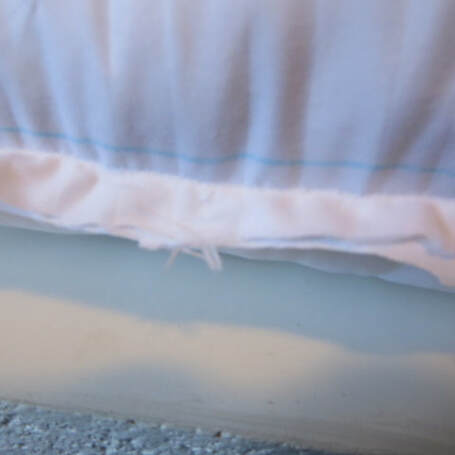 All sewn. Now I had 2 nice pillow forms that only cost about $3.00 a piece! All I needed to do was cover them. Large Square Pillow with Trim: I found the fabric for the pillows at Walmart. You will also need a sewing machine, a tiny bit of fiber fill, thread and trim. You will need to cut 2 pieces of fabric, one for the front and one for the back. Measure them to the size of your pillow. Measure over the fat part of the pillow to get the right measurement. Then, add about 5/8" all around for a seam allowance. Click on the photos below to get directions: I bought some orange mini pom-pom trim. Generally, when adding trim, I put it on the seam line, facing inward and sew it into the seam line. When you flip the fabric right side out, the trim will show on the edge. But, this time, there wasn't very much sewing room on my trim, so I decided to add it on the outside. OH MY GOODNESS, I had such a time of it! I even made a collage about it! Add one more thing to your supplies, a glue gun! 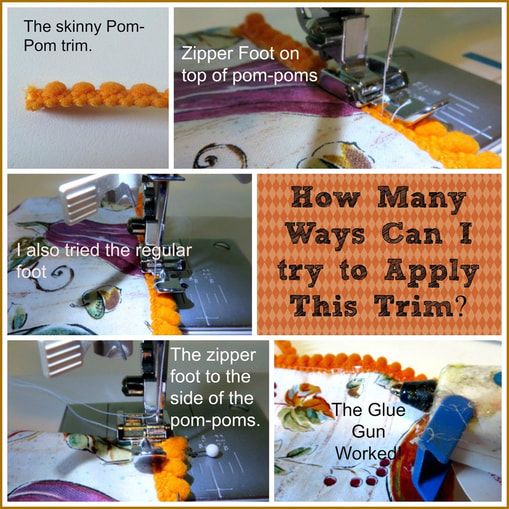 I usually hate it when I hear the term "no-sew" pillows, etc. because to me sewing things makes them more lasting and better quality. But, this time I gave myself permission to use the glue gun for this tiny trim! After you glue it around the 3 sewn sides of the pillow, put the form into the pillow cover. Then, for nice crisp corners, take some bits of fiber fill and stuff it into the corners of the pillow. It will fill in where the form cannot go. It looks so much nicer in the final product. Trust me! When that is done, whip stitch the open side closed. 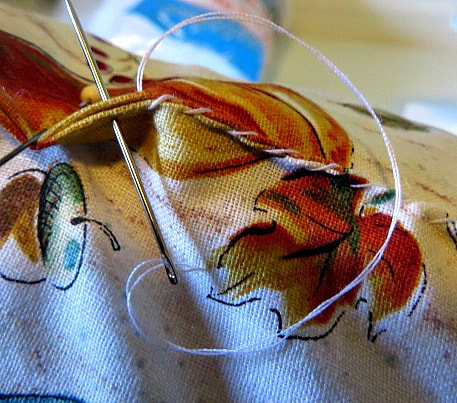 Just whip it shut. Then, glue on the trim. The trim will hide the stitching and strengthen it as well. Et Voila! You have an adorable pillow! 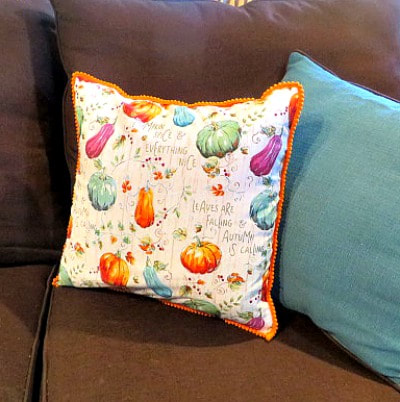 That trim was worth the trouble! And, see how my corners are nice and perky? It's the fiber fill. An Envelope Neck Roll PIllow: When I started this pillow, I had something else in mind, but it kind of evolved as I went along. For this pillow, you will need to cut a back according to the width and height of your pillow form, just like you did with the square pillow. For the front, you will need a bottom pocket and an overlapping top flap. Here are some pictures to show you how it is done: By the way, I also tucked some fiber fill into the corners of this pillow as well. I am in love with the cuteness! I have one more pillow that I plan to use for Christmas pillows! I can hardly wait to get started! 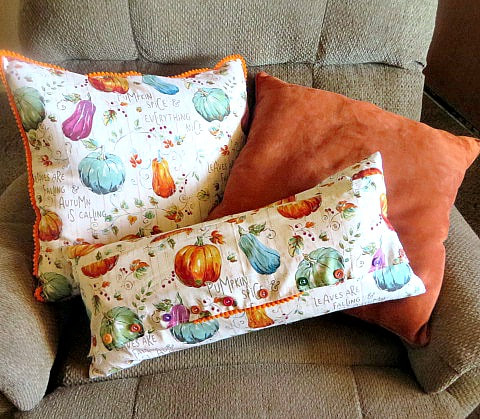 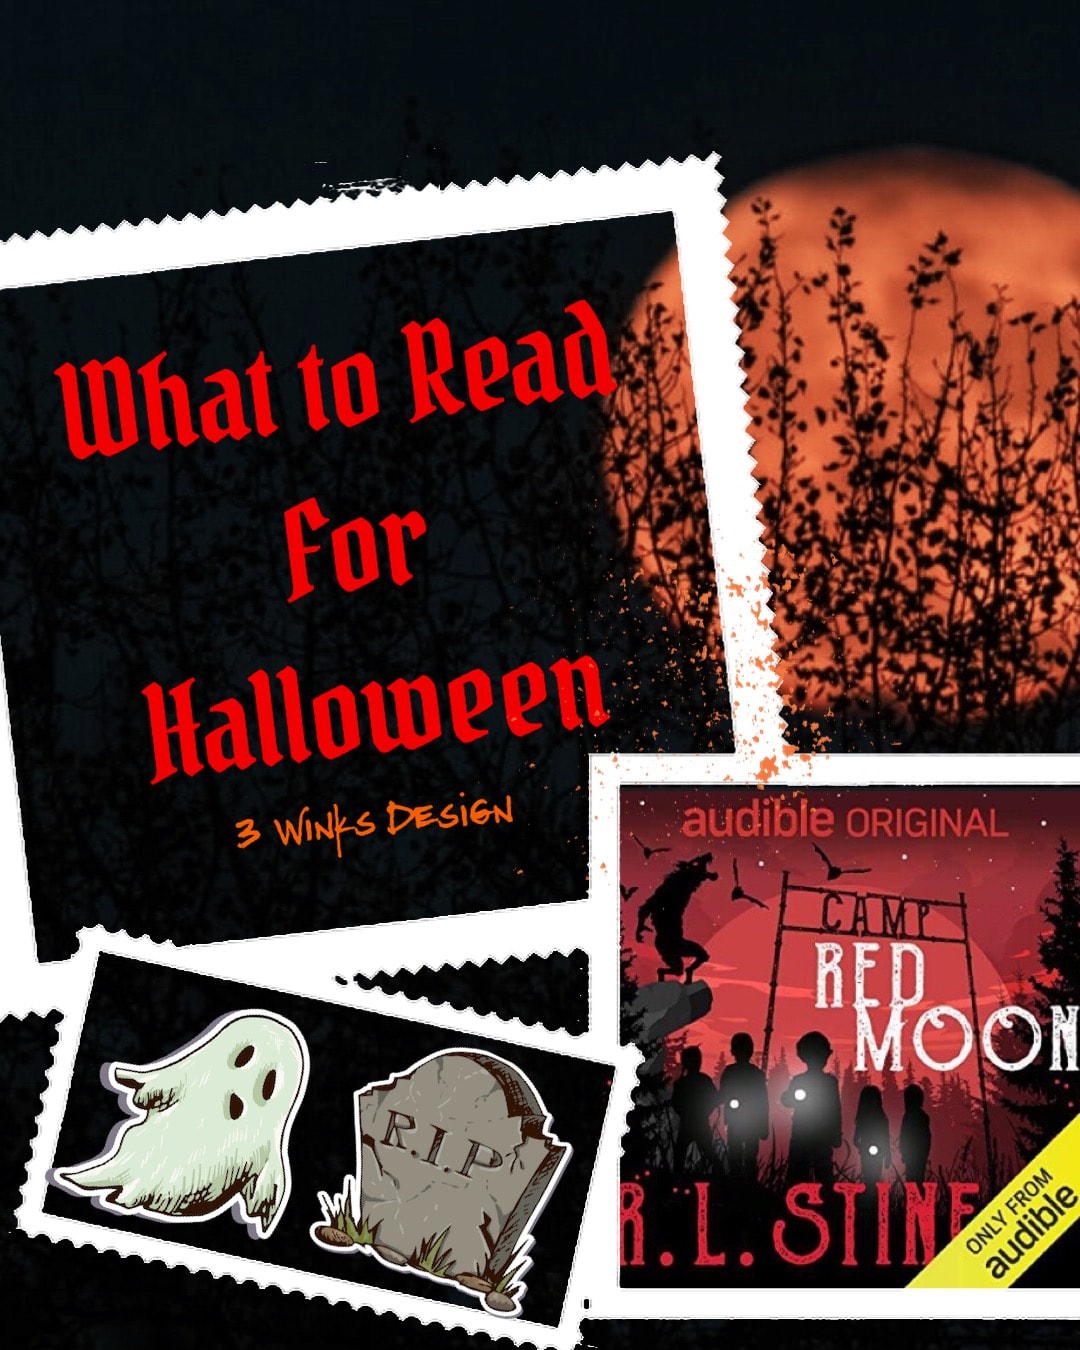
For what to read Wednesday this week I am recommending Goosebumps by R.L. Stine. Loved by preteens everywhere, it will probably give you chills even into adulthood. Goosebumps is a series of books that tell frightening stories which don’t always have happy endings. Titles of note that you might remember from the series include Welcome to Dead House,Night of the Living Dummy, and one of my favorites One Day at Horror Land.
Right now I’m listening to a new RL Stine book called Camp Red Moon. It’s an Audible Originals so you’ll have to have Audible to get it. It’s a short anthology of stories that all take place at Camp Red Moon. Each story is about an hour and there are 4 total I believe. My favorite story so far was the second one, about a kid named Richard who meets a new camper name Sammy. All is fine and we’ll until Sammy seemingly starts taking on Richard’s identity. But Richard can’t convince anyone of it. Is Sammy just imitating Richard to flatter him or is something more sinister afoot? This story freaked me out so much I had to stop listening to it in the middle of the night while I was working on my daughter’s birthday party. I kept thinking I was hearing noises in my house it was probably just my kids moving around in bed. But I didn’t lose any sleep over it I was just anxious to keep listening to the story.
This is the same way I feel with all Goosebumps books. So if you’ve looking for a fun read for Halloween, you can never go wrong with Goosebumps.
The stories are scary enough to actually scare you but not enough to freak you out for the rest of your life (except maybe Slappy.) It’s inspired TV shows & movies and is the original horror genre for kids for people my age.
So have you read goosebumps? Are you gonna check it out? Are you gonna check out Camp Red Moon? Let us know in the comments below.
|
Creators of Hot Cocoa Bombs! (copyrighted)

Author
Helen Reynolds: Mother of six children , grandmother to eleven! I love to cook, craft and create things and I especially love doing that with my family, So, when my lawyer daughter, Lindsey, my artist daughter, Madalynn, and I came up with the idea of Hot Cocoa Bombs, this blog was born. Then, one more daughter, with her technical and science skills, plus creativity has joined in to round us out! Read more about us here! 
Click this link and visit 3WinksDesignShop on Etsy. Find our Hot Cocoa Bomb Idea Book, our For the Love of PIe e-book and more of our creations!

Amazon Gift Cards are the Perfect Gift!
    Archives
July 2024
|


 RSS Feed