|
This post contains affiliate links. I will be compensated for any purchases made through those links at no additional cost to you. Thank you for your support! 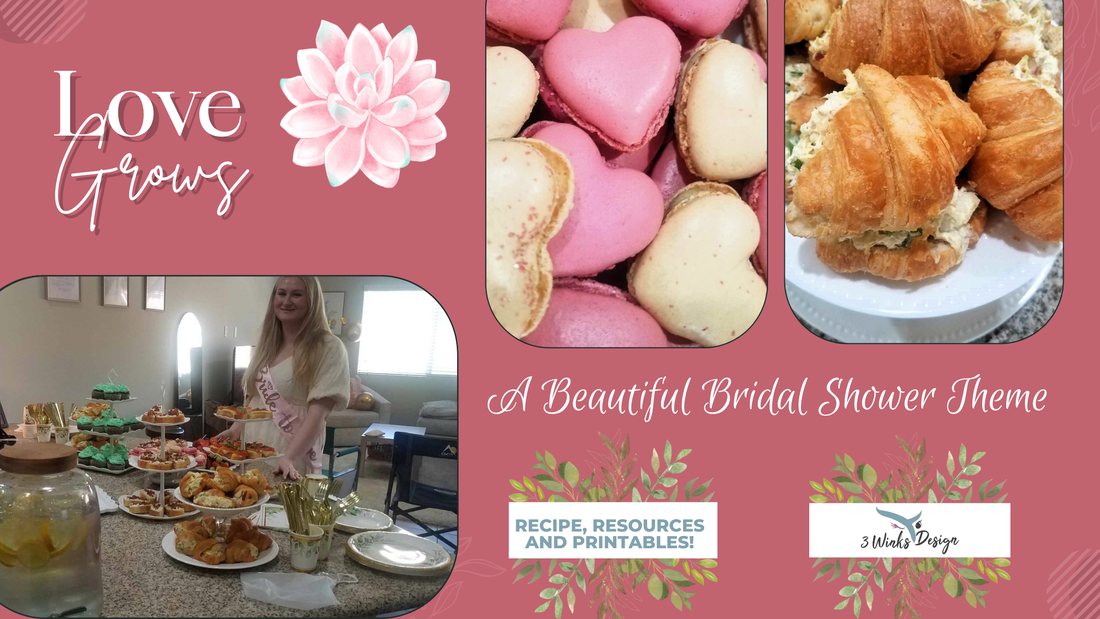 Do you see that beautiful girl in that picture above? That is Rachel and she is soon to be my daughter-in-law! We are so excited to have her in our family! Since she is from out of state, where her family threw her a bridal shower, we decided that she needed to have one here in her fairly new home state of Arizona, so Maddy took the lead and planned a shower for her, with Lindsey and I helping. It turned out so great!
3 Comments
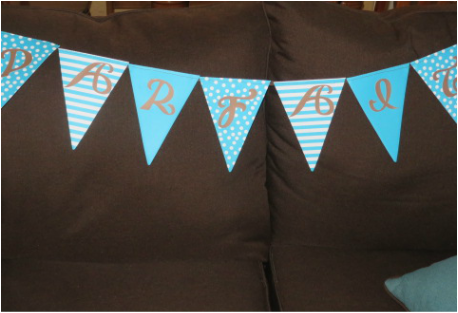
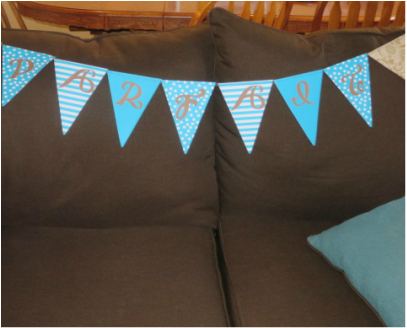
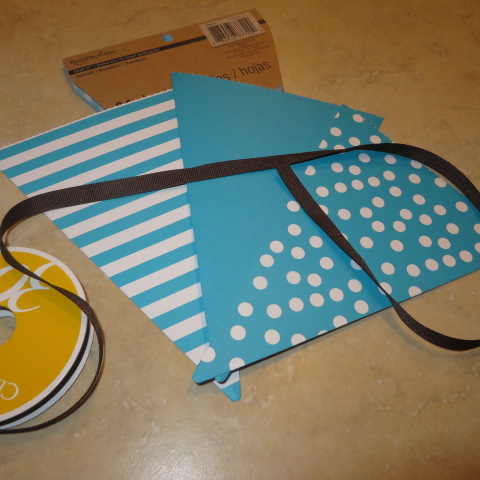
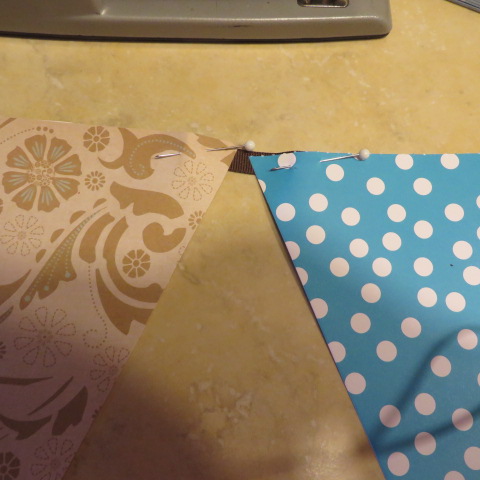
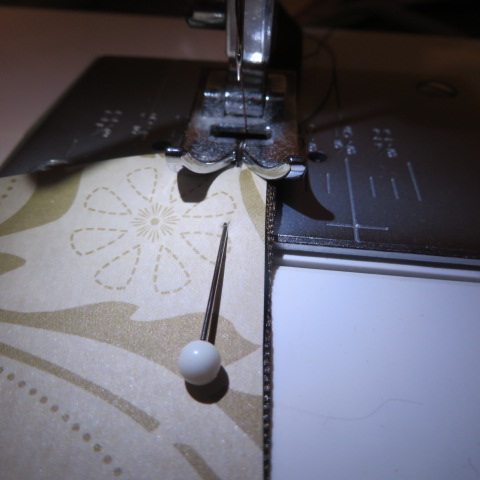
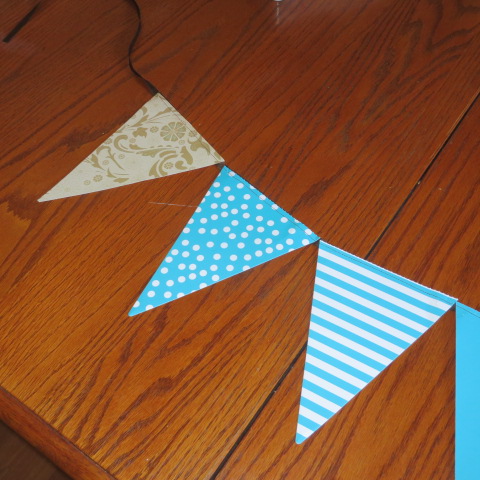
Here is another fun and easy wedding project that will add some real punch to the decor at the reception. I am making banners to hang along the front of the food tables. Since the wedding is in the evening, the food is going to be snacks of a french nature. One of the tables will have a parfait bar! Another will have the cake (gateau) and a third will have other finger foods. I am going to hang the banners with the french words to show which table has what! Above, you see the parfait banner. Parfait means "perfect" in french, so I love the double entendre! (tee hee, also french!)
I foundthese already cut paper banner papers at Michael's in just the right size and color. I also purchased some brown ribbon on sale there. Once again, just like in mytablecloth project, I had to use math. The papers are 5.5 " wide, the tables are 6' long. So for each word, plus two blanks at the beginning and end, I had to multiply 5.5 by that number of papers, leave about an 18 " length of ribbon for attaching (or less, it is up to you) and cut my ribbon that long. Here is how I did it:
This is a quick project that I can finish in a few hours! You could make birthday banners, congrats banners, and all sorts of things! So cute!
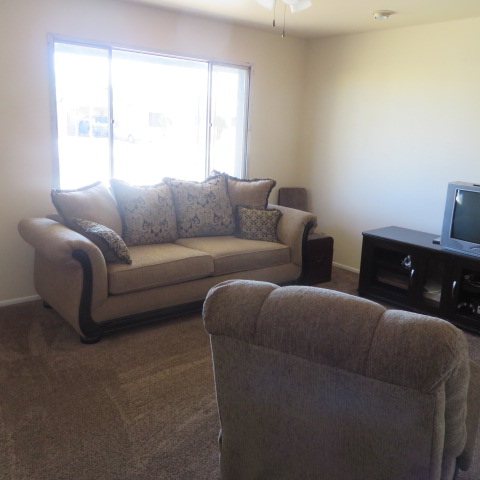
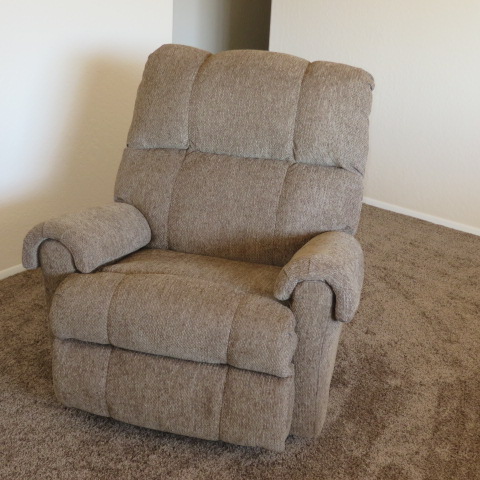
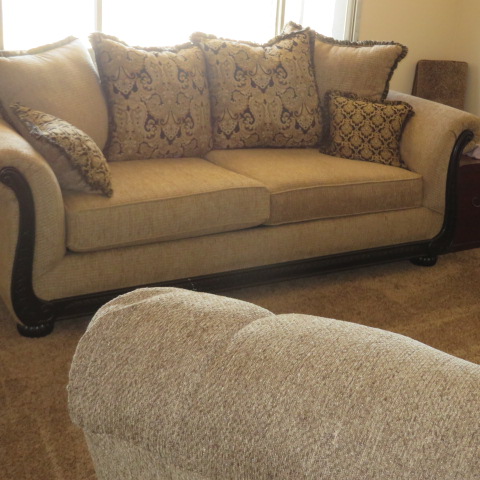
PS: This was a busy weekend! Our AC went out! We spent one miserable night here in Phoenix without it! I was so happy with the repairman came that I totally forgot that our living room furniture was also being delivered that day! Whoo Hoo! Here are a few photos! Just 1 week until company starts coming. Now we have a place for them to sit!
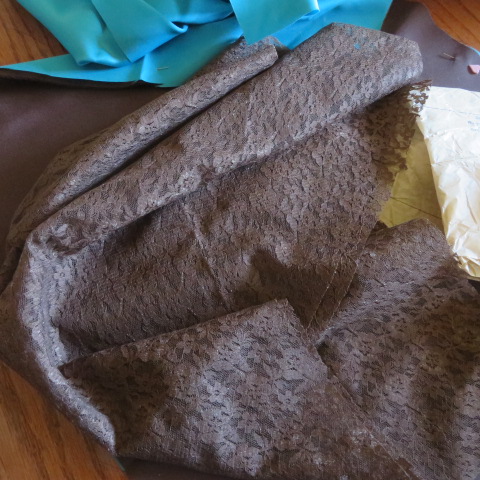
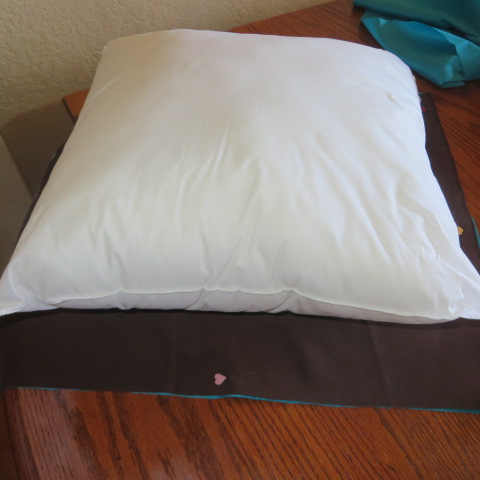
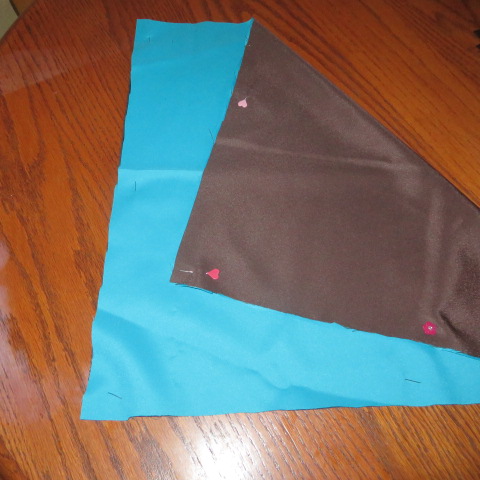
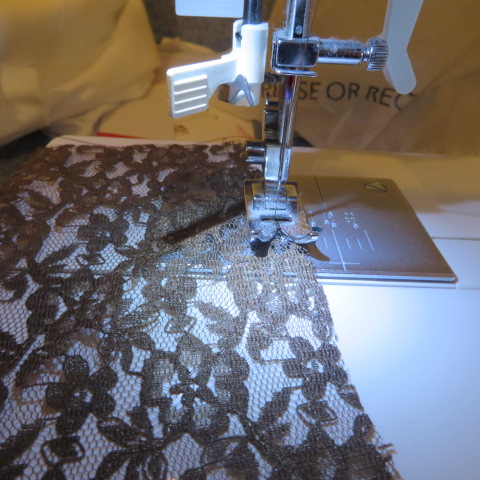
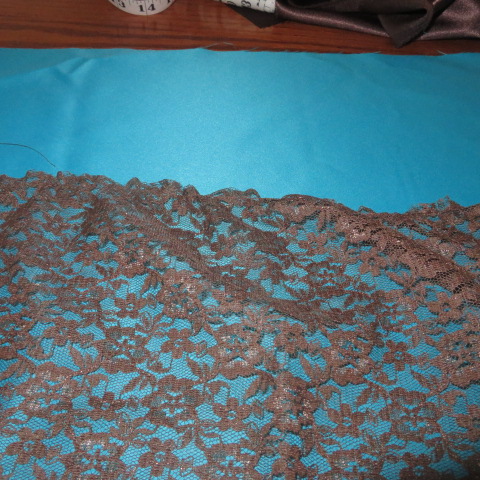
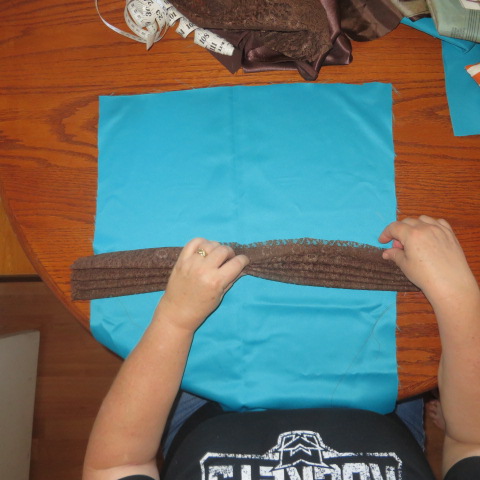
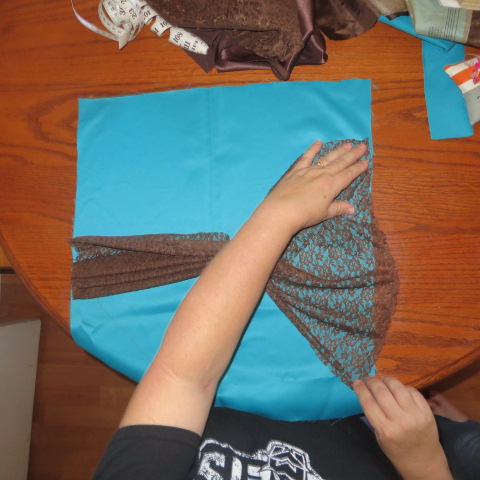
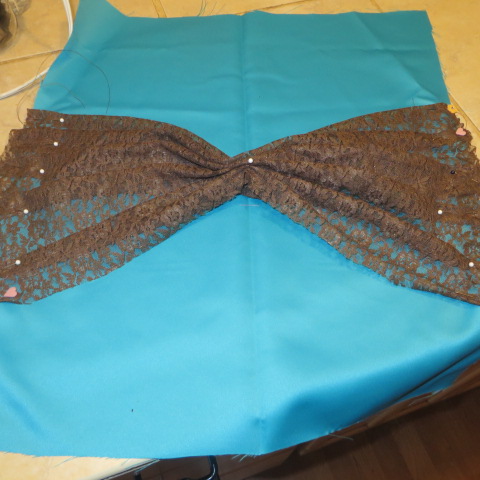
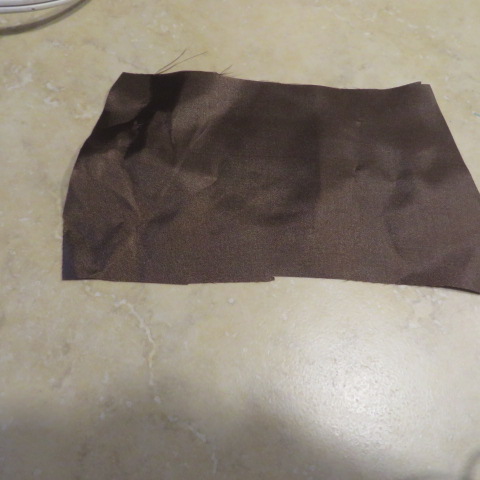
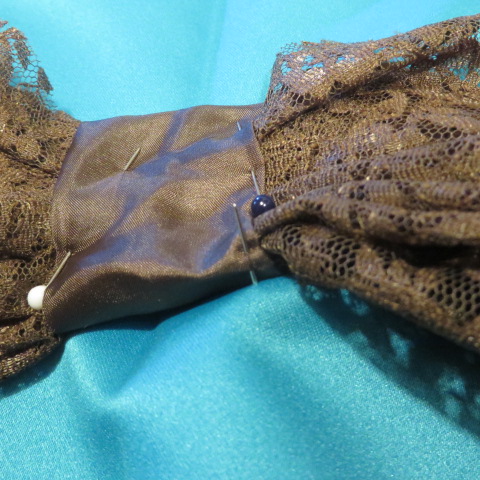
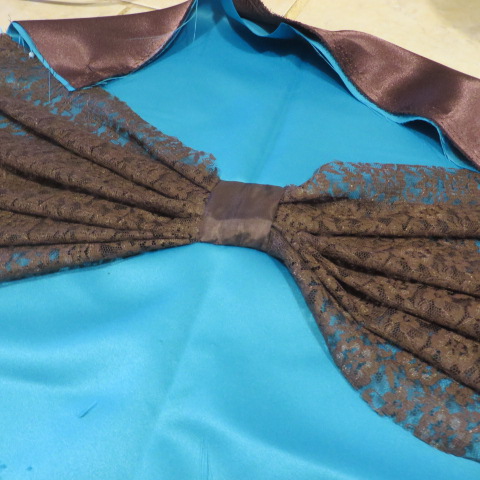
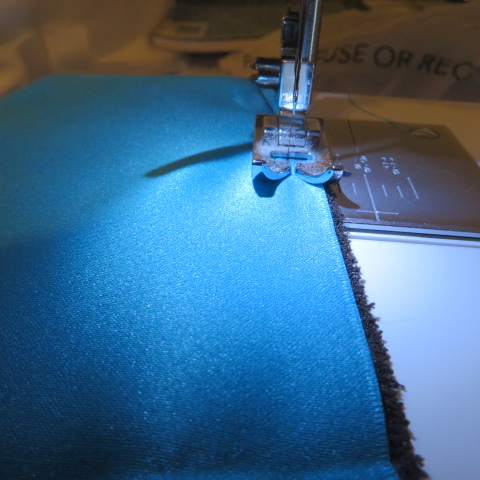
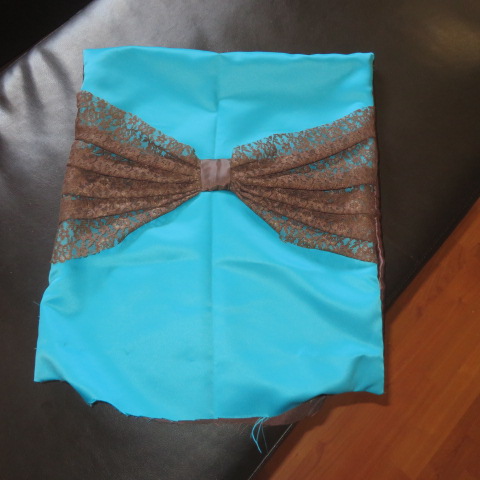
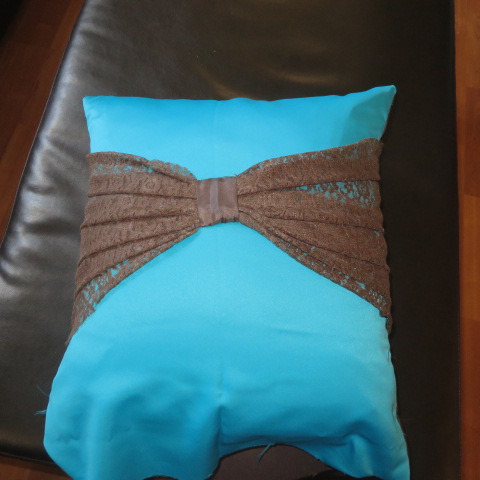
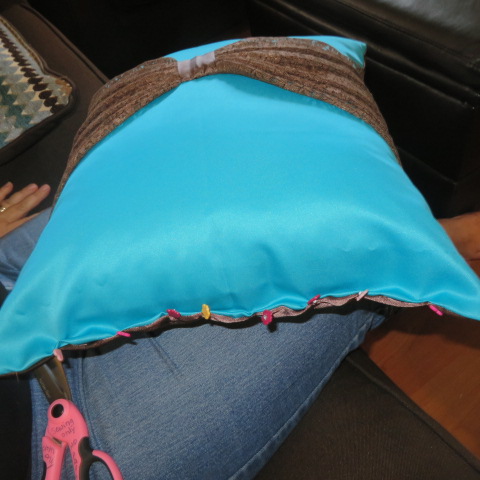
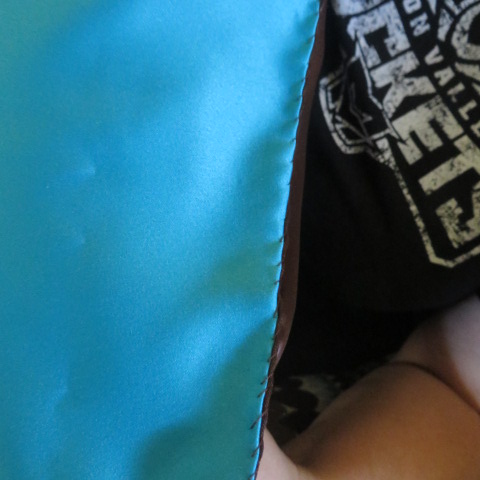
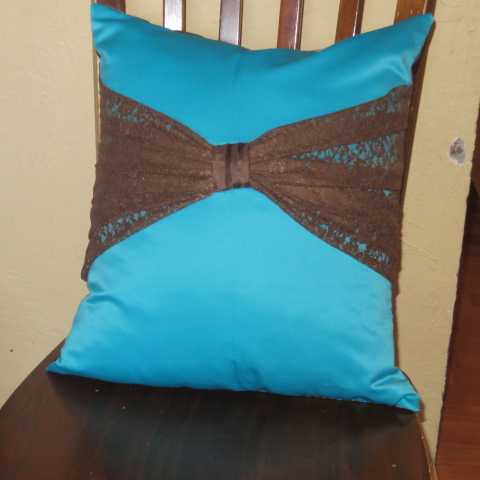
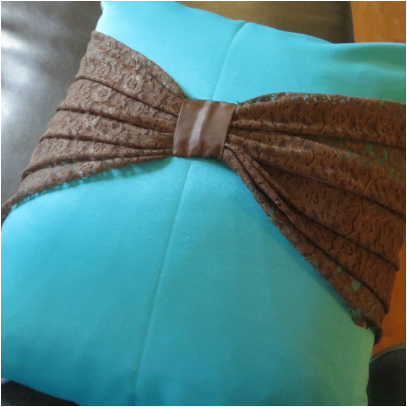 Let me tell you the story of the bridesmaid dress that was supposed to be turquoise with brown lace. I was halfway finished with it when I went to press the bodice and I melted it all over the iron. After going out and purchasing bridesmaid dresses, I was left with the brown and turquoise fabric. So, not wanting to let anything go to waste, I knew that I could use the fabric for cushions and table coverings. I conjured up the idea for the above pillow first. It was a little bit tricky, but here is how I did it. (I was careful not to press it, or at least to use a pressing cloth). First, you need a few supplies: fabric, pillow form, thread By the way, if you don't have a pillow form, found this cool idea for making one on pinterest. Set your pillow form on your fabric and cut out your fabric to fit. I like to hold it up to the side of the form and add a little for a seam allowance. It should go past the side seam. Next, take a gathering stitch on opposite sides of the lace piece. Don't gather it very much, just a little. Then, fold the lace like a fan and pin it in the middle. Here are the directions: Stitch the sides down close to the edge of the front of pillow piece. Then, cut a strip of fabric and make a center covering. Press the seam of the tab to the middle back and wrap the center. Hand stitch in place catching the fabric of the pillow as well as the tab. I did french seams on this pillow because pillows come apart too easily otherwise. Here is a past post on how to do french seams. So, with wrong sides together, take a small seam around three sides of the pillow. On the fourth side, just go in a few inches from each corner. Then, turn inside out and stitch again, a little farther in. I took a 5/8" seam. Then flip it right side out. Now you are ready to insert the pillow form. There is a sweet swing where I think this pillow will look great on in the yard where we are having the reception. I have a few more tricks up my sleeve for this fabric still! So, stay tuned! 
Have you ever heard your kids ask, "When will I ever use this in my real life anyway?", when it comes to school subjects? Well, tell them to get busy and practice their geometry because you never know when you are going to need to remember those equations!
It all began with this fabric that I purchased as the overlay tablecloths for Lindsey's wedding reception. (Once again I went to SAS!) 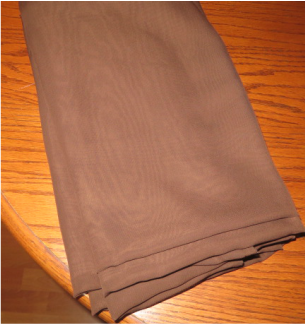
Problem #1: Size to cut the fabric:
This is 12 yards of chocolate brown chiffon. It was $2.99 per yard at SAS. It is 59" wide. So, here was my dilemma, did I need to add to the width of the fabric? The tables are 60" in diameter. I wanted an overhang at the corners. Did I need to add to the length or should I make it a 59 x 59 " square? How long would the over hang be? Well, between my son (a senior in HS who is starting AP Calculus this year), and my daughter (who took AP Calculus while in HS), we came up with what we hope are the right calculations that will make these tablecloths look great. Actually, I shouldn't say "we", but "they". I did remember some geometry formulas, but not necessarily the ones I needed. Here is the work as Madalynn recorded it: 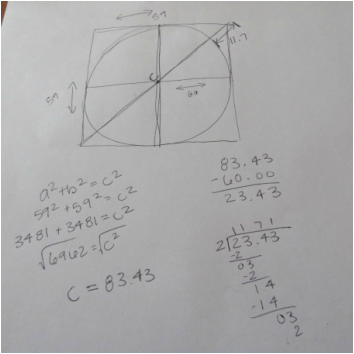
Frankly, it didn't even occur to me to draw the square of the fabric over the tip of the circle of the table, so I am really glad that my kids were here.
The final outcome was that if I cut the fabric into 59" squares, I would have an almost 12" overhang. I decided that would be acceptable so that is what I did.
Trick #2: Cutting the fabric evenly
I measured down the fabric 59" and made a snip. Then I realized that cutting this slippery fabric was going to be tricky. I called Madalynn once again for help. She sat at the opposite side of the table and measured and snipped at that side. The cutting was still going to be a problem. I don't have a large enough self healing mat to use my rotary cutter. Then I realized that at the fabric store, they ripped the fabric. So, I tried it! And do you know that it ripped from my snip to Madalynn's snip almost perfectly! Problem solved. 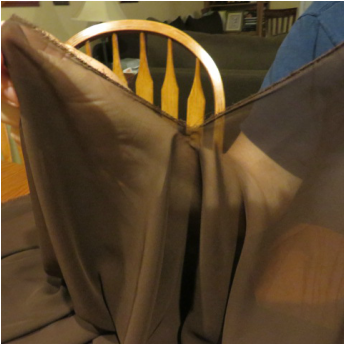
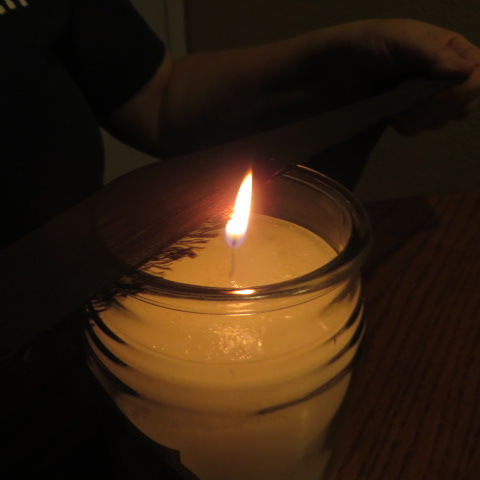
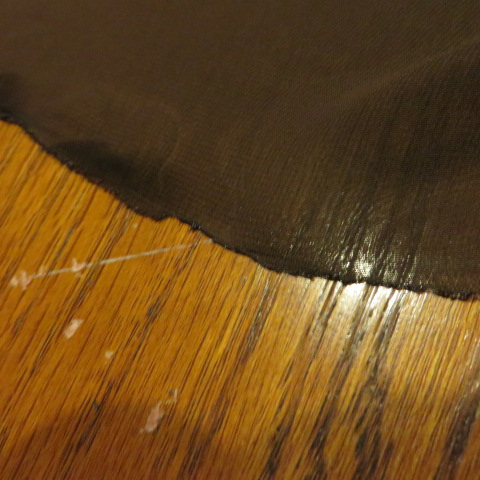
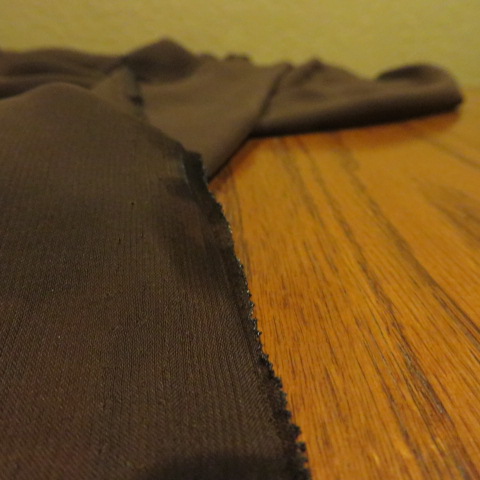
Problem #3: Fraying edges
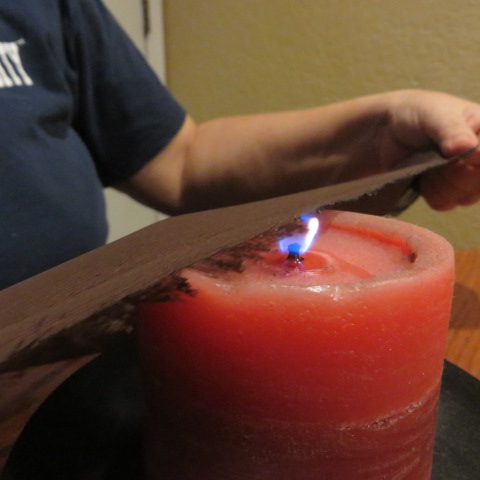
This chiffon fabric really frays. Plus, it is so silky and fine that I worried that it would get chewed up in my sewing machine if I tried to hem it regularly. Or, there would be puckering. So, what I had seen done on this kind of fabric was melting the edges to stop the fraying and to keep the edges light. So, I called my friend Diane and got some advice from her. She suggested various methods. I had already tested the fabric and I knew that it would melt rather than just catch fire and burn my house down. So, the method I decided to use was a large, stable candle. I started with a large pillar, but the wick was too short and I kept smothering it out. I then switched to a large jar candle with a long wick. The slippery glass worked great to slide the fabric across quickly as I melted the edge.
So, problem solved and one more task completed towards the wedding! I think these will look great with the turquoise centerpieces! Stay tuned for more projects!
|
Creators of Hot Cocoa Bombs! (copyrighted)

Author
Helen Reynolds: Mother of six children , grandmother to eleven! I love to cook, craft and create things and I especially love doing that with my family, So, when my lawyer daughter, Lindsey, my artist daughter, Madalynn, and I came up with the idea of Hot Cocoa Bombs, this blog was born. Then, one more daughter, with her technical and science skills, plus creativity has joined in to round us out! Read more about us here! 
Click this link and visit 3WinksDesignShop on Etsy. Find our Hot Cocoa Bomb Idea Book, our For the Love of PIe e-book and more of our creations!

Amazon Gift Cards are the Perfect Gift!
    Archives
May 2024
|


 RSS Feed