|
I have really been wanting to do a great Pioneer Singing time on Sunday since Pioneer Day, July 24, actually falls on Sunday this year. Last week, our wagon wheel singing time went very well. Now this week will be the big week! I have searched Pinterest for some great ideas and foundthis and this which were very similar, but different. Luckily, because I couldn't print the maps the way they suggested, I have an artistic daughter who drew my map for me.
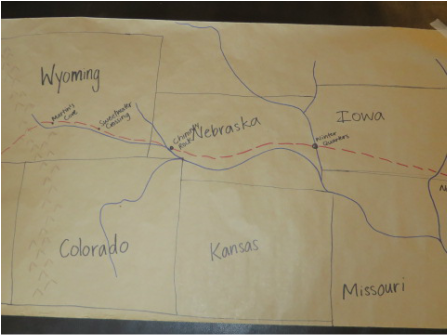
I am going to have all of the children sit around a fake campfire on the floor. We will start our trek in Nauvoo with a picture of the Nauvoo Temple and talk about leaving that place. Then we will talk about each stop along the way and sing one or two songs to go with it. After we talk about Nauvoo we will sing "Praise to The Man", because they had just lost the prophet Joseph Smith. I looked at some of the things that were written by the pinners I mentioned above, and then came up with my own stories and words to read and talk about. I encourage you to do the same thing for your kids so that you will be saying the thing the Lord wants your children in your ward to hear. I am using the story of the three 18 year old young men at Sweetwater Crossing because that is one of my favorite stories. : (Hinckley, Gordon B. “Four B’s for Boys”. Ensign. November 1989.) At the end I am going to give them a little campfire cookie (no bake of course) that I found here. It is actually supposed to be a burning bush, but I think it makes a great campfire as well. The recipe is on that webpage. 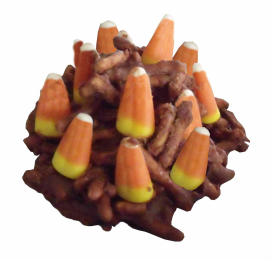
Of course, we will stand up and do actions and walking with many of the songs. I will use bonnets and hats for the children to act things out, like gathering berries and chips. (I will explain what chips are). I hope that they feel the Spirit as we talk about and sing about their Pioneer ancestors and the sacrifices they made. Thanks to all of you choristers out there who helped me to formulate this plan! I am so excited to share it with my Primary kids!
0 Comments
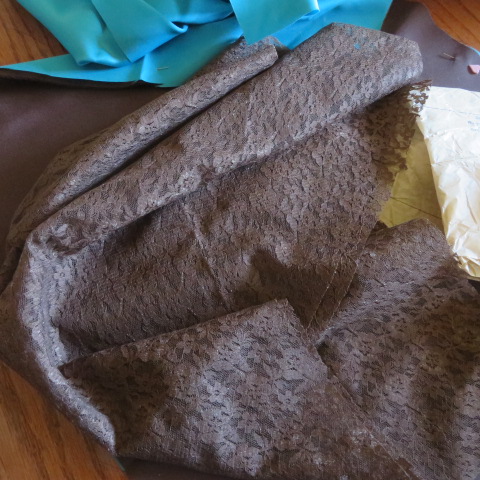
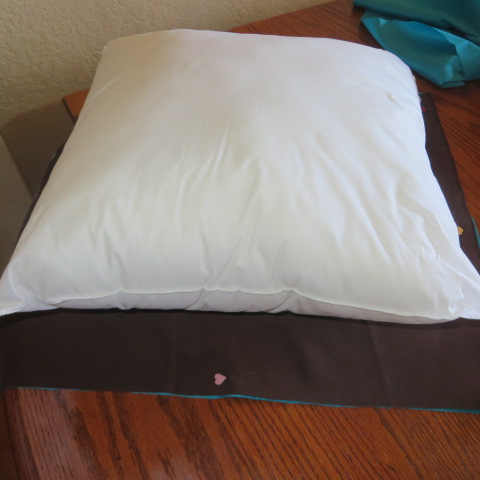
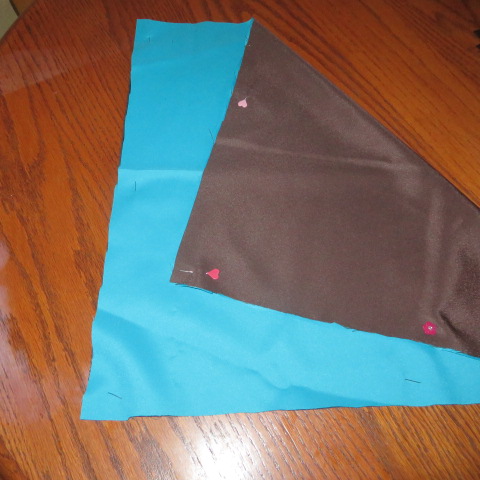
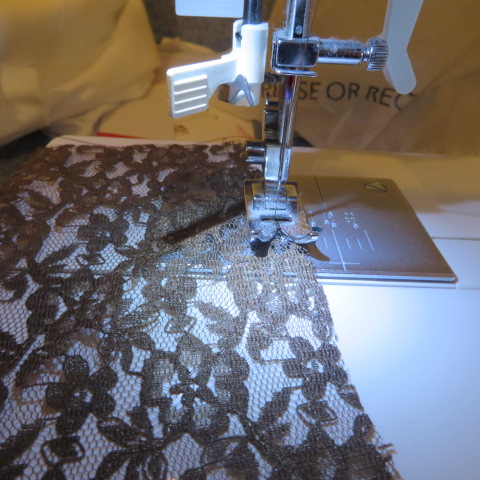
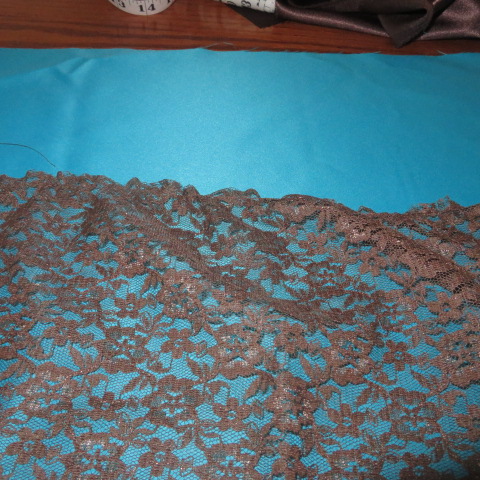
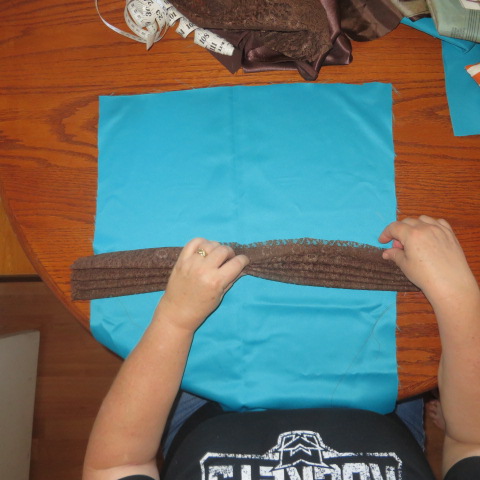
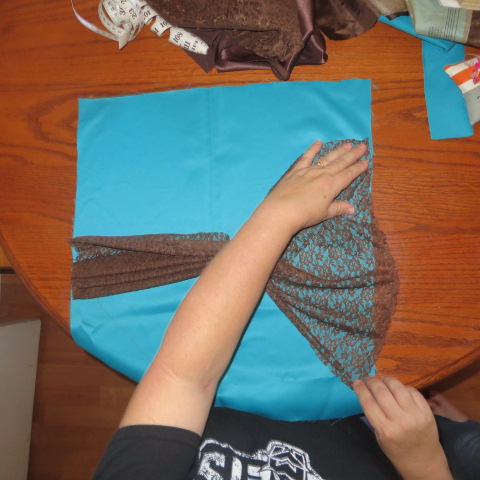
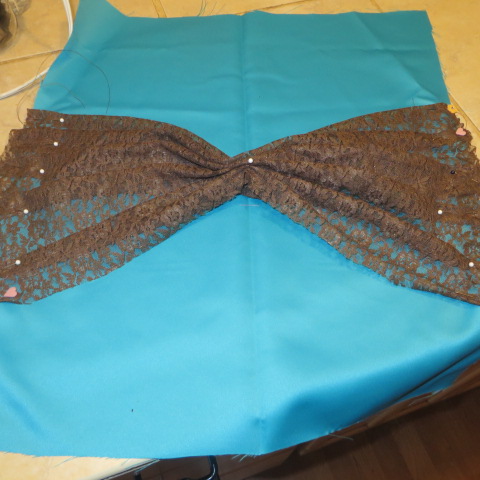
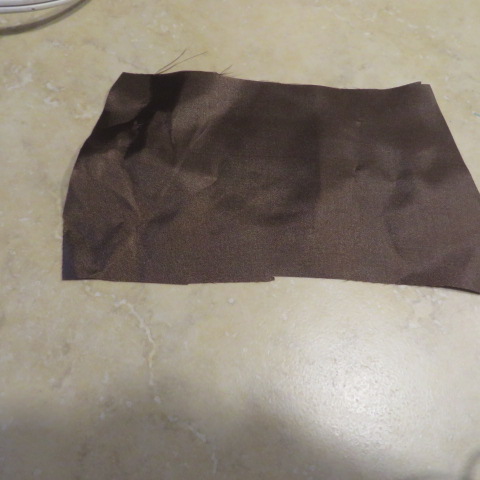
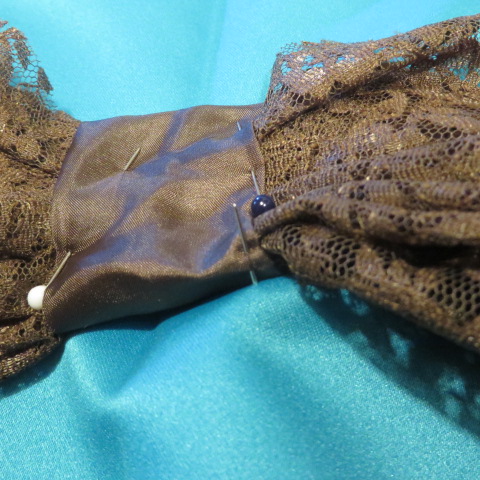
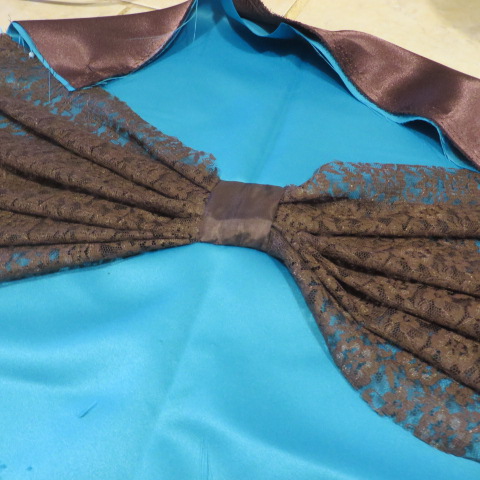
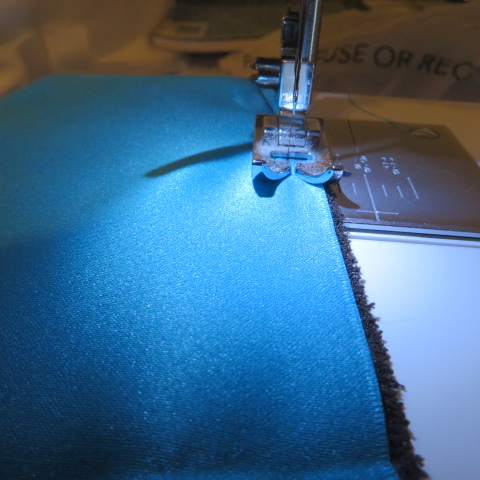
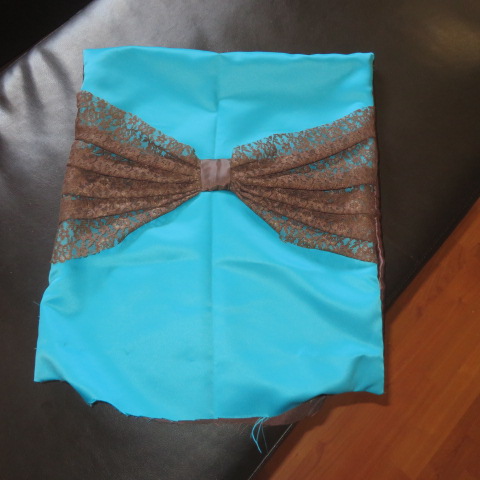
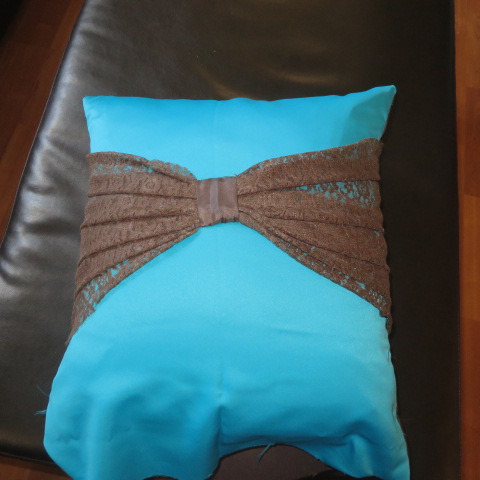
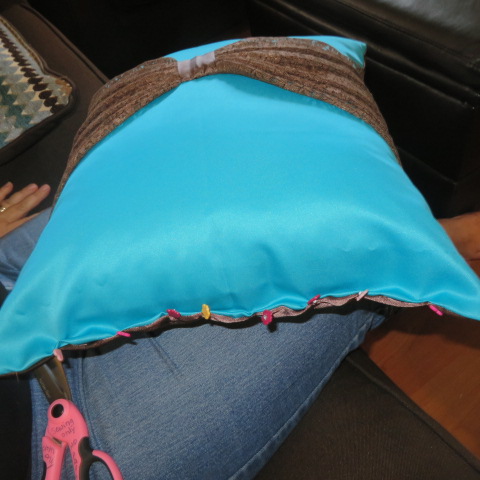
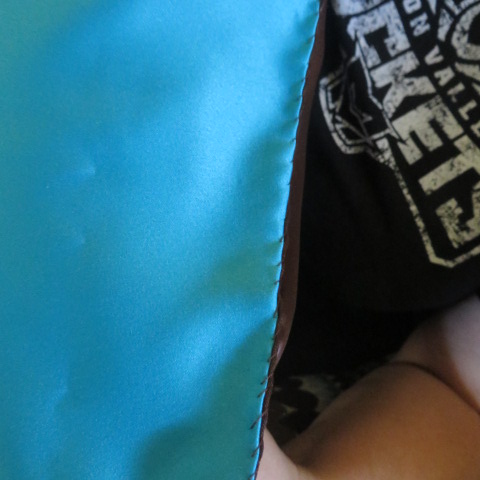
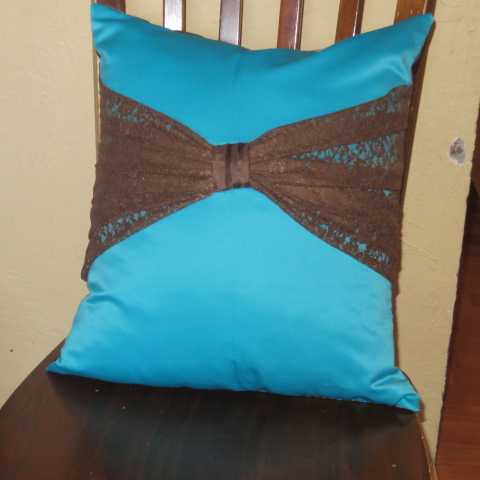
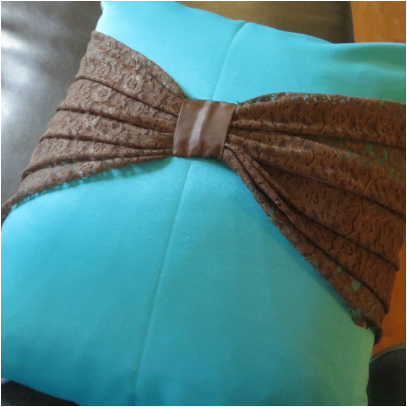 Let me tell you the story of the bridesmaid dress that was supposed to be turquoise with brown lace. I was halfway finished with it when I went to press the bodice and I melted it all over the iron. After going out and purchasing bridesmaid dresses, I was left with the brown and turquoise fabric. So, not wanting to let anything go to waste, I knew that I could use the fabric for cushions and table coverings. I conjured up the idea for the above pillow first. It was a little bit tricky, but here is how I did it. (I was careful not to press it, or at least to use a pressing cloth). First, you need a few supplies: fabric, pillow form, thread By the way, if you don't have a pillow form, found this cool idea for making one on pinterest. Set your pillow form on your fabric and cut out your fabric to fit. I like to hold it up to the side of the form and add a little for a seam allowance. It should go past the side seam. Next, take a gathering stitch on opposite sides of the lace piece. Don't gather it very much, just a little. Then, fold the lace like a fan and pin it in the middle. Here are the directions: Stitch the sides down close to the edge of the front of pillow piece. Then, cut a strip of fabric and make a center covering. Press the seam of the tab to the middle back and wrap the center. Hand stitch in place catching the fabric of the pillow as well as the tab. I did french seams on this pillow because pillows come apart too easily otherwise. Here is a past post on how to do french seams. So, with wrong sides together, take a small seam around three sides of the pillow. On the fourth side, just go in a few inches from each corner. Then, turn inside out and stitch again, a little farther in. I took a 5/8" seam. Then flip it right side out. Now you are ready to insert the pillow form. There is a sweet swing where I think this pillow will look great on in the yard where we are having the reception. I have a few more tricks up my sleeve for this fabric still! So, stay tuned! 
Have you ever heard your kids ask, "When will I ever use this in my real life anyway?", when it comes to school subjects? Well, tell them to get busy and practice their geometry because you never know when you are going to need to remember those equations!
It all began with this fabric that I purchased as the overlay tablecloths for Lindsey's wedding reception. (Once again I went to SAS!) 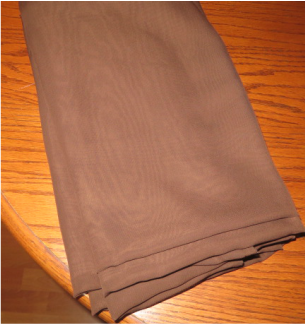
Problem #1: Size to cut the fabric:
This is 12 yards of chocolate brown chiffon. It was $2.99 per yard at SAS. It is 59" wide. So, here was my dilemma, did I need to add to the width of the fabric? The tables are 60" in diameter. I wanted an overhang at the corners. Did I need to add to the length or should I make it a 59 x 59 " square? How long would the over hang be? Well, between my son (a senior in HS who is starting AP Calculus this year), and my daughter (who took AP Calculus while in HS), we came up with what we hope are the right calculations that will make these tablecloths look great. Actually, I shouldn't say "we", but "they". I did remember some geometry formulas, but not necessarily the ones I needed. Here is the work as Madalynn recorded it: 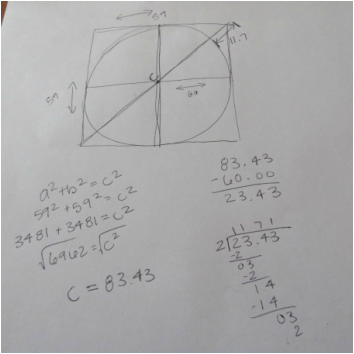
Frankly, it didn't even occur to me to draw the square of the fabric over the tip of the circle of the table, so I am really glad that my kids were here.
The final outcome was that if I cut the fabric into 59" squares, I would have an almost 12" overhang. I decided that would be acceptable so that is what I did.
Trick #2: Cutting the fabric evenly
I measured down the fabric 59" and made a snip. Then I realized that cutting this slippery fabric was going to be tricky. I called Madalynn once again for help. She sat at the opposite side of the table and measured and snipped at that side. The cutting was still going to be a problem. I don't have a large enough self healing mat to use my rotary cutter. Then I realized that at the fabric store, they ripped the fabric. So, I tried it! And do you know that it ripped from my snip to Madalynn's snip almost perfectly! Problem solved. 
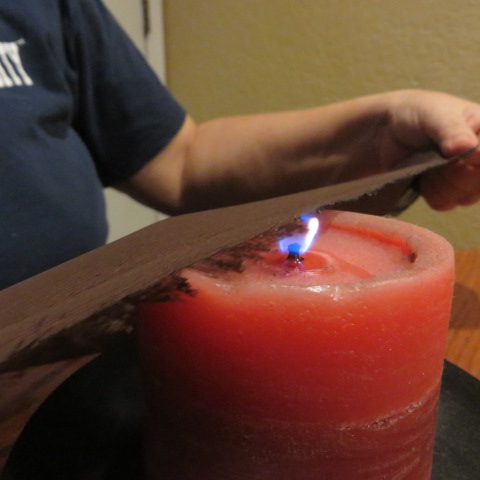
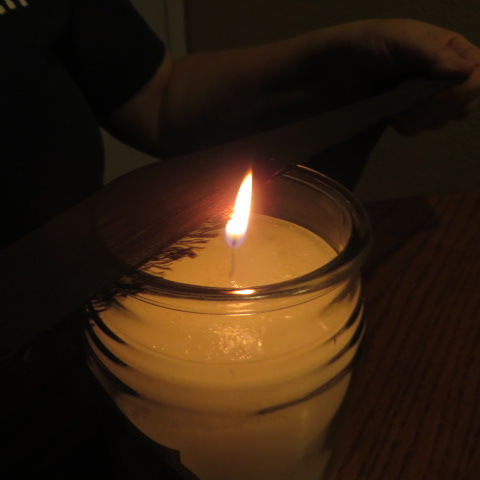
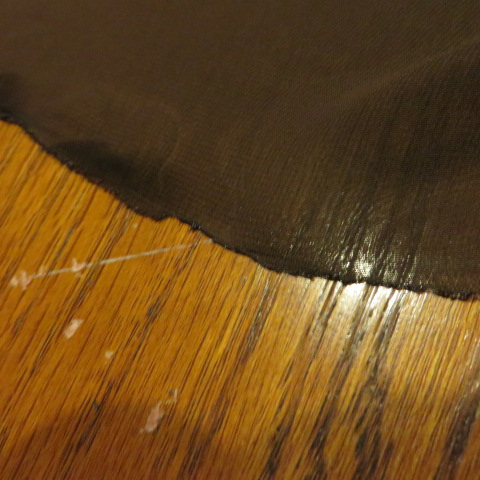
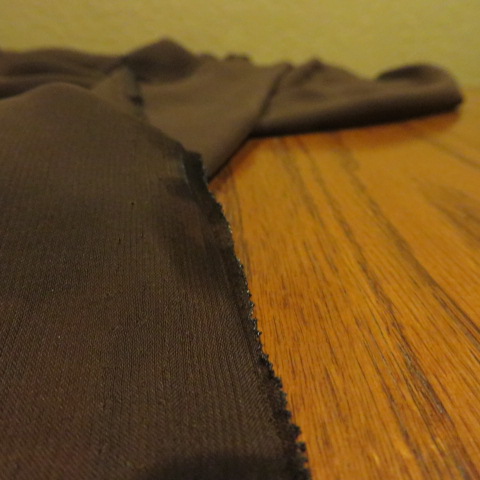
Problem #3: Fraying edges
This chiffon fabric really frays. Plus, it is so silky and fine that I worried that it would get chewed up in my sewing machine if I tried to hem it regularly. Or, there would be puckering. So, what I had seen done on this kind of fabric was melting the edges to stop the fraying and to keep the edges light. So, I called my friend Diane and got some advice from her. She suggested various methods. I had already tested the fabric and I knew that it would melt rather than just catch fire and burn my house down. So, the method I decided to use was a large, stable candle. I started with a large pillar, but the wick was too short and I kept smothering it out. I then switched to a large jar candle with a long wick. The slippery glass worked great to slide the fabric across quickly as I melted the edge.
So, problem solved and one more task completed towards the wedding! I think these will look great with the turquoise centerpieces! Stay tuned for more projects!

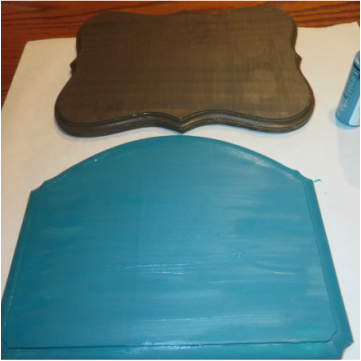
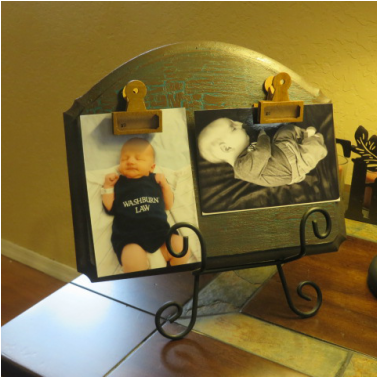
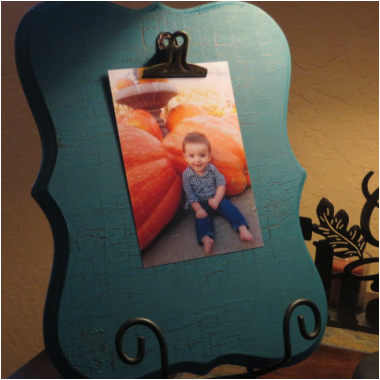
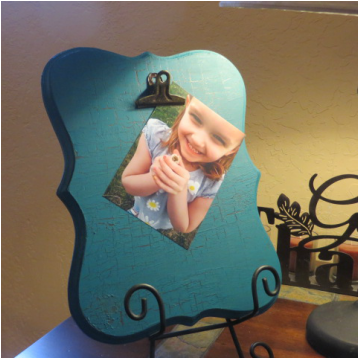
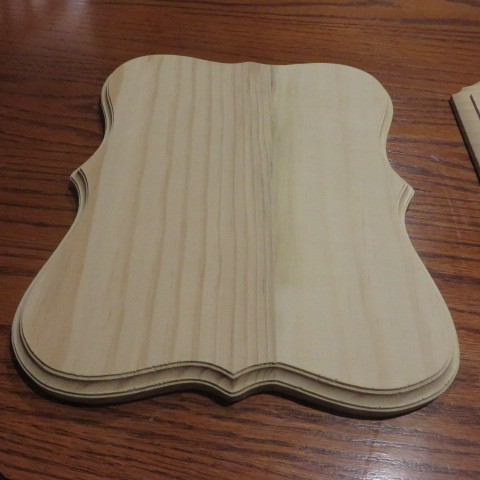
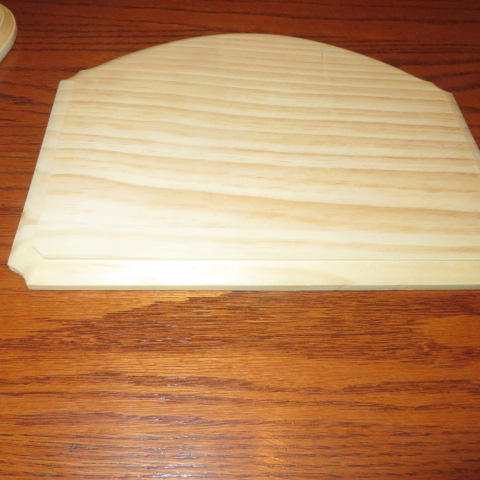
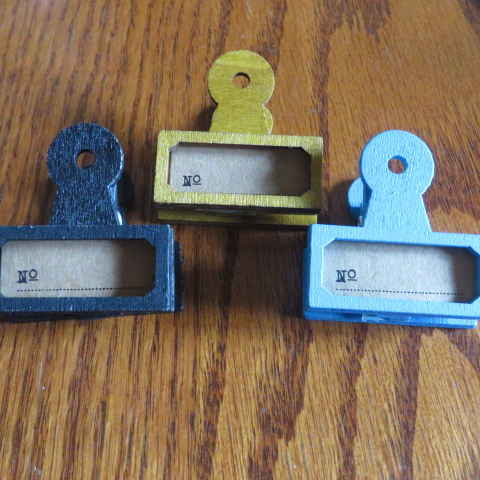
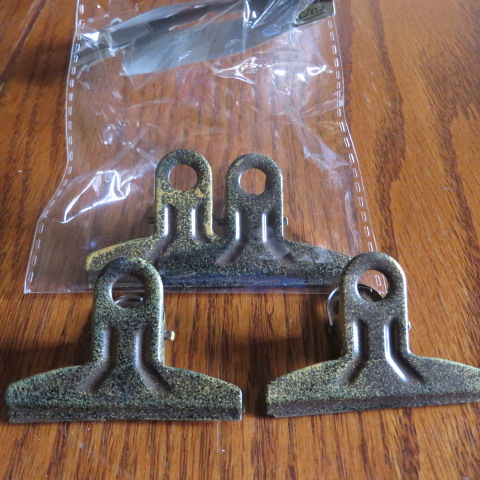
The wedding preparations are in high gear now! I was at Michael's to purchase some card stock and $80 later I came home with more projects to make. One of these projects is to make some frames to hold engagement pictures on the sign-in table at the reception. These cute new trendy clip frames seemed just the thing, but they were so expensive! Well, you know me, I am a cheapskate and I knew that I could make what I wanted, in the right colors, by myself. Here are some of the supplies I found. Some of them were 70% off!
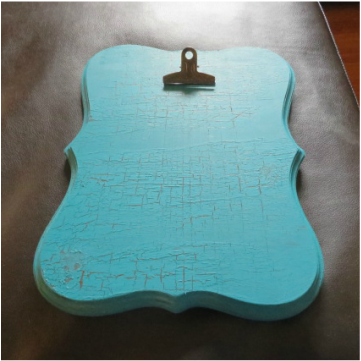
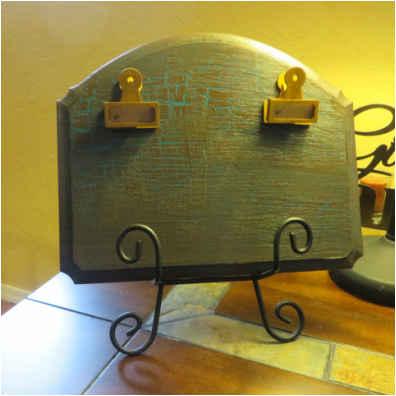
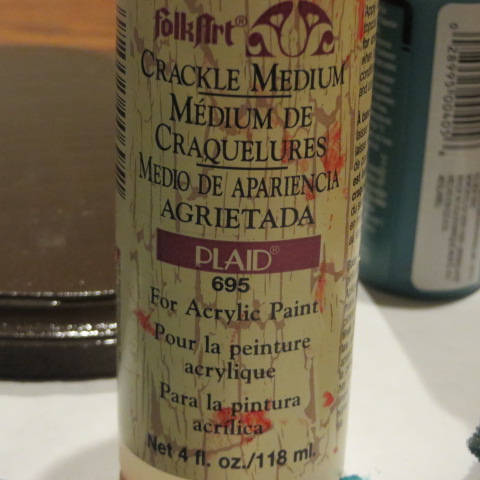
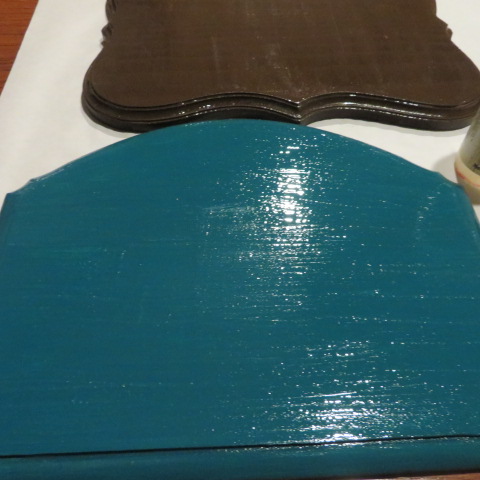
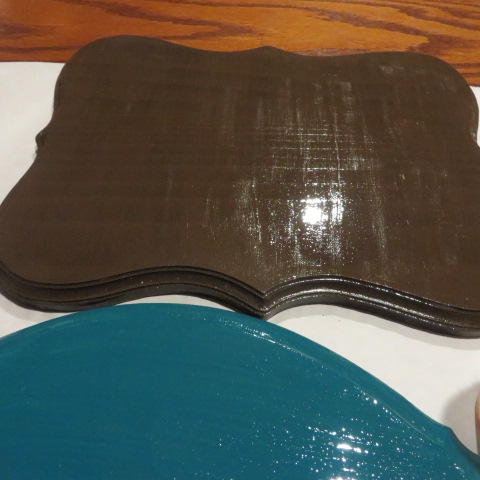
As you know from my tutorial to make a ponderize frame, I love the crackle finish. My daughter's wedding colors are turquoise and chocolate brown. I decided to do opposite colors on the two frames. So, first I base coated them.
After the paint dries, then spread on the crackle finish.
When the crackle coat is dry, spread the top coat of paint on evenly without going back, or it will goop up and smear. Just do even strokes all over it with your top color.
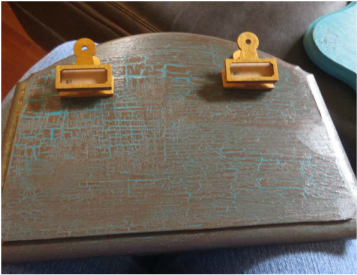
As you can see, I decided to use different clips on each frame. Don't try to glue gun the clips on, they will pop off too easily after consistent use. I used E-6000 which will hold much better. It takes it a little longer to dry, but the result is worth it. Because I want to put these on the table by the guest book, I have some little cute hinges that I can use to make a stand on the back, but for now I am using an easel to show you how they look. This is so easy to do and much less expensive than the $30 to $40 they were charging in the store! I used crackle finish, paint and glue that I already had, so the cost for me was about $7.00 per frame. The plaques were the most expensive parts. You may be able to find them for less somewhere, I haven't checked because I am in a hurry to get ready for the wedding. Or, buy wood and make your own.
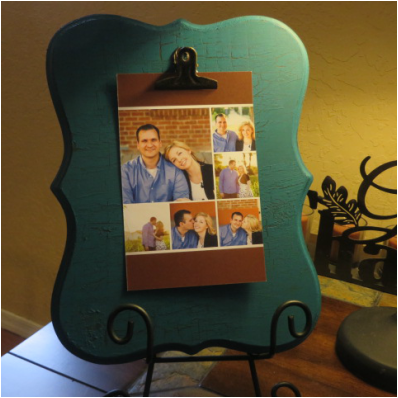
The nice thing is that you can change the pictures out whenever you want! I hope you give these a try. Now more pictures! (My grandchildren and daughter's wedding announcement are included.) 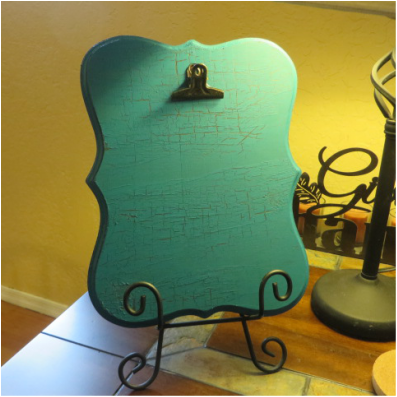
|
Creators of Hot Cocoa Bombs! (copyrighted)

Author
Helen Reynolds: Mother of six children , grandmother to eleven! I love to cook, craft and create things and I especially love doing that with my family, So, when my lawyer daughter, Lindsey, my artist daughter, Madalynn, and I came up with the idea of Hot Cocoa Bombs, this blog was born. Then, one more daughter, with her technical and science skills, plus creativity has joined in to round us out! Read more about us here! 
Click this link and visit 3WinksDesignShop on Etsy. Find our Hot Cocoa Bomb Idea Book, our For the Love of PIe e-book and more of our creations!

Amazon Gift Cards are the Perfect Gift!
    Archives
July 2024
|


 RSS Feed