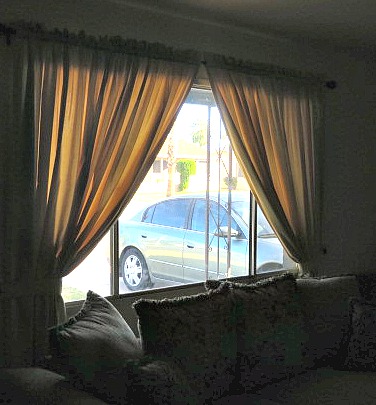
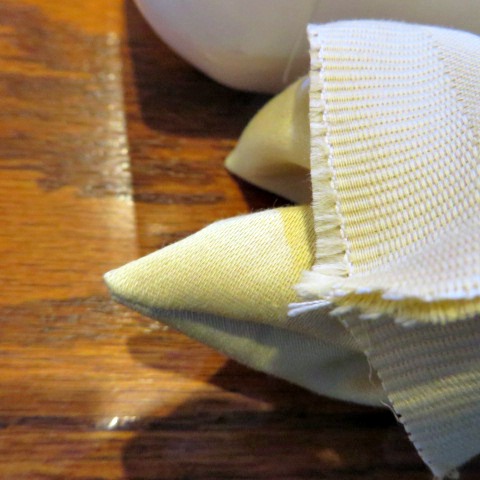
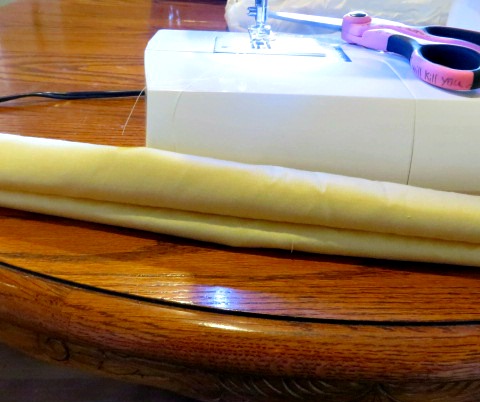
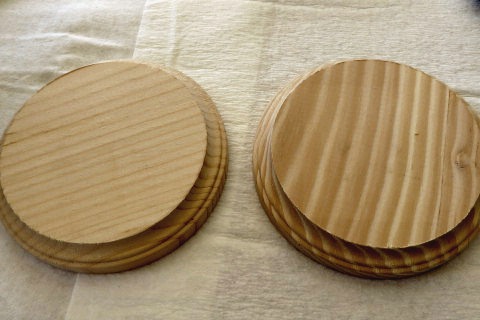
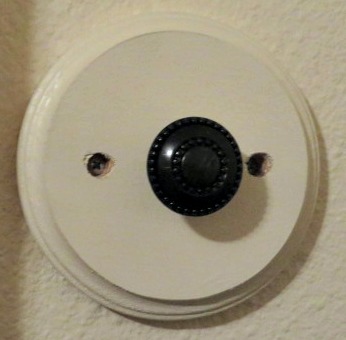
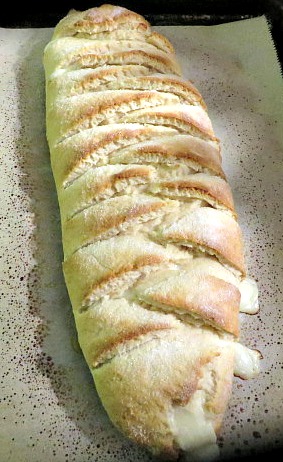
 It feels like forever since I put up the tutorial about sewing your own drapes and then promised to show you how to do the tie backs. Sorry! But, they are finally finished! Please excuse my photo because it is really difficult to take pictures of an open window in the daylight. On today's market, you can purchase hook-like contraptions to use as tie backs for your curtains. Here are some, and here. Or, you can purchase other types of ties, like these, these, or these .But, for some reason in my mind I envisioned same fabric tie backs, matching my drapes, that kind of buttoned on some sort of a knob or something. So, with my husbands help, that is what I did. First of all, let me show you how I made the tie backs. Just like when I told you how to sew the drapes, measuring is very important. But, it is up to you to decide how wide and long you want your tie backs to be. For mine, I used a tape measure to wrap around the drapes and hold them back to what I thought was a good look and took my measurement from that. Mine in this case are about 28" long (71 cm) and since I wanted a thicker band holding back the drape, they are 3" wide (7.5 cm). Remember to allow extra for a seam allowance, so I cut mine about an inch larger all around, then trimmed the seams afterwards. Click on the pictures for more directions. Now that the fabric part of my tie back was finished, I had to figure out what I wanted to have hold them on the wall. I looked and looked and the things that I thought were the most beautiful, went with my room's decor and would work well were actually drawer pulls! There are so many choices of drawer pulls, but the problem is, I wasn't going to be attaching mine to a drawer. That created a problem because you couldn't get to the end of the screw to add the nut to hold it in place like you would on a drawer. I told my husband my idea and dilemma and he didn't even bat an eye! He just came up with the solution. 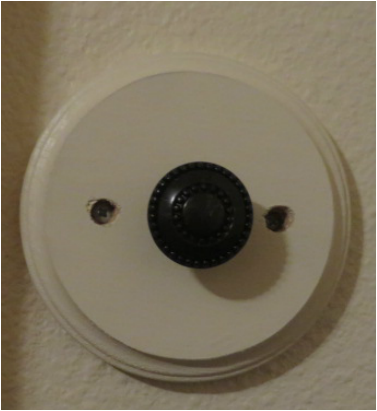 To cover the screws, he purchased some wood plugs that fit right in the holes. I will show you the picture in a minute. Next, I had to put buttonholes in my tie backs in order for them to work. Measure how large your knob is, and always make a test buttonhole on a scrap of fabric to see if you have the size right. When I went to make my buttonholes, I discovered that a piece of my buttonhole foot was missing! Argh! I had to manually make the adjustments on my machine to get them done., so don't expect closeups, Ha Ha! But, actually, they look pretty good, and the big knob covers most of them anyway. So, here is how they look! 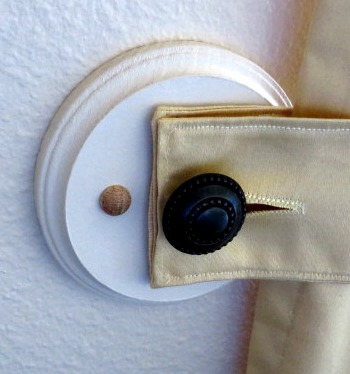 You can see the plug that covers the screws here. We will come back and paint them the same color as the medallion. I just wanted to post this today! 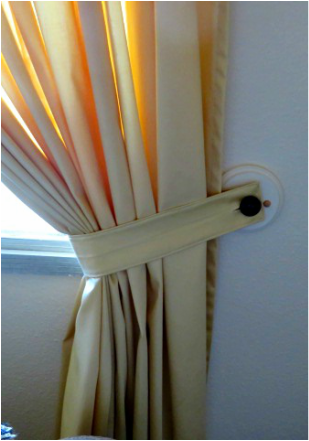 I really like the look! It is easy to blouse the drapes anyway that you want them to look. 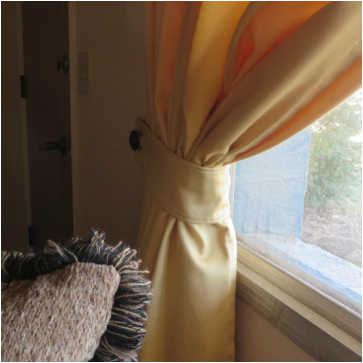 I love the width of the band as it holds back the curtains. So, there you have it! Not necessarily a faster, easier method, but the look is what I wanted and my husband and I worked and problem solved together to make it happen, and that is a big part of the fun in the process! Now, my front window is ready to frame my Christmas Tree when we put it up. By the way, if you were wondering about the writing on my sewing scissors, here is a picture. 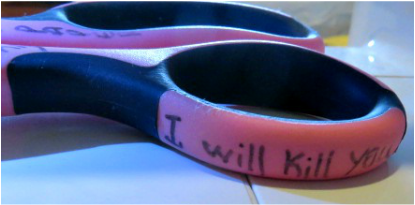 If you have gone through as many pairs of sewing scissors as I have, you will know why. (tee hee)
5 Comments
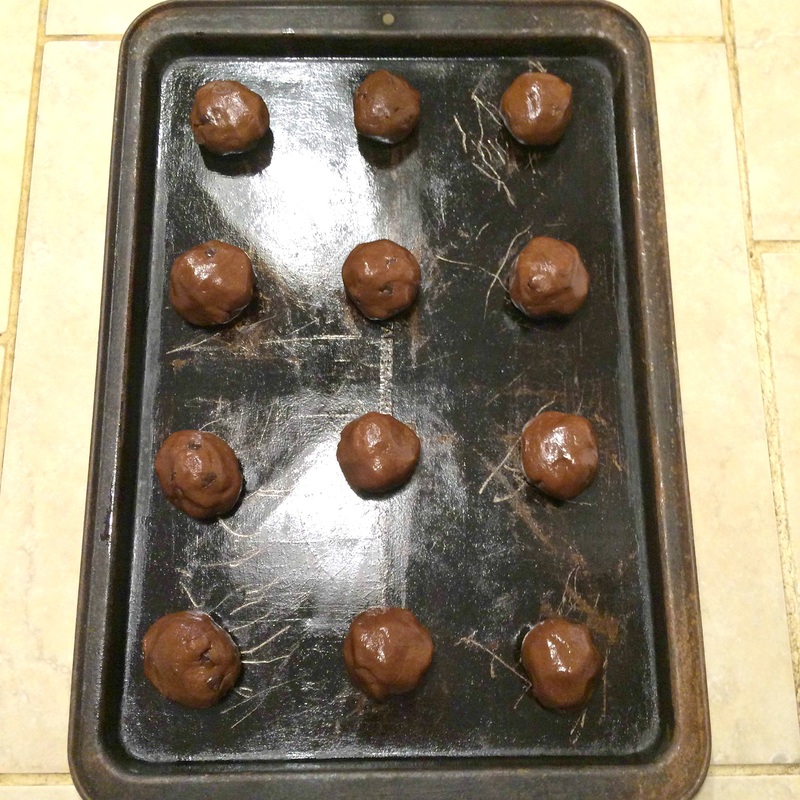
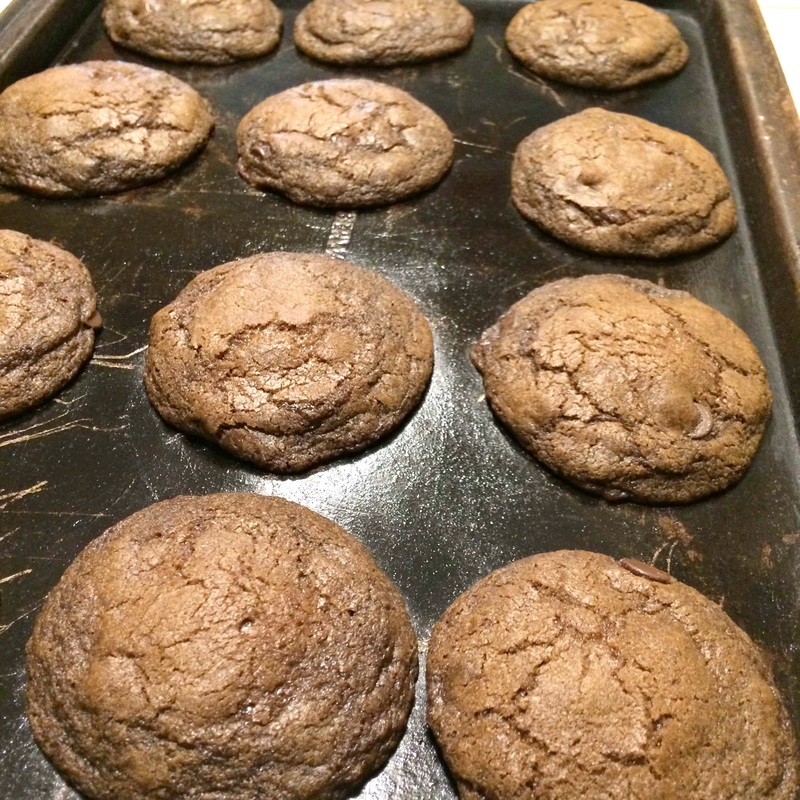
Hey guys. It's Madalynn. I haven't contributed to the blog in forms of a post yet, but you may recognize me from my work on our Instagram, or our owl logo I drew with the first three Sharpies I saw while my mom was creating the blog. (Spoiler Alert: We may be updating that soon, so stay tuned.) Anyway, my mom went out of town this weekend, so I figured I would finally make myself useful around here and make some cookies. But not just any cookies. Vegan cookies. 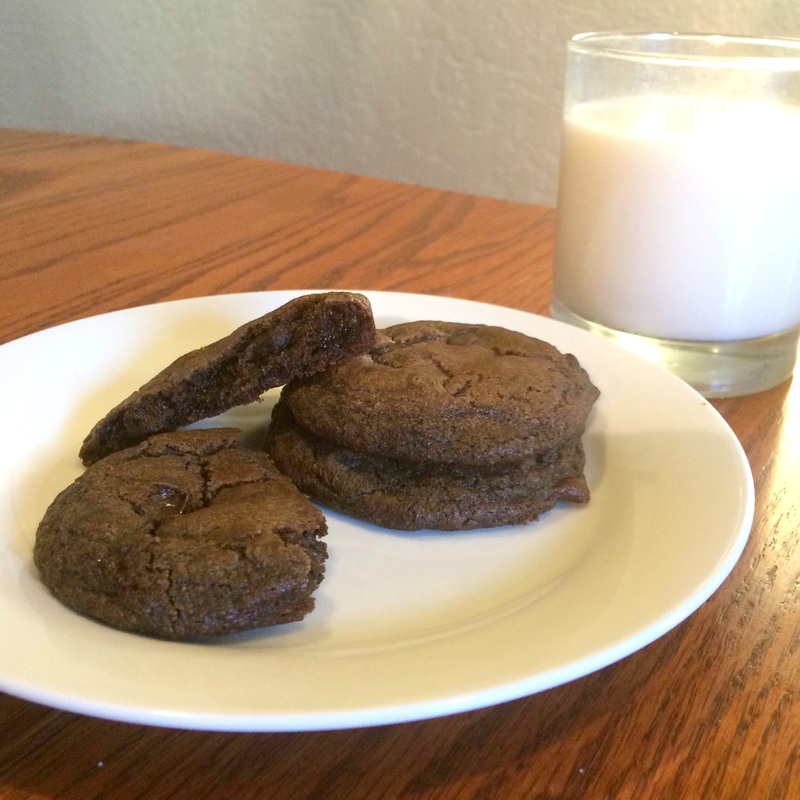 Now, I'm not really a vegan, but I like to try and eat a lot of vegan meals because 1) I'm pretty sure I'm lactose intolerant, 2) I like meat, but not for every meal, and 3) I don't really like to support factory farming, so depending on what brand the meat is or which meat supplier a restaurant uses, I will avoid it. So, this is a recipe I found by a vegan vlogger on Youtube called Liv's Healthy Life. I did things just slightly differently than the way she does them in that video, but oh my heck they are so good and so easy and so fast. Usually I dread making cookies because it can take a while, but these were done in like twenty minutes, if not less. Here are the ingredients you will need:
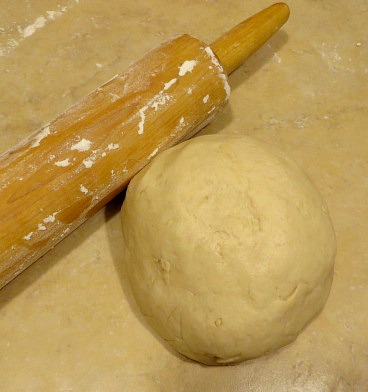
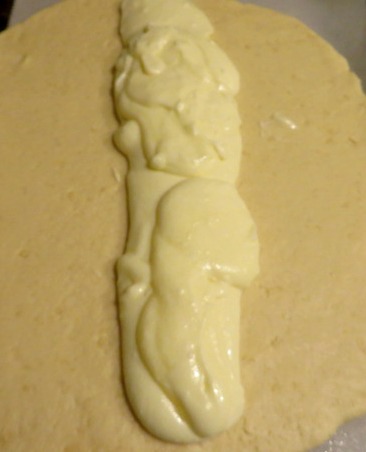
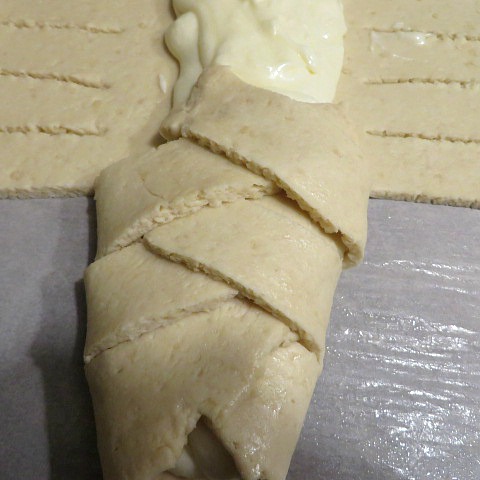
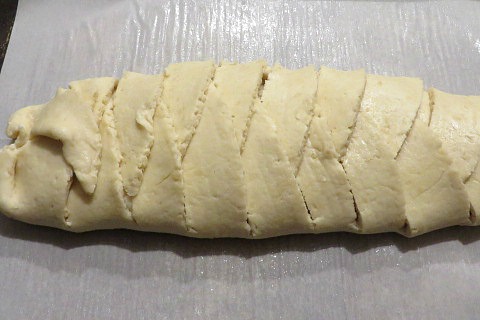
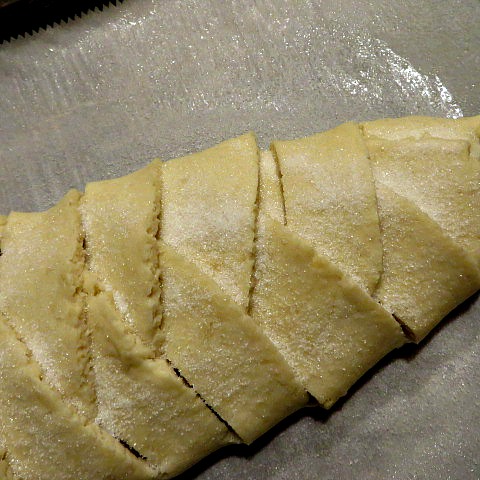
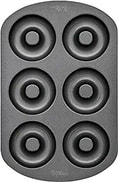
So I mean, most of that stuff will already be in your home. The only thing I had to pick up was some more almond milk and some chocolate chips. Once you have all of your ingredients, preheat your oven to 350 degrees Fahrenheit. Then you can start mixing things. Now, I greased a baking sheet before putting these in the oven, but you don't necessarily have to since they have the oil inside them. I didn't with the second batch I put in and they came out perfectly fine. If you do want to grease the sheet, I just used a little bit of coconut oil and wiped it around with a paper towel. So yeah, they came out looking awesome and they also tasted really good. I know there is this stigma surrounding vegan food that it's super gross, but I can assure you it is not. You might think this is biased, but I didn't tell people the cookies were vegan until after they tried them and they said they would have never known. I went out with my friend Charly (who also thought they were delicious) and when I came home later that night, they were practically all eaten. So I mean, the evidence speaks for itself. Let me know if you try this recipe and whether or not you'd like to see more vegan recipes! I have a ton that I would love to share. If you want to download this recipe, I have prepared that for you as well. Enjoy! 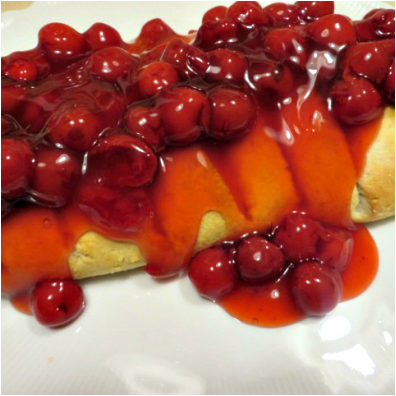 It is the time of year when the Norman Rockwell images come to my mind as I prepare for my children and grandchildren to come home for the holidays. I think about what delightful gifts I can make or buy for them and I think about the food that I will feed them. This recipe for Cherry-Cheese Coffee Cake fits right into that vision of holiday bliss. It is a favorite at our house, and even though it is really pretty simple to make, I usually only make it on special occasions. 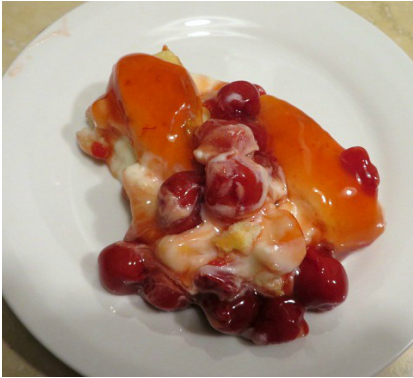 I have had this recipe for so long, that I really don't remember where I got it, but it has Bisquick as a main ingredient, so I am guessing it was originally from them. Even though it has Bisquick in the dough, because of the cream cheese and butter in it, you don't get a boxed taste. I am sure that you could use a scratch recipe for biscuits and alter it to add the cream cheese into the dough if you wanted to. There is no yeast in this recipe or rising that needs to happen, so you can whip this up pretty quickly, but it looks like you spent hours. Here's how it is done, click on the pictures for details. After allowing the braid to cool for 10 minutes, transfer it to a serving platter. I didn't have a nice long one. After all of these years you would think I would have gotten one, but I never think of it until I need it. Maybe I will check out Amazon today! Anyway, here is mine on a big round platter. 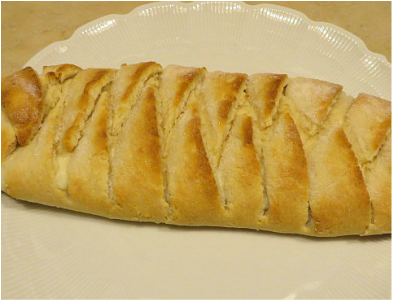 Now you pour on a can of cherry pie filling. It really is a beautiful dessert besides being delicious. Serve it up on your best dessert plates. It is great for that holiday feeling! Click the button for the full recipe. 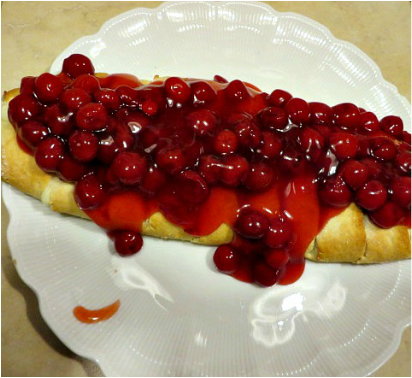 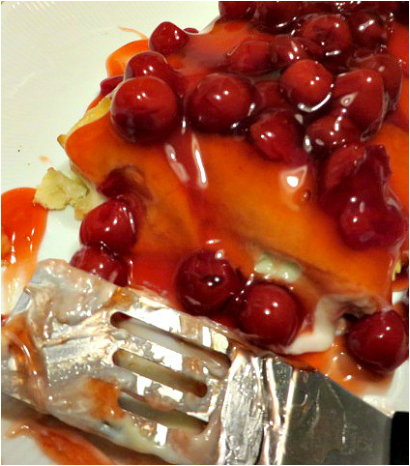 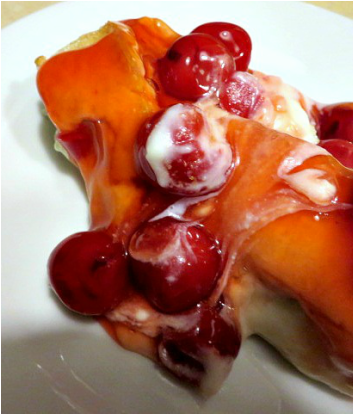 Of course, at our house we don't drink coffee, so we could call it a Hot Cocoa Bomb Cake instead. Yum! Would it be cherry overkill to have a Cherry Cordial Hot Cocoa Bomb with it? What do you do to get that Norman Rockwell experience at your house? 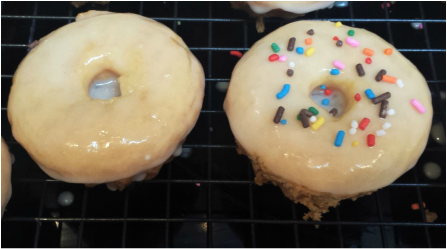 It's Lindsey again! I am back with a non pumpkin related treat. You see, PH and I teach a Sunday School class at church to a group of nine year olds. Now, if you've ever spent any time around a group of nine year olds you'll know that they can be a handful as they teeter back and forth between a sweet kid that still wants to please you, and cranky adolescent who has more emotions than they know what to do with. We have a lot of fun with them, they're a good group of kids. There is one kid that can be particularly challenging. He comes with his own set of needs and as PH and I came in brand new he felt the need to push boundaries to see where his limitations are with us. It has been really exhausting. We love our kids, but when there are ten of them and two of us, having control of the class is of utmost importance, and sometimes it brought us a little to the edge. 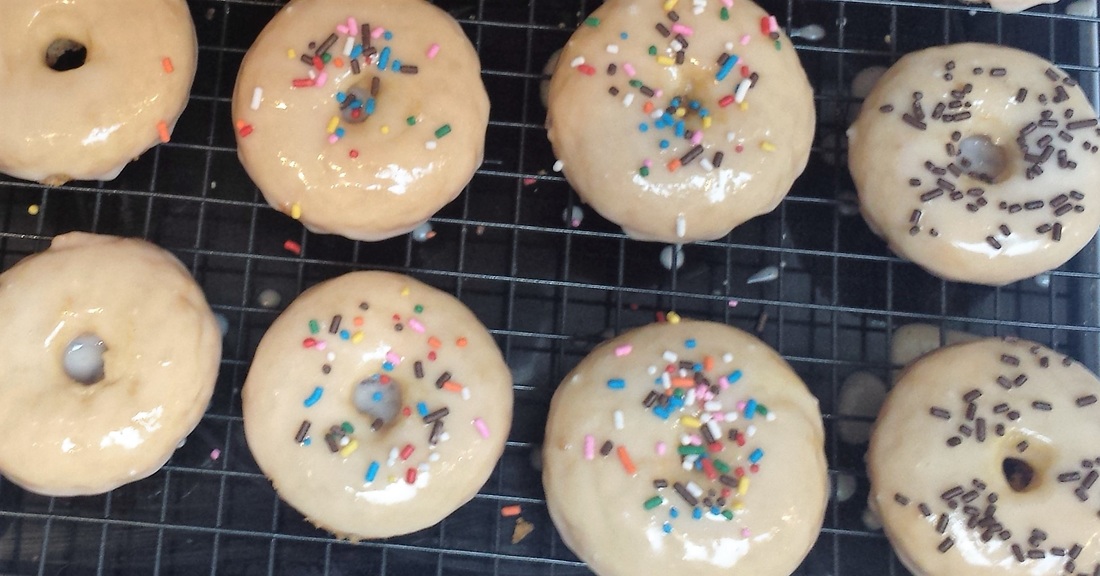 Well for the last few weeks we have been spending our class time at church working on something called the Primary Program. It's called that because the classes for children under twelve are all part of Primary, and each year they do a presentation where they each get a part to speak, and they sing the songs they've spent the year learning, and everyone gets to come watch. Since I am not beneath bribery (don't judge me), I told the kids that if they were well behaved and sang the songs, I'd make them a treat. Well, our special little boy did a complete 180 and just became so sweet and well behaved these last few weeks. He is also a HUGE fan of PH. I can't say that I blame him. So I asked him what treat he would like me to make after the program, which took place on October 30. I gave him no limitations so I brought it on myself when he told me, "doughnuts!" 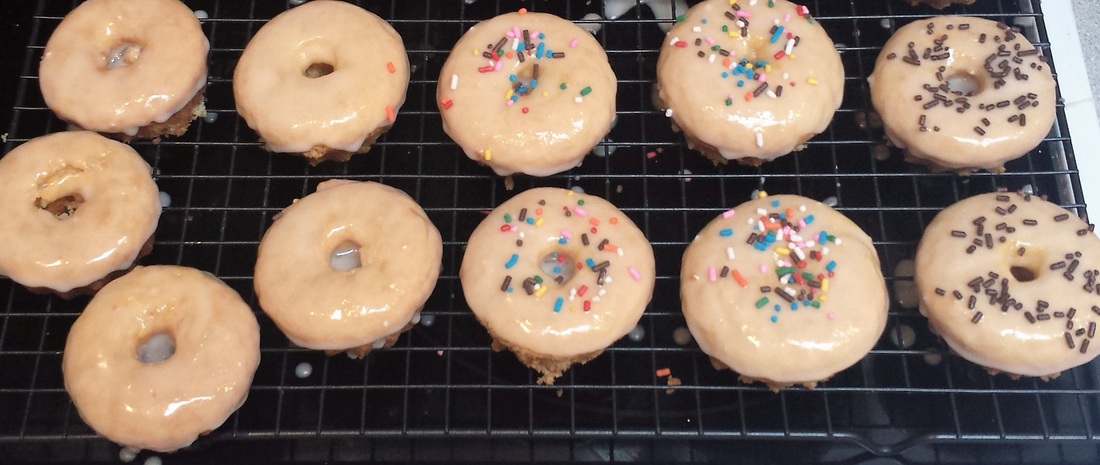 Doughnuts are not a thing I make often, because, well, honestly, I'm not a huge doughnut fan. Besides the fact that doughnut making can be tricky, getting the oil to the right temperature, and then frying them.... it didn't sound pleasant to me. So I got to work scouring the internets and I found so many recipes for doughnuts made with cake mix, and baked in an OVEN! Yay!! I came up with these little beauties. Now I do not have a doughnut pan, so I got creative and used my mini bundt pan and just didn't fill them as full as I usually do for mini bundt cakes. When they came out of the oven they had that perfect round doughnut top, and the bundt cake bottom made it easier for me to dip them in the glaze. Then, as you can see, I sprinkled about half in order to have variety for the kids. They were a hit! Everyone loved them, they inhaled them like ravenous vultures, and it was SO much easier! So, if you're in the need of some homemade doughnuts, look no further, this will make your life infinitely easier! This recipe is adapted from one I found on Jennifer Meyering's website! 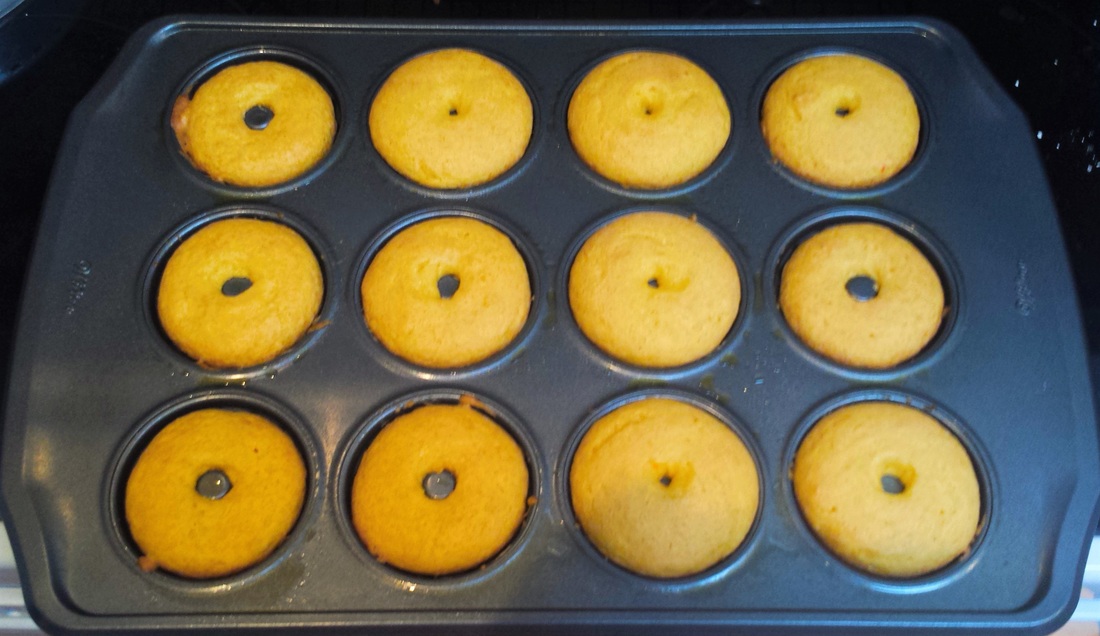 Click the button to download the recipe! 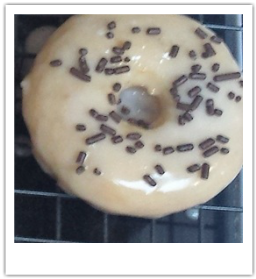
|
Creators of Hot Cocoa Bombs! (copyrighted)

Author
Helen Reynolds: Mother of six children , grandmother to eleven! I love to cook, craft and create things and I especially love doing that with my family, So, when my lawyer daughter, Lindsey, my artist daughter, Madalynn, and I came up with the idea of Hot Cocoa Bombs, this blog was born. Then, one more daughter, with her technical and science skills, plus creativity has joined in to round us out! Read more about us here! 
Click this link and visit 3WinksDesignShop on Etsy. Find our Hot Cocoa Bomb Idea Book, our For the Love of PIe e-book and more of our creations!

Amazon Gift Cards are the Perfect Gift!
    Archives
April 2024
|


 RSS Feed