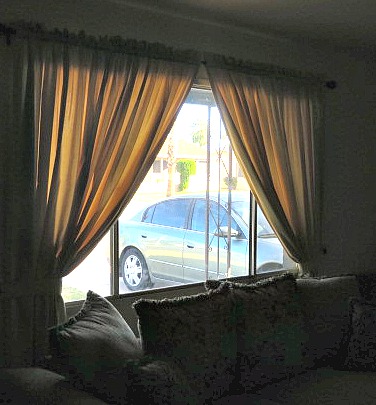
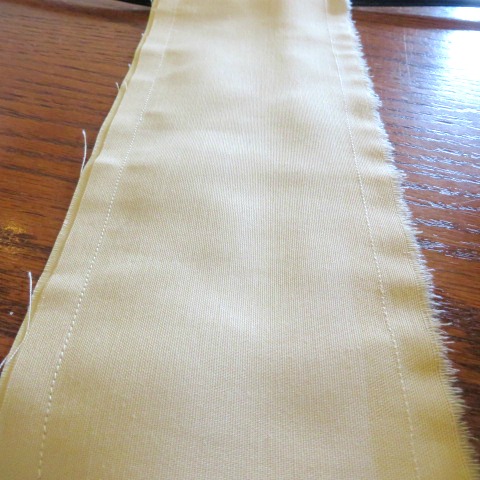
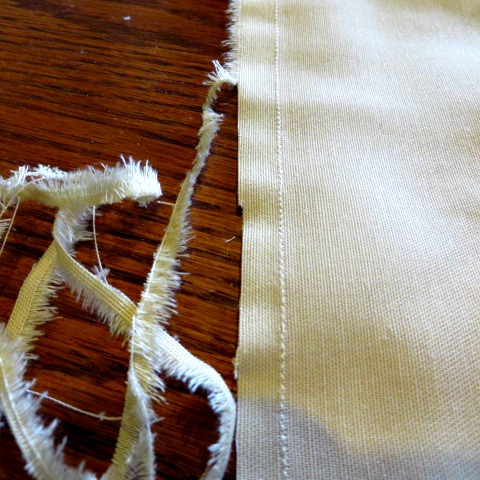
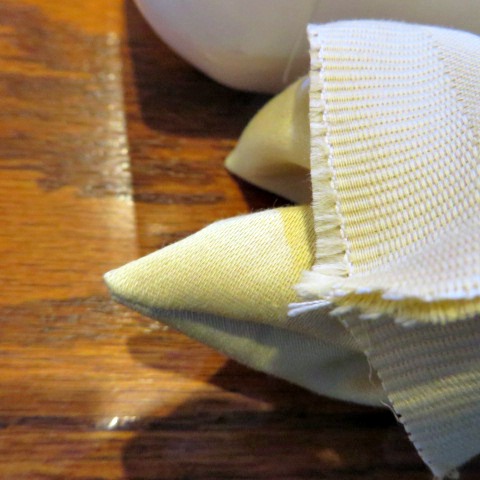
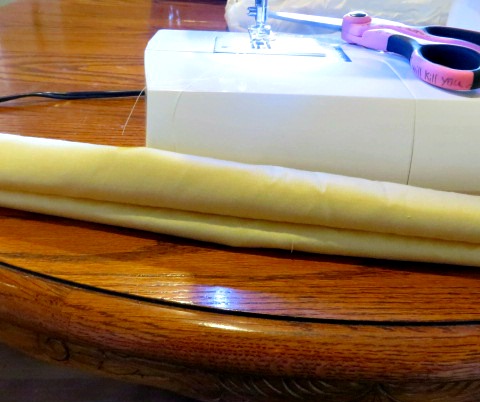
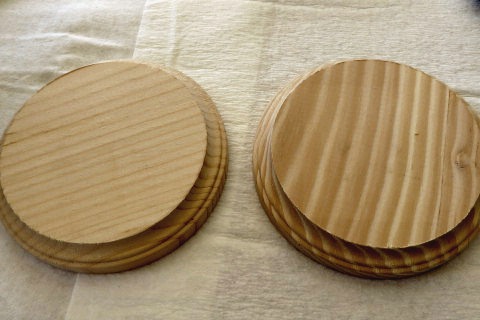
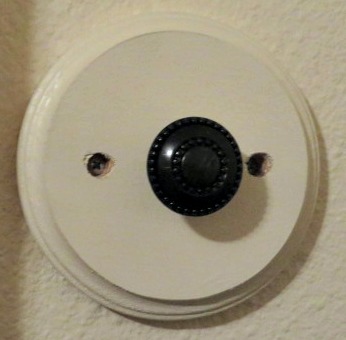
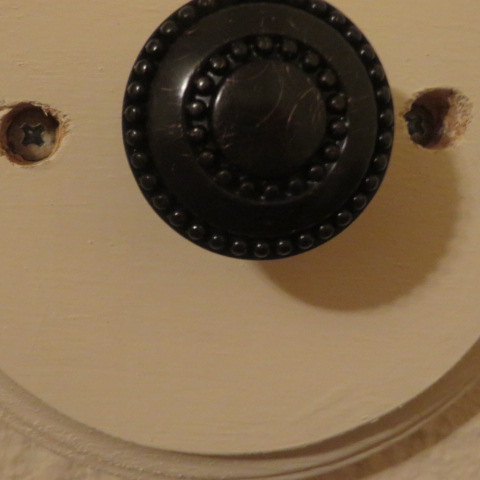
 It feels like forever since I put up the tutorial about sewing your own drapes and then promised to show you how to do the tie backs. Sorry! But, they are finally finished! Please excuse my photo because it is really difficult to take pictures of an open window in the daylight. On today's market, you can purchase hook-like contraptions to use as tie backs for your curtains. Here are some, and here. Or, you can purchase other types of ties, like these, these, or these .But, for some reason in my mind I envisioned same fabric tie backs, matching my drapes, that kind of buttoned on some sort of a knob or something. So, with my husbands help, that is what I did. First of all, let me show you how I made the tie backs. Just like when I told you how to sew the drapes, measuring is very important. But, it is up to you to decide how wide and long you want your tie backs to be. For mine, I used a tape measure to wrap around the drapes and hold them back to what I thought was a good look and took my measurement from that. Mine in this case are about 28" long (71 cm) and since I wanted a thicker band holding back the drape, they are 3" wide (7.5 cm). Remember to allow extra for a seam allowance, so I cut mine about an inch larger all around, then trimmed the seams afterwards. Click on the pictures for more directions. Now that the fabric part of my tie back was finished, I had to figure out what I wanted to have hold them on the wall. I looked and looked and the things that I thought were the most beautiful, went with my room's decor and would work well were actually drawer pulls! There are so many choices of drawer pulls, but the problem is, I wasn't going to be attaching mine to a drawer. That created a problem because you couldn't get to the end of the screw to add the nut to hold it in place like you would on a drawer. I told my husband my idea and dilemma and he didn't even bat an eye! He just came up with the solution. 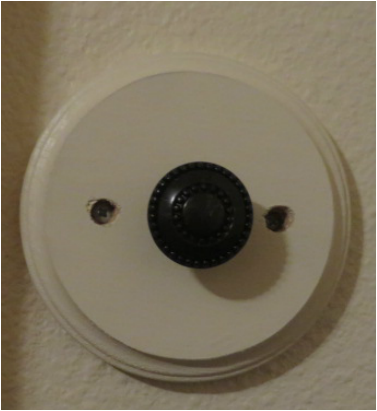 To cover the screws, he purchased some wood plugs that fit right in the holes. I will show you the picture in a minute. Next, I had to put buttonholes in my tie backs in order for them to work. Measure how large your knob is, and always make a test buttonhole on a scrap of fabric to see if you have the size right. When I went to make my buttonholes, I discovered that a piece of my buttonhole foot was missing! Argh! I had to manually make the adjustments on my machine to get them done., so don't expect closeups, Ha Ha! But, actually, they look pretty good, and the big knob covers most of them anyway. So, here is how they look! 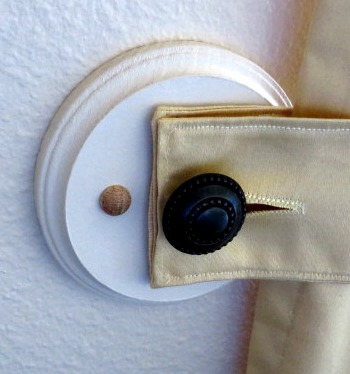 You can see the plug that covers the screws here. We will come back and paint them the same color as the medallion. I just wanted to post this today! 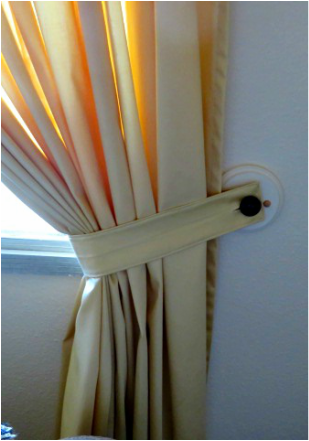 I really like the look! It is easy to blouse the drapes anyway that you want them to look. 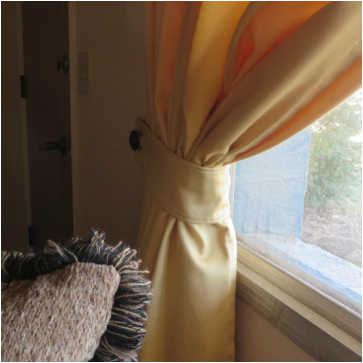 I love the width of the band as it holds back the curtains. So, there you have it! Not necessarily a faster, easier method, but the look is what I wanted and my husband and I worked and problem solved together to make it happen, and that is a big part of the fun in the process! Now, my front window is ready to frame my Christmas Tree when we put it up. By the way, if you were wondering about the writing on my sewing scissors, here is a picture. 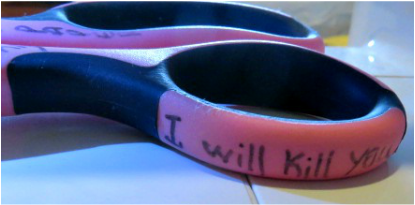 If you have gone through as many pairs of sewing scissors as I have, you will know why. (tee hee) 
5 Comments
11/8/2016 07:24:02 pm
These look REALLY great! Well done indeed. I've been wanting to do tie-backs for a while now - I may try your instructions.
Helen Reynolds
11/8/2016 09:09:20 pm
Thank you so much! Hope your attempt goes well for you. Thanks for stopping by. 11/15/2016 07:16:54 am
You make it look so easy!! Thanks for sharing on the Pleasures of the NW's DIY Party! 11/18/2016 12:59:10 pm
Thanks so much for posting this great tutorial to the #fandayfriday link party! #fdflinkparty. Hope to see more of your posts there soon!
Helen Reynolds
11/18/2016 02:02:43 pm
You are welcome! Thank you for hosting the party. Your comment will be posted after it is approved.
Leave a Reply. |
Creators of Hot Cocoa Bombs! (copyrighted)

Author
Helen Reynolds: Mother of six children , grandmother to eleven! I love to cook, craft and create things and I especially love doing that with my family, So, when my lawyer daughter, Lindsey, my artist daughter, Madalynn, and I came up with the idea of Hot Cocoa Bombs, this blog was born. Then, one more daughter, with her technical and science skills, plus creativity has joined in to round us out! Read more about us here! 
Click this link and visit 3WinksDesignShop on Etsy. Find our Hot Cocoa Bomb Idea Book, our For the Love of PIe e-book and more of our creations!

Amazon Gift Cards are the Perfect Gift!
    Archives
July 2024
|


 RSS Feed