|
This post contains affiliate links. I will be compensated for any purchases made through those links at no additional cost to you. Thank you for your support! 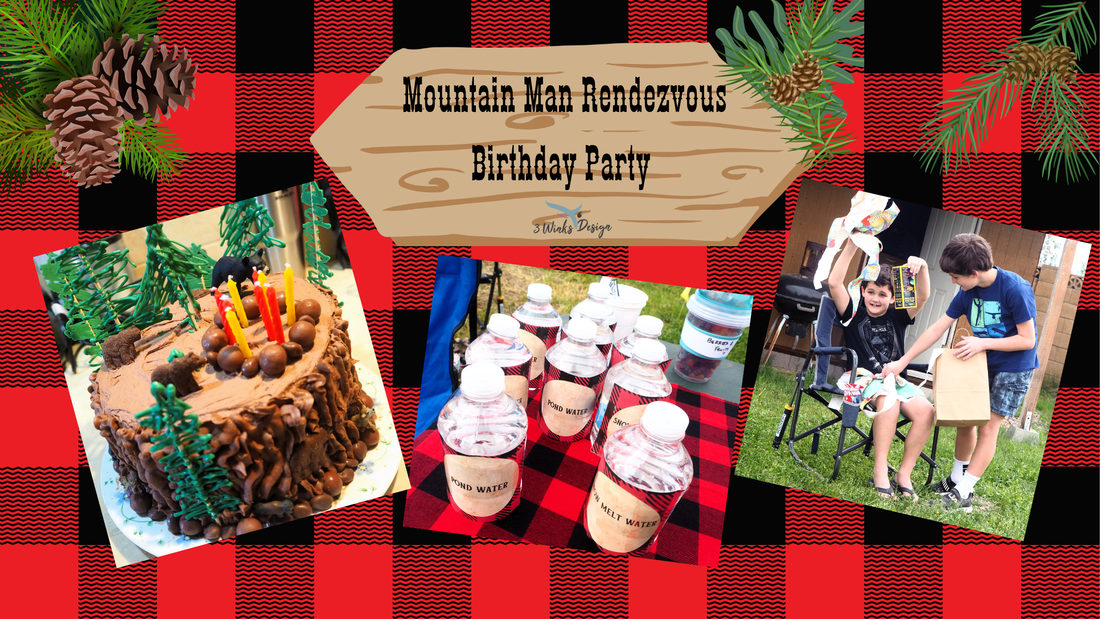 Between a wedding and a birthday, we are in the party mode around here!
That happy little boy up there turned 9 this past week, so we threw him a birthday party! It was so much fun to plan as well as execute. Today I'm sharing all about it!
3 Comments
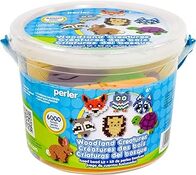
THIS POST CONTAINS AFFILIATE LINKS. WE WILL BE COMPENSATED FOR PURCHASES MADE THROUGH THOSE LINKS AT NO ADDITIONAL COST TO YOU. ALL VIEWS EXPRESSED ARE OUR OWN. Our 6 year old daughter is really into arts and crafts. I can always guarantee the toys she is going to play with everyday are her Legos and her arts and crafts bin. If she has a spare moment she will pull out paper and pen and draw. So when she had a Daddy Daughter Date night they decided to pick out a craft project they could do together. She got really excited about Perler Beads, and so did her creative dad. They spent the night making cute scenes of unicorns and rainbows to decorate her new room with! 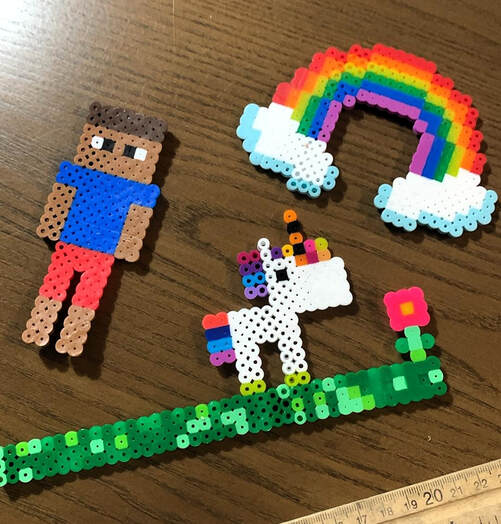 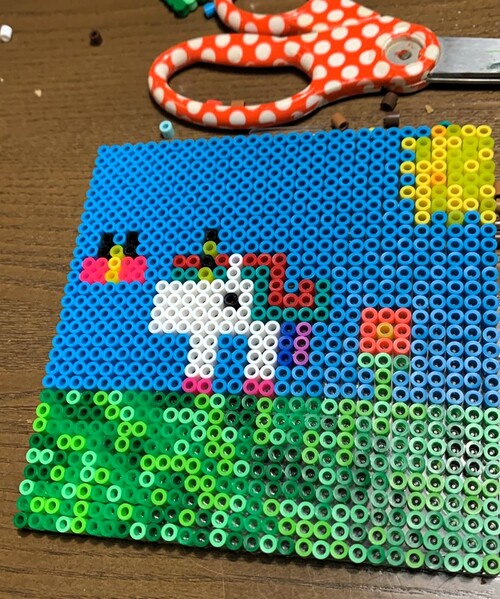 Then the Perler Beads came out to be used everyday for the whole of the next week. Many MineCraft characters, more unicorns, Godzilla, and even a big Megaman made their appearance. But I was hitting a creative block of what to make to join in on the fun. That’s when my daughter said she was going to make her own bracelet. 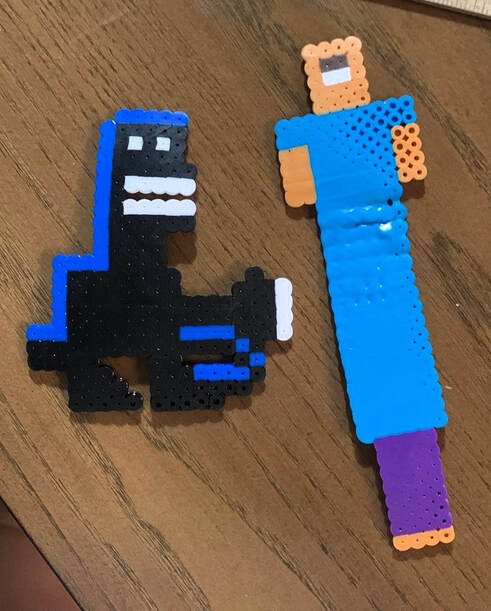 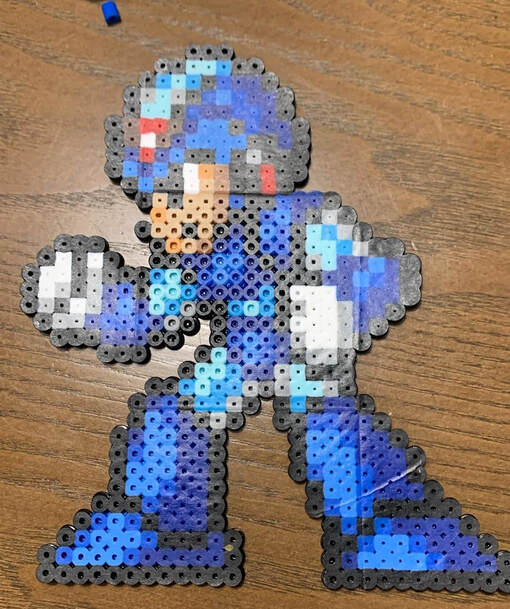 She designed a very cute simple square bracelet for herself and it reminded me of the fun earrings I used to wear in high school. My freshman year of high school those large chandelier earrings were in vogue and I loved to wear them. (Side note: One of the reasons I loved them was the nostalgia they provided from this picture book we had about getting pierced ears. Lots of fun earring designs in there!) And so I decided to design and make little, funky, colorful earrings. It was so easy and fast. I made three pairs for myself and then used a jewelry making kit my cousin gave me to attach them to hook earrings. Here is a kit I found on Amazon. And here is a kit specifically for jewelry! To make the earrings I used a square base plate and whatever Perler Beads I liked to make cute designs on the plate. If you decide to do this, make sure the beads are adjacent to each other so they will melt together. After you have the design you like, use a hot iron and a piece of parchment or wax paper over your beads. We found it worked best to Let it melt the beads for a few seconds before trying to move the iron around. Otherwise the beads would come loose and your design could be ruined. Once the first side is done flip the base plate over and remove your designs. Put the melted side down on another piece of parchment. Replace the parchment over your design and melt the other side. When that’s finished, set something heavy over your earrings to keep them flat (if that’s the look you’re going for. I accidentally melted the hole away in my peeler beads so I just heated up a needle and melted a new hole in the top bead. You could also attach post earring backs or clip on earring backs with glue or by melting the plastic and pushing the post into it, though I have not tried that method. 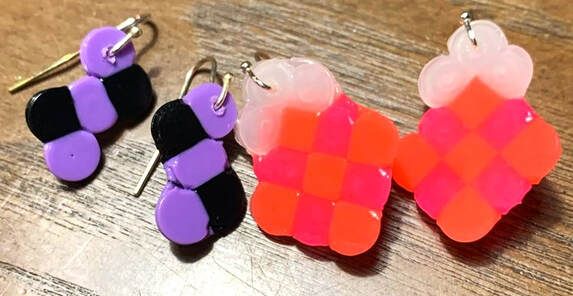 The earrings came out so cute and fun! My daughter decided to make me more and we’re going to get some clip-on backs to add to some of the earrings for her to wear.To make the earrings I used a square base plate and whatever Perler Beads I liked to make cute designs on the plate. If you decide to do this, make sure the beads are adjacent to each other so they will melt together. This would be a fun activity to do at a birthday party. I love the kind of party favors that will last more than a week and will be something the party goer can use over and over again. Or do it for a Girls Night with your friends! It would be an awesome Galentine’s Day Activity. Or just on your own, the possibilities are endless! We've found other sources of ideas for Perler Earrings, too! Check these out: Maker Mama The Thinking Closet Here are some great Perler Kits to help you with designs:
 This post contains affiliate links. I will be compensated for purchases made through those links at no additional cost to you. All views expressed are my own. Thank you for your support! 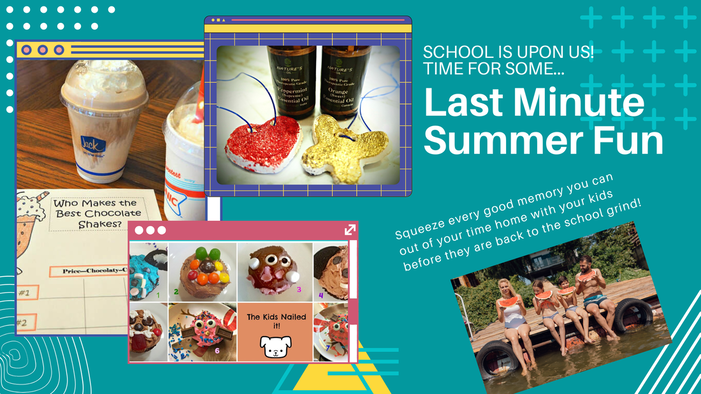 I was never the Mom who could hardly wait for her kids to go back to school. I have always loved having my entire family around me at home as much as possible, creating strong family ties and making memories. I know that some families have had school start already, others are starting this week, some not until much later in the month. But, the time flies when it comes to family time together and some children really stress out about starting school. Giving them that feeling of family togetherness, love and support can help them cope with life at school as the new school year begins. Even though I hated sending my children back to school on the inside, on the outside I tried to be excited and encouraging and let them know that our family was there to help them be successful. We were blessed over the last couple of weeks to have some of our grandchildren with us during these last days before school. We had so much fun together going to the waterpark, swimming and crafting. We played old school Wii and had bowling tournaments and fun on the Wii Fit. We watched our watermelon grow in the garden (no ripe ones yet, darn it!). We also did 1/2 hour of reading every morning AND, we did a bunch of little activities that cost very little, but were super fun! Having cousins together was also a highlight of our time together. My message to you in this post is to find little ways to help your kids squeeze every minute of fun and enjoyment out of their summer. Even if they have already started school, many of these activities could easily be done in the evening or on a weekend and would be a respite from the homework grind!
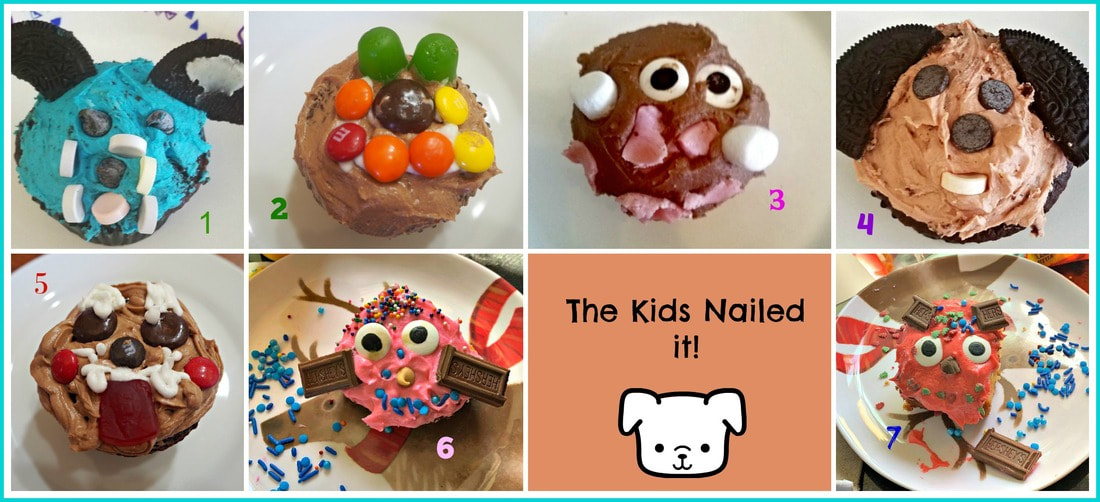 The adults also joined into this competition! 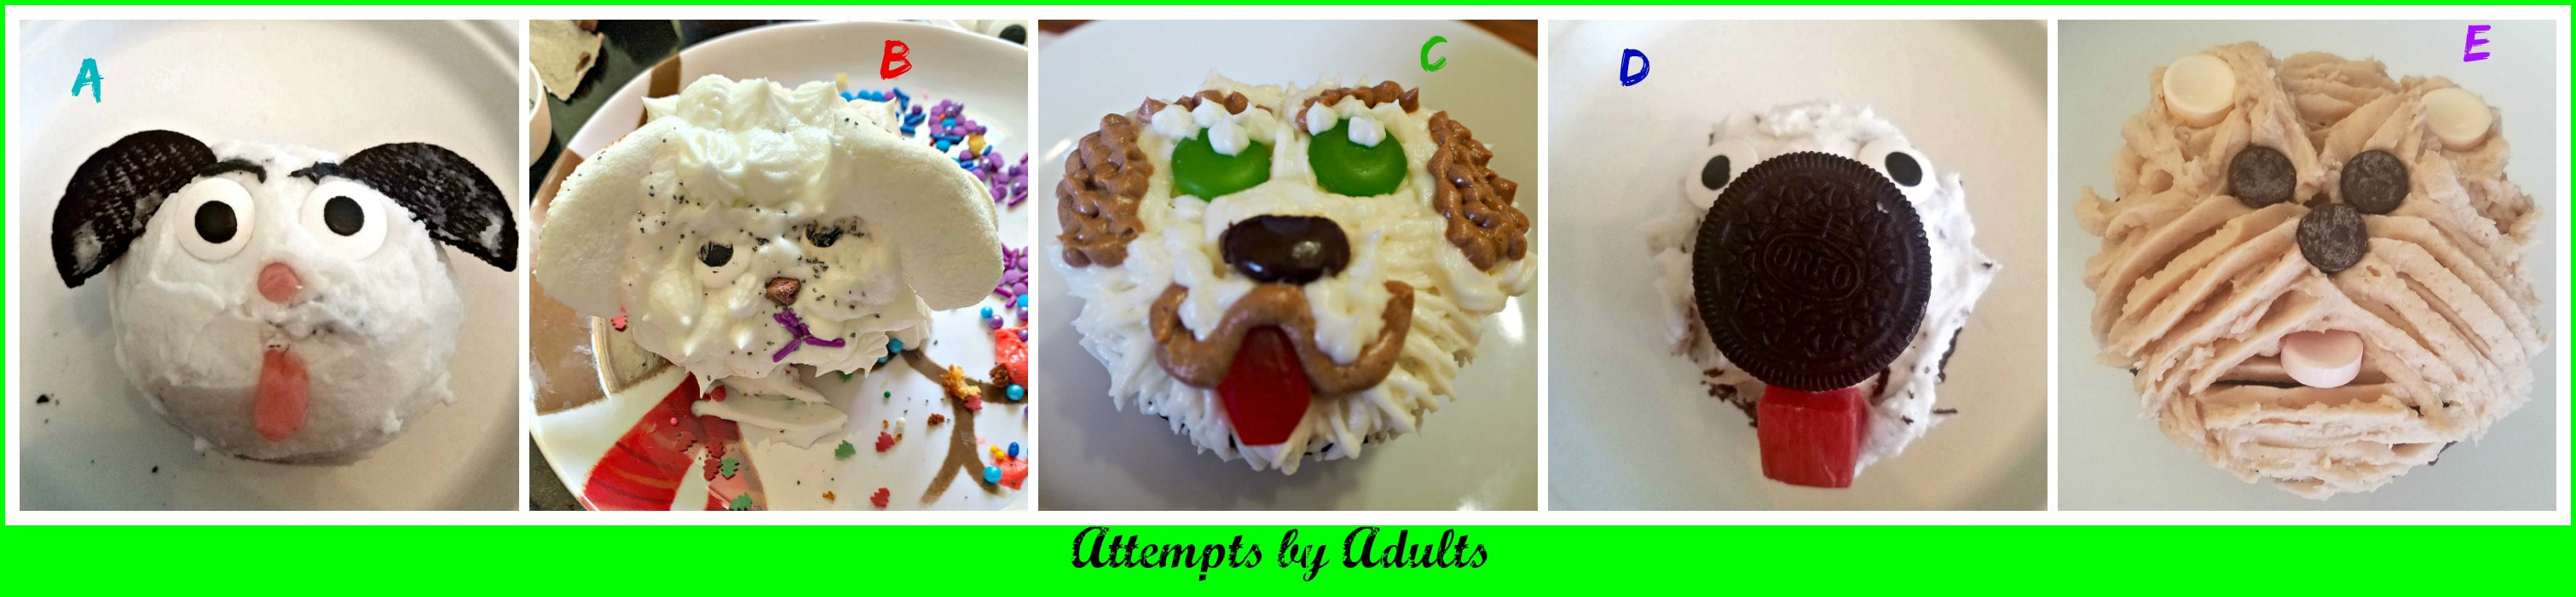
Do you have any end of summer traditions that you do with your kids that squeezes in one more fun activity that starts them out in school with happy memories? Please share them with us in the comments!
This post contains affiliated links. I will be compensated for purchases made at those links with no additional cost to you. Thank you for your support. 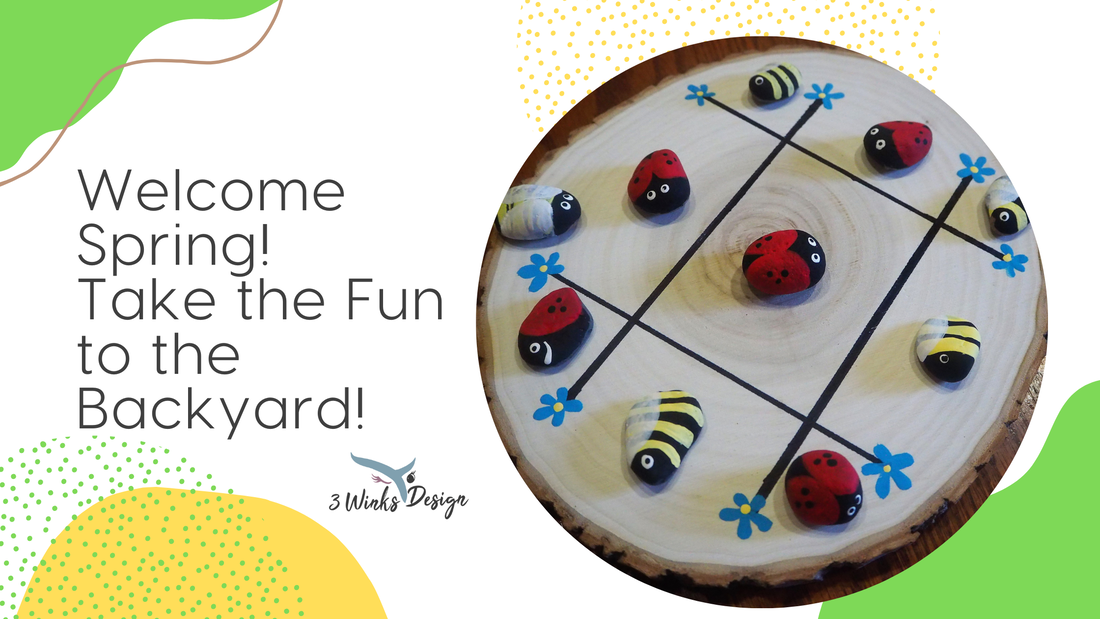 Like me, you've probably seen a ton of variations of this tic-tac-toe game all over Pinterest. I have always wanted to make one for my backyard because I think my grandkids will get a kick out of it. The Spring weather that is finally happening motivated me to finally complete this project. I am so happy with how it turned out!
|
Creators of Hot Cocoa Bombs! (copyrighted)

Author
Helen Reynolds: Mother of six children , grandmother to eleven! I love to cook, craft and create things and I especially love doing that with my family, So, when my lawyer daughter, Lindsey, my artist daughter, Madalynn, and I came up with the idea of Hot Cocoa Bombs, this blog was born. Then, one more daughter, with her technical and science skills, plus creativity has joined in to round us out! Read more about us here! 
Click this link and visit 3WinksDesignShop on Etsy. Find our Hot Cocoa Bomb Idea Book, our For the Love of PIe e-book and more of our creations!

Amazon Gift Cards are the Perfect Gift!
    Archives
April 2024
|
 RSS Feed