3 Winks Design
  • Home
  • About Us
    • Contact Us
  • Printables
  • Where I Party
    • Places Featured
  • Contests
    • Writing Challenge
  • From Cover to Reel
    • Show Notes

Renny's Recipes: Honey Lemon Salmon

2/23/2017

8 Comments

 
I am back! Sorry I was gone last week. Moving is the absolute worst thing ever. This time I am moving from a house to a house, which is exciting and difficult at the same time.  

Anyway, you didn't know this, but I can read your mind. I know you were thinking, "Lindsey, I want healthy recipes, but I am tired of always using chicken. I need other protein options." I heard you, and I get it. Chicken tends to be our protein of choice because, well, it's delicious and versatile. PH calls it "girl food" because I guess women tend to prefer it to things like steak. (Although, I like steak!)

Well, I am here with some other healthy, tasty protein options for you! (my vegan friends, I see you and I love you. Don't leave me, I promise, I am not ignoring you. Recipes for you will be forthcoming!)
This week's recipe uses Salmon!
Picture
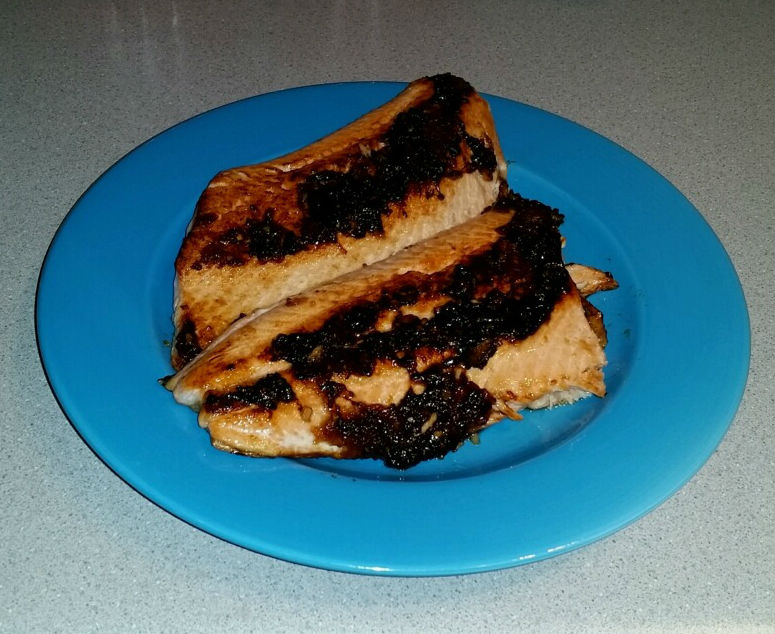
Salmon happens to be my mom's favorite fish, so it is one that I am quite used to using. I found this recipe on Pinterest and decided I wanted to try it out.
I bought a nice large piece of salmon at Fry's (the best grocery store in town and also the world) and do you know what happened? I got home and realized I had no lime juice.
PH had used it all.
Yes, we had no limes. No, I was not going to go back to the grocery store.
Instead, I used the basic premise of the recipe and kind of did my own thing.
Picture
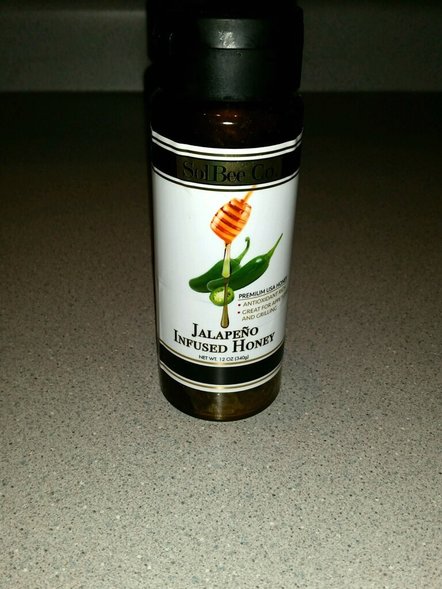
One of those things was this jalapeno honey. PH and I bought it in New Mexico when we went for his cousin's wedding. It has a nice kick to it, which adds great flavor to the dish. Also, if you had red pepper flakes you'll get a burn on both ends. You know what I mean. Jalapeno has a more immediate burn, and those red pepper flakes don't start burning until after the bite.
When PH came home, he loved it! He also heated up a few corn tortillas and made his own little fish tacos with it. So, there is another option for you. He used our mini skillet pan that I talked about in this post to cook them. He ate a lot of fish. Which is a good thing!
Picture
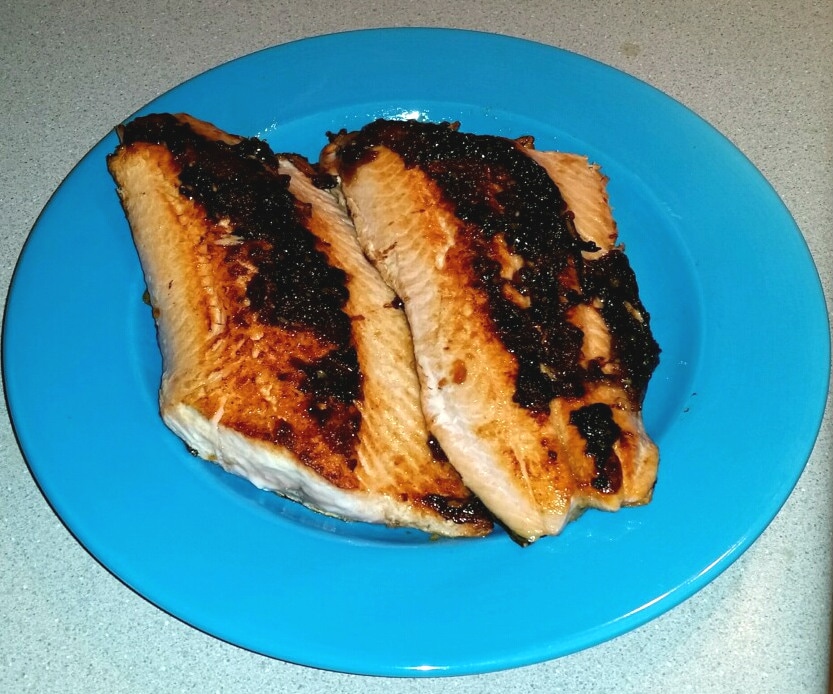
So here you go, a healthy fish recipe. Get into the kitchen and shake up your chicken blues!
Jalapeno Honey Lemon Chicken
Shop this Post:
8 Comments

Pan Roasting Chicken

2/22/2017

3 Comments

 
Picture
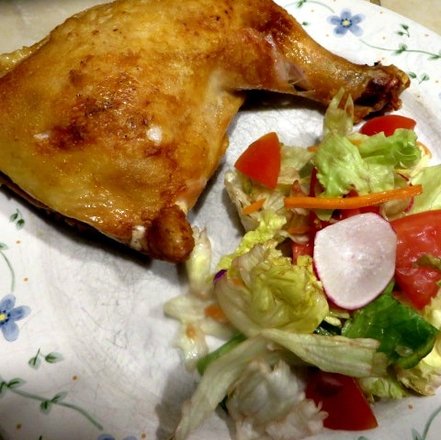
          Busy moms often have so much going on that there is little time to get dinner on the table.  You know it isn't healthy to stick to hot dogs or cereal, but sometimes, you really need something quick! Trying to be frugal is important as well, so buying fast food or going out isn't in everyone's budget, nor is that a healthy way to eat, and it certainly doesn't bring the family around the table at dinnertime for those family times that we all need.  That is why I was excited to find this method of pan roasting a chicken in a cast iron skillet in about half an hour.

         This recipe is taught by Chef Kevin Gillespie, the winner of Fan Favorites on Top Chef! He just seems like such a down to earth, kind person and he really knows how to cook!  I remember rooting for him on his season.
       In this lesson, Kevin teaches how to cut up a chicken and brown it in a cast iron skillet.  Just like Chef Anita Lo taught in this post about Chicken Cacciatore,  Kevin reiterates that you always start browning presentation side down. The neat thing about this recipe is that you only season with salt and that is it, yet the flavor is so good!  Chef Kevin preheated his skillet quite a while before adding the oil.  (We love lodge brand cast iron. Here and here are a couple of links besides the one above.) Kevin browns the chicken in grapeseed oil, which I don't have, but he says it is okay to use vegetable oil.  Do not use olive oil or butter because they will burn.  One other thing he taught that I found fascinating is that you should dry your chicken pieces with a paper towel really well before putting them in the oil or they won't brown as well and they will stick to the pan more if they are wet.  I did what he said and I had no sticking problems!  
​      

Picture
Here is my first side all browned.
         After the chicken is well browned on both sides, you put it into a 500 degree oven for about 15-20 min.! I was shocked!  I have never had my oven set all of the way to 500 degrees!  It kind of scared me! He even said that it would set off the smoke alarms! You should see the smoke when he pulls his chicken out of the oven!  Mine got smokey, but the alarms didn't go off.   
Picture
      My husband was so excited to see this chicken when he got home from work!  He loves a good chicken, roasted or fried.  It was very delicious.  I didn't cut up a whole chicken for this like Chef Kevin did.  I had leg quarters, so that is what I used.  But, what a great way to get a nice roasted chicken and salad on for dinner in about half an hour! 
       Now, one more thing before you go!  Be sure to subscribe to our blog and get access to our secret free printable page that we have just started!  Here is a preview of our first give away to subscribers:
Picture
We had to start with an owl, of course.

Just be sure to subscribe and we will send you the link! 

Subscribe to Newsletter
Last but not least, I just had to show you this skillet, Ha Ha! For your rock and roll chefs! 
3 Comments

Large Batch Sprouted Wheat Bread

2/21/2017

10 Comments

 
Picture
         So, you've put the time and energy into sprouting your own wheat and grinding it into flour.   Did you do all of those steps just to make 1 loaf of bread?  I think not!  I decided that this time I would make a large batch of bread and freeze some so that we would have it for a while before I went through the entire process again.  It isn't a difficult process, but lets face it, large batches are just as easy to make as small ones and that is a good use of time and energy.  I gave you a single batch recipe here.  I mean, that would be great for people with those single loaf bread machines and maybe one person or a couple.  But, for more people than that, a larger batch of bread just makes sense. 
            The recipe I have will make 6 loaves of bread.  Since I promised to share my glitches and all today, here is glitch #1.  I only have 5 loaf pans.  I made 5 loaves from this recipe so consequently my loaves came out humongous!  I should have just done one loaf free form or made it into rolls.  It didn't alter the taste at all, but I had to bake these loaves much longer to make sure that they were done in the middle.
              To make such a large batch, you need a large bread machine, or Bosch.  It looks like this.
Picture
Of course there is a lid as well. This is a knock off brand that works great! There are many varieties of machines like this.
         My recipe for this large batch of bread gives the exact order that the ingredients are to go in the mixer.  It may seem a little different from other bread recipes, but the results are amazing.  I adapted this recipe from one given to me by my good friend Tracy Moore.  Click on the button for the recipe.
Moore Family Bread Recipe (adapted)
        Now it is time for glitch #2.  If you will remember, in yesterday's post, when I told you how to sprout the wheat, I told you that I had sprouted 9 cups of wheat.  One of the videos I watched had informed me that one cup of wheat would make about 1 1/2 cups of flour.  Like a goofball, I didn't check my recipe first and I just assumed that 13 1/2 to 14 cups of flour would be plenty.  It wasn't. This recipe starts with 8 cups of flour and then by the end you add 8 or 9 cups more.  Luckily, I had a little bit of the King Arthur Flour left over that I was able to combine with my own self-sprouted flour.  But, in the end, I had to add about 3 cups of all purpose flour to get the right consistency of dough.  So, for all of you purists out there, I am sorry!  But, because I have done this before with the one loaf recipe, I know that the results with just the sprouted wheat flour are amazing.  There is plenty of sprouted wheat flour in this batch to give us great health benefits, so I am not going to feel badly about this mistake.  Next time I will either sprout more wheat or make a slightly smaller batch.  
             The really nice thing about using a bread machine like the one I used is that there is no kneading needed!  (Say that 3 times real fast!)  You let the machine do the work for you for as long as it takes to get a stretchy, not too sticky dough.  Then, you roll it out onto an oiled surface and divide it into your pans.  
Picture
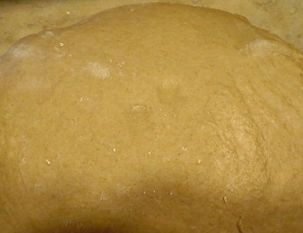
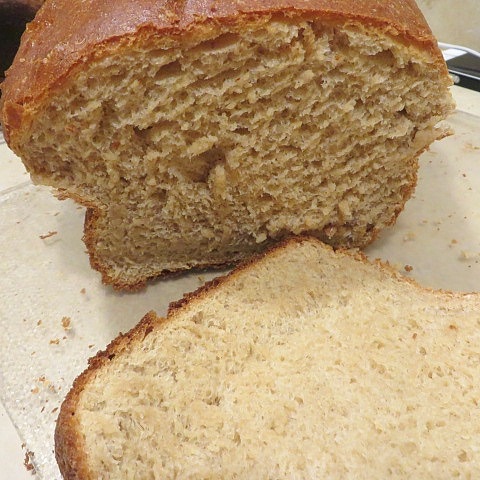
Here is the massive blob of dough on my oiled counter.
Picture
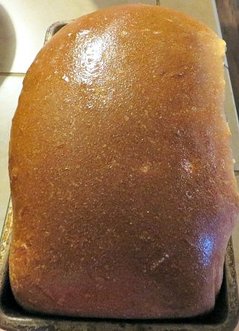
Here it is in the loaf pans. See, they didn't look so huge at this point.
               I covered the pans with a towel and let them rise.  I figured that they would take an hour or and hour and a half to double in size.  But, in 30 min., Madalynn went into the kitchen and asked, "Mom, when are you going to bake these?"  I replied, "When they double in size."  Then I looked and she looked at me wide-eyed because they were already large and bulging up over the pans.  That was fast!  I quickly heated the oven up to 350 degrees and popped them in.  As I said earlier, I had to bake them a little longer than the recipe calls for because they were such huge loaves! 
Picture
Picture
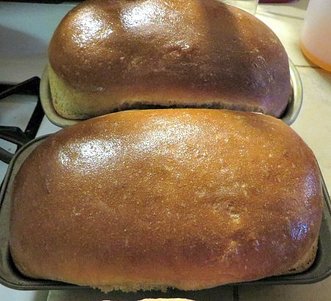
And there were 2 more of them!
             Once, my friend Rhonda, who got me interested in the sprouted wheat technique, told me that the first loaf you cut into is the sacrificial loaf that everyone eats right away.  Just like the story of the story of the Little Red Hen, there are always plenty of people ready to help sample the bread when it comes out of the oven! It is a good thing that around here they are willing to help, too. The butter and honey spread on the warm bread is hard to resist.
                As I mentioned in the 1 loaf recipe, it is hard to believe how light and fluffy this bread is and what a mild flavor it has.  Combining that with the health benefits of sprouted wheat makes this the perfect bread! I call that a great use of time and energy! 
Here are some other bread posts you might enjoy! 
Picture
Picture
Beautiful Braided Bread
Picture
Ecuadorian Cheese Bread
10 Comments

Sprouting Wheat For Flour

2/19/2017

10 Comments

 
Picture
         My Friend, Rhonda, has been making sprouted wheat flour bread for her family for a few years now.  While her bread tastes really good, when I heard the process I thought, "No way!"  It sounded so time consuming and took so many steps!  Then, one day she brought me a bag of King Arthur Sprouted Wheat Flour.  I made the bread in my Kitchen Aid, and talked about it a little over a month ago on this post.  It was some of the best bread I have ever made, and I was converted.  I decided that I had to learn and try the process of making my own sprouted wheat flour.  
         Rhonda was ready for me when I approached her.  She had sheets of information and a cookbook to help me learn.  She even loaned me a dehydrator in case mine wasn't large enough. The Cookbook she loaned me is called, The Diet Rebel's Cookbook, by Jillayne Clements and Michelle Stewart.   You can order it at that link in paperback or on your Kindle.  It holds a fountain of information for "eating clean and green" .  I used it as a reference, as well as the info Rhonda told me and from all of the YouTube videos I watched in preparation for trying the process.  
               To begin, you need whole wheat berries.  I happened to get a really good deal on some from Costco the other day.  But, from what I understand, not all Costcos carry it.  I found something that looks very interesting on Amazon here, but there are a myriad of sources to order whole grains from.  In my first blog post about baking bread with sprouted wheat flour, I listed some of the health benefits that you get by using this method.  Since that time there are a few other things that I have learned.  One of the main things I have learned is that all grain contains phytic acid in its bran.  Phytic acid reduces our bodies ability to absorb nutrients from the grain.  So, when we think we are getting all of these great vitamins from eating whole grain foods, we are actually only absorbing 80% of what we think we are getting. For a  fascinating article about why in modern times there are more grain allergies in the USA, read this on Wellness Mama.  Do not despair! Soaking, rinsing and sprouting your grains reduces the phytic acid and allows you to absorb and more easily digest the whole grain.  So, that is STEP 1:  Soak and rinse your grain.
               
Picture
First, soak your grain. I have heard a variety of amounts of time to soak, all of the way up to 24 hours. I forgot about the soaking step until after I was into the process! I did soak it for about 5 min. Then, I put portions of it at a time into a wire colander and rinsed it well. Oh well, next time I will do better.
                 After rinsing the grain, I put it in a big metal bowl lined with a wet towel and covered it with the wet towel.  Please realize that this is my first time doing this process and in retrospect, I should have perhaps used a large colander to sprout in, but actually, the bowl method worked well for me. At this point, I just left the bowl on my counter to do its business and I went about the rest of my day.  Except,  after about 3 hours, I dumped the wheat out of the towel into the bowl and I rinsed and drained it.  This time I just put the damp towel over the top of the wheat.  I did the rinsing and draining 2 more times before I went to bed that night.  Just before going to bed, I began to see the ends of the wheat start to look like it might be beginning to sprout!  I decided I would let it sprout over night and see how it looked in the morning.
Picture
Look! Do you see those little sprouts coming out of the ends of the wheat kernel? That is what you want. You don't want huge sprouts because it will not make flour that will hold your bread together when you bake it. These little berries are soft and tasty at this point, so don't snack on them all or you won't have enough to grind into flour.
                  Step 2:  Dehydrate   
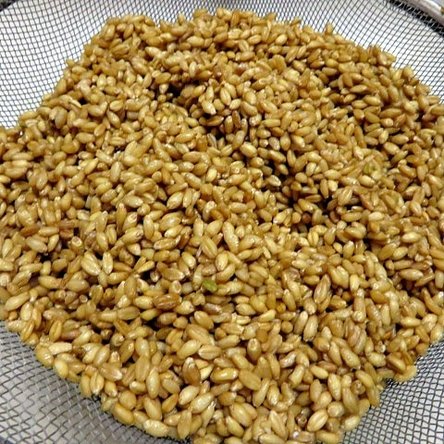
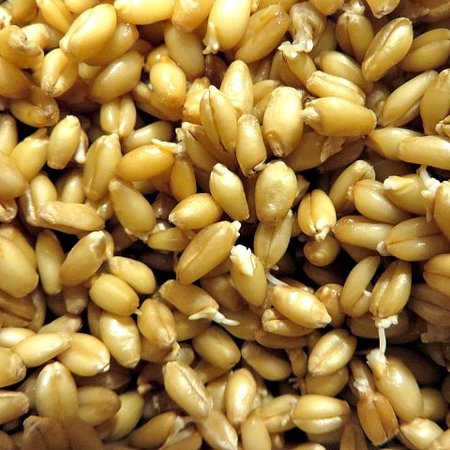
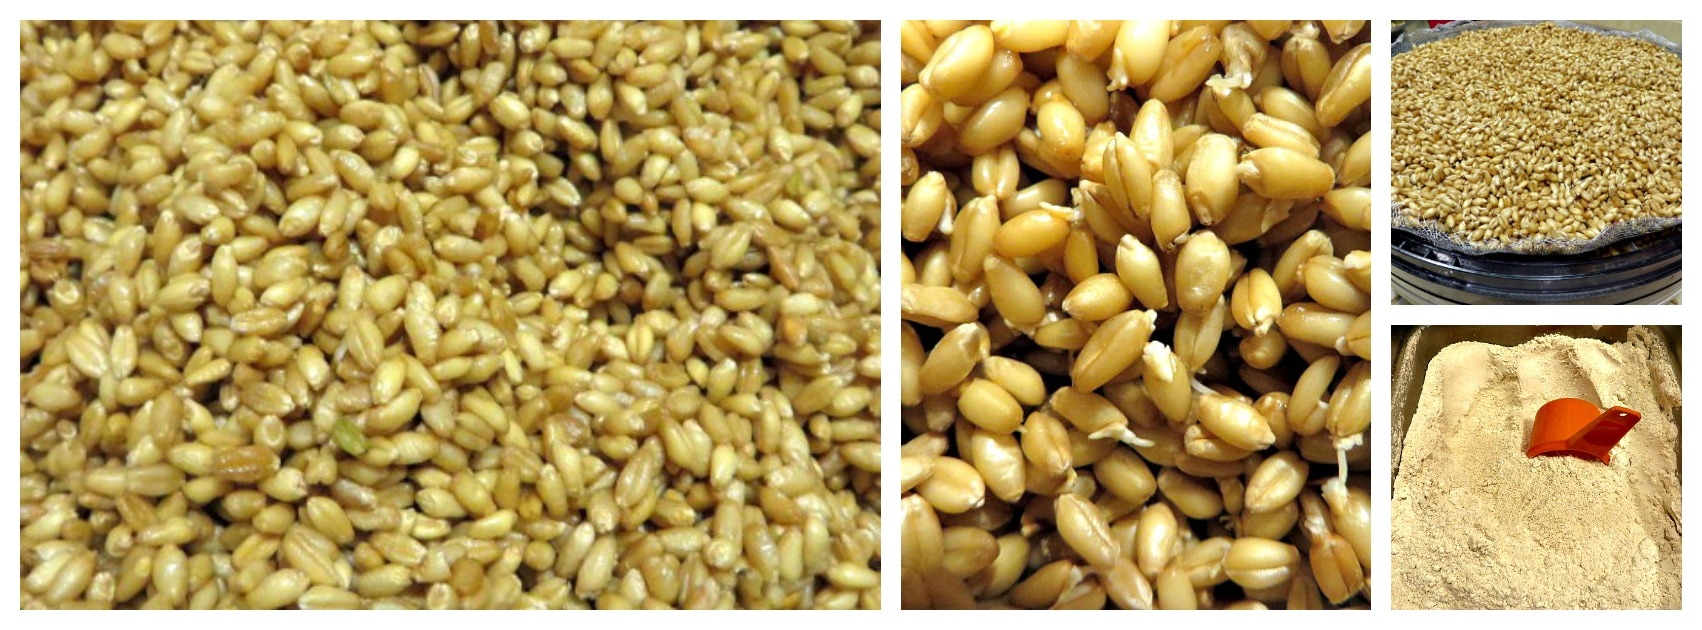
                I sprouted about 9 cups of wheat.  I was able to fit all of that in my dehydrator. I have had my dehydrator for a long time, and I couldn't find it on Amazon, but here is a similar one. I don't know if it holds the same volume as mine did.  Rhonda had loaned me a rectangular one, similar to this,  just in case, but I didn't need to use it. After grinding the wheat and making a large batch of bread, I actually should have dehydrated more than this, so I would have needed the two dehydrators.  
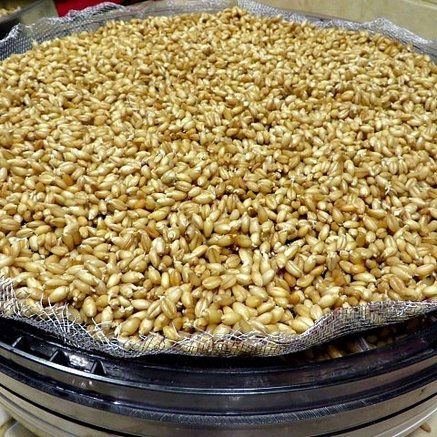
                 The trays in our dehydrator had wide slots that the wheat would have fallen through.  We purchased some aluminum screen and cut out liners for each tray.  I crimped up the edges to help hold the wheat on the tray.  Then, I spread the wheat on the trays, only 2-3 kernels thick, and turned on the dehydrator. 
          
Picture
I thought that this step might take up to 2 days to complete, but they were totally dry in about 7 hours. We changed the trays around part way through the dehydrating process. Try biting a kernel from each tray to test to see if they are crunchy. Wet grain will gum up your wheat grinder!
                    Step 3:  Grinding into Flour
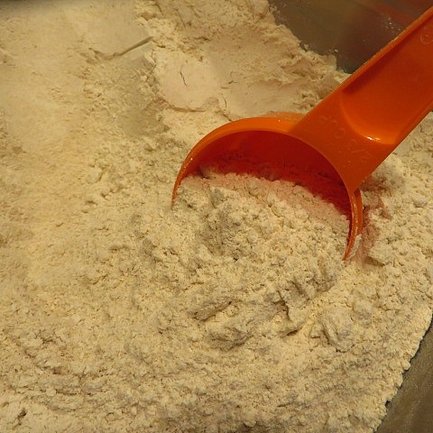
                    There are many wheat grinders available on the market.  I have a Magic Mill Grinder.  You can find it on Amazon here.    The hopper easily held the flour from my 9 cups of wheat.  We also have a hand grinder like this one.  It grinds a nice, fine flour, but that would have been a lot of cranking to grind 9 cups of wheat.  The electric grinder made short order of it.
Picture
Here is the wheat going down the hopper into the grinder. I noticed that the sprouted wheat even smelled differently as it was grinding than the regular whole berries normally do. It was a more mild, earthy odor.
                And, Voila!  Here is the wonderful sprouted wheat flour!  
Picture
               Once my wheat was ground, I wanted to bake my bread right away because that is when the nutritional value is at its highest.  Come back for tomorrow's blog post when I will show you how I made the bread.  I think Rhonda will be so proud of me!  There were a few glitches, (which I will explain tomorrow), but over all this has been a wonderful success!  It seems daunting at first, with a lot of steps.  But, remember, each step only takes a few minutes to complete. (I mean, I saved my screen liners, so I won't have to make those again.) While each step happens, you can go on your merry way doing whatever you need to do! If you try it and taste the results, I think that you will convert to this method, too.  Come back tomorrow to see the delicious results! 

10 Comments
<<Previous
Forward>>
    Picture
    Creators of Hot Cocoa Bombs!  (copyrighted)
    Subscribe to Our Email!
    Picture

    Author

    Helen Reynolds: Mother of six children , grandmother to eleven!  I love to cook, craft and create things and I especially love doing that with my family, So, when my lawyer daughter, Lindsey, my artist daughter, Madalynn, and I came up with the idea of Hot Cocoa Bombs, this blog was born.  Then, one more daughter, with her technical and science skills, plus creativity has joined in to round us out!  Read more about us here!
        

    Picture
    Click this link and visit 3WinksDesignShop on Etsy. Find our Hot Cocoa Bomb Idea Book, our For the Love of PIe e-book and more of our creations!


    Save on Wedding Favors @ Beau-coup.com
    Weebly - Websites, eCommerce &amp; Marketing in one place.

    RSS Feed

    Archives

    May 2022
    April 2022
    March 2022
    February 2022
    January 2022
    December 2021
    November 2021
    October 2021
    September 2021
    August 2021
    July 2021
    June 2021
    May 2021
    April 2021
    March 2021
    February 2021
    January 2021
    December 2020
    November 2020
    October 2020
    September 2020
    August 2020
    July 2020
    June 2020
    May 2020
    April 2020
    March 2020
    February 2020
    January 2020
    December 2019
    November 2019
    October 2019
    September 2019
    August 2019
    July 2019
    June 2019
    May 2019
    April 2019
    March 2019
    February 2019
    January 2019
    December 2018
    November 2018
    October 2018
    September 2018
    August 2018
    July 2018
    June 2018
    May 2018
    April 2018
    March 2018
    February 2018
    January 2018
    December 2017
    November 2017
    October 2017
    September 2017
    August 2017
    July 2017
    June 2017
    May 2017
    April 2017
    March 2017
    February 2017
    January 2017
    December 2016
    November 2016
    October 2016
    September 2016
    August 2016
    July 2016
    June 2016
    April 2016
    March 2016
    February 2016
    January 2016
    December 2015
    November 2015
    October 2015
    September 2015
    August 2015
    July 2015
    June 2015
    May 2015
    April 2015
    March 2015
    February 2015
    January 2015
    December 2014
    November 2014

Proudly powered by Weebly
  • Home
  • About Us
    • Contact Us
  • Printables
  • Where I Party
    • Places Featured
  • Contests
    • Writing Challenge
  • From Cover to Reel
    • Show Notes