My Friend, Rhonda, has been making sprouted wheat flour bread for her family for a few years now. While her bread tastes really good, when I heard the process I thought, "No way!" It sounded so time consuming and took so many steps! Then, one day she brought me a bag of King Arthur Sprouted Wheat Flour. I made the bread in my Kitchen Aid, and talked about it a little over a month ago on this post. It was some of the best bread I have ever made, and I was converted. I decided that I had to learn and try the process of making my own sprouted wheat flour.
Rhonda was ready for me when I approached her. She had sheets of information and a cookbook to help me learn. She even loaned me a dehydrator in case mine wasn't large enough. The Cookbook she loaned me is called, The Diet Rebel's Cookbook, by Jillayne Clements and Michelle Stewart. You can order it at that link in paperback or on your Kindle. It holds a fountain of information for "eating clean and green" . I used it as a reference, as well as the info Rhonda told me and from all of the YouTube videos I watched in preparation for trying the process.
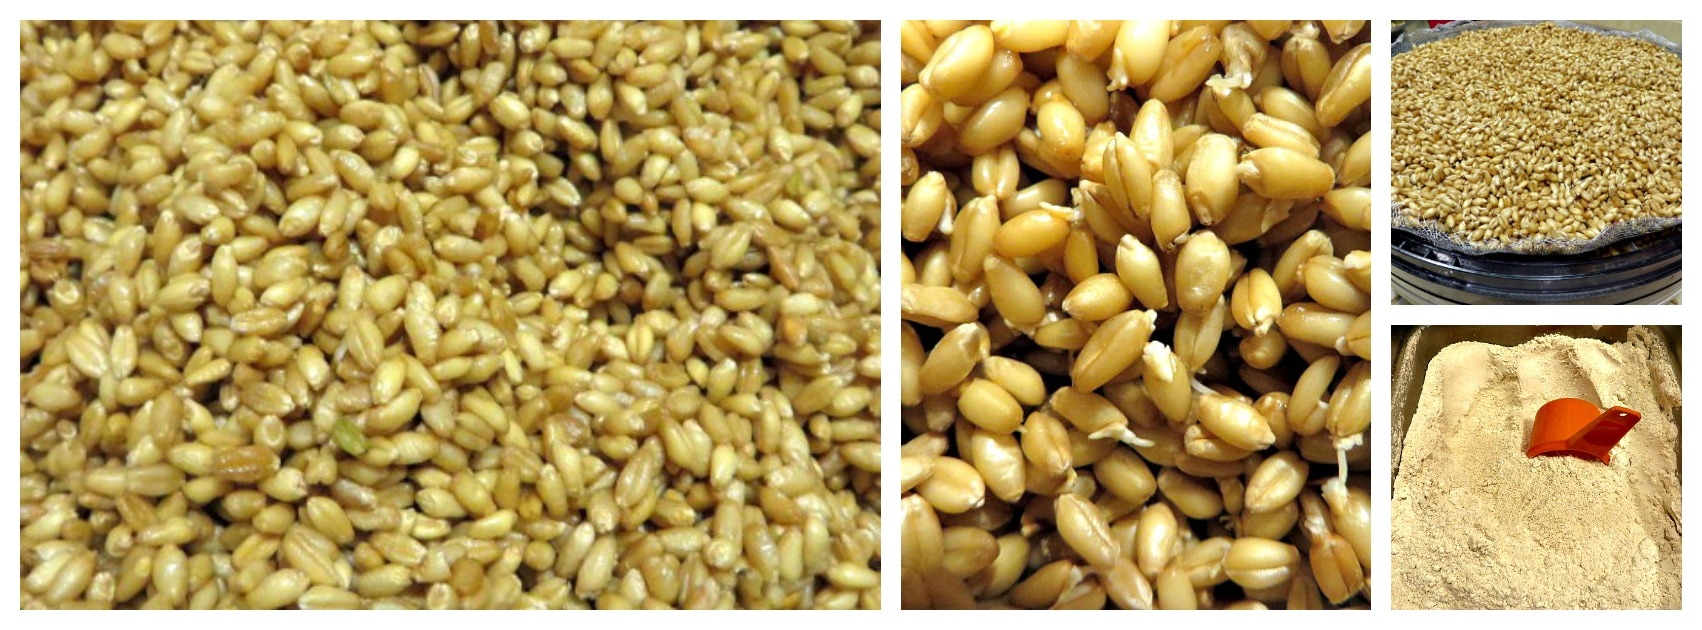
To begin, you need whole wheat berries. I happened to get a really good deal on some from Costco the other day. But, from what I understand, not all Costcos carry it. I found something that looks very interesting on Amazon here, but there are a myriad of sources to order whole grains from. In my first blog post about baking bread with sprouted wheat flour, I listed some of the health benefits that you get by using this method. Since that time there are a few other things that I have learned. One of the main things I have learned is that all grain contains phytic acid in its bran. Phytic acid reduces our bodies ability to absorb nutrients from the grain. So, when we think we are getting all of these great vitamins from eating whole grain foods, we are actually only absorbing 80% of what we think we are getting. For a fascinating article about why in modern times there are more grain allergies in the USA, read this on Wellness Mama. Do not despair! Soaking, rinsing and sprouting your grains reduces the phytic acid and allows you to absorb and more easily digest the whole grain. So, that is STEP 1: Soak and rinse your grain.
First, soak your grain. I have heard a variety of amounts of time to soak, all of the way up to 24 hours. I forgot about the soaking step until after I was into the process! I did soak it for about 5 min. Then, I put portions of it at a time into a wire colander and rinsed it well. Oh well, next time I will do better.
After rinsing the grain, I put it in a big metal bowl lined with a wet towel and covered it with the wet towel. Please realize that this is my first time doing this process and in retrospect, I should have perhaps used a large colander to sprout in, but actually, the bowl method worked well for me. At this point, I just left the bowl on my counter to do its business and I went about the rest of my day. Except, after about 3 hours, I dumped the wheat out of the towel into the bowl and I rinsed and drained it. This time I just put the damp towel over the top of the wheat. I did the rinsing and draining 2 more times before I went to bed that night. Just before going to bed, I began to see the ends of the wheat start to look like it might be beginning to sprout! I decided I would let it sprout over night and see how it looked in the morning.
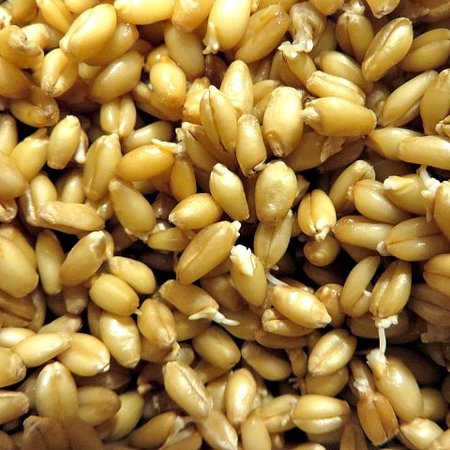
Look! Do you see those little sprouts coming out of the ends of the wheat kernel? That is what you want. You don't want huge sprouts because it will not make flour that will hold your bread together when you bake it. These little berries are soft and tasty at this point, so don't snack on them all or you won't have enough to grind into flour.
Step 2: Dehydrate
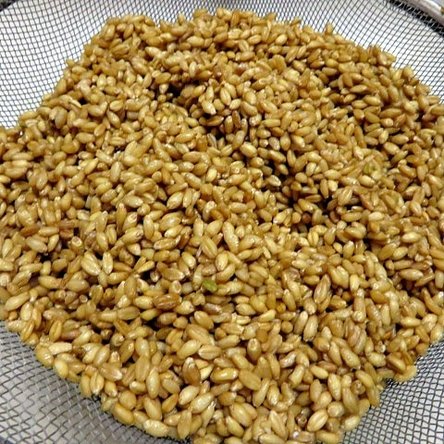
I sprouted about 9 cups of wheat. I was able to fit all of that in my dehydrator. I have had my dehydrator for a long time, and I couldn't find it on Amazon, but here is a similar one. I don't know if it holds the same volume as mine did. Rhonda had loaned me a rectangular one, similar to this, just in case, but I didn't need to use it. After grinding the wheat and making a large batch of bread, I actually should have dehydrated more than this, so I would have needed the two dehydrators. The trays in our dehydrator had wide slots that the wheat would have fallen through. We purchased some aluminum screen and cut out liners for each tray. I crimped up the edges to help hold the wheat on the tray. Then, I spread the wheat on the trays, only 2-3 kernels thick, and turned on the dehydrator. 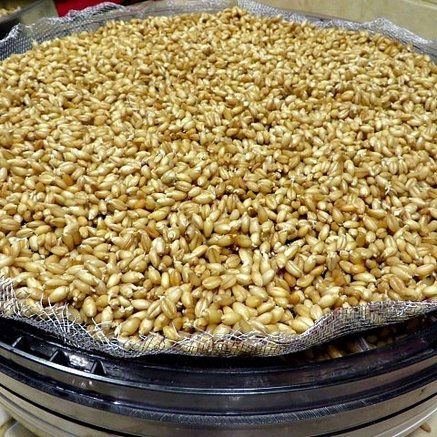
I thought that this step might take up to 2 days to complete, but they were totally dry in about 7 hours. We changed the trays around part way through the dehydrating process. Try biting a kernel from each tray to test to see if they are crunchy. Wet grain will gum up your wheat grinder!
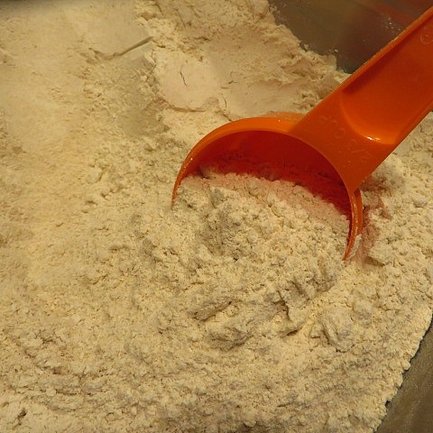
Step 3: Grinding into Flour
There are many wheat grinders available on the market. I have a Magic Mill Grinder. You can find it on Amazon here. The hopper easily held the flour from my 9 cups of wheat. We also have a hand grinder like this one. It grinds a nice, fine flour, but that would have been a lot of cranking to grind 9 cups of wheat. The electric grinder made short order of it. 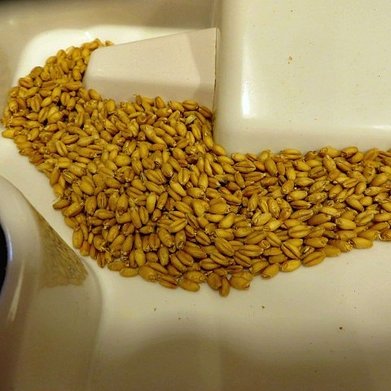
Here is the wheat going down the hopper into the grinder. I noticed that the sprouted wheat even smelled differently as it was grinding than the regular whole berries normally do. It was a more mild, earthy odor.
And, Voila! Here is the wonderful sprouted wheat flour!
Once my wheat was ground, I wanted to bake my bread right away because that is when the nutritional value is at its highest. Come back for tomorrow's blog post when I will show you how I made the bread. I think Rhonda will be so proud of me! There were a few glitches, (which I will explain tomorrow), but over all this has been a wonderful success! It seems daunting at first, with a lot of steps. But, remember, each step only takes a few minutes to complete. (I mean, I saved my screen liners, so I won't have to make those again.) While each step happens, you can go on your merry way doing whatever you need to do! If you try it and taste the results, I think that you will convert to this method, too. Come back tomorrow to see the delicious results!

10 Comments
Helen Reynolds
2/21/2017 03:22:51 pm
It is amazing, tasty and so much healthier! 2/25/2017 11:26:04 am
This is an interesting process. I didn't realize it could sprout so quickly! Thanks for sharing on the #WasteLessWednesday Blog Hop!
Lindsey Reynolds
2/25/2017 12:41:34 pm
Yes, it does happen very quickly!
Helen Reynolds
2/25/2017 08:04:31 pm
And freshly ground is much healthier! Hi, Spinach and bacon are not the things that I would really think of combining. The taste that both bacon and spinach is really different from one another. To tell you the truth, I am not really a fan of vegetables, more so of spinach. However, I do love eating bacon and I am not really closed to new things. I think that I would probably try this original spinach and bacon recipe of yours, I hope that I made the right choice doing it. 8/28/2020 12:44:59 am
11/20/2020 05:54:07 am
Your comment will be posted after it is approved.
Leave a Reply. |
Creators of Hot Cocoa Bombs! (copyrighted)

Author
Helen Reynolds: Mother of six children , grandmother to eleven! I love to cook, craft and create things and I especially love doing that with my family, So, when my lawyer daughter, Lindsey, my artist daughter, Madalynn, and I came up with the idea of Hot Cocoa Bombs, this blog was born. Then, one more daughter, with her technical and science skills, plus creativity has joined in to round us out! Read more about us here! 
Click this link and visit 3WinksDesignShop on Etsy. Find our Hot Cocoa Bomb Idea Book, our For the Love of PIe e-book and more of our creations!

Amazon Gift Cards are the Perfect Gift!
    Archives
July 2024
|
 RSS Feed