|
This post contains affiliate links. I will be compensated for purchases made through those links at no additional cost to you. All views expressed are my own. Thank you for your support! 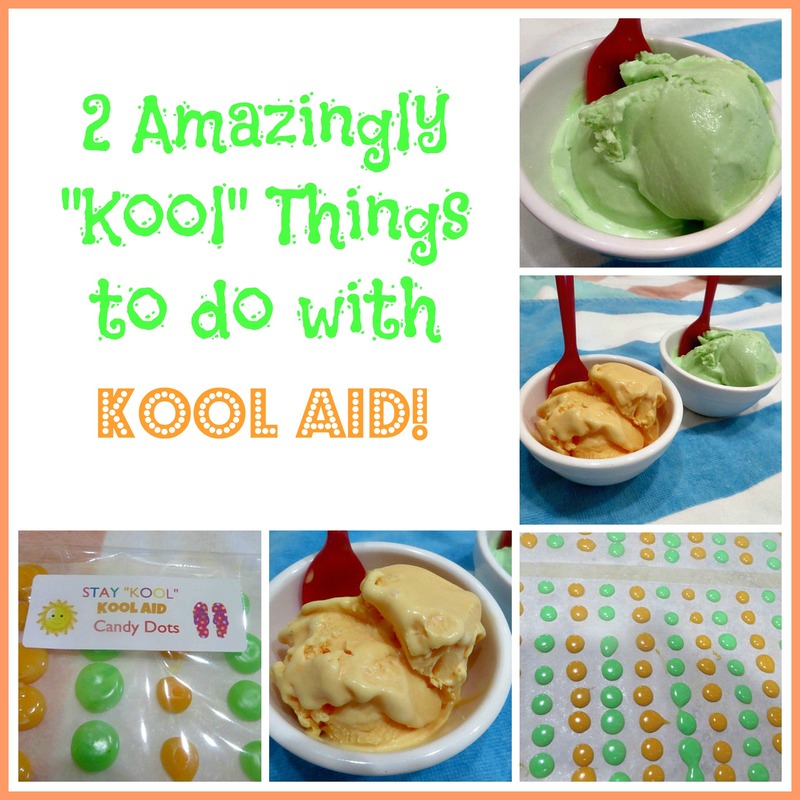 Are you old enough to remember the Kool Aid Man commercials? Oh Yeah! I've done a lot with Kool Aid over the years besides drink it the regular way. I've made slushies for my kids with it. I have made play dough with it. I've seen people dye their hair with it, though I haven't done that. But, today for Fun Friday I am going to share a couple of "new to me" ideas using this versatile powdered beverage, plus I am throwing in a free printable, too! Kool Aid Candy Dots When I was a kid growing up, getting those little wax paper sheets of colorful candy dots was a fun treat for us. When I recently began to see recipes for them on Pinterest, I was intrigued. The recipes I saw all called for egg whites or meringue powder. I wanted to make my dots vegan, so I used corn syrup instead. You can make your Candy Dots any flavor you would like and they only take 4 ingredients! Here is how I made them: Kool Aid Candy Dots 1 c. powdered sugar 1/2 package kool aid unsweetened mix, any flavor 2 T. corn syrup 1 T. almond milk Mix the ingredients together until a stiff yet flowing dough forms. Put into a piping bag and using a small round tip, pipe onto waxed paper strips. (Just make small dots, the dots will spread.) I made two batches, one of orange and one lime. This recipe made LOADS of dots! Allow the dots to dry over night. 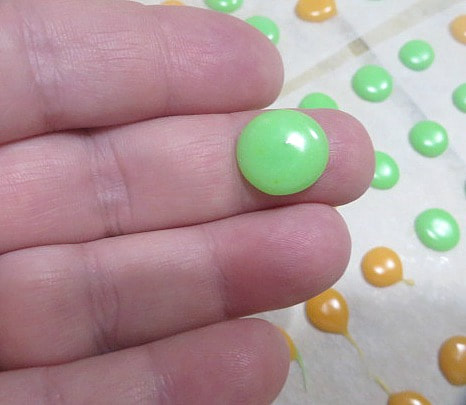 When they are dry, you can peel them off of the paper and pop them into your mouth. My candy dots stayed a little soft inside, not totally crunchy. The Kool Aid really gives them a burst of flavor and bright color! After they dried, I cut my waxed paper strips between the dots into 4x6 inch rectangles and slipped them into plastic cookie bags. I think these would make a sweet, fun party favor!  This would be such a budget friendly favor! You can literally make more that a dozen of this size package with just that little recipe above.  I created these little labels to dress them up a bit! I used Avery labels, #8160. To print, use the Avery 8160 labels. Do not check "fit to page." I used lime and orange flavors, but the possibilities are only limited by the flavors of Kool Aid available. I love how bright and sunny these colors are and I think they would be great at a swimming party, (along with some Kool Aid Slushes!) Kool Aid Sherbet or Ice Cream Believe it or not, I think this sherbet was even easier than the candy dots and of course, much cooler! Since it only took 1/2 a package of Kool Aid to make the Candy Dots, I used the same flavors to make this ice cream, or sherbet, whichever you want to call it, and it only took 3 ingredients! Not only that, I made one of the flavors vegan for Maddy's sake and it is so good! I will give you the recipe for both the vegan and the non-vegan versions.  "Put the Lime in the Coconut" Vegan Kool Aid Sherbet 1-15 oz can coconut cream or coconut milk 3/4 c. granulated sugar 1/2 package lime Kool Aid "Put the lime in the coconut and mix it all together!" (I couldn't resist!) Mix all of the ingredients together very well. Pour them into a regular sized loaf pan. Put in the freezer for about 2 hours. After 2 hours, the sherbet should be partially set. Use the hand held electric beaters and beat the mixture to create a more creamy texture and smooth back into shape in the loaf pan. Place back in the freezer. 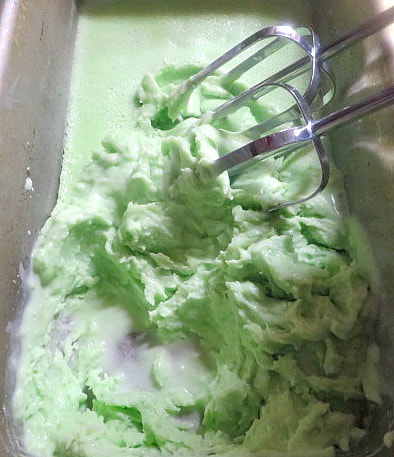 No need to dirty another bowl, just beat the mixture right in the loaf pan. I left it in the freezer until the next day and then scooped it out to serve! It is really delicious! Creamy Orange Kool Aid Ice Cream 1 and 1/2 c. heavy cream 1/2 package orange Kool Aid 3/4 c. granulated sugar Mix all the ingredients together and prepare just like the lime recipe. It is so yummy! 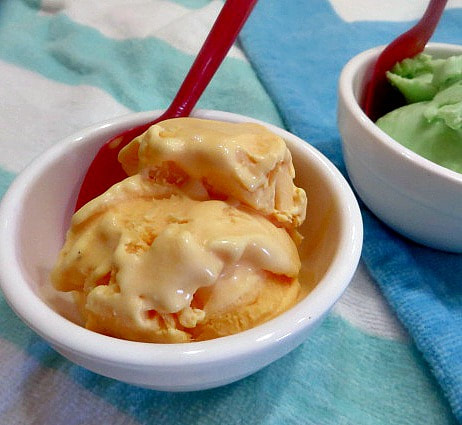 Hope you have some good summer fun this weekend and maybe give one or both of these recipes a try! Let me know what you think and if you have any other off the wall Kool Aid ideas!
5 Comments
This post contains affiliate links. I will be compensated for purchases made through those links at no additional cost to you. All views expressed are my own. Thank you for your support!
Sorry I've missed What to Read Wednesday the last two weeks but I'm back again with a book I'm still listening to but love so far: Dad is Fat by Jim Gaffigan.
You may know him as the Hot Pocket comedian. I know him from his first Comedy Central special and the joke about mayonnaise. This was the late 90's and my family had it on in the background, but by the end we were all watching and laughing. Since then we have enjoyed Jim Gaffigan's stand-up and acting. So when his book, Dad is Fat, came out, I knew I wanted to read it. It's been on my To Read list for a long time. And let me tell you, it is funny, and enjoyable. Dad is Fat is about Jim's observations of parenthood. He has five kids, so he's no stranger to parenthood. In stead of those parenting books you give to expecting parents, you should give them Dad is Fat. Dad is Fat is a great realistic way to see parenthood, but it won't scare you away from it. One of the things I love about the book is the how much you can tell Jim loves his family, his kids, but especially his wife Jeannie. I'm just a sucker for a loving family I guess.
His humor mixed with amusing anecdotes of parenthood, make this an easy and insightful read. I highly recommend. Listening to the book adds another dimension because Jim reads it himself. I always think that adds something special to the audiobook. If you're on the fence about trying Audible, maybe start with the 30 day free trial and use it for this book. You won't regret it!
And it makes me excited to read his other book Food: a Love Story. AND even more excited to read Jeannie Gaffigan's book coming out in October, When Life Gives You Pears. So called because she recently had a pear sized tumor removed from her brain. She is Jim's writing partner and executive producer for his shows. So if you like his stuff, I'm sure you will like her book. I haven't read it yet, I just have that feeling. It's available for pre-order now.
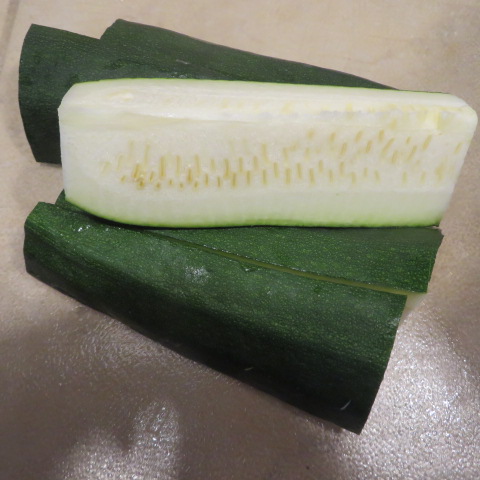
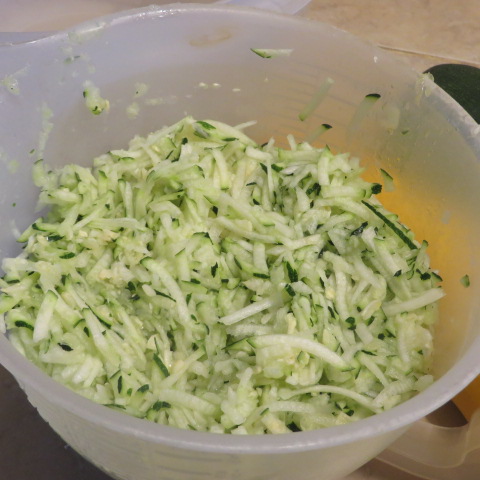
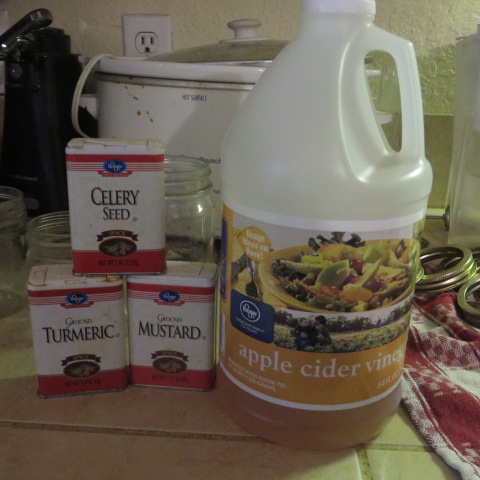
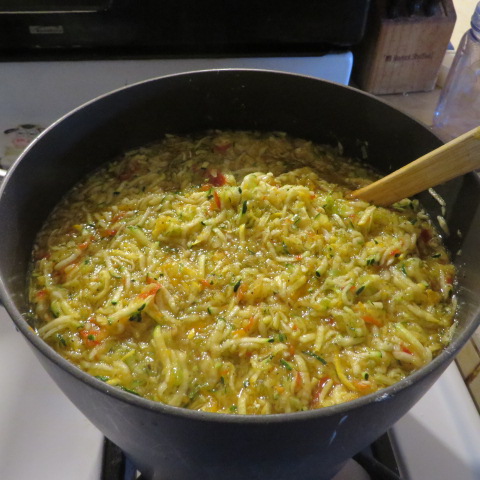
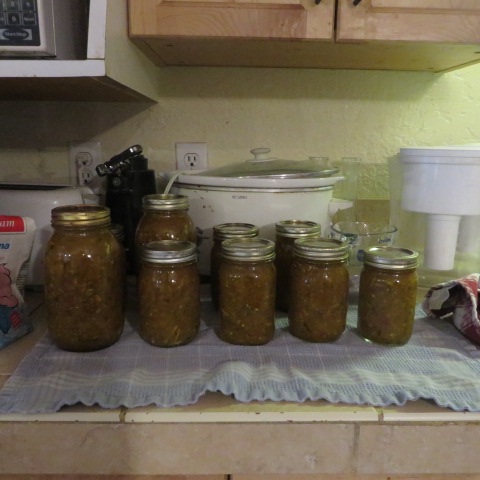
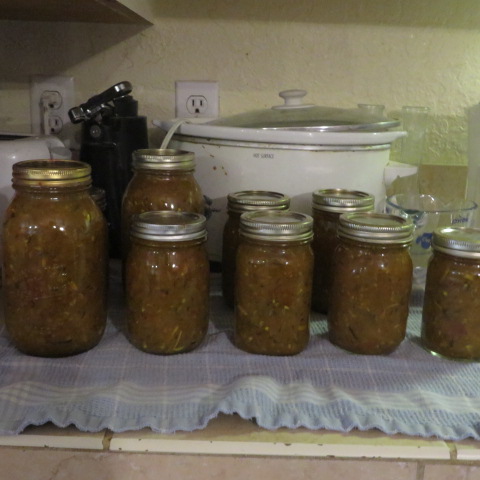
This post contains affiliate links. I will be compensated for purchases made through those links at no additional cost to you. All views expressed are my own. Thank you for your support! It is always fun to go out to the garden and find the fruits of your labor. With zucchini, it never ceases to amaze me how well those buggers can hide. Just when you think you are staying on top of picking the nice, tender, normal sized version of the vegetable to cook for your dinner, suddenly there appears before your eyes the humongous monster zucchini that you hadn't seen until that very moment. This is the time of year when those of you who grow zucchini should be having it come out of your ears! This zucchini relish is one of our favorite ways to use those large harvests of zucchini and yellow summer squash. I actually put up this recipe a few years ago, but decided it was time to pull it back out for you with a bit of an update! I hope you enjoy it! 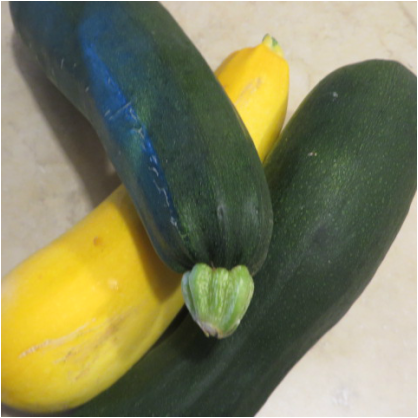 I learned from my Uncle Paul and his wife, Melba, how to make Zucchini Relish. It is actually a recipe Melba got as a girl in school. Uncle Paul used to make it by the gallons to give as gifts. My kids love it better than cucumber relish. It is a great way to use up all of those fabulous zucchini from your garden. As you can see by the picture above, We also mix in the yellow crook-neck squash as well. It adds a lot of pretty color to the jar. Here is the recipe.  Here are the other veggies that add to the color.  This recipe relies heavily on the food processor! Mine made fast work of all of that grating! 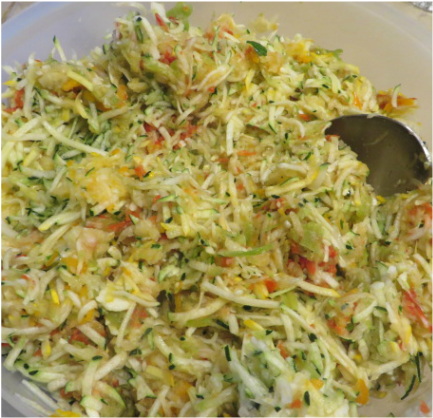 Here are all of the grated veggies combined! I think they look pretty! Mix all of the vegetables with the salt. Then cover and let stand for 5-24 hours. (I always do the 24 hours, or at least over night because after all that grating, I am ready for a break.)  The next day, use a large colander to drain and rinse the mixture well. (I don't own this one, but now that I see it, I want it!) Then, use a very large pot for the next part of the recipe. Click the pictures to see what was happening. Put the relish into pint jars, clean the rims and add the lids. Process in a water bath canner for 15 minutes. (Here is the kind I've used for years) All of that vinegar used in pickling means you don't need to pressure can this recipe! Remove from the canner and allow the jars to cool and listen for the pop that to signify the sealing of the lids! If you have any left over relish in the pan, put it in a bowl in the fridge to use first! As you can see, I also used some quart jars. These will need to be processed longer. Process them for 25 minutes. Now, all you have to do is grill up some dogs or brats and enjoy your relish! You will love it. When it comes to large bowls, I have always relied on my huge Tupperware bowls when I need something that will hold a lot! This one holds 32 cups! 
This post contains affiliate links. I will be compensated for purchases made through those links at no additional cost to you. All views expressed are my own. Thank you for your support!
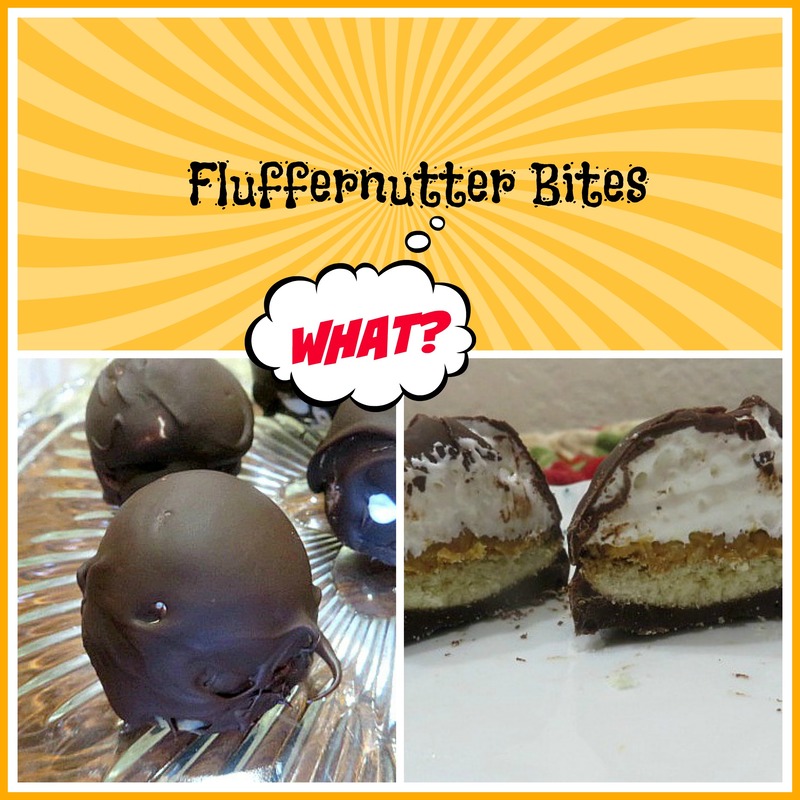
Slightly less than 40 years ago, when I was just a newlywed and my husband was in the army, we were living in Montery, CA because my husband was learning Russian at the Presidio there. One day we were in the grocery store and he saw one of his classmates, Dennis and he introduced me to him. Dennis' wife was in a different aisle at the moment, but then she came around and saw us and asked me if I knew where the "Fluffa Nutta" was. Her name was Kelly, and she and her husband are from Massachusetts. They had very strong accents that I had no experience with and I couldn't understand a word she said! Eventually I learned that she was looking for a product called Marshmallow Fluff that is very common on the East coast but pretty much unheard of in the West. In the West, we have marshmallow cream, which is less fluffy and more runny than Fluff. They use Fluff for many things in the East, one of those things is the "Fluffernutter," (pronounced "fluffa nutta") a sandwich made with peanut butter and Marshmallow Fluff. If you are able to shop in a military commissary, you may be able to find it. Dennis and Kelly, who have remained dear friends of ours over the past 40 years since that day, have been so kind to send me Fluff from to time.
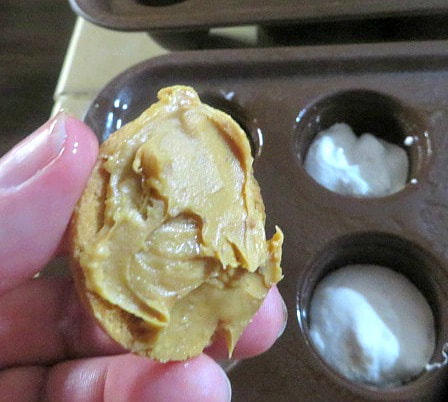
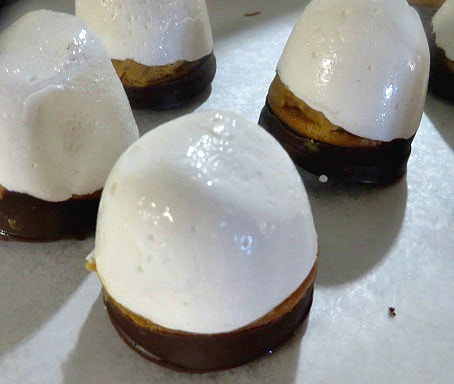
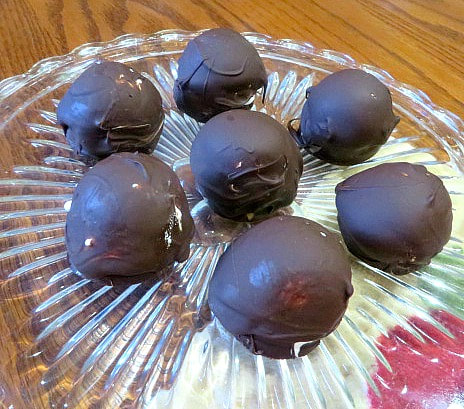
Now, fast forward to a couple of weeks ago when I was shopping at an Asian Supermarket which actually carries foods from many countries. I found some big cookies from Germany, which I purchased for nostalgic reasons. They looked like those marshmallow cookies covered with chocolate that you can buy anywhere, only much taller. Then, when I bit into one, I realized it wasn't a firm marshmallow inside the cookie, but some really light marshmallow fluff! Well, that reminded me of Kelly and the way she introduced me to "Fluffernutter " sandwiches and I thought, I could make cookies like these except add peanut butter and call them Fluffernutter Bites! And that, dear readers, is how these bites were born! Thanks Kelly!
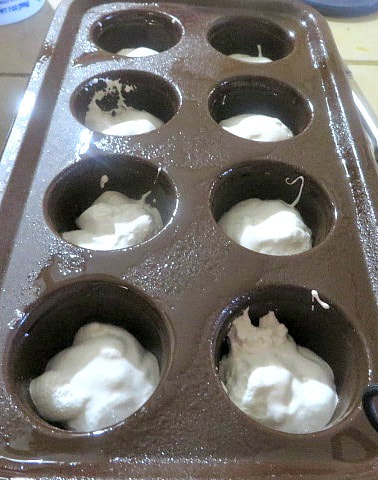
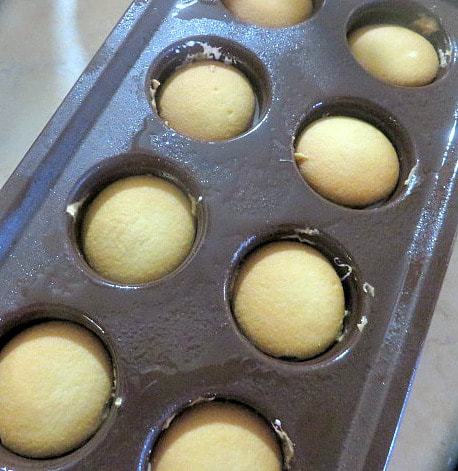
Unfortunately, I didn't have any Fluff when I made these. I had to use marshmallow cream. But, I know that if you use Fluff, they will be even better. Click on the pictures to see what I did. Once again I used my Hot Cocoa Bomb molds. You can find the molds here.
Ingredients and Supplies:
Fluffernutter Bites Tips:

This recipe made 16 Fluffernutter Bites. That was plenty because they are very rich and sweet. The peanut butter layer adds the perfect touch!
|
Creators of Hot Cocoa Bombs! (copyrighted)

Author
Helen Reynolds: Mother of six children , grandmother to eleven! I love to cook, craft and create things and I especially love doing that with my family, So, when my lawyer daughter, Lindsey, my artist daughter, Madalynn, and I came up with the idea of Hot Cocoa Bombs, this blog was born. Then, one more daughter, with her technical and science skills, plus creativity has joined in to round us out! Read more about us here! 
Click this link and visit 3WinksDesignShop on Etsy. Find our Hot Cocoa Bomb Idea Book, our For the Love of PIe e-book and more of our creations!

Amazon Gift Cards are the Perfect Gift!
    Archives
July 2024
|


 RSS Feed