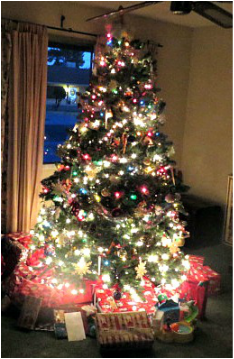
Wow! Now that our living room has been redecorated, this view is going to much different this year! I can hardly wait!
"The Most Wonderful Time of the Year" has officially started! Now that I am a grandma, without my own tiny children, I don't have to worry as much about Black Friday Sales as I used to do. Although, now that everyone is opening up their stores on Thursday, it has taken the fun out of Black Friday shopping for me anyway. But, not out of Christmas! I am counting my way to that great day and having a lot of fun doing it!
While there are a few days left in November, there is still time to get your advent calendars ready for the count down to Christmas! Thinking back over the years with my own children, it seems that we always had more than one way to count the days. That was nice because having to wait 6 days until your next turn to put the ornament or whatever on the calendar could seem like an eternity, and only give a child a couple of turns at it before Christmas. Here are a few of the ideas for counting the advent that we used: 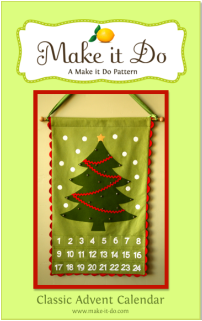
The first thing I did when I only had 2 children was make up my own pattern to create a Christmas Tree Advent calendar with pockets, much like this one on Make It Do. Mine did not come out nearly as symmetrical and perfect as this one, but our children have loved it over the years. I would show you a picture of mine, but we haven't unpacked it from the Christmas stuff yet. Make It Do has a pattern you can purchase on her site, or you could just make it up yourself like I did. If you don't think you can make one, here is a reallycute one from Oriental Trading. They usually have very quick delivery.

Tomfo.com has this really cute printable Santa Countdown that you build Santa's beard on! So cute. My kids used to make those paper chain beard Santas at school, and those are cute. But I like this one because they build the beard instead of take it away.
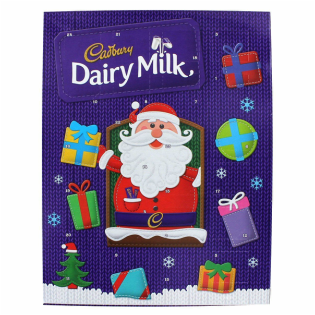
Then, one year I discovered the chocolate advent calendars! I would get one for each of my kids. They loved having a little piece of chocolate each morning before school! Who wouldn't? The one pictured above is from Amazon. But you can find them in the stores for about $1 a piece. This is a tradition that even my older kids don't want to give up.
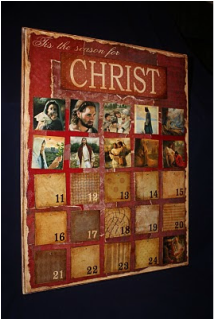
A couple of years ago, my daughter-in-law made me a Christ centered advent calendar similar to this one. It is beautiful. (Once again, still not unpacked). I love it and my grandchildren were here when I first received it, and they loved it, too. It is a beautiful daily reminder of the reason for the season. I have found a couple of links to how to make it here and here at Kemley Design. There are other types of Christ centered calendars to purchase here and here.
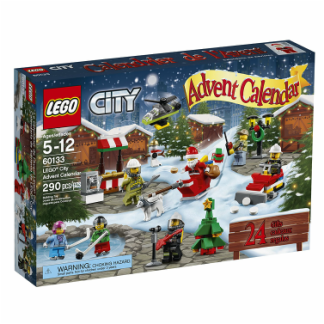
Last year, I saw this Lego Advent Calendar in the store. I loved it because our family has always been big Lego fans. It seemed pricey though, but in my heart I really wanted it. Then, just a couple of days before Christmas, it was half price! I snapped it up. Our family put the entire thing together in one night. It was so much fun! Then, at the end of the season I carefully put everything back into their slots and I think we will try it a little more slowly this year. Ha Ha! I have seen it in stores again since then. The link above is on Amazon. They also have this one directed mainly to girls, and this Star Wars one.
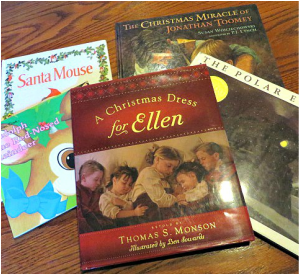
Here are just a few of our Christmas story books that we love. Once, many years ago, when my children were small, I collected 24 of their Christmas books (we already owned them all) and I wrapped them in Christmas paper. Each night we would unwrap a book and read it before going to bed. It was such a nice, snugly time. Now I have seen on Facebook that this is a thing! Who knew that I could be so ahead of my time? But, really, reading with your kids is extra special over the Christmas season and it is a good teaching time because most of the books for Christmas have a moral value in them that you can discuss with your children. If you don't have time to make or purchase anything, this idea is free, the books you gather don't even have to be about Christmas, but if they are it is a bonus. Your kids will love getting to unwrap something every evening, even when it turns out to be just a book that they already love. Guessing what the book will be adds to the fun.
#LIGHTtheWORLD
The Church of Jesus Christ of Latter-Day Saints (Of which I am a member) has a wonderful way to count the days to Christmas this year through service. The above link will take you to a video about the project. Here is a link to a calendar of service ideas for the entire month of December. The ideas are all based on the example that the Savior taught us. There are ideas to fit any age and each day there is a video to watch with your family. What better way is there to honor Christmas than by giving to and serving others. As I reviewed this site and these ideas I felt humbled and excited all at once to do something to help share His love and peace with a troubled world. There is no better way to feel the Christmas Spirit. I hope you will check this site out!
Counting the Days until Christmas is a great way to bring a little more joy into your home. We have so many more ways to share that joy with you. Keep checking back! Be sure to share with us the way you like to count "up" to Christmas!

8 Comments
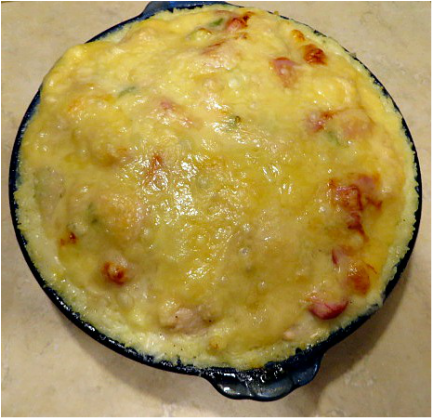
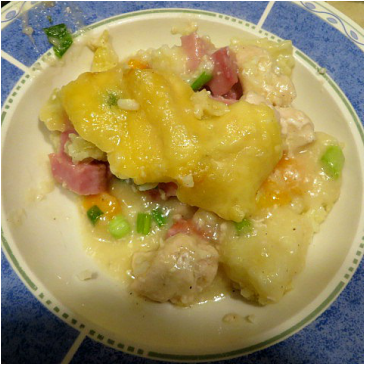
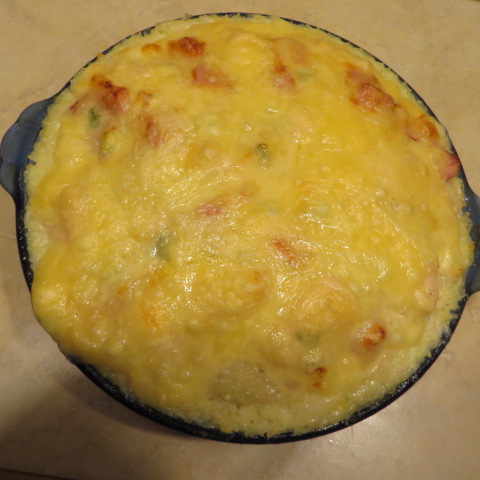
This is the last pie in our Thanksgiving Pie Series. This pie is a little different from the rest, which were dessert pies, (plus a printable). At our house, we try very hard not to waste food. So, we eat leftovers. Sometimes we even love leftovers! This pie is a great way to use up your Thanksgiving leftover turkey and ham (we usually have both at our large gatherings).
As I was planning what we would do for this series, Madalynn suggested that we do a meat pie. I thought it was a great idea and I started thinking about a good recipe that would use up the combination of poultry and ham. The first thing that came to my mind was Chicken Cordon Bleu. The blending of the chicken and ham with Swiss cheese sounded like something I could turn into a pie! To try it out, I used chicken because of course I hadn't cooked the turkey yet. But, I often use chicken and turkey interchangeably with small variation in flavor. This pie turned out so good, I can hardly wait to make it again with turkey after Thanksgiving! 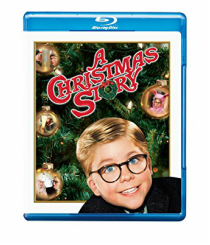
Whenever I think about using turkey leftovers, I think about this movie, one of our family's favorites.
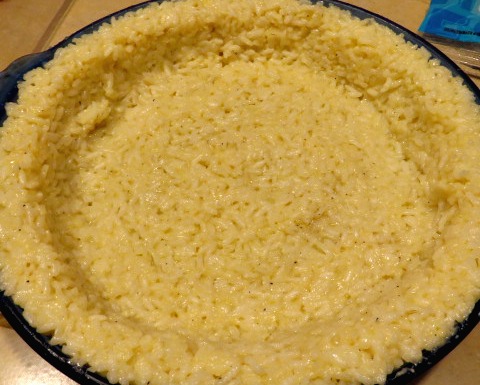
When Glen and I were married 37 years ago, we received a Better Homes and Garden Cookbook as a gift. I have used it extensively throughout our married life. It has been republished many times over the years with changes and updates, but I still use my original edition. One of the recipes in it used rice as the crust of a meat pie. I thought that was a great idea for a change of pace from all of the pies that are already being eaten for the holidays. Madalynn and I tried it for this pie and it turned out great!
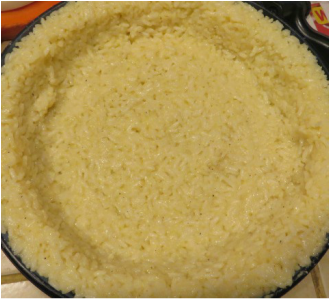
Madalynn formed it beautifully into the pie plate.
Click the button to get the recipe for the rice pie shell.
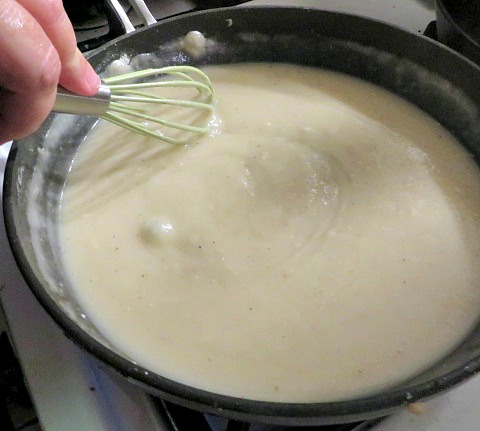
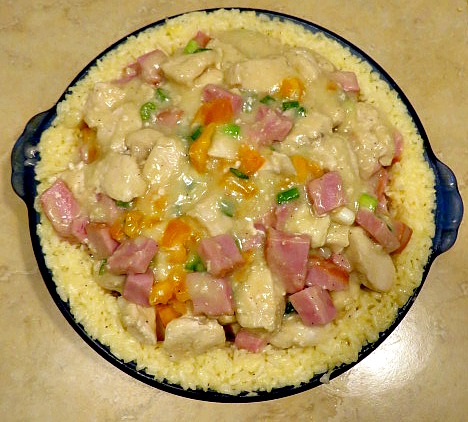
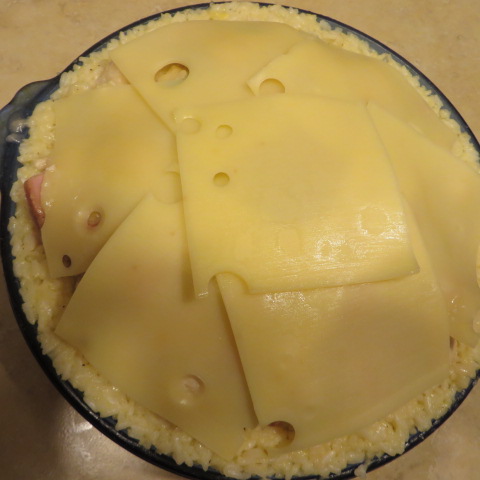
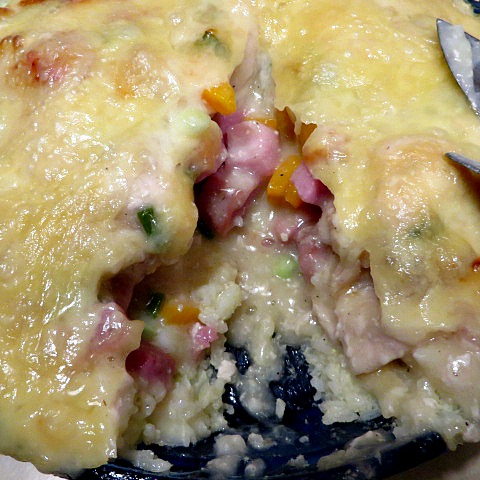
Now it is time to make the filling. I used about 2 cups each of both chicken (or turkey) and ham. Then, I chopped up about 1/4 c. green onions and 1 bell pepper, (any color). I sauteed the peppers in a little olive oil with the meats, just to soften the peppers and to warm up and brown the meats, then removed to a bowl and reserved for later. In that same pan, melt about 1/4 c. of butter and mix in quickly about 5 T. flour. When mixed, pour in 2 c. of chicken broth and add salt and pepper. Cook and stir until thickened. This is basically a white sauce. Now, return the meats and peppers to the pan with the sauce. Also, throw in the green onions. Mix it all together then pour it into the pie shell. It will really fill it up, just pile it in! Finally, lay Swiss cheese slices over the entire thing to cover. Bake at 350 degrees for 40 min. Let stand for a few minutes before serving. It will serve 8. Click on the pictures below and the button to get more instruction and for the printable recipe.
Now, I wouldn't call this low-cal, but it is sure good! So, go eat your pie and do some online Christmas Shopping! Happy Thanksgiving from all of us at 3 Winks! See you on Friday!

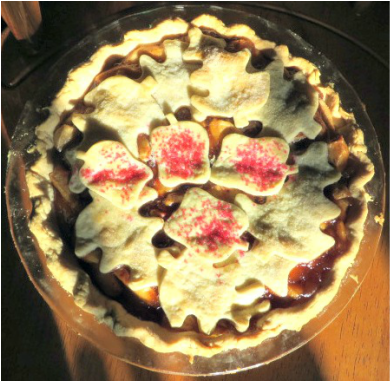
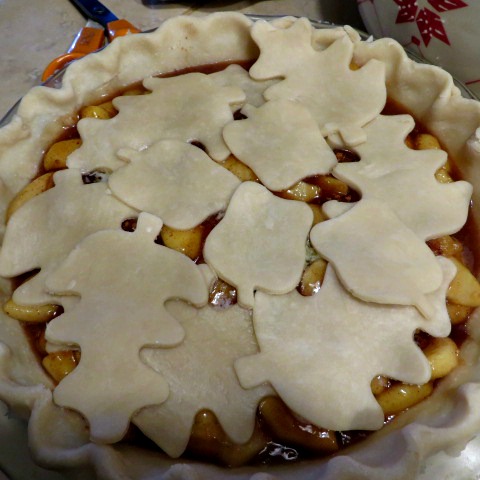
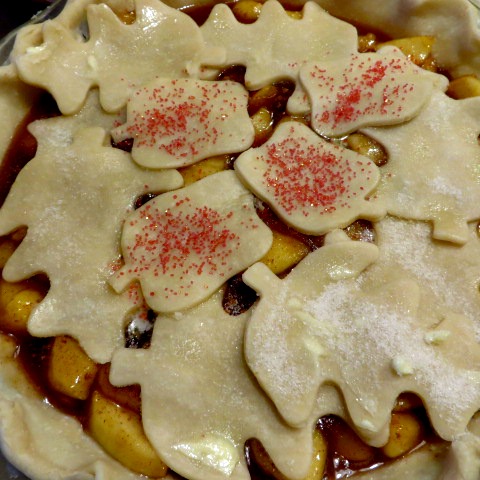
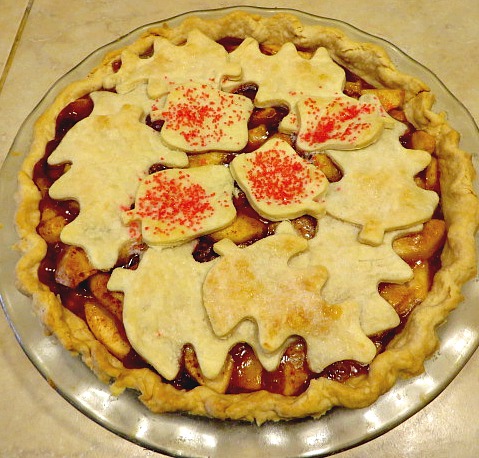
It seems as though those decorative crusts are all the rage now, and I wanted to give it a try on my classic Apple Pie. It is kind of fun, I just used my oak leaf cookie cutter and my apple cookie cutter. I used red colored sugar on the apples.
Whenever I make apple pies, I always think of my brother-in-law Tom. He loved apple pie. When I brought them to family gatherings, he always tried to take it all for himself. I got so that I brought 2 pies, one for everyone else and one for Tom. Apple Pie was always my Christmas gift to him. Isn't it funny how those little things come back to you as a warm memory after you lose someone? I am so grateful that he was in our lives.
I always make my apple pie filling from scratch. The consensus in our extended family is that scratch is what tastes best. Scratch =Delicious, Canned=Not so good. I already shared how I make my pie filling on this post, but it is pared down a little because there is less room for the filling in that pie. I will now give you the recipe for filling a full Apple Pie! You will want to bake it tomorrow to be ready for Thanksgiving.
If you want to see the making of the top crust, here is a little gallery. Don't forget the crust recipe is here.
You can also see how I decorated a blackberry pie,here.
We will have one more pie post tomorrow, take a break for Thanksgiving, and then we have some amazing Christmas ideas and tutorials in store for you! I am so excited about some of them that I can hardly keep myself from publishing them all at once!
Tomorrow's post is a different spin on pie and one you will want to use after Thanksgiving! So, check back tomorrow. I will wish you a Happy Thanksgiving then! Don't forget to start your Black Friday Shopping Early and from the comfort of your chair and pajamas! Amazon Deals are already going on. Plus, there are stocking stuffers to be ordered on Oriental trading. Madalynn and I found some great buys on supplies at the Dollar Tree as well! You can click to them right here through my links. I really appreciate it. But, however you do your Christmas Shopping, Have Fun and enjoy the season. (But, don't go overboard!) 
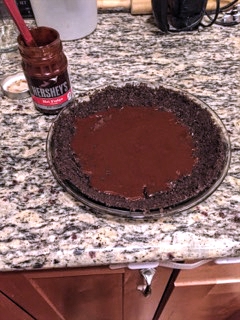
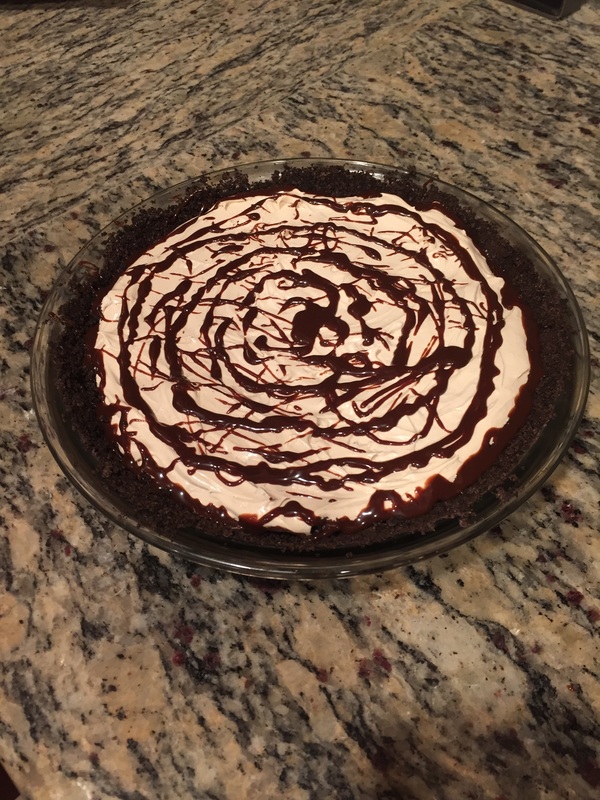
Alicia here to teach you how to make the easiest, yummiest, dream pie! It's award winning, so you know it's great.
When I was a freshmen in college at BYU I lived in "dorms" (they weren't really dorms, but apartments owned by BYU that they were housing freshman in while they were renovating the real dorms). And our dorms decided to do a pie contest activity for Thanksgiving. My roommate Jenessa and I decided to enter the competition. But we weren't going to make any regular pie, we decided to invent a pie so delicious it blow the competition away. And this is what we came up with! At the contest we won the grand prize, which wasn't an original category. The problem was that we won all the categories, so the judges decided to make the grand prize category so other pies could win. I'm not trying to brag, but just sell you on the idea that this pie is really good even though it is so simple. In fact when you look at the other pies, it's hard to believe that ours edged out the competition, because those other pies were super delicious! 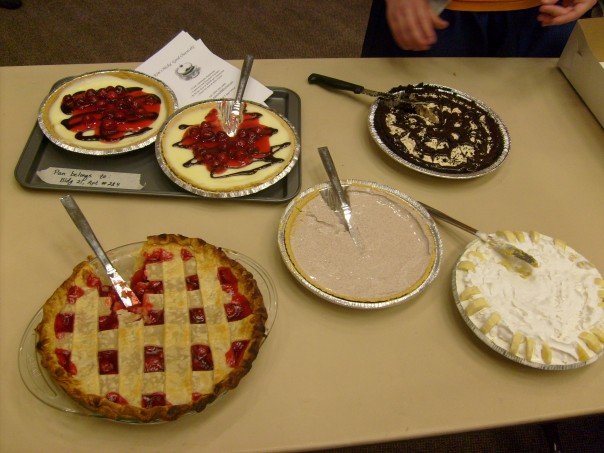
All the pies in the competition. Can you guess which pie is ours? Also look how delicious all the other pies look! I think I tried a slice of all of them...
So are you ready?
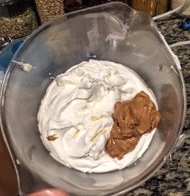
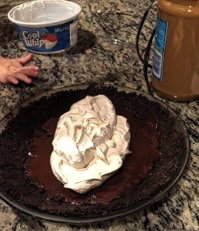
The Dream Pie only uses 4 ingredients, and you can whip it up in about 15 minutes so it's perfect if you forgot to make a pie. It's no bake, but does need to freeze for at least an hour. Click through the gallery below to get the instructions!
Some tips:
Well I hope you give the pie a try and enjoy it! But please don't feed the pie to your nut allergy friends and family. They probably would not like it. To get the printable recipe click the button below!
And here is a video my husband made about making the pie. We are huge Food Network fans so that's where his inspiration came from. And I'm a Gossip Girl fan so that's where the "XOXO" comes from.
As you can tell he is a huge jokester! But this is how I did the swirl of fudge on top so I thought I would show you. I put the bag in a cup so I don't make a huge mess, and then just snip off a tiny bit of the corner. You can also use a pastry bag. Just be warned if you're using warm hot fudge it's not very viscous and will just pour out of the bag, so be prepared! |
Creators of Hot Cocoa Bombs! (copyrighted)

Author
Helen Reynolds: Mother of six children , grandmother to eleven! I love to cook, craft and create things and I especially love doing that with my family, So, when my lawyer daughter, Lindsey, my artist daughter, Madalynn, and I came up with the idea of Hot Cocoa Bombs, this blog was born. Then, one more daughter, with her technical and science skills, plus creativity has joined in to round us out! Read more about us here! 
Click this link and visit 3WinksDesignShop on Etsy. Find our Hot Cocoa Bomb Idea Book, our For the Love of PIe e-book and more of our creations!

Amazon Gift Cards are the Perfect Gift!
    Archives
July 2024
|


 RSS Feed