|
This post contains affiliate links. I will be compensated for any purchases made through those links at no additional cost to you. Thank you for your support!  The big day finally happened! My youngest son and his sweet fiancé were married! Everything was beautiful, and as often happens, I came home from the reception with lots of leftovers and perishable things that I didn't want to go to waste! One of those things was about a gallon of buttermilk!
2 Comments
This post contains affiliate links. I will be compensated for any purchases made through those links at no additional cost to you. Thank you for your support!  Years ago I received an Oster Bread machine, and I loved how easy it made it to mix up dough, but I could never get the bread to bake without collapsing. It was very annoying, as kneading bread is my least favorite part of making bread, and I liked how simple a bread machine made it to have fresh baked bread everyday. I mean a fresh loaf with about 5 minutes of work on my part is a dream. Alas I felt it wasn’t meant to be for us, and once I got my KitchenAid, the bread machine sat on a shelf collecting dust. And we went back to buying store bought bread. But I guess I wasn’t exactly ready to give up on my bread machine, because it is one of the things that made the move with us to Georgia. And with the prices of groceries rising everyday, it seemed like a good time to pull it out and give it another go. I mean millions of others use bread machines to make great loaves of bread, I knew I could too. Plus now we’re more in the country and farther from stores so it makes running to the store for bread a big hassle. If I could just make a loaf every night of the next day, it’s less time consuming and more economical!
This post contains affiliate links. If you make a purchase after clicking them, we will be compensated, but there is no additional cost to you. All opinions expressed are our own. Thank you for your support. 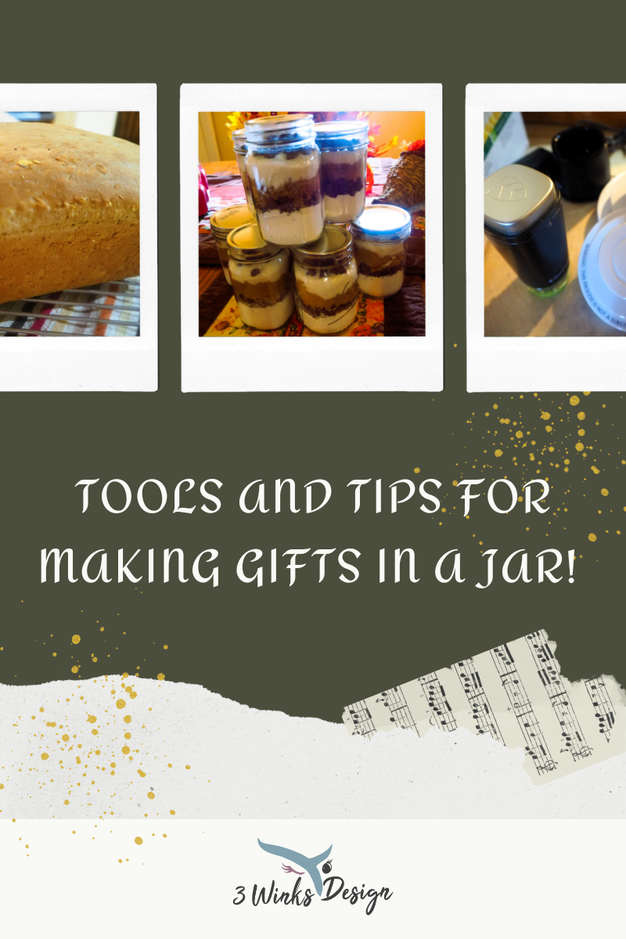 I have been sharing handmade gift ideas with you lately. I've been pretty busy and productive making these and these for family, neighbors and friends as I prepare for Christmas this year. Making things myself really helps to put me in the Christmas Spirit! Another very popular gift I'm working on this year are a couple of recipes for gifts in a jar. With grocery prices being so high this year, I feel like some food gifts will be appreciated by many and I have found and come up with some great recipes! Plus, I've found efficient, quick ways to pack and seal them so that making up a bunch of these gifts is a snap! First, I'll start with a couple of recipes! One uses a quart jar and one uses pint jars.
This post contains affiliate links. I will be compensated for purchases made through those links at no additional cost to you. All views expressed are my own. Thank you for your support! 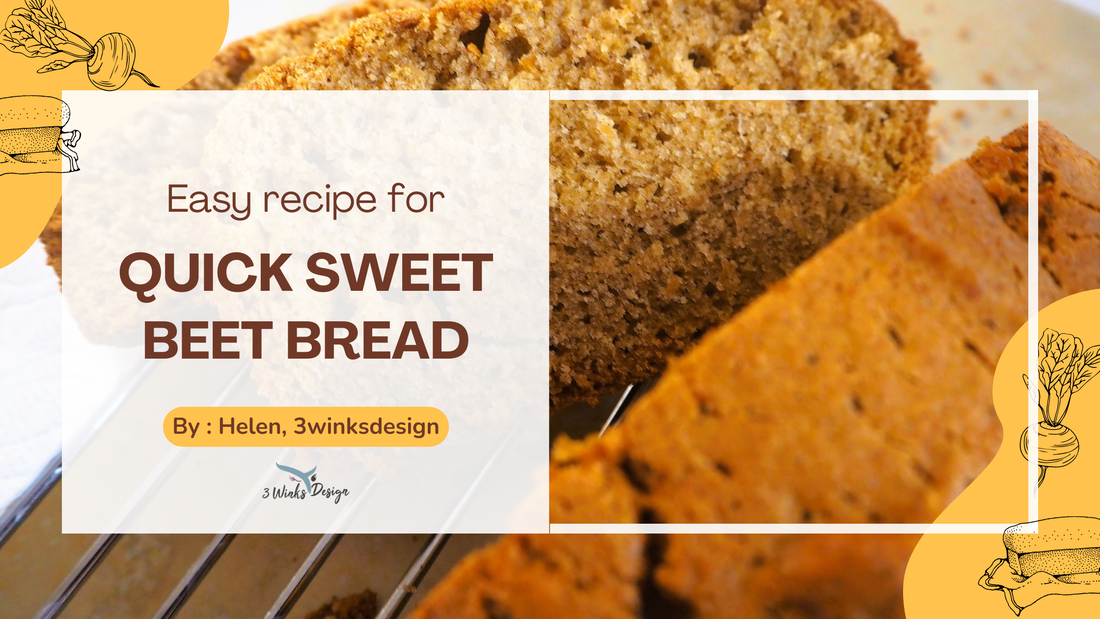 Well, after being spoiled this year with prolonged cool temperatures, rain and also wind, today in Phoenix, we are well into the 90s! 97 is supposed to be the high I believe! You know what it means when the thermometer goes over 100 degrees, baking at our house will come to an end for a few months. So, I am going to share one last fantastic recipe with you created out of necessity that is perfect for all of you prolific beet grower! It is a Quick Sweet Beet Bread Recipe!
|
Creators of Hot Cocoa Bombs! (copyrighted)

Author
Helen Reynolds: Mother of six children , grandmother to eleven! I love to cook, craft and create things and I especially love doing that with my family, So, when my lawyer daughter, Lindsey, my artist daughter, Madalynn, and I came up with the idea of Hot Cocoa Bombs, this blog was born. Then, one more daughter, with her technical and science skills, plus creativity has joined in to round us out! Read more about us here! 
Click this link and visit 3WinksDesignShop on Etsy. Find our Hot Cocoa Bomb Idea Book, our For the Love of PIe e-book and more of our creations!

Amazon Gift Cards are the Perfect Gift!
    Archives
July 2024
|
 RSS Feed