|
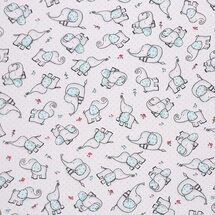
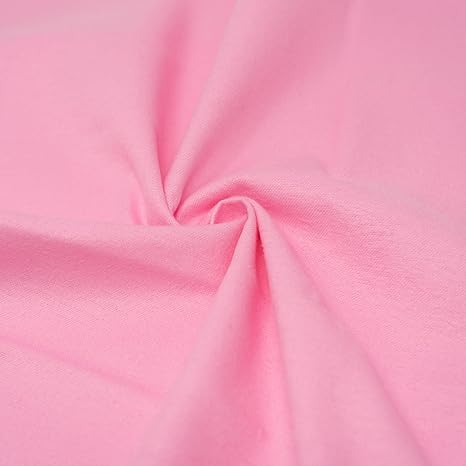
This post contains affiliate links. I will be compensated for purchases made through those links at no additional cost to you. All views expressed are my own. Thank you for your support! 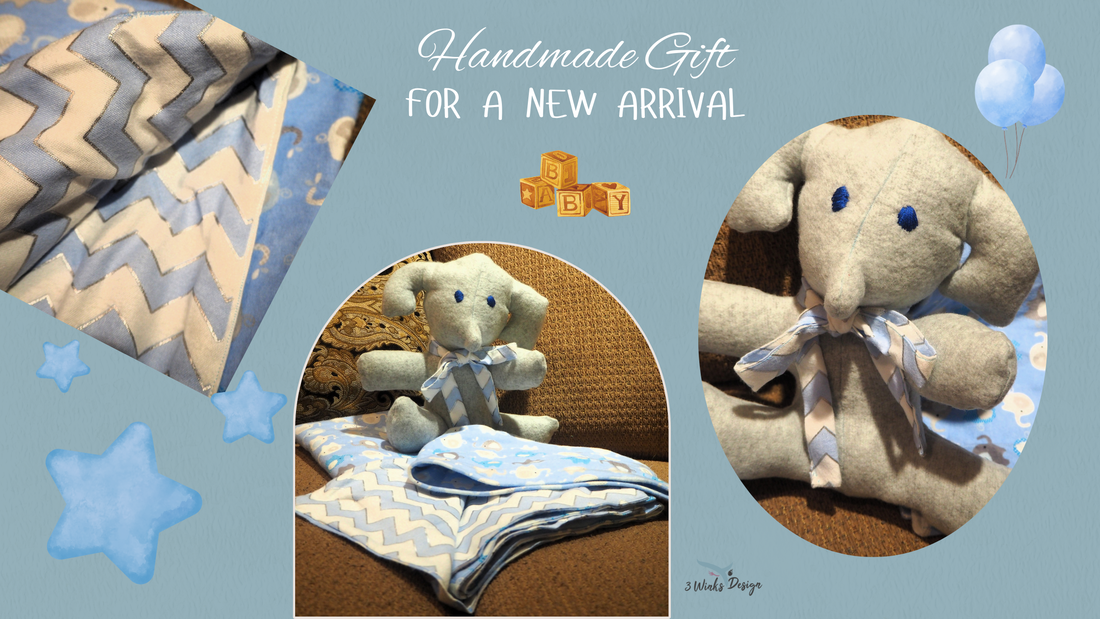 As you already know, Alicia recently had a baby a number of weeks early. He is doing great! Just after he was born, I flew off to go and give her and her family a hand while the little guy was in the NICU getting stronger. (Lindsey gave some tips about how to help NICU parents on this post!) Before I left, my granddaughter pulled out her sewing machine and we worked together to create a special gift for the baby. Here is what we made! We got into my stash of flannel fabric and found an adorable elephant print and a chevron stripe that coordinated with it. We wanted to make a receiving blanket with a matching burp cloth. My granddaughter loves elephants, so it was the perfect choice. Here are some other choices you might love:
...And don't forget a solid or coordinating stripe or print for the back of the receiving blanket !
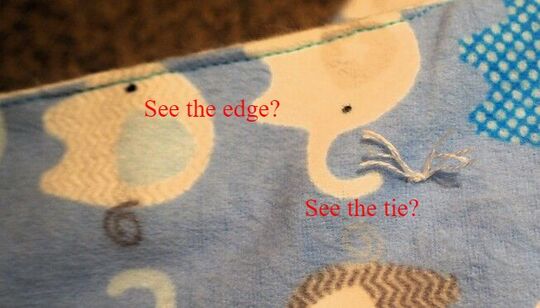
REMINDER: Be sure to prewash and preshrink your fabric before sewing your items. Flannel is notorious for shrinking and getting a little misshapen and you want that to happen before you cut it out and sew it together. Plus, you will want nice clean fabric to give as a gift to a baby! To Make The Blanket, we used a little over a yard to cut matching sized squares of the main color fabric, (the elephants) and the backing fabric, (the stripe).
 The burp cloth was made much like the blanket only on a smaller scale. But, instead of tying the fabric together, we simply sewed them right sides together and flipped them right side out before finishing the edge the rest of the way and top stitching around. The burp cloth fabric measures about 8 inches wide and about 18 inches long. You can adjust these measurements according to how much fabric you have and the way it lays on your shoulder. Burp cloths are very forgiving and can be sized according to your personal preference. 6 inches by 12 inches could also work! I like to make the burp cloth with double flannel fabric to help it be nice an absorbent. It can't be simply cute, it has to be functional! I may have added, (I can't remember), and extra layer of flannel on the inside of the burp cloth just to give it more thickness and absorbency. 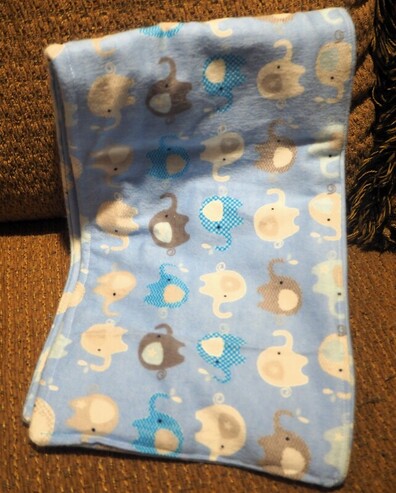 The Stuffed Elephant: We used Simplicity Pattern 2613 to sew the elephant from gray fleece. 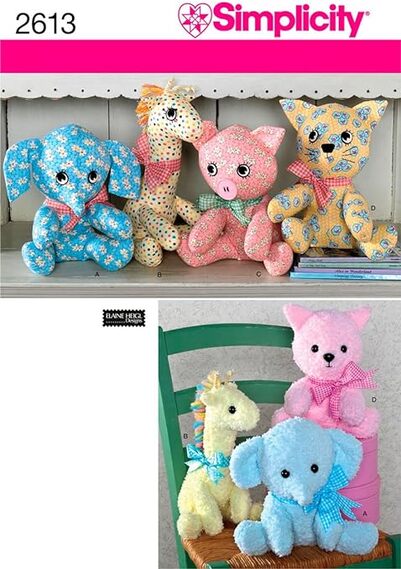 The pattern was so simple to make that my granddaughter did most of the sewing by herself and she is an age 13 beginner! I was very proud of her. That girl has no fear of trying new things! We didn't want the eyes to be able to be pulled off and choked on by the baby, so we embroidered them on with embroidery floss. Then, we used some of the left over fabric from the blanket to make a bow for his neck. We loved how it turned out! As the baby gets older, I'm sure that he will love it as well!  The entire set all together! There is something especially special about handmade baby gifts, I think. These little works of art can become heirlooms one day, or a cherished blanket that the child adores. Not only are handmade gifts nice and helpful for mom and baby, I know that my granddaughter felt a lot of pride and happiness, a sense of accomplishment from making it for them. When I came home from my trip, she asked me if it was appreciated. I know it was and will continue to be loved by her aunt and cousin. I hope you will have reasons to give these special gift ideas a try. More baby gift ideas:  For quilt patterns, check out Connecting Threads
0 Comments
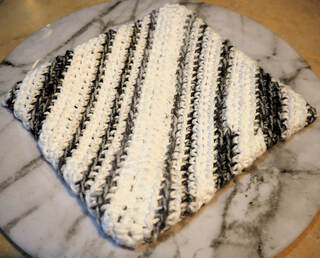
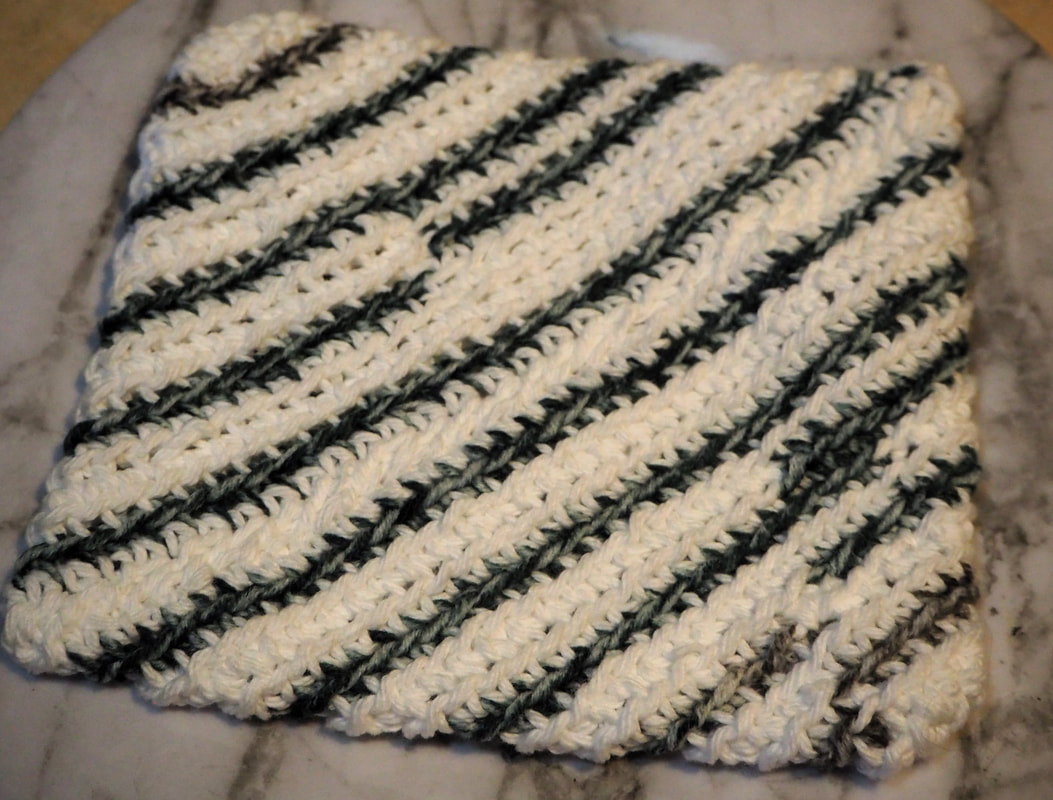
This post contains affiliate links. I will be compensated for purchases made through those links at no additional cost to you. All views expressed are my own. Thank you for your support! 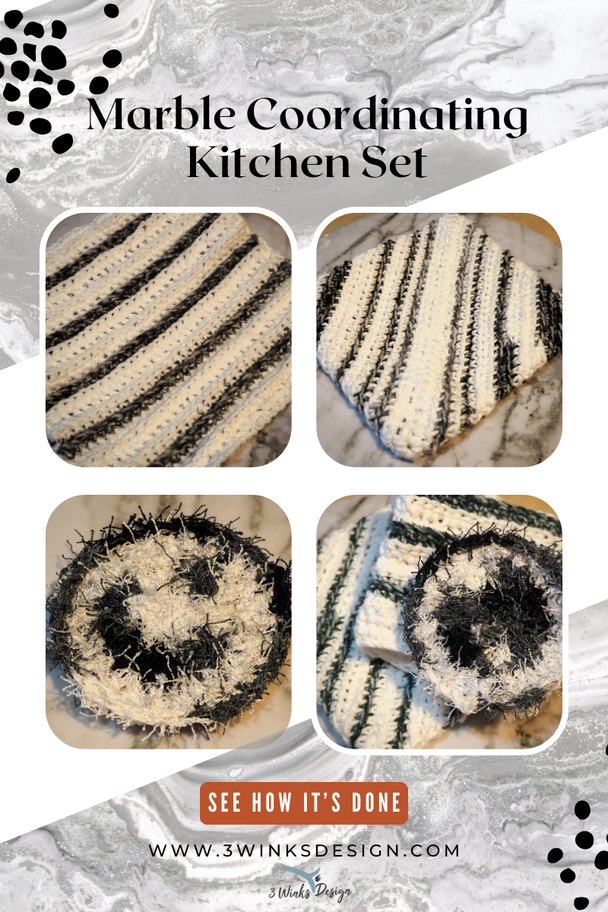 I've been crocheting a lot since before Christmas. I latch onto a project and make a million of that item for everyone and then I find something else to make and the pattern continues. I guess I am channeling my mom who did knitting and crocheting throughout her life. My most recent addiction has been to crochet diagonal double thick pot holders. I made them for all of my girls for Valentine's Day in different. They are so simple to make, made in a inexpensive cotton yarn, they are simply single crochet that you do in the round around the original chain. Here is a great pattern to follow. As I was making these beauties, I started using two yarns to make stripes and designs and also to use up small bits of yarn, creating new designs. I had a little bit of variegated black and white yarn that I wanted to use up. My girl, Charly, has a lot of marble in her kitchen and I wondered if I could create something that would coordinate with her pallet. She liked it!
I had to buy more yarn to try to recreate the look. The yarn wasn't the same as I had used for hers, but I think it still looks good with the marble. I tried to start and stop randomly after a few rows of white, adding the black variegated yarn as I went along. I wanted the affect that marble has with thinner then a few thick places of the veins of dark color. Or, just a simple striped pattern would work fine I think. Just choose a main body color and then add stripes of a thinner accent. Of course, I couldn't stop there. While shopping for yarn, I saw the scrubby yarn in the same black and white pattern. I thought, "Wouldn't it be nice to make a matching set of kitchen item?" I had never worked with the scrubby yarn before, so fair warning, it is hard to see your stitches! Use really good lighting! 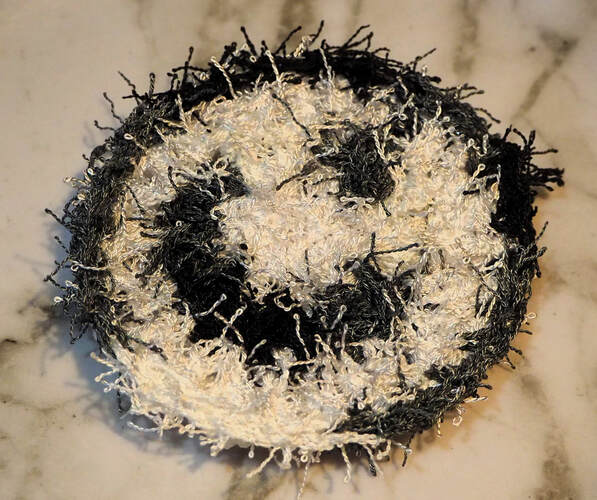 Basic Instructions for Round Scrubby: For this scrubby, you need to crochet 2 sides of the circle. One side will be with the scrubby yarn and one will be with coordinating cotton yarn. The pattern will be the same for each. Chain 3 then connect the ends together with a slip stitch, forming a circle. Chain 3 and then Double crochet 9 times into the circle. Join to the top of the chain 3 with a slip stitch. Chain 3 then double crochet twice in each stitch around. Join with a slip stitch into the chain 3 again. Chain 3 then double crochet in the stitch right next to the chain 3. In the next stitch, * double crochet twice, in the next stitch double crochet once. Continue alternating from the * back to the chain 3. Join with a slip stitch and you are finished! After you have two circles completed, put them wrong sides together and join them either with a single crochet around using the scrubby yarn, or stitch with a needle and the cotton yarn, your choice. There you have it! A cute pot scrubby! *NOTE- You can make your circle a little bigger if you would like a larger scrubby. The nice thing is that these are machine washable. Well I couldn't stop there! I had to make a dishcloth as well! 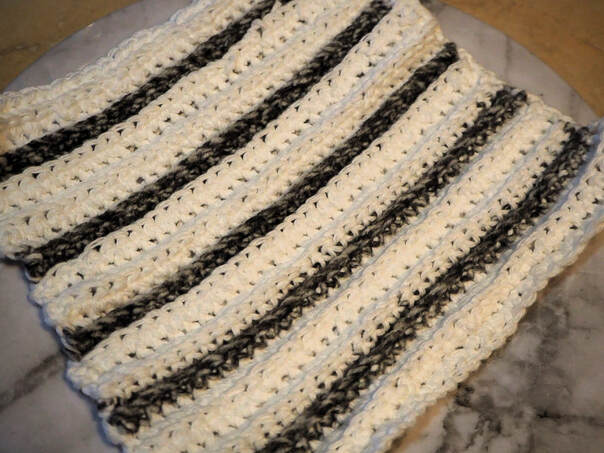 This is simply single crochet like the pot holder. I chained 36 and then crocheted in the back loop only to get the ridge effect. I added the dark yarn in 2 rows after a wider band of white. A wonderful thing about these projects is that they make up so quickly! I love to work on them while watching TV in the evening. I can get an entire set finished in 2 evenings! So many people are getting marble or Quartz countertops today that I thought that this set would make a great little gift for a bridal shower, house warming gift or just because. 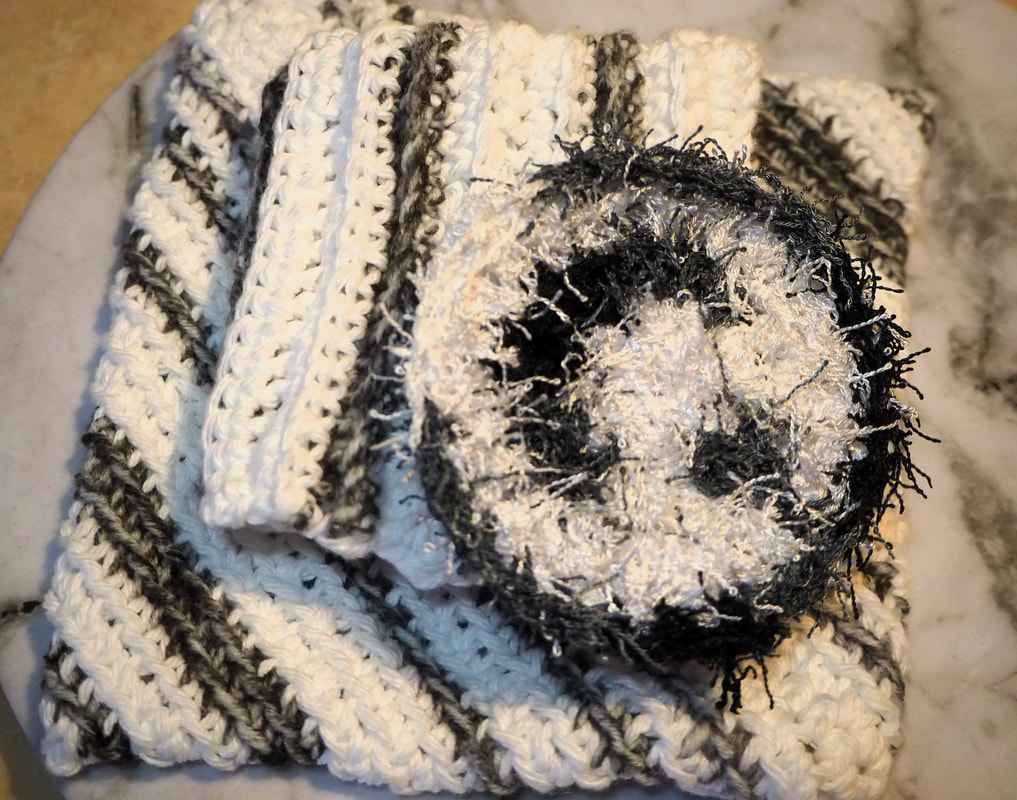 You could even make a dish towel if you would like, or trim one with a bit of crochet. Let me know if you give any of these patterns a try! Other Needlework Patterns: THIS POST CONTAINS AFFILIATE LINKS. WE WILL BE COMPENSATED FOR PURCHASES MADE THROUGH THOSE LINKS AT NO ADDITIONAL COST TO YOU. ALL VIEWS EXPRESSED ARE OUR OWN. 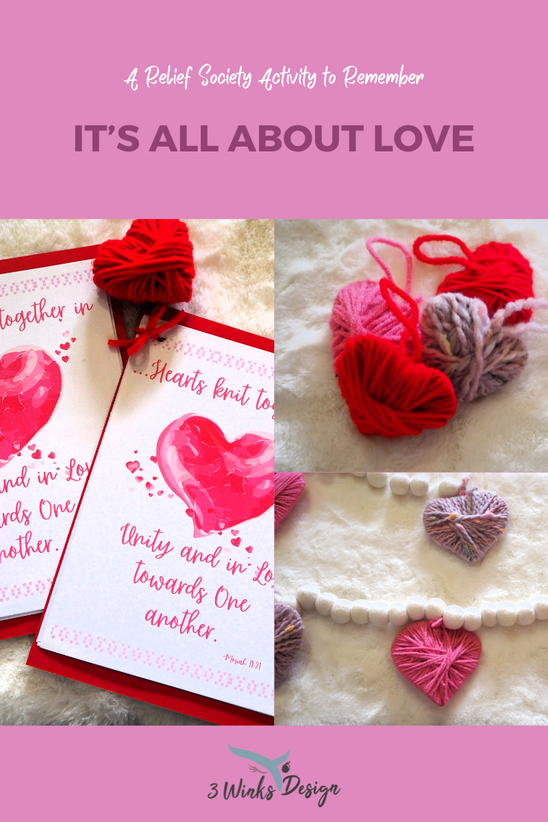 I am on the Relief Society Activity committee at my church. Relief Society is the Women's Organization and we try to have uplifting, self-improvement type activities throughout the year on one weeknight per month (give or take). I am blessed to work with some wonderful women on this committee and it is so much fun to sit and plan these activities together. We peruse the internet for ideas, we pray about what the women in our group may need, we bounce ideas around and get goosebumps when we come up with a really good plan.
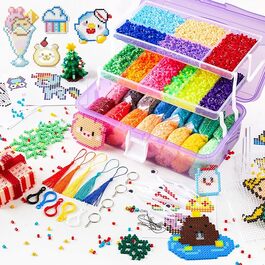
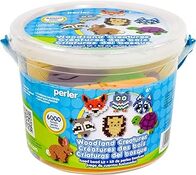
I generally share ideas for our activities with you after the fact, such as this Alice in Wonderland themed activity, but since we are getting so close to Valentine's Day, I figured someone out there might need an idea in a pinch, so here is one that I think will be really good. THIS POST CONTAINS AFFILIATE LINKS. WE WILL BE COMPENSATED FOR PURCHASES MADE THROUGH THOSE LINKS AT NO ADDITIONAL COST TO YOU. ALL VIEWS EXPRESSED ARE OUR OWN. Our 6 year old daughter is really into arts and crafts. I can always guarantee the toys she is going to play with everyday are her Legos and her arts and crafts bin. If she has a spare moment she will pull out paper and pen and draw. So when she had a Daddy Daughter Date night they decided to pick out a craft project they could do together. She got really excited about Perler Beads, and so did her creative dad. They spent the night making cute scenes of unicorns and rainbows to decorate her new room with! 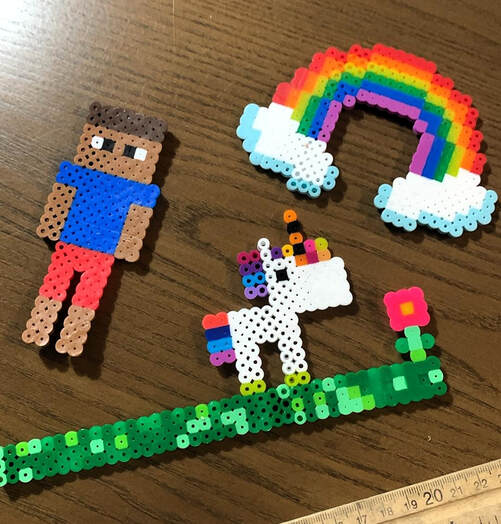 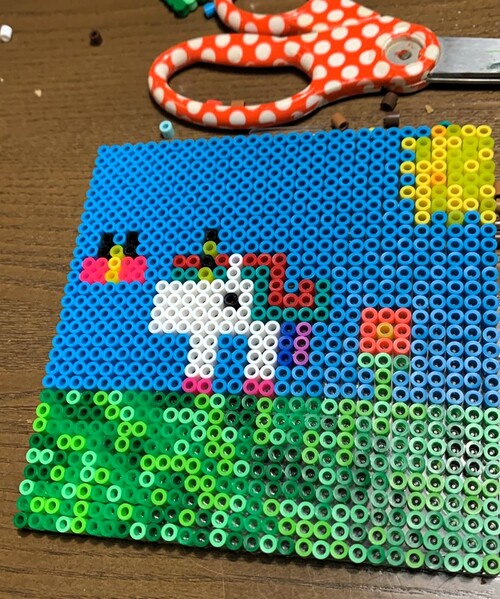 Then the Perler Beads came out to be used everyday for the whole of the next week. Many MineCraft characters, more unicorns, Godzilla, and even a big Megaman made their appearance. But I was hitting a creative block of what to make to join in on the fun. That’s when my daughter said she was going to make her own bracelet. 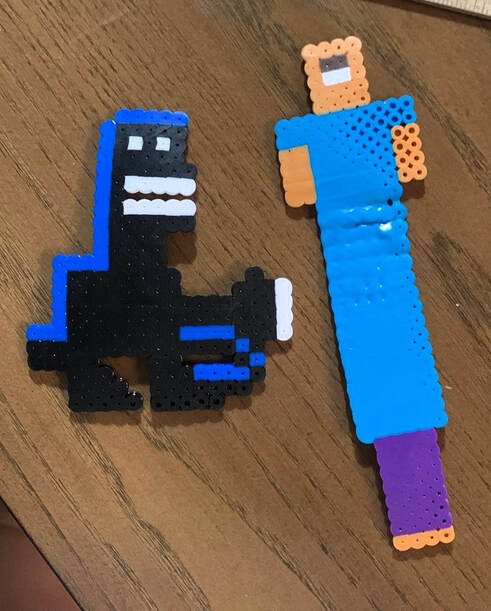 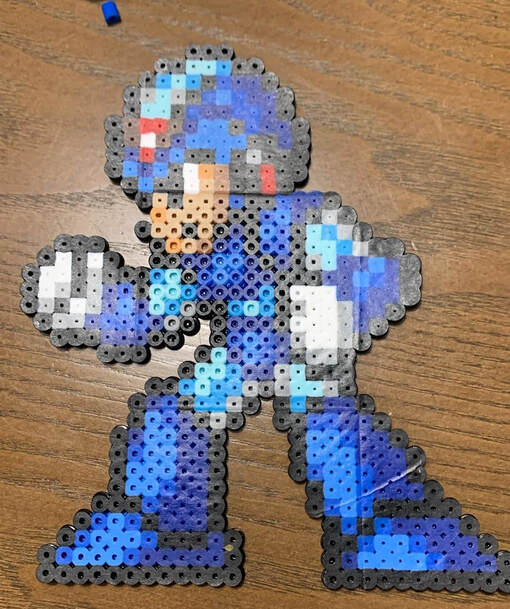 She designed a very cute simple square bracelet for herself and it reminded me of the fun earrings I used to wear in high school. My freshman year of high school those large chandelier earrings were in vogue and I loved to wear them. (Side note: One of the reasons I loved them was the nostalgia they provided from this picture book we had about getting pierced ears. Lots of fun earring designs in there!) And so I decided to design and make little, funky, colorful earrings. It was so easy and fast. I made three pairs for myself and then used a jewelry making kit my cousin gave me to attach them to hook earrings. Here is a kit I found on Amazon. And here is a kit specifically for jewelry! To make the earrings I used a square base plate and whatever Perler Beads I liked to make cute designs on the plate. If you decide to do this, make sure the beads are adjacent to each other so they will melt together. After you have the design you like, use a hot iron and a piece of parchment or wax paper over your beads. We found it worked best to Let it melt the beads for a few seconds before trying to move the iron around. Otherwise the beads would come loose and your design could be ruined. Once the first side is done flip the base plate over and remove your designs. Put the melted side down on another piece of parchment. Replace the parchment over your design and melt the other side. When that’s finished, set something heavy over your earrings to keep them flat (if that’s the look you’re going for. I accidentally melted the hole away in my peeler beads so I just heated up a needle and melted a new hole in the top bead. You could also attach post earring backs or clip on earring backs with glue or by melting the plastic and pushing the post into it, though I have not tried that method. 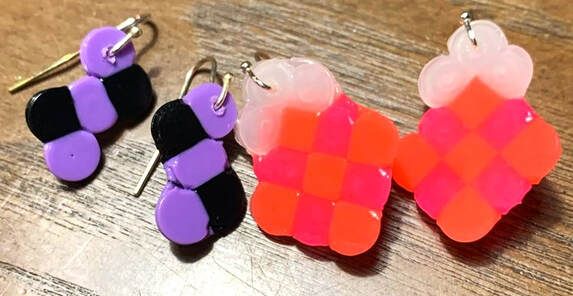 The earrings came out so cute and fun! My daughter decided to make me more and we’re going to get some clip-on backs to add to some of the earrings for her to wear.To make the earrings I used a square base plate and whatever Perler Beads I liked to make cute designs on the plate. If you decide to do this, make sure the beads are adjacent to each other so they will melt together. This would be a fun activity to do at a birthday party. I love the kind of party favors that will last more than a week and will be something the party goer can use over and over again. Or do it for a Girls Night with your friends! It would be an awesome Galentine’s Day Activity. Or just on your own, the possibilities are endless! We've found other sources of ideas for Perler Earrings, too! Check these out: Maker Mama The Thinking Closet Here are some great Perler Kits to help you with designs:
 |
Creators of Hot Cocoa Bombs! (copyrighted)

Author
Helen Reynolds: Mother of six children , grandmother to eleven! I love to cook, craft and create things and I especially love doing that with my family, So, when my lawyer daughter, Lindsey, my artist daughter, Madalynn, and I came up with the idea of Hot Cocoa Bombs, this blog was born. Then, one more daughter, with her technical and science skills, plus creativity has joined in to round us out! Read more about us here! 
Click this link and visit 3WinksDesignShop on Etsy. Find our Hot Cocoa Bomb Idea Book, our For the Love of PIe e-book and more of our creations!

Amazon Gift Cards are the Perfect Gift!
    Archives
May 2024
|


 RSS Feed