3 Winks Design
  • Home
  • About Us
    • Contact Us
  • Printables
  • Where I Party
    • Places Featured
  • Contests
    • Writing Challenge
  • From Cover to Reel
    • Show Notes

First View of a Wedding & Frame Filled With Love Tutorial!

8/8/2016

3 Comments

 
Picture
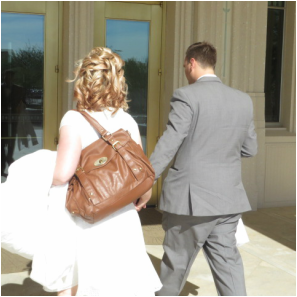
On their way into the temple, still Lindsey Reynolds and Austin Hannan.
Picture
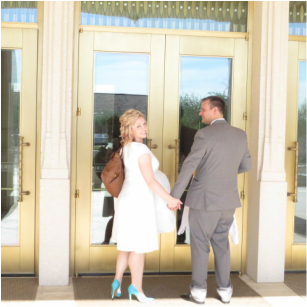
Just about to step inside! So exciting!
Picture
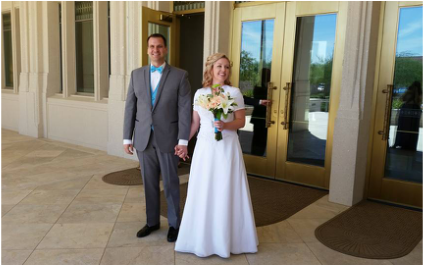
And here they are...Mr. & Mrs. Hannan! So many smiles and so much happiness!
     I have been fairly absent during this past week with all of the excitement of the wedding going on.  Everything turned out beautifully and the smile on my daughter's face is worth all of the sleep deprivation of the last few days.  There will be many more pictures coming about the fun things we did to make this event even more special and fun! My niece, Tara Fritz, is a professional photographer who came from Las Vegas to take her photos. I can't wait to see them and share them with you.  Also, look at Lindsey's beautiful bouquet, Her sister, Alicia, made it for her.  Our dear friend, Tracy Moore, did her hair (and all of our hair, and redid it before the reception! Plus, she and her daughter ME, did our nails!)  We had so much help and support from friends and family, I can't even begin to list them all here, but they all added so much to the success of the day.  
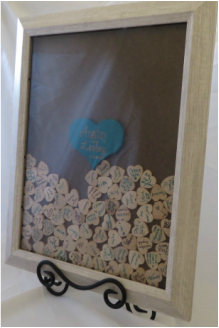
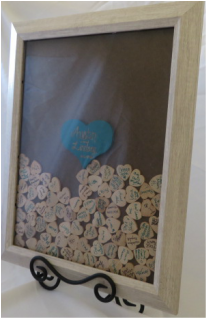
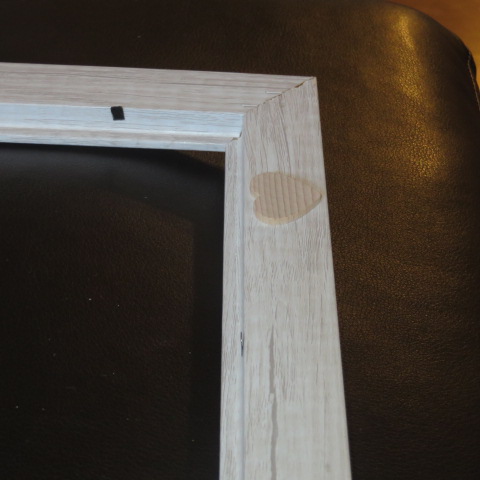
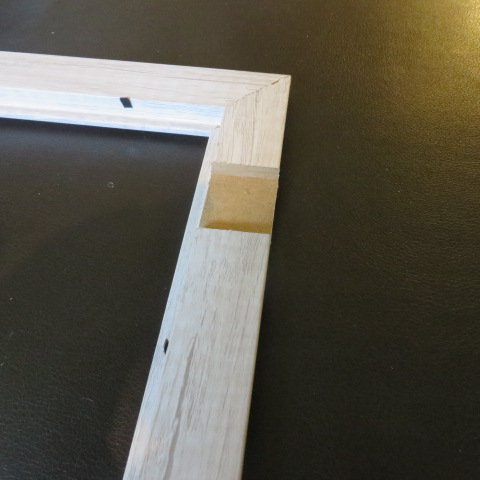
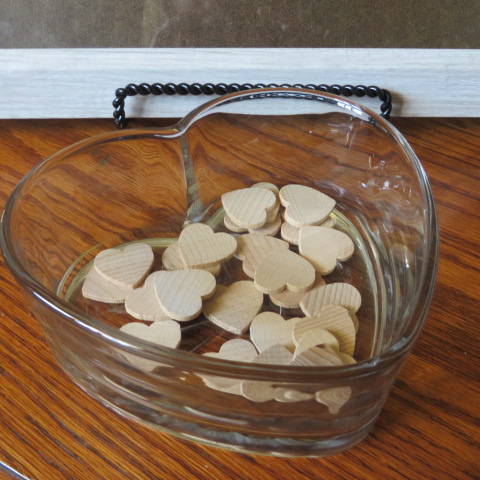
       One of the ideas that we used to make the reception fun and a little interactive with the guests was our special sign in frame! You may have seen these on etsy.  We did and decided we had to figure out how to make one for Lindsey and Austin's wedding reception. We call it The Filled With Love Frame. Here is how it turned out:
Picture
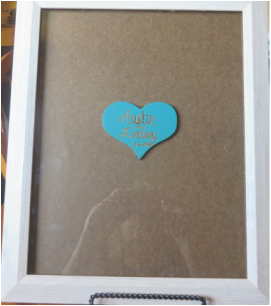
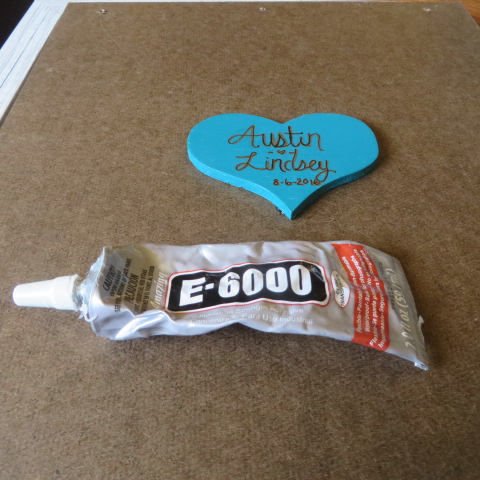
      The way you use it is to have little hearts that guests sign their names on and then drop them into a little slot on the top of the frame.  
Picture
        If you want to see how we made it, click read more below.

​        I also wanted to make you aware of one of my affiliates who is having a great deal for the next two days!Oriental Trading  is having a special of 2 days of free shipping on any order!  They are a terrific resource for teachers and students for back to school items, or for any wedding or party you may be planning. 

       
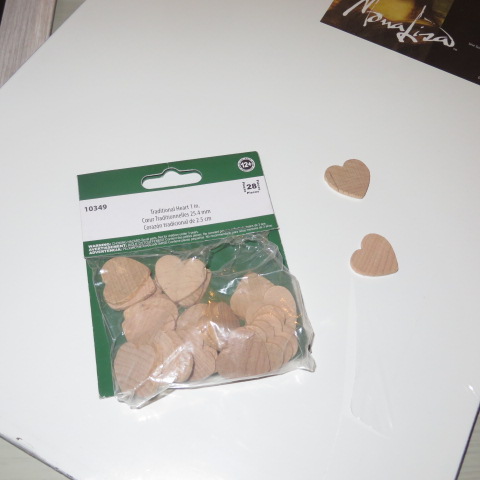
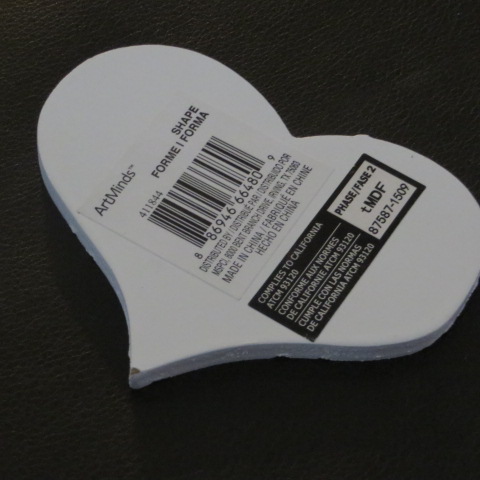
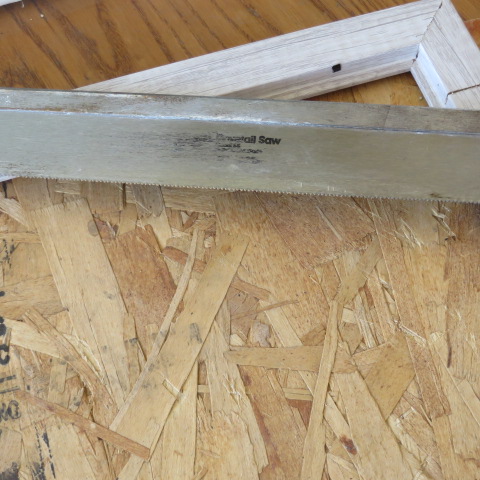
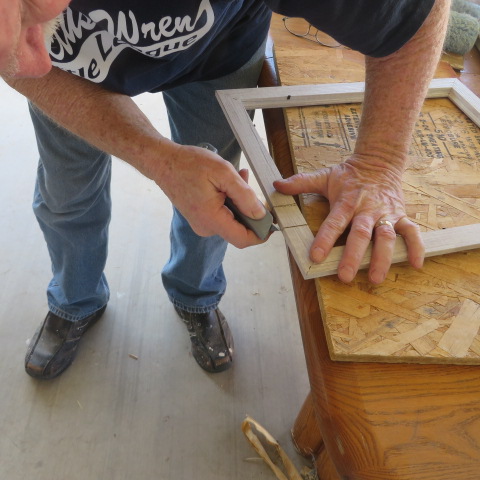
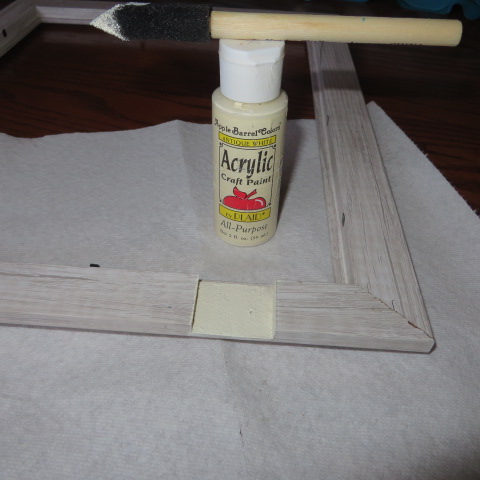
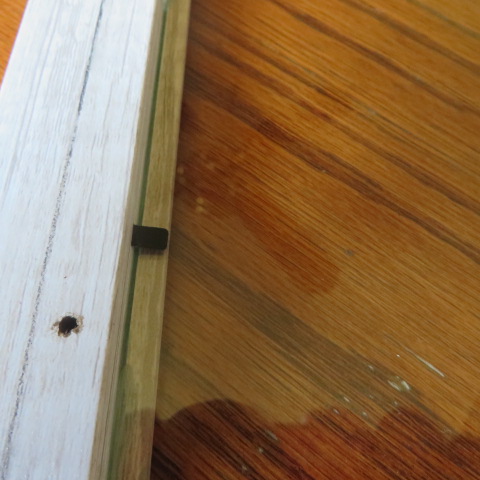
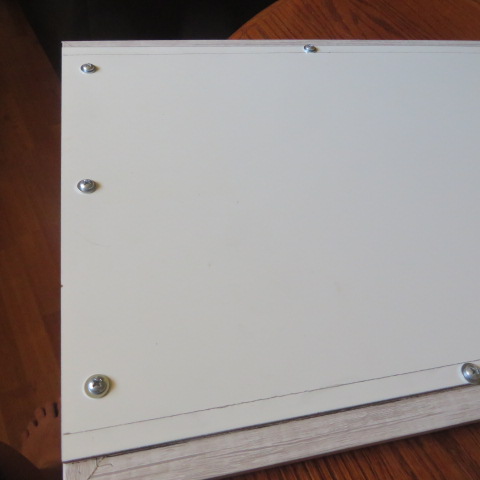
      To make the Filled with Love Frame, this is what we did.  Click on each picture for directions.
I went to Michael's and purchased this frame because I thought it was wooden. We wanted something we could cut the slot into.
I also purchased a piece of masonite that was larger than the frame opening. Our frame is 11 x 14. The masonite is 12 x16.
I purchased a bunch of packages of these little hearts that were slightly narrower than the depth of the frame.
Then I bought one larger wooden heart to put Lindsey and Austin's names on, plus their wedding date.
        For this project, I got my husband in on the act.  He is always good at helping me with the logistics of my projects.  
He used one of the little hearts go figure out how wide of a slot he wanted to cut. We cut the slot to one side of the top of the frame. He drew lines slightly farther apart than the widest part of the hearts.
You can see him drawing lines on each side of the heart.
He used a miter saw to cut the slot.
Here he is cutting.
To cut out the bottom part of the slot, he used his utility knife.
It cut out really easily because this is when we discovered this frame isn't really made of wood, but of a pressed paper product. Oh well, it looks nice and was easy to cut.
        After the cutting was done, Madalynn and I got in on the action of making it.
To protect the slot, I painted it in an off white acrylic paint.
Next, I glued the glass into the frame with E-6000 glue.
I used the little clamps in the frame to hold the glass in place until it dried. You can also see the holes my husband predrilled to use to screw on the new back.
Madalynn painted the large heart and wrote the names and date on it. First she did it in gold, but that was too hard to see, so we shadowed it in brown. This was done in Sharpie. Since the masonite was brown on one side, it fit our colors, so we glued the heart on the brown side with E-6000 glue. You can see my tube is starting to run low. Of course, you can paint your heart and board whatever colors you need.
Then we screwed the board onto the back of the frame with washers and screws. This gives enough room for the hearts to slip down into the frame.
We used a glass heart shaped dish from the dollar store to hold the hearts at the reception.
Picture
        If you have any questions that I didn't cover, please ask me! This will be a great keepsake for the bride and groom!
3 Comments
Ruth Maki
8/8/2016 05:34:30 pm

I love it!

Reply
Grandmas House DIY link
9/28/2016 02:17:35 pm

What a sweet and fun idea! Thank you for sharing with us at the To grandma's house we go link party! Pinned!

Reply
Helen Reynolds
9/28/2016 02:54:52 pm

Thanks for hosting! This frame received many compliments at my daughter's wedding.

Reply

Your comment will be posted after it is approved.


Leave a Reply.

    Picture
    Creators of Hot Cocoa Bombs!  (copyrighted)
    Subscribe to Our Email!
    Picture

    Author

    Helen Reynolds: Mother of six children , grandmother to eleven!  I love to cook, craft and create things and I especially love doing that with my family, So, when my lawyer daughter, Lindsey, my artist daughter, Madalynn, and I came up with the idea of Hot Cocoa Bombs, this blog was born.  Then, one more daughter, with her technical and science skills, plus creativity has joined in to round us out!  Read more about us here!
        

    Picture
    Click this link and visit 3WinksDesignShop on Etsy. Find our Hot Cocoa Bomb Idea Book, our For the Love of PIe e-book and more of our creations!
    gluten free gifts
    Shop Party Favors @ Beau-coup.com


    Weebly - Websites, eCommerce & Marketing in one place.

    RSS Feed

    Archives

    March 2023
    February 2023
    January 2023
    December 2022
    November 2022
    October 2022
    September 2022
    August 2022
    July 2022
    June 2022
    May 2022
    April 2022
    March 2022
    February 2022
    January 2022
    December 2021
    November 2021
    October 2021
    September 2021
    August 2021
    July 2021
    June 2021
    May 2021
    April 2021
    March 2021
    February 2021
    January 2021
    December 2020
    November 2020
    October 2020
    September 2020
    August 2020
    July 2020
    June 2020
    May 2020
    April 2020
    March 2020
    February 2020
    January 2020
    December 2019
    November 2019
    October 2019
    September 2019
    August 2019
    July 2019
    June 2019
    May 2019
    April 2019
    March 2019
    February 2019
    January 2019
    December 2018
    November 2018
    October 2018
    September 2018
    August 2018
    July 2018
    June 2018
    May 2018
    April 2018
    March 2018
    February 2018
    January 2018
    December 2017
    November 2017
    October 2017
    September 2017
    August 2017
    July 2017
    June 2017
    May 2017
    April 2017
    March 2017
    February 2017
    January 2017
    December 2016
    November 2016
    October 2016
    September 2016
    August 2016
    July 2016
    June 2016
    April 2016
    March 2016
    February 2016
    January 2016
    December 2015
    November 2015
    October 2015
    September 2015
    August 2015
    July 2015
    June 2015
    May 2015
    April 2015
    March 2015
    February 2015
    January 2015
    December 2014
    November 2014

Proudly powered by Weebly
  • Home
  • About Us
    • Contact Us
  • Printables
  • Where I Party
    • Places Featured
  • Contests
    • Writing Challenge
  • From Cover to Reel
    • Show Notes