3 Winks Design
  • Home
  • About Us
    • Contact Us
  • Printables
  • From Cover to Reel
    • Show Notes
  • Where I Party
    • Places Featured
​Welcome Readers! 
Subscribe to have access to FREE printables, ONLY available to our subscribers!
Subscribe to access exclusive content!

Save Money! Make Your Own Drapes!

8/29/2016

9 Comments

 
Picture
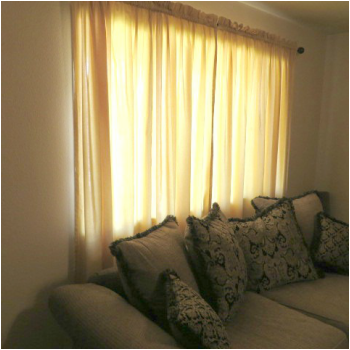
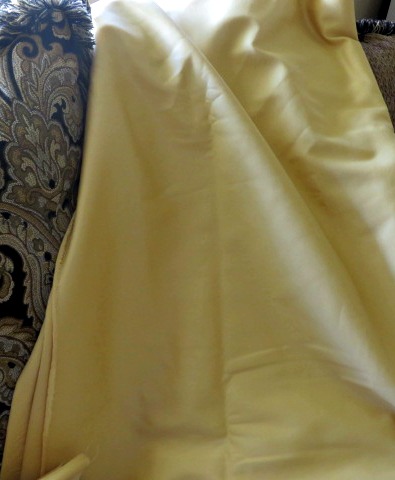
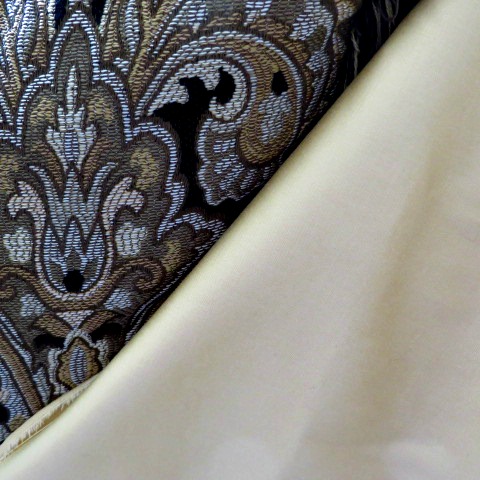
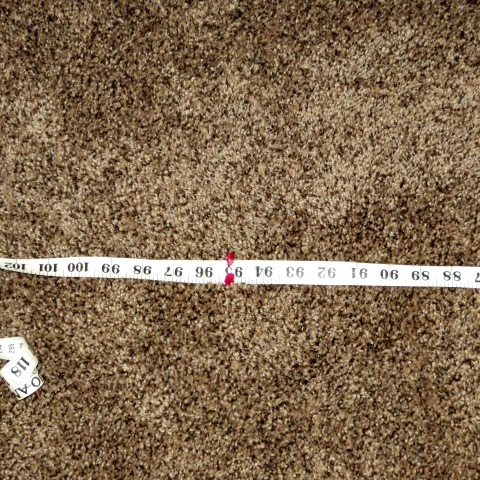
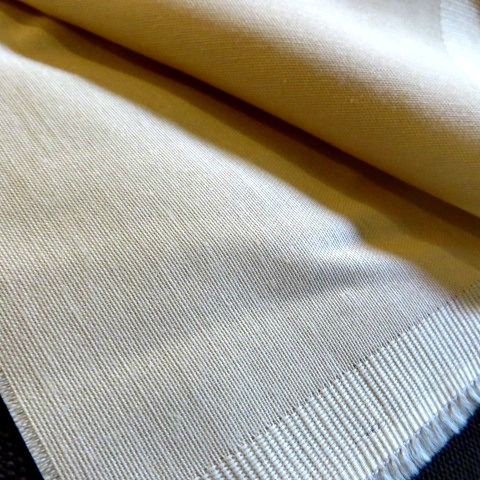
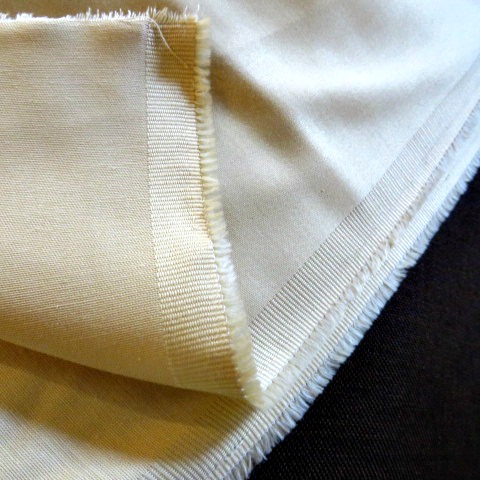
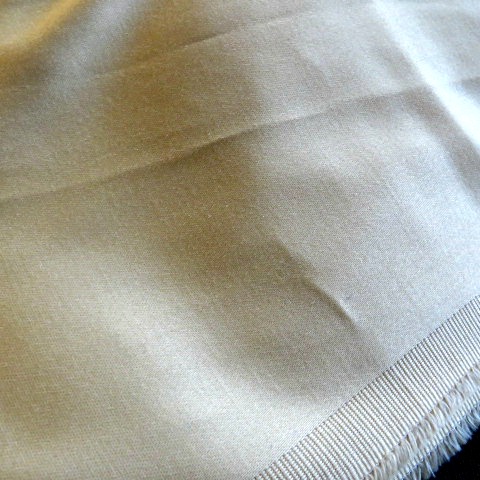
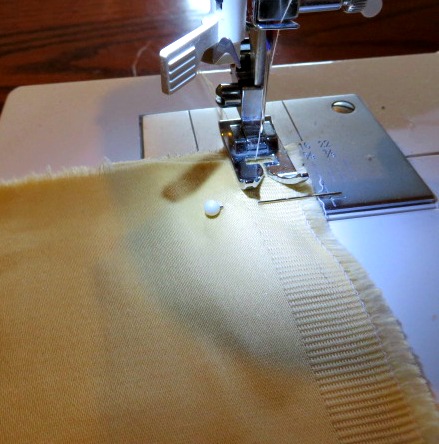
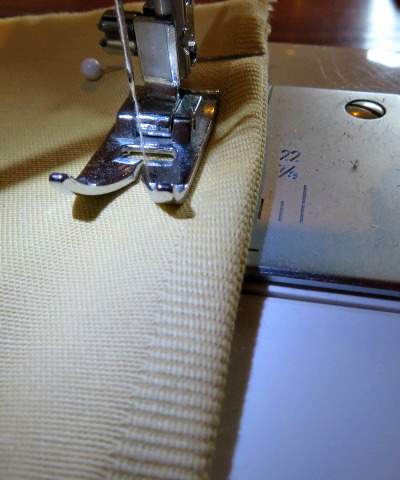
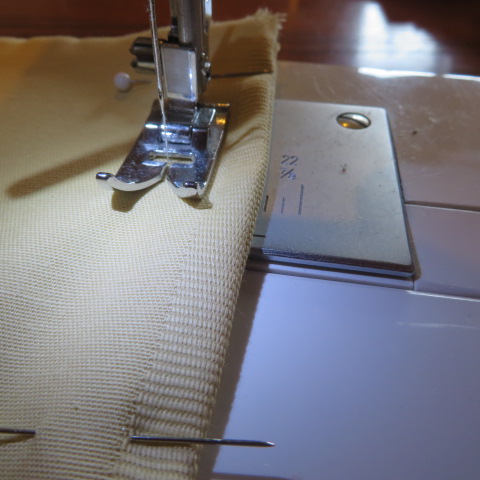
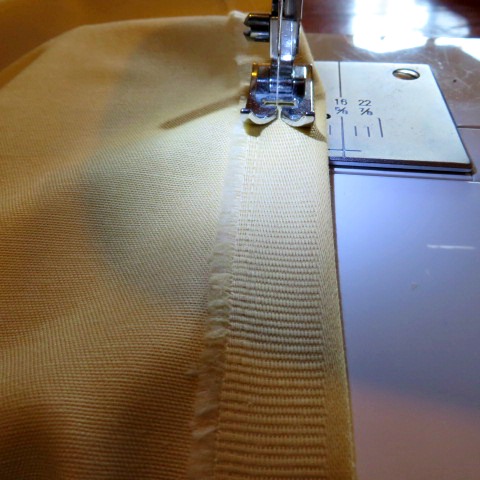
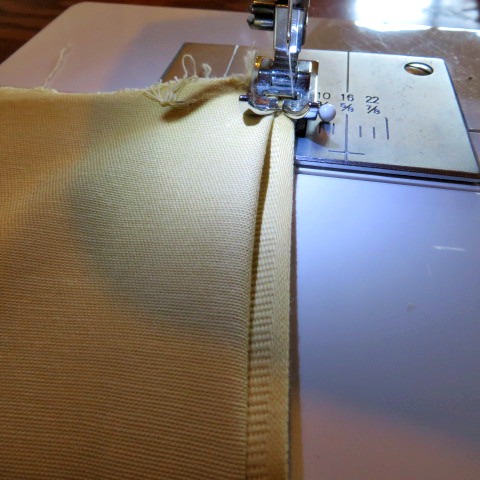
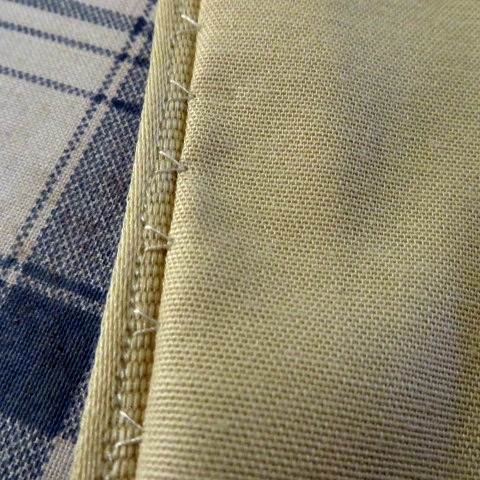
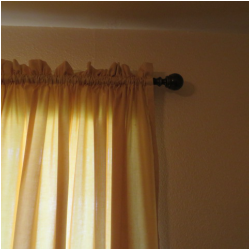
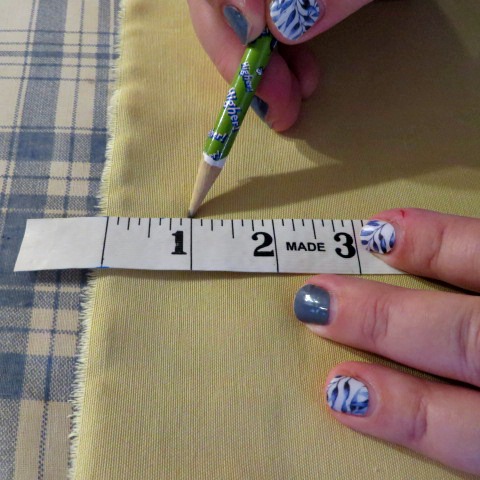
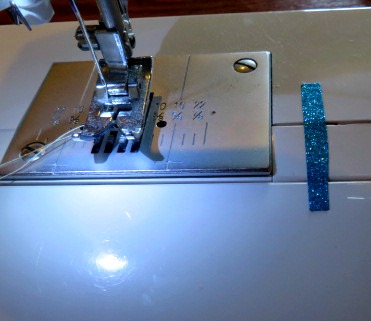
      You may remember photos of my empty living room from past posts.  I posted about my carpet and new furniture, but my living room was very bright because I hadn't yet put up the drapes.  I loved the brightness in the daytime, but there was no privacy at night, so I began my hunt for drapes that would coordinate with my carpet and furniture.  
Tip # 1:  Carry your couch pillow with you in a bag to get the perfect color that you are looking for.
     That is what I did! And, guess what? Nothing that I could afford gave me the look that I wanted.  I was trying to avoid making my own drapes because of the time it would take me. But, when I had no luck, I went to the fabric store.  The store was having a 50% off sale on their decorator fabrics, and I found the perfect color! But, I figured I needed about 11 yards or so of fabric and even at $10 per yard, that was going to be over $110! So, I decided, to try to cut costs even more, I would go to SAS, our discount fabric warehouse and see if I could get lucky finding the same color that I had fallen in love with at the regular fabric store.  Jackpot! I found the same color drapery fabric in the clearance section of the SAS for $3.99 per yard!  Plus, one spool of the perfect match of thread.  After tax, the cost of my drapes came to just under $50! 
Picture
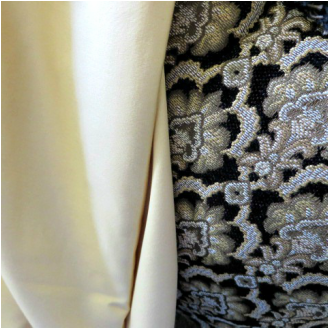
See how this nice, polished, drapery weight cotton's golden color goes well against my sofa?
      Tip #2:  Measure, measure, measure! Measure your windows before you shop and figure out how much fabric you will need, and add a little just to be safe.  I ended up getting 11 3/4 yards of fabric because I had to use two different bolts because one didn't have enough on it.  So, I didn't want a seam suddenly in the middle of my drapery panel, so I had to buy enough for 3 panels and then buy enough for the fourth panel from a different bolt.  Now that I am finished, I wish I had figured the panel length a little longer because in retrospect I would have made a deeper hem.  
I laid my measuring tape down on the floor and pinned it in place.
Then I laid the fabric out next to the tape to measure it.
I tore it across the grain for a straight edge.
       Tip #3:  Make french seams! No raveling allowed and you want the back of the panels to look as good as the front!  I have taught french seams before on my pillowcase post, but I will go over it again.
To start french seams, put the wrong sides of the fabric together.
This fabric had obvious wrong and right sides. The right side was polished and had a sheen to it.
Here is the right side that I started to sew on first. I was sewing a long center seam, adding two curtain panels together into one large panel so that I would have 2 panels on each side of my window instead of 4 separate panels.
Since there was a nice salvage edge, I used it as a guide and sewed down the middle of it for a straight 1/2 inch seam.
Then, I flipped the fabric so that the right sides were together and stitched the seam farther in, in this case 1 tick over from the 5/8 mark, to make sure that I captured the first 1/2 inch seam inside of it.
Can you see where I am using the guidelines to get a straight stitch?
     Tip #4:  Finish the edges of your panels very neatly, because they will show and be noticeable and no one wants to see puckering! I used my sewing machine's hem stitch to make a nice edge finish that looks great, if I do say so myself.
Once again, the salvage end is our friend. I used it to fold over the first part of the side hem. If you look at professional drapes, they usually have about a 1" or so wide side finished hem.
After stitching down the first part of the edge, fold it over again and then pull the under fabric back from the first crease in order to sew the hem stitch.
This is how the stitch looks. You sew along the hemmed creased edge and every so often, the needle will catch a bit of the fabric.
This is how it will look on the right side. Very neatly done!
     Tip #5: Decide how you want to hang your curtain in advance so that you will have measured for the correct amount of fabric and you will know what to measure for.  I decided to have a casing with a 2"piece above it that would shirr onto the rod. 
     So, I decided that I needed a 4" top hem.  My rod is 3/4 inches in diameter, so I made the casing just over an inch wide, plus I needed to sew under about 1/2 to finish the edge.  Here is the process;
Picture
Measure down and mark where you want the fabric to meet itself. For example, here I wanted a 1/2" finished edge, so I measured down 1", once I folded it, that would make 1/2". Then, When I wanted a 4" casing, I measured down 8".
I knew I was going to have a 2 1/4" top of my curtain, so I measured over from the needle and put a piece of tape as a stop to follow as I sewed.
I began sewing at the tip top of the curtain, I sewed down the top crease. Then I put the edge of the top against the tape and sewed the top of the casing. This kept my line very straight. Finally I stitched along the very bottom of the casing to finish it off.
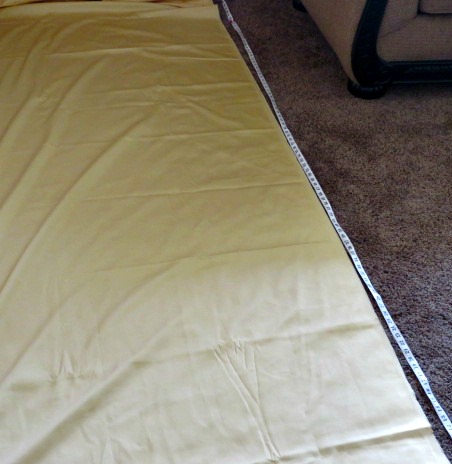
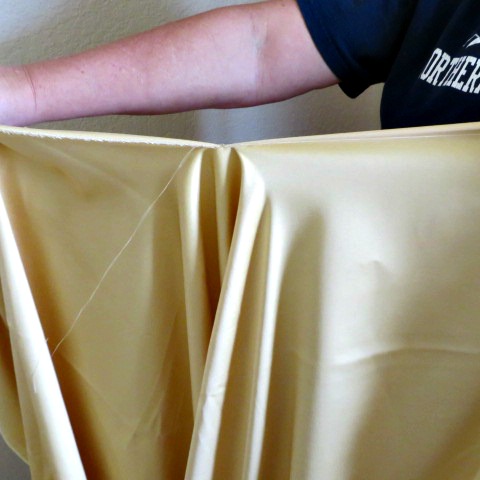
      Remember that through all of these steps, your iron is your friend! Press down your seams, press down your hem lines.  This will help you end up with a beautiful finished look. 
       Tip #6:  Hang your drapes up to hem them to the right length.  I feel bad that I forgot to take pictures of my husband putting up my drapery rod.  He didn't even complain when I made him take out one end and put it up 3/16 of an inch higher because it didn't look even.  Our house is old and not everything is square anymore.  That is one reason why I felt I needed to hang the drapes to hem them.  If I had only measured, they would have surely looked crooked.
Picture
Sorry, I couldn't find a way to crop out my bare foot. I used the baseboard as a line to help me mark the hem. I wanted the drapes just above the floor.
Picture
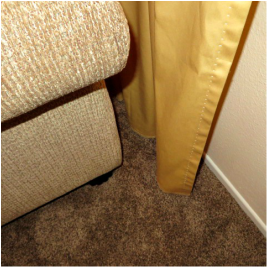
The hem falls behind my couch. I love it!
     Once I finished the pinning, I took the drapes back down and sewed in a nice finished hem.  Then, I pressed the drapes and we hung them up!  I am so pleased with the results and with the cost!  Next, I am going to make tie-backs, but that will be a topic for another post!  
       Sewing your own drapes really isn't very difficult.  It is all straight stitching.  I think that the most difficult part is just the length and volume of fabric.  It took me 3 days (a few hours per day) to finish these.  I did one side each day for 2 days and then the hem on the third day.  It was time well spent for me! Now I have money left over to spend on other parts of my house.  Let me know if you think you will give this a try!
9 Comments
Ruthj
8/29/2016 08:07:43 pm

GREAT JOB Helen! I can't wait to see all your projects in person! ;-)

Reply
Helen link
9/5/2016 02:55:24 pm

Looking forward to that, too, Ruth!

Reply
Gina link
9/1/2016 07:04:37 am

I've been wanting to make my own drapes for a while now. It's so intimidating though! These tips definitely help and I may just take a trip to the fabric store this week and start planning.

Reply
Lindsey Reynolds
9/1/2016 07:06:27 am

Good luck! It really is easier than it seems. The hardest part for me was picking the right fabric!

Reply
April J Harris link
9/7/2016 09:59:55 am

I'm not a fantastic sewer so have never made my own drapes but your tutorial makes it look very do-able! Thank you for sharing with us at the Hearth and Soul Hop.

Reply
Helen Reynolds
9/7/2016 10:09:25 am

You are welcome! Hope you give it a try!

Reply
Helen at pleasures of the NW link
9/10/2016 06:15:20 am

Thanks for sharing on the Pleasures of the NW’s DIY party-and don’t forget to leave a comment at the party – Next week’s features that also leave a comment get pinned and tweeted!

Reply
HelenReynolds
9/10/2016 02:33:35 pm

I will! Thanks for hosting!

Reply
Jack Titchener link
8/17/2017 09:55:02 am

I would love to be able to sew my own black-out curtain one day. My wife has a hard time sleeping if there is any kind of light so I would have to use some pretty dark heavy fabric for the curtain to work. I'll have to refer back to this if I ever try and make them on my own!

Reply

Your comment will be posted after it is approved.


Leave a Reply.

    Picture
    Creators of Hot Cocoa Bombs!  (copyrighted)

    Picture

    Author

    Helen Reynolds: Mother of six children , grandmother to ten and counting!  I love to cook, craft and create things and I especially love doing that with my family, So, when my lawyer daughter, Lindsey, and my artist daughter, Madalynn, and I came up with the idea of Hot Cocoa Bombs, this blog was born.  Then, one more daughter, with her technical and science skills, plus creativity has joined in to round us out!  Read more about us here!
        

    Picture
    Click this link and visit 3WinksDesignShop on Etsy. Find our Hot Cocoa Bomb Idea Book, our For the Love of PIe e-book and more of our creations!

    Categories

    All
    Advent Calendars
    Alicia
    Amazon
    Arizona
    Baby
    Baking
    Bar Cookies
    Birthday
    Blackberries
    Black Friday
    Blueberries
    Books
    Bread
    Breakfast
    Cake
    Camp
    Candy
    Canning
    Cheese
    Chicken
    Chocolate
    Christmas
    Cobbler
    Cookies
    Cooking And Baking
    Crafts
    Crochet
    Crock Pot
    Dessert
    Diy
    Dollar Tree
    Donuts
    Earn Money
    Easter
    Easy
    Easy Recipes
    Eco Friendly
    Ecuador
    Etsy
    Fall
    Family
    Fast Recipes
    Food Storage
    Friday Faves
    Games
    Gifts
    Gluten Free
    Grilling
    Halloween
    Handmade Monthly
    Healthy Eating
    Helen
    Holidays
    Home Decor
    Hot Cocoa Bombs
    International Recipes
    Italian
    Jam
    July 4th
    Lemons
    Lindsey
    Madalynn
    Music
    New Years
    Organization
    Owls
    Painting
    Panna
    Parties
    Pie
    Potato
    Primary
    Printable
    Products
    Pumpkin
    Quilts
    Recipes
    Salads
    Science
    Scouting
    Seafood
    Service
    Sewing
    Side Dishes
    Slow Cooker
    Soup
    St Patricks Day
    Strawberries
    Target
    Testimony
    Thanksgiving
    Traditions
    Travel
    Valentines Day Craft
    Valentines Day Food
    Valentines Day Gift
    Vegan
    Wedding

    Janie and Jack Sale on Now
    Save on Wedding Favors @ Beau-coup.com

    International Gifts
    Lulus.com
    Weebly - Websites, eCommerce & Marketing in one place.

    RSS Feed

    Archives

    January 2019
    December 2018
    November 2018
    October 2018
    September 2018
    August 2018
    July 2018
    June 2018
    May 2018
    April 2018
    March 2018
    February 2018
    January 2018
    December 2017
    November 2017
    October 2017
    September 2017
    August 2017
    July 2017
    June 2017
    May 2017
    April 2017
    March 2017
    February 2017
    January 2017
    December 2016
    November 2016
    October 2016
    September 2016
    August 2016
    July 2016
    June 2016
    April 2016
    March 2016
    February 2016
    January 2016
    December 2015
    November 2015
    October 2015
    September 2015
    August 2015
    July 2015
    June 2015
    May 2015
    April 2015
    March 2015
    February 2015
    January 2015
    December 2014
    November 2014

    Picture

    Get my Blog Button

    <div align="center"><a href=" http://threewinksdesign.weebly.com" title="3WinksDesign"><img src=" http://threewinksdesign.weebly.com/uploads/4/2/4/5/42456147/button_orig.png" alt="3WinksDesign" style="border:none;" /></a></div


Proudly powered by Weebly
  • Home
  • About Us
    • Contact Us
  • Printables
  • From Cover to Reel
    • Show Notes
  • Where I Party
    • Places Featured