3 Winks Design
  • Home
  • About Us
    • Contact Us
  • Printables
  • From Cover to Reel
    • Contests >
      • Writing Challenge
    • Show Notes
  • Where I Party
    • Places Featured
  • Archives

Scrappy Snake Valentine

1/18/2017

12 Comments

 
Picture
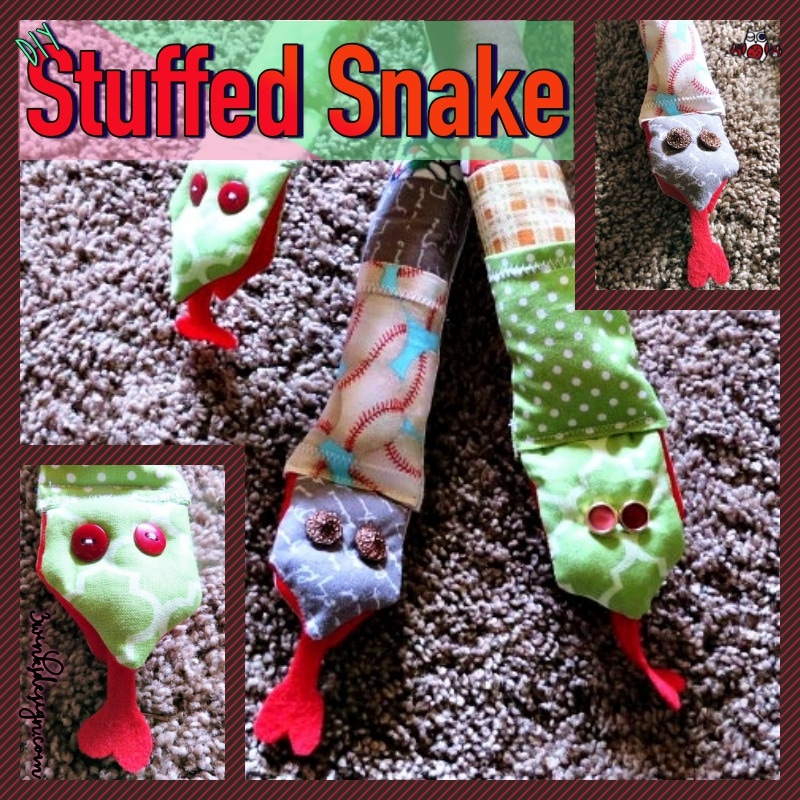
         About a week ago, I made a  little owl purse  as a Valentine's Day gift for my granddaughters.  Today I am going to show you what I came up with for my grandsons!  I put together a picture tutorial for a Scrappy Snake using some sporty fabric and adding a pocket at the neck to be used to tuck in treats or for little fingers to fit in to make their snake slither! 

          This snake is really pretty simple to make.  I have broken it down into sections to help you see how I did it.  But, although it will seem like a lot because of all of the pictures, it really goes together pretty quickly.

Picture
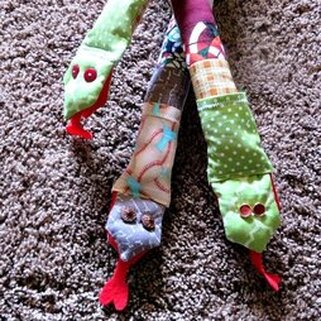
I have already made 3 of them. Just 2 more to go.
  Supplies:
  • Any scraps of fabric  I used cotton, but you could use almost any type, knits would be cute or fleece.  Be sure to have some solid red for the mouth.
  • Buttons for eyes, or felt or something else for the eyes.  For my baby grandson, I will probably stitch on felt eyes really tightly to make sure he won't choke on buttons.  He is at that chewing stage.
  • Thin quilt batting. (You only need a small amount, so if you have any scraps...)
  • Fiber Fill stuffing (1 bag will fill many, many snakes.)
  • Thread, red and any other color to match your color scheme.
  • needle and pins
  • scissors
  • sewing machine (This is mine that I bought just a couple of years ago.)
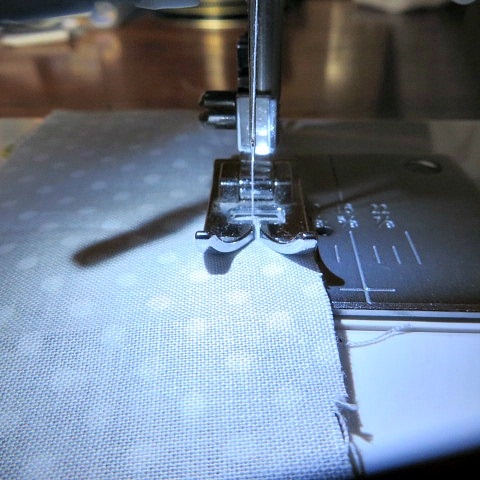
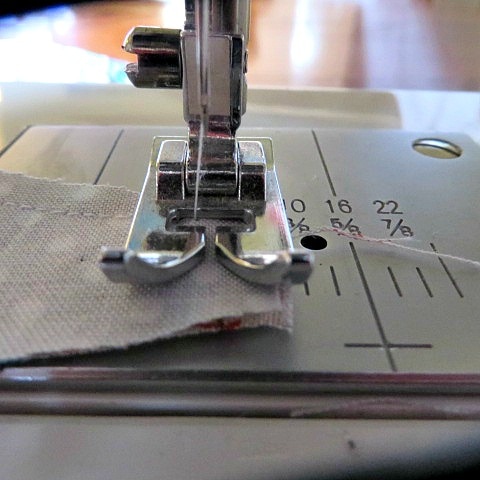
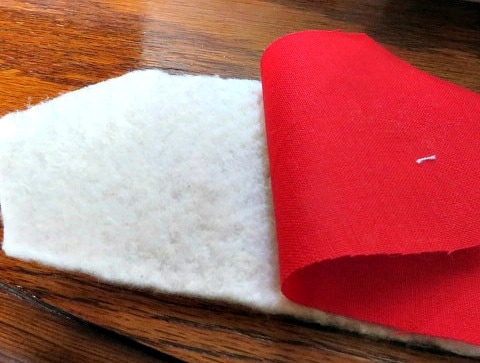
Preparing the snake skin:
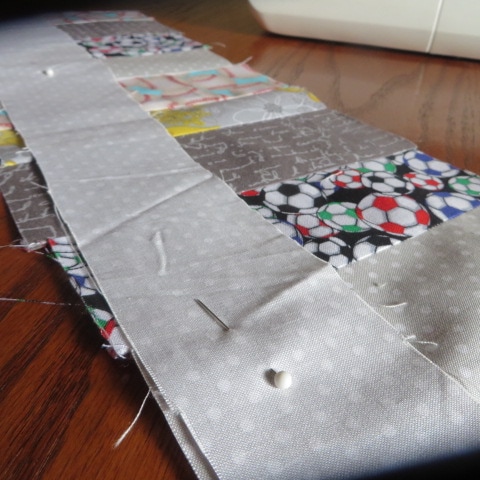
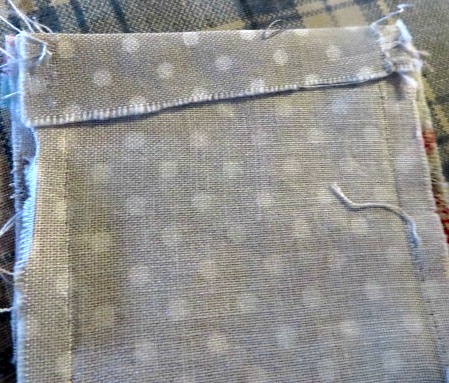
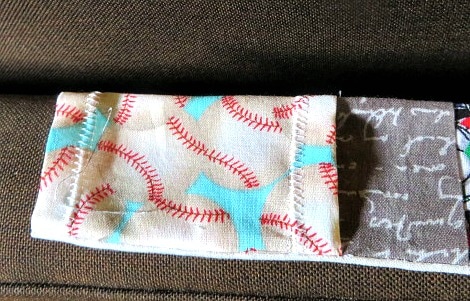
​          The largest piece of fabric you will need is a long strip to be the under belly of the snake.  I had some long left over scraps from another project which were actually the inspiration for this snake project.  These strips became the under belly of the snake.
Picture
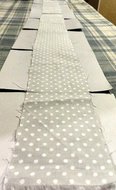
You can make your snake any length you would like. I have made 3 snakes so far, and they are each a different length.
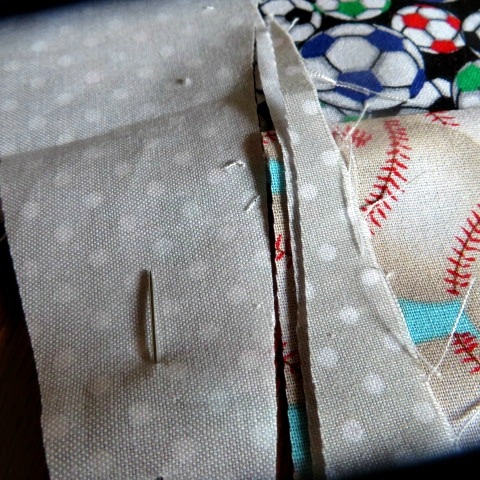
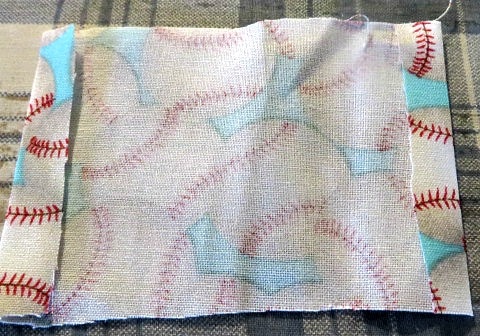
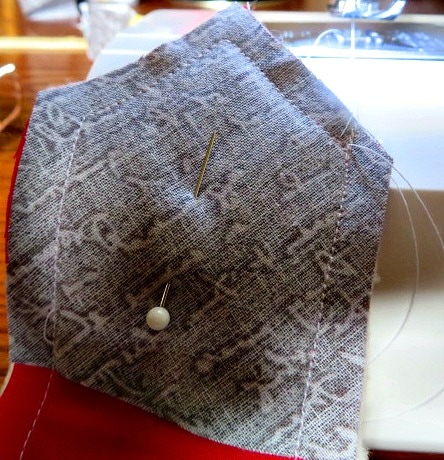
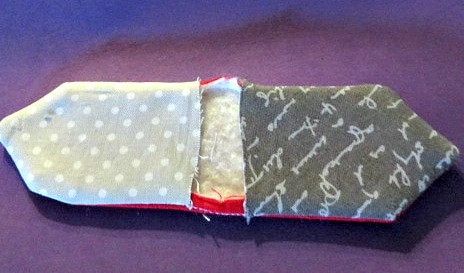
           Of course, one of the most fun things about this project is picking out the fabric to use.  When you have picked them out, cut out sections that are about 3 x 6 inches and line them up in a pleasing way.  Here is a gallery of what I did.  Click on the pictures for directions.
I laid the fabric out in a pleasing pattern.
Here are more of the fabrics together. You may start to worry and think this is going to look terrible. But, don't panic!
Once you have them laid out, sew them together into a long strip, long sides together. Press the panel flat, pressing the seams down flat.
          From this size of a scrap panel, you should be able to make 2 snake bodies. You need to make the scrap panel as long as your under belly.  Then, here is what you do next.  
Lay the snake under belly on the scrap panel to one side, to save room to make another snake later! Pin the under belly in place.
I wanted to taper the tail, so I cut an angle from one end, leaving about a 1" flat section along the bottom. I used the angled piece of fabric that I cut away as a pattern for the opposite side to make the body somewhat symmetrical.
Here it is with the asp-like tail cut.
Now you just cut along the side of the underbelly, all of the way up.
Prepare a pocket that is the same width as the underbelly and about 3" long. Edge finish the 2 short ends with a zig-zag stitch.
Also fold over the top neck edge of the snake on both sides.
Layer the pieces like this: scrap panel body piece right side up. Pocket piece with right side up. Underbelly with right side down against the pocket. Pin it all in place.
Starting at the top of the neck, stitch down the side.
When you get to the end of the tail, turn the fabric and make a few stitches along the end before going up the other side.
On the second side, leave an opening for stuffing and turning at about the middle of the body. Turn through this opening from either end. You will need to use a knitting needle or your closed scissors or something else to turn the snake, especially if it is extra long.
Be sure that you leave the neck open. After you turn it, press the body flat. This is a view of the pocket.
Now you have a long, flat body that is starting to look better than you thought it would!
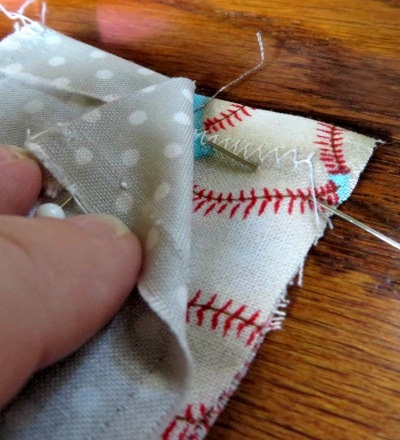
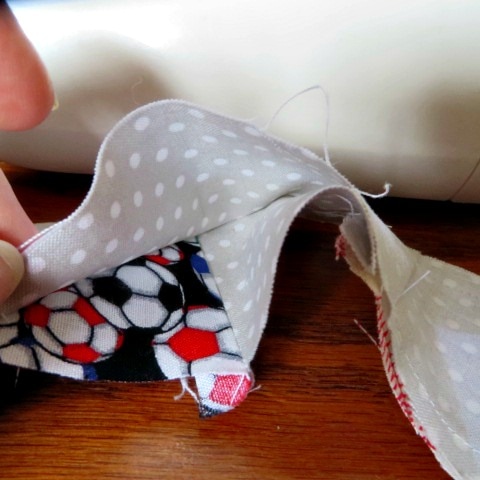
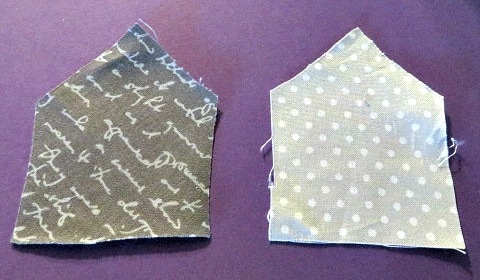
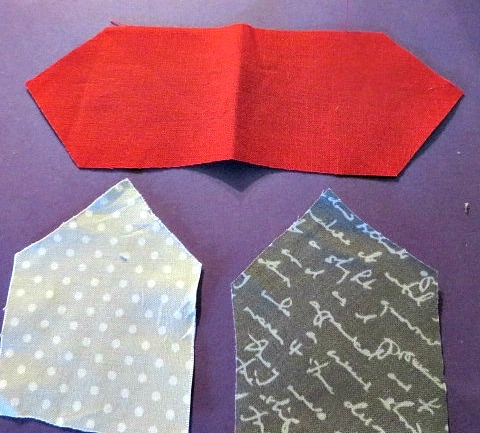
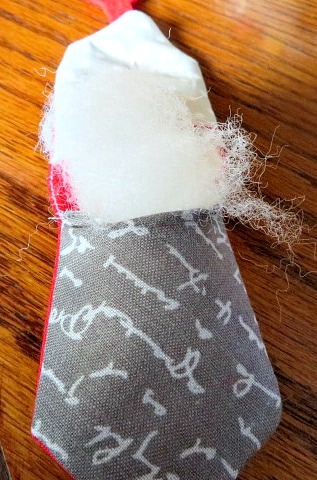
The Head of the Snake:
      Now you need to give your snake a head.  Read on to see how I did it.
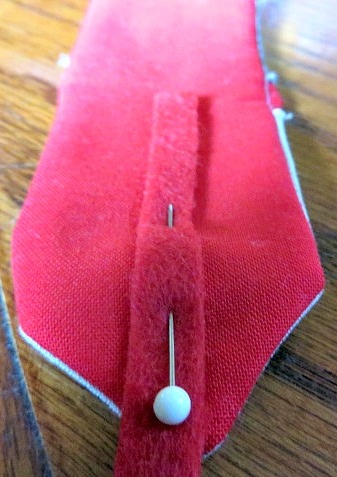
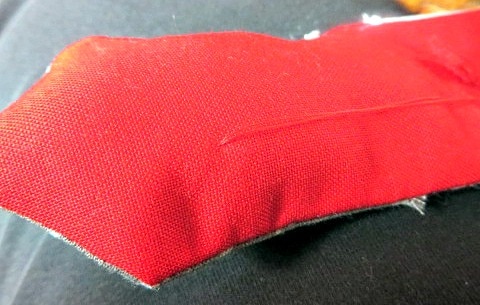
You need to cut 2 pentagons for the top and bottom parts of the head. Mine are about 3 x 4 inches.
Lay one of your pentagons on the fold of the red fabric for the inner mouth and cut out a piece like this.
Also cut out a piece of thin batting the same size and shape as the red fabric.
BTW, the raw edges of the head piece are going to fit inside the body, so make sure you make your pentagons just large enough to leave seam allowances so it will fit.
Now layer the head starting with the batting, the red fabric and then the pentagons on either end, face down. and pin into place.
Here is one end of the head...
Here is the other end. Stitch all around it. Leave the middles open.
At the middle openings, turn the head pieces right-side out. Press flat and you will have a piece that looks like this.
Adding the Tongue:
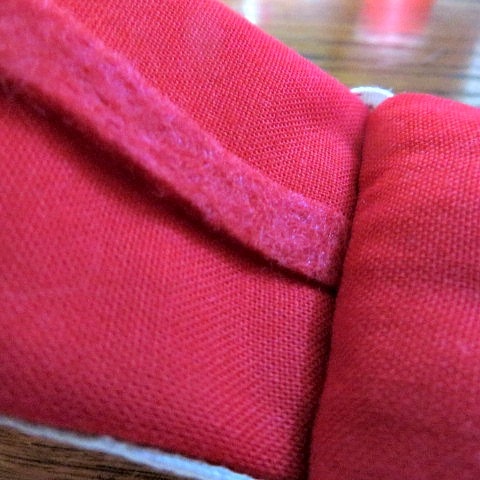
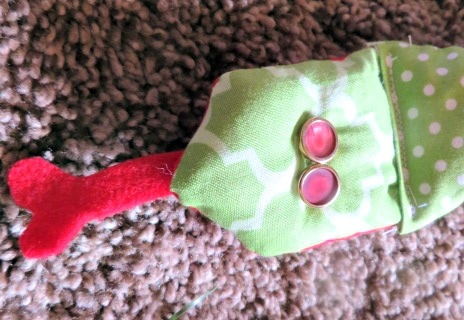
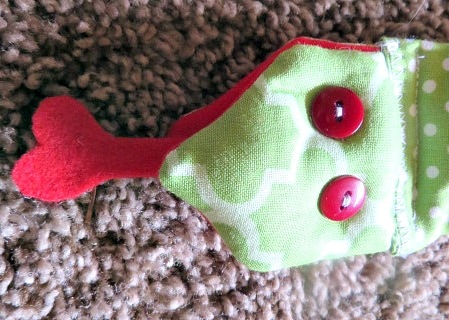
      Because this snake is a Valentine's Day gift, I decided to give him a heart tongue instead of a forked tongue.  I simply used a piece of felt and folded it in half length-wise and cut a heart at the end.  Then I opened it up and finished cutting the narrow tongue strip.  I made sure it was long enough to stick out of the mouth.  Check out the gallery for this:
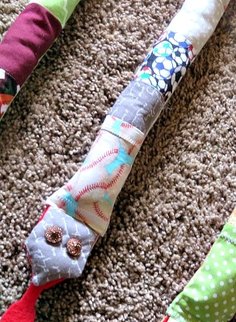
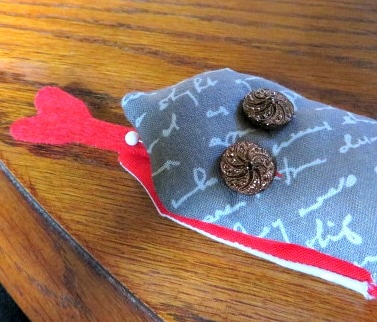
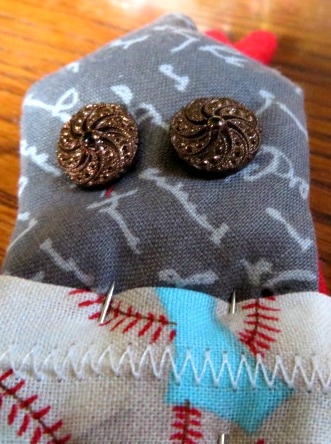
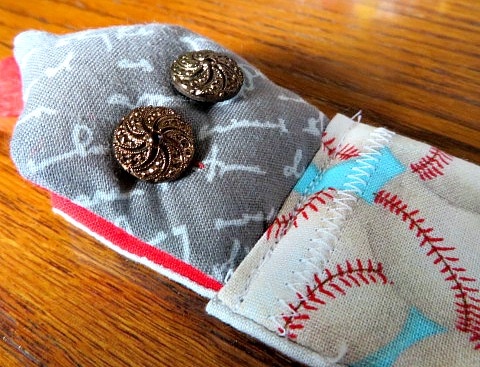
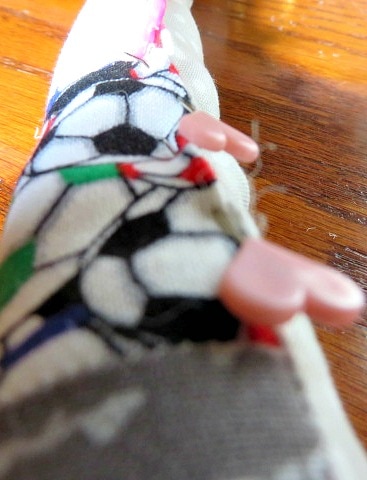
Here is the tongue. Just cut the end like you would any valentine, but leave a tail on the end.
Pin the tongue on the red side (the mouth side) of the head from the center. This will be caught into the sewing soon.
Adding the Eyes:
     There are many ways to add eyes.  Depending on the age of the children receiving these snakes, you want to make sure the eyes are safe.  Buttons can be a choking hazard.  If you feel like your children are old enough to not eat the buttons, still attach them very securely.  For my youngest grandson, I am going to stitch on felt eyes very securely because I think that will be safer for him.  For my older grandchildren, I looked through my button box to find something interesting for the eyes. Here is how I attached them.
      
Before you attach the eyes, use a little fiber fill to stuff the top part of the head. You don't want to have a flat head!
Entering with the needle through the open part of the head, push the needle through to the spot that you want the first eye located. I used red thread because it was going to show a bit in the mouth area. Take a stitch, then add your first button.
Push your needle all of the way through to the mouth and back up through the button a number of time s to hold it very securely. Pull it tight.
Add your button and go through it many times, pulling tightly. When you are ready to attach the next button, simply push the needle up at the spot you want the second eye and stitch it there.
As you sew and pull tightly, each place where you have placed an eye will leave a quilted look on the inside of the mouth. Make a small knot when you are finished, then exit and knot again on the inside of the head.
Now just fold the head in half and you are ready to add it to the body!
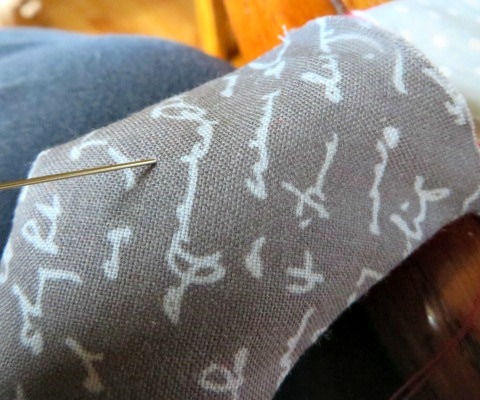
Adding the Head to the Body:
​       You are getting close to being finished!  Attaching the head to the body is really quick and then you will be ready to stuff this guy!
Stick the raw end of the head inside the neck of the body. Pit it in place.
Stitch right across the neck. I did it twice for good measure.
See how the tongue is attached in the mouth now?
Now, stuff the body through the opening you left. You will want to use something long to help you squish it up to the head and down into the tail. When you stuff the tail, us just a tiny bit at first to get it to all of the way into the tip.
Pin the seam together and stitch it closed. Use tiny, tight whip stitches.
 And Voila!  You have a super cute snake!  Just think, if you can make two snakes (or more if you make the panel wider) you can save a bunch of time on your next one.  Also, I was a little worried when I first put my panel together that it was going to look terrible.  But, once it was finished, I was really pleased with the look.  Each snake has different eyes that I found in my button box.
Picture
Picture
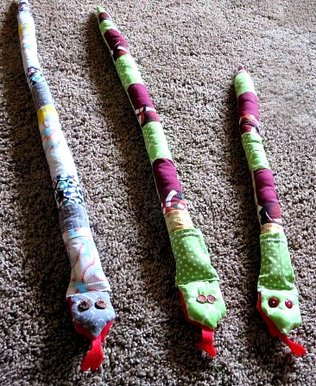
       The funny thing is, I am terribly afraid of real snakes, but I really like these guys! 
        Now, I am off to the Dollar Tree to get some things to tuck in the mouths and pockets to really turn them into Valentines!  I'll show you some pictures of that later.  Come back tomorrow for the first edition of Renny's Recipes!  You will love it! 
12 Comments
Crystal link
1/19/2017 09:45:12 am

Very cute! I have soooo many scraps I never know what to do with. Maybe my daughter would like to make these with them. Think Tank Thursday link

Reply
Helen Reynolds
1/19/2017 11:52:27 am

They would make great gifts for her friends!

Reply
jodie filogomo link
1/20/2017 06:17:30 am

These are so cute!! What a great idea for leftover material!
jodie
www.jtouchofstyle.com
#fandayfriday

Reply
Helen Reynolds
1/20/2017 08:40:49 am

Thanks Jodie. They are fun and easy to make, too.

Reply
Petrina link
1/20/2017 05:03:04 pm

Omg, these are absolutely adorable! These are such a unique way to do Valentine's! I'm gonna have to try these out for my son this year. Thank you so much for sharing!

Reply
Helen Reynolds
1/20/2017 08:45:18 pm

You are welcome! I hope he loves them!

Reply
Sharon@bluewillowhouse link
1/23/2017 05:03:02 pm

Adorable. My grandson would love one. Thank you for sharing at Vintage Charm.

Reply
Helen Reynolds
1/23/2017 08:22:54 pm

Thanks! I am getting ready to mail mine to my grandchildren!

Reply
Patty Gordon link
1/26/2017 10:28:39 am

Another unique project from you! Such a cute idea and would be great for someone who has limited sewing skills like me!

Thanks so much for posting your blog post to the #FanDayFriday Link Party! I hope you have a great experience with the link party and come back again next week! #fdflinkparty

Reply
Helen Reynolds
1/26/2017 04:25:27 pm

Thank you Patty! I love the link party! I hope you try the snake, it is super easy.

Reply
Sports Games link
2/9/2018 10:13:58 pm

Very Informative and useful, keep it up the great work. For free free download fully pc games, you may also visit us.

Reply
Bad Piggies Online link
6/4/2018 11:48:20 pm

Very Informative and useful... Keep it up the great work

Reply

Your comment will be posted after it is approved.


Leave a Reply.

    Picture
    Creators of Hot Cocoa Bombs!  (copyrighted)
    Subscribe to Our Email!
    Picture

    Author

    Helen Reynolds: Mother of six children , grandmother to fifteen!  I love to cook, craft and create things and I especially love doing that with my family, So, when my lawyer daughter, Lindsey, my artist daughter, Madalynn, and I came up with the idea of Hot Cocoa Bombs, this blog was born.  Then, one more daughter, with her technical and science skills, plus creativity has joined in to round us out!  Read more about us here!
        

    Picture
    Click this link and visit 3WinksDesignShop on Etsy. Find our Hot Cocoa Bomb Idea Book, our For the Love of PIe e-book and more of our creations!

    Picture
    Shop Mood Fabrics


    RSS Feed

    Archives

    June 2025
    May 2025
    April 2025
    March 2025
    February 2025
    January 2025
    December 2024
    November 2024
    October 2024
    September 2024
    August 2024
    July 2024
    June 2024
    May 2024
    April 2024
    March 2024
    February 2024
    January 2024
    December 2023
    November 2023
    October 2023
    September 2023
    August 2023
    July 2023
    June 2023
    May 2023
    April 2023
    March 2023
    February 2023
    January 2023
    December 2022
    November 2022
    October 2022
    September 2022
    August 2022
    July 2022
    June 2022
    May 2022
    April 2022
    March 2022
    February 2022
    January 2022
    December 2021
    November 2021
    October 2021
    September 2021
    August 2021
    July 2021
    June 2021
    May 2021
    April 2021
    March 2021
    February 2021
    January 2021
    December 2020
    November 2020
    October 2020
    September 2020
    August 2020
    July 2020
    June 2020
    May 2020
    April 2020
    March 2020
    February 2020
    January 2020
    December 2019
    November 2019
    October 2019
    September 2019
    August 2019
    July 2019
    June 2019
    May 2019
    April 2019
    March 2019
    February 2019
    January 2019
    December 2018
    November 2018
    October 2018
    September 2018
    August 2018
    July 2018
    June 2018
    May 2018
    April 2018
    March 2018
    February 2018
    January 2018
    December 2017
    November 2017
    October 2017
    September 2017
    August 2017
    July 2017
    June 2017
    May 2017
    April 2017
    March 2017
    February 2017
    January 2017
    December 2016
    November 2016
    October 2016
    September 2016
    August 2016
    July 2016
    June 2016
    April 2016
    March 2016
    February 2016
    January 2016
    December 2015
    November 2015
    October 2015
    September 2015
    August 2015
    July 2015
    June 2015
    May 2015
    April 2015
    March 2015
    February 2015
    January 2015
    December 2014
    November 2014

Proudly powered by Weebly
  • Home
  • About Us
    • Contact Us
  • Printables
  • From Cover to Reel
    • Contests >
      • Writing Challenge
    • Show Notes
  • Where I Party
    • Places Featured
  • Archives