|
This post contains affiliate links and I will be compensated if you make a purchase after clicking on my links. Thanks for your support!
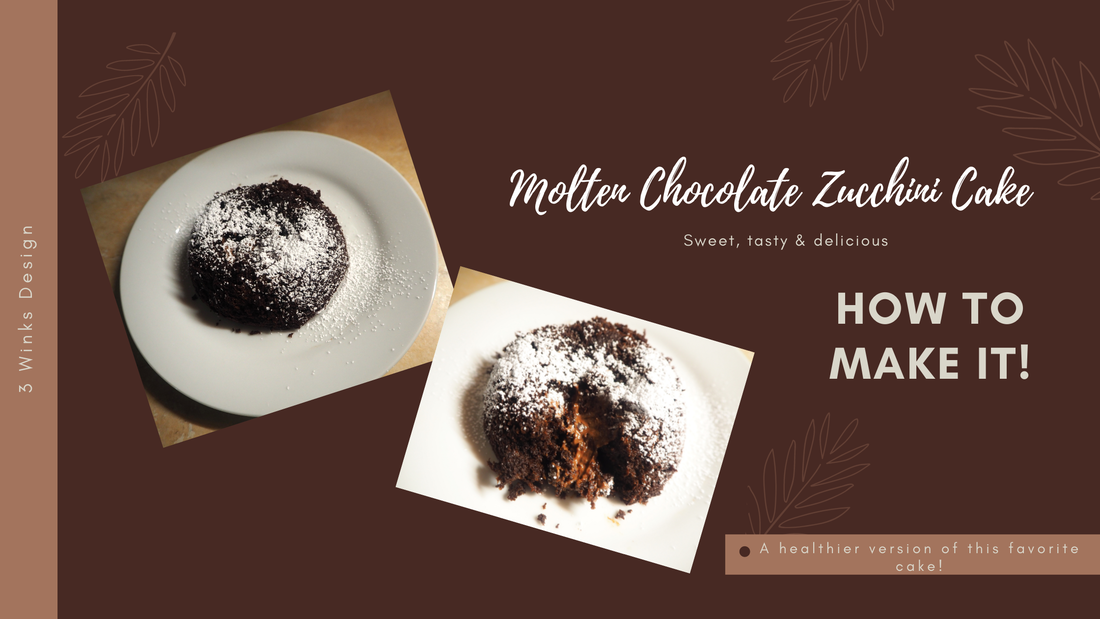
Just the words Molten Lava Cake make me want one, even if I'm not hungry. The idea of that creamy warm chocolate, flowing out of a moist chocolate cake sets my makes my mouth start to water.
Unfortunately, I rarely allow myself to eat one because I know that they are not the healthiest things in the world for me. Then, I heard about a Molten Zucchini Cake and realized that if I made a Molten Lava Cake in a healthier way, I could enjoy the chocolatey goodness way more often! Plus, there is a bonus! This cake is a great way to use up the zucchini from your garden! Here are more great reasons why it is okay to eat this cake:
Here are a few tricks to making this cake successfully the first time. (It is pretty easy anyway!)
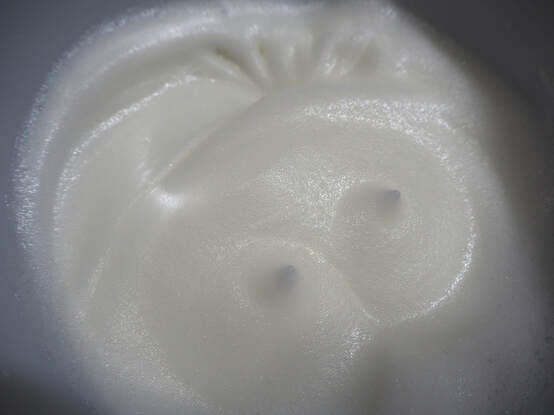
Don't over whip until they are dry.
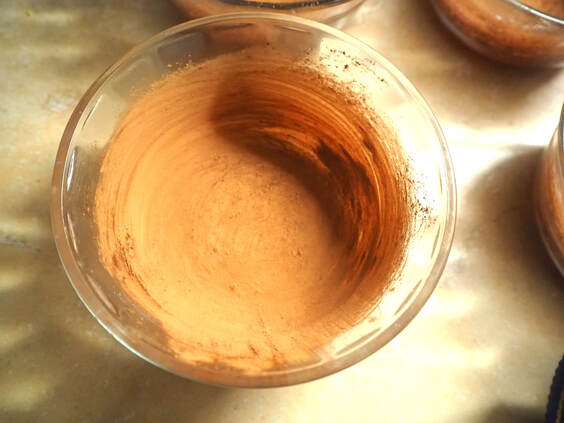
Here is the recipe:
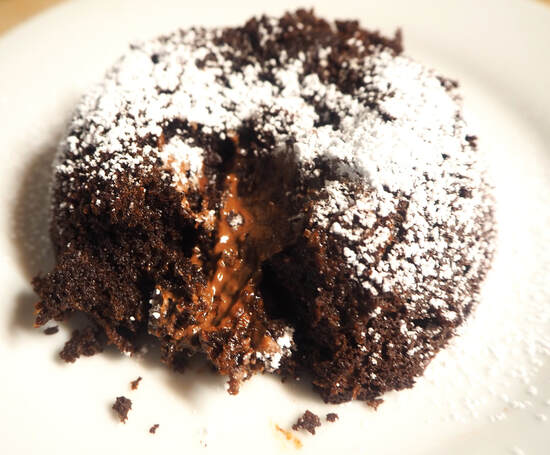
Don't forget to sprinkle on the powdered sugar like you mean it! Enjoy!
0 Comments
This post contains affiliate links. If you make a purchase after clicking them, we will be compensated, but there is no additional cost to you. All opinions expressed are our own. Thank you for your support
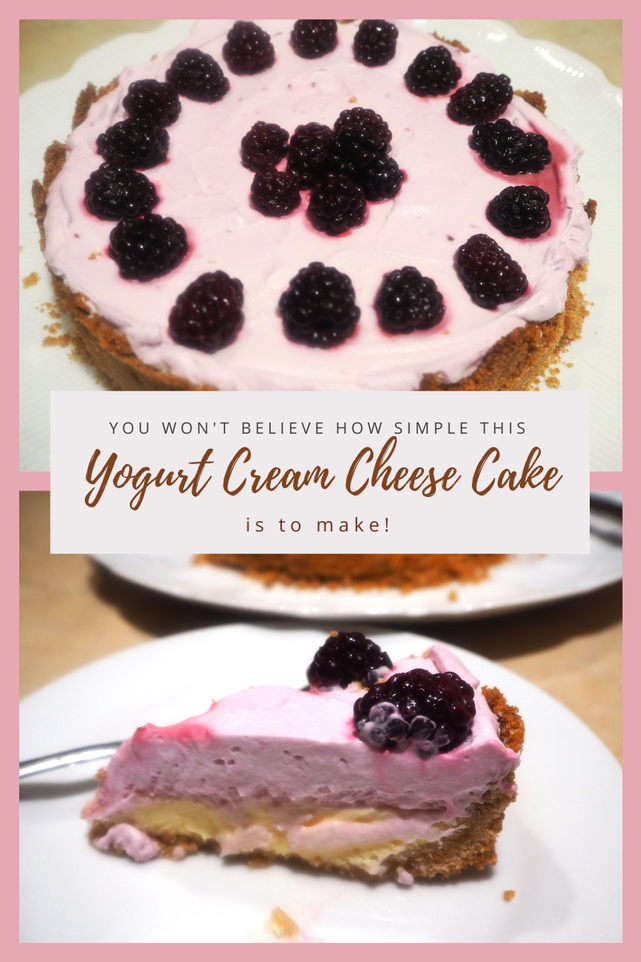
In my last post, I shared my first experience making yogurt. One of the great things about making yogurt is that you can use it for so many things. One of the things that I wanted to do first was to make cream cheese from the yogurt and make a cheesecake. Just like making the yogurt, turning it into a cream cheese substitute is very easy.
The first thing that you have to do is drain the yogurt until it is much thicker than the yogurt that you would normally eat. Since I needed about 2 cups of cream cheese for my cheesecake, I measured out about 2.5 cups of yogurt into a clean flour sack towel and put it into a strainer sitting over a bowl. The bowl will catch the extra whey that will drain out. Leave the yogurt to drain in the refrigerator over night. You could also use your regular yogurt strainer. I didn't because my yogurt amount was so small that I could take up less room in my fridge by using a smaller bowl and strainer.
When your yogurt is finished draining, it will look like this. Next you use it just like cream cheese and make your recipe as you normally would.
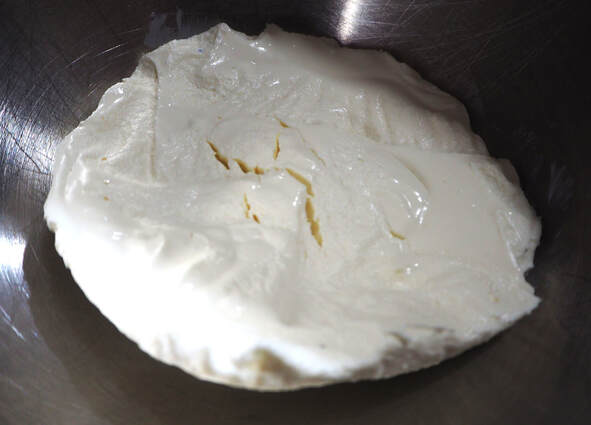
Nice and thick
I decided to make a Lemon Blackberry Cheesecake by baking the lemon cheesecake base and then topping it with a stabilized blackberry whipped cream. I used lemon oil and lemon zest to flavor the lemon cream cheese base. It came out pretty awesome. Here is the recipe:
There will be more yogurt product recipes to come, so come back and see!
Here are some other cheesecake recipes you will enjoy:
This post contains affiliate links. If you make a purchase after clicking them, we will be compensated, but there is no additional cost to you. All opinions expressed are our own. Thank you for your support.
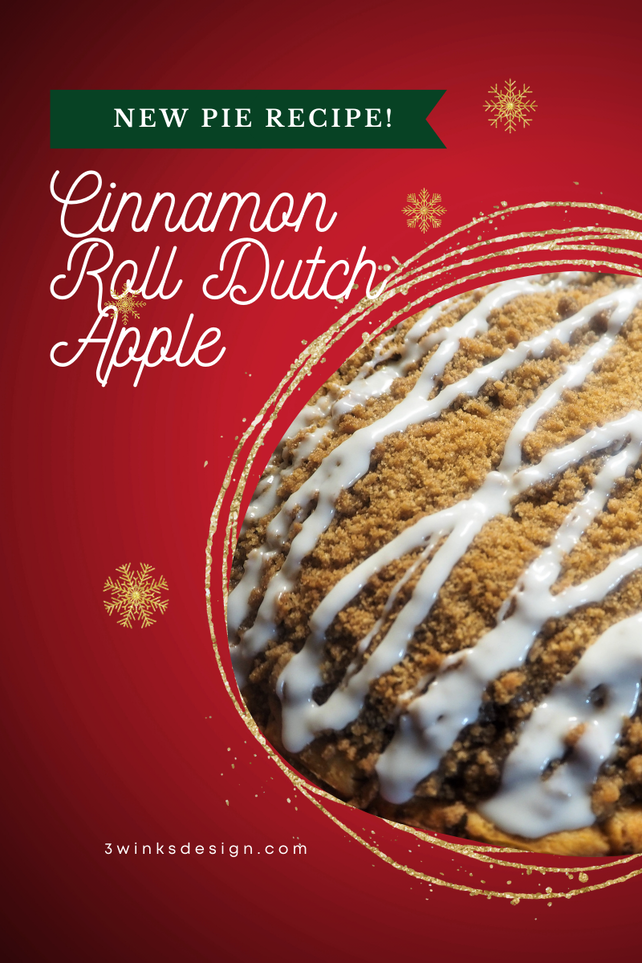
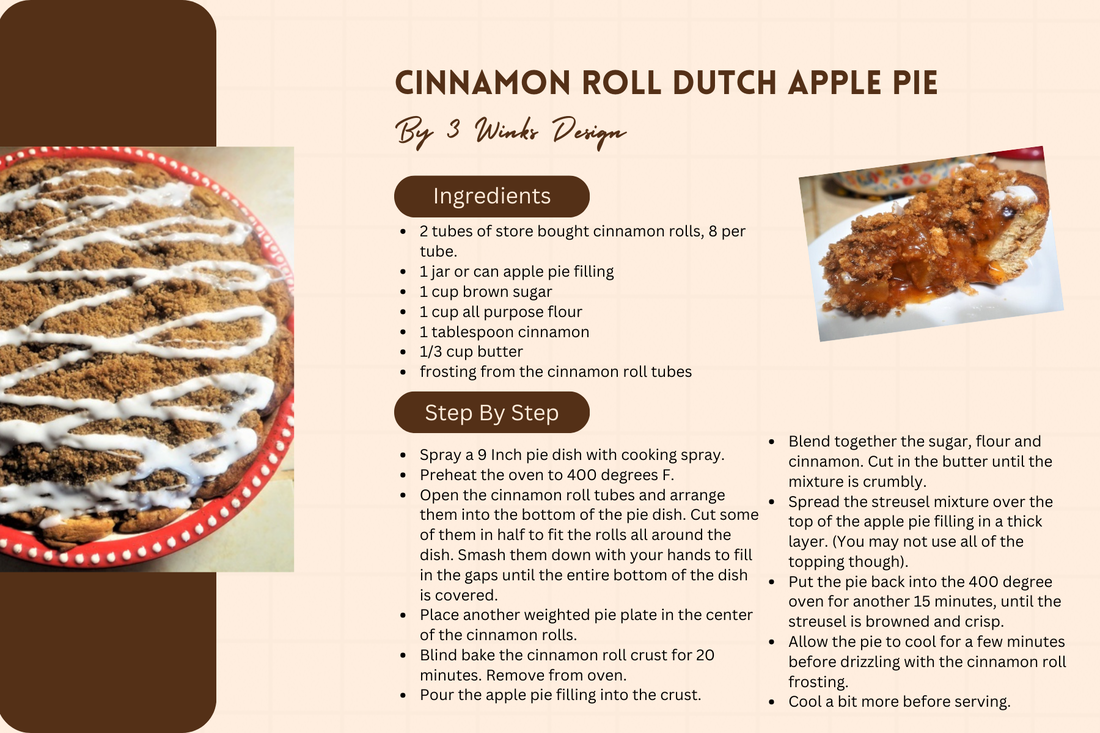
I recently have seen ads for Cracker Barrel restaurant advertising their Cinnamon Roll Pie. That sounded intriguing to me, so I got on line and checked out just what this thing is. Surprisingly, it turns out that their pie is actually cinnamon rolls baked in a pie crust. Interesting and probably good but it sounds very starchy to me. The idea got my wheels turning though and I thought, "What if the Cinnamon Rolls were the crust of the pie?"
Well, obviously, I didn't want to go to all of the trouble of baking a batch of cinnamon rolls just to mash them into a pie crust. I went to the store and bought some canned cinnamon rolls and smooshed them into the bottom of my pie dish. It took 2 tubes of them to cover the bottom and the sides. Sometimes you have to cut the cinnamon rolls in half to fit them around the sides of the dish. 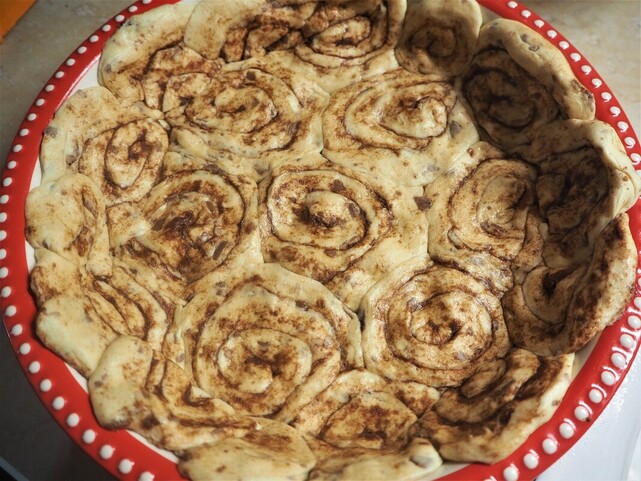
The scalloping of the rolls on the sides actually looks pretty nice when all is said and done.
I prebaked my cinnamon roll crust by placing another pie dish in the center and adding weight. You a can get pie weights, or use beans or something. I didn't want my cinnamon rolls to rise up and get puffy. They did puff a bit, but that was okay, they still had the crust shape with room to add a filling. I baked it at 400 degrees for 20 minutes.
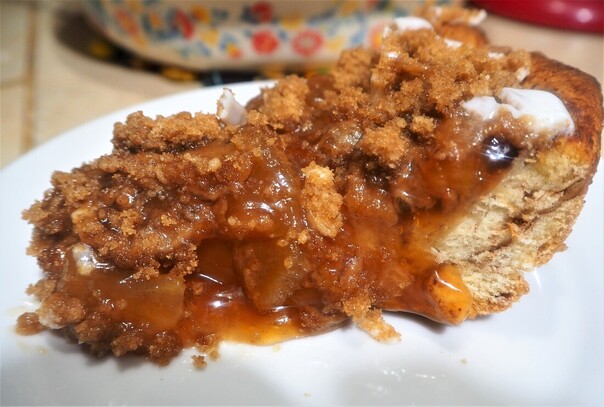
When the crust was out of the oven, I filled it with some of my home canned pie filling, just one jar. 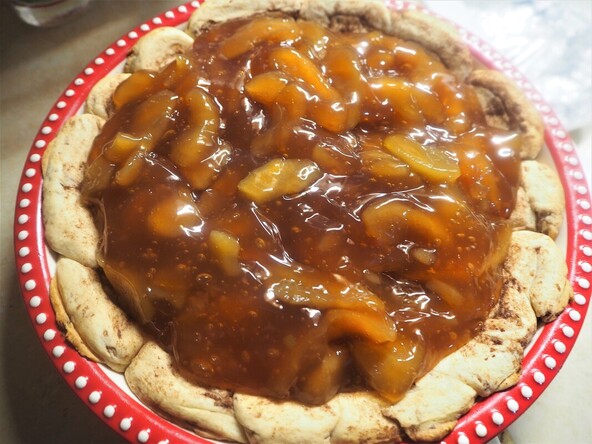
See how the puffy cinnamon rolls look nice on the edges?
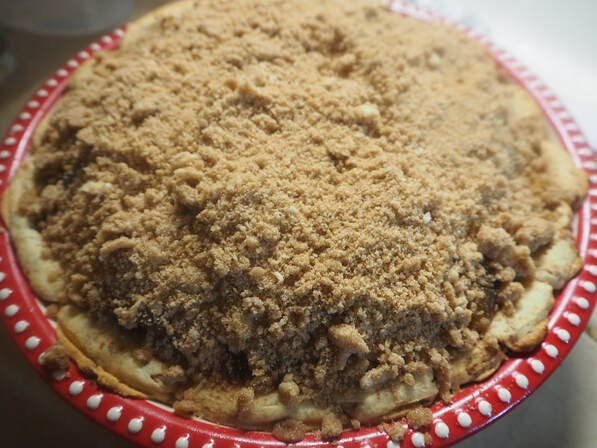
Then, I topped the pie filling with a cinnamon streusel topping!
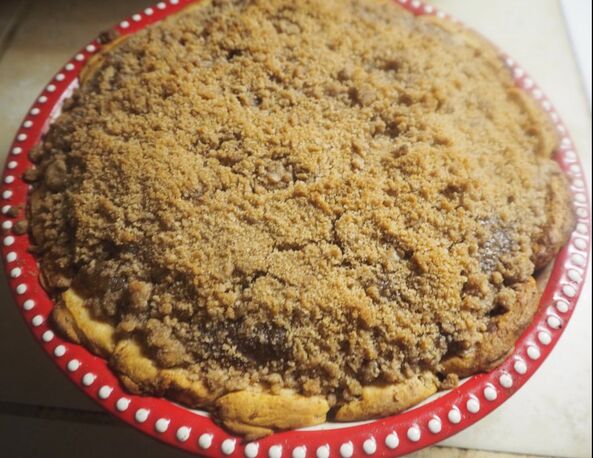
Next, I popped the pie back into the 400 degree oven for another 15 minutes until the streusel was brown and toasty.
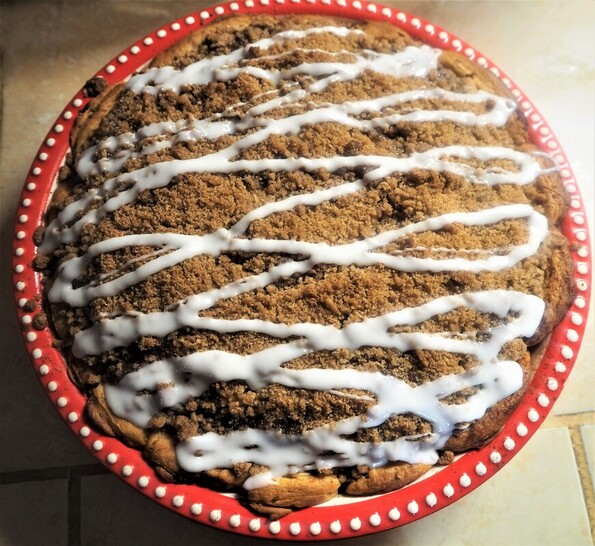
But, there was one thing missing! You can't have cinnamon rolls without the ooey, gooey frosting! So, I used the frosting from the cinnamon roll tubes to drizzle on top of the pie!
Such a pretty pie and the cinnamon roll crust is delicious!
Finally, we ate it for dessert after a great chicken dinner with roasted vegetables! This seems like such an All American Meal to me and the pie was the perfect ending. Everyone pronounced the pie a success! I think it will be a terrific breakfast pie as well! It is kind of like a breakfast apple streusel or coffee cake. it would be perfect on Christmas morning.
Let me know if you give this pie a try! I hope you love it!
This post contains affiliate links. I will be compensated for purchases made through those links at no additional cost to you. All views expressed are my own. Thank you for your support!  This Saturday is National Chocolate Chip Day AND National Sliders Day! This recipe seems to fit the bill for both of those things! Hope you enjoy it! When you have grandchildren around like my husband I do this summer, you'll discover that it is important to have Popsicles and other cool treats on hand for the middle of a hot day stuck at home. Those treats always seem to cheer everyone right up! One day, I happened to find some chocolate cookie ice cream sandwiches on sale at the grocery store and they quickly became a favorite around here. My grandkids and I decided to try to make a batch of our own! They came out really good and delicious and making them together added to our fun! We made our basic cookie recipe, but left out the butter and substituted all shortening because we didn't want the cookies to spread too thin. When they are made with shortening, they tend to stay a little thicker and hold their shape better. We were also careful to use a cookie scoop filled just right so that our cookies would be uniform for the sandwiches. My granddaughter became quite adept at it. 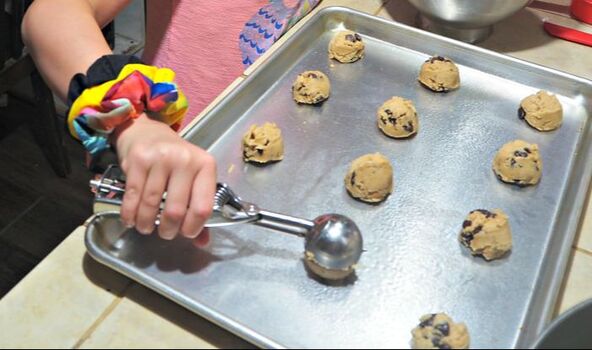 The kids couldn't decide if they wanted chocolate, vanilla or strawberry ice cream filling, so we bought Neapolitan and made everyone happy! There are so many flavors to choose from! I just kept it simple this time. Personally, I would have chosen mint chocolate chip! After the cookies were baked, we matched them up with each other for the sandwiches. Next, I tore off the cardboard from the ice cream and sliced it into layers. My grandson used a cookie cutter that was the same diameter as the cookies themselves to cut out circles of ice cream. My granddaughter scooped them up with a little brownie server and placed them into the cookie sandwich. I wrapped them up with plastic wrap and put them into the freezer. We had quite the assembly line going! 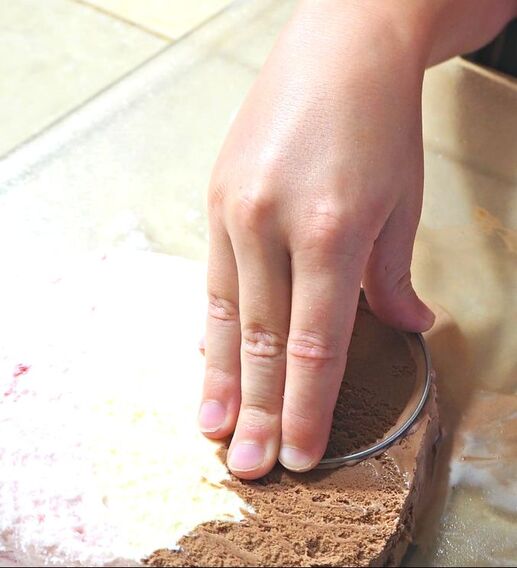 We put the scraps of ice cream in a bowl and refroze them! I have a special surprise using them coming on a post in the near future! The cookie sandwiches froze up nicely! 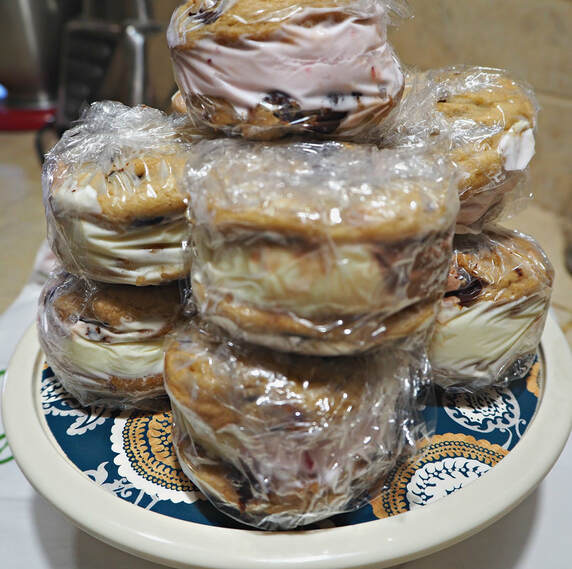 As you can see, I wasn't too careful about the depth that I sliced the ice cream, so some of the sandwiches are thicker that others. But, no one has complained yet! Another nice thing about making these treats in advance, they are easy to pass out with no mess! I hope you try this special summer treat! Don't miss these other cool treats to make with kids:
|
Creators of Hot Cocoa Bombs! (copyrighted)

Author
Helen Reynolds: Mother of six children , grandmother to eleven! I love to cook, craft and create things and I especially love doing that with my family, So, when my lawyer daughter, Lindsey, my artist daughter, Madalynn, and I came up with the idea of Hot Cocoa Bombs, this blog was born. Then, one more daughter, with her technical and science skills, plus creativity has joined in to round us out! Read more about us here! 
Click this link and visit 3WinksDesignShop on Etsy. Find our Hot Cocoa Bomb Idea Book, our For the Love of PIe e-book and more of our creations!

Amazon Gift Cards are the Perfect Gift!
    Archives
April 2024
|
 RSS Feed