|
This post contains affiliate links. If you make a purchase after clicking them, we will be compensated, but there is no additional cost to you. All opinions expressed are our own. Thank you for your support

The women in our church group had a very successful activity last night! It was so easy to plan and was a very enjoyable night. Here is what we did:
The Theme was about organizing our homes as well as our inner spiritual lives.
We kept The Decorations simple since most of the space was taken up with the stuff people brought!
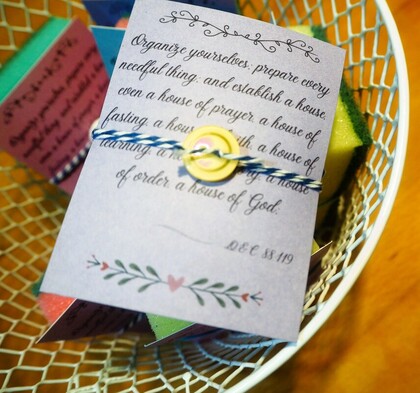
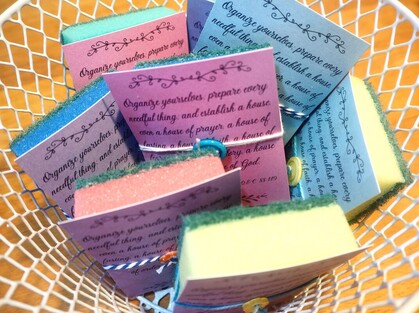
I think they looked colorful and cute in the baskets.
Here is the link for the cards. It has a white background so that you can print it on any color cardstock.
At the end of the activity, everyone pitched in to clean-up and to load up the leftover items into a waiting truck and trailer. The clean-up went pretty quickly with many hands and everyone went home happy to homes a little bit lightened of things that didn't want and/or with new items that they really needed.

0 Comments
This post contains affiliate links. We will be compensated for any purchases you make at no additional cost to you. Thanks for your support!
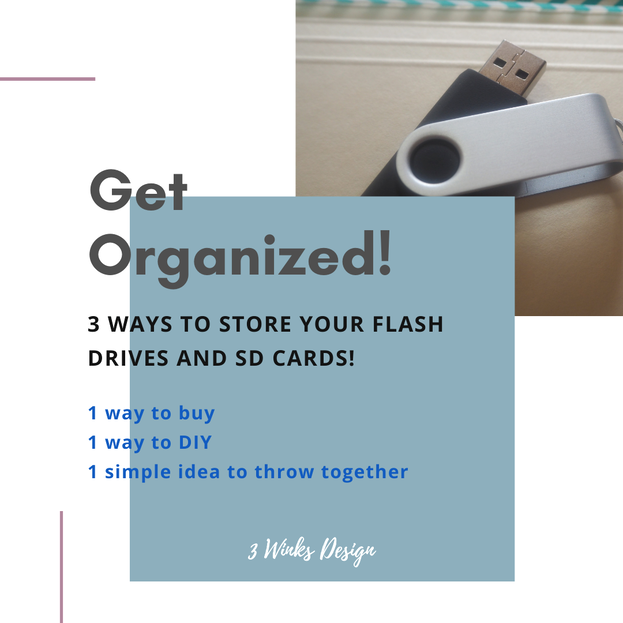
It has been 1 year since I bought my, what still seems very new to me, car! At least because of the pandemic, I haven't put as many miles on it as I might have. (Except for that trip to Disneyland in February and the one to Wyoming in May.) When I purchased my car, I was very surprised when all of the "paperwork" for the warranty, etc. was handed to me in the form of a little flash drive! (I realized then that the digital age had truly invaded my life whether I was comfortable with it or not.)
The other day, I found that car warranty flash drive in my sock drawer. I also had a couple of them in my jewelry box that are loaded with pictures. On my kitchen counter I have an SD card that came with my new phone. Anyway, I realized that I needed a way to store these little things in a way that I would be able to easily find them when I need them and not have them cluttering up various areas of my house. I figured you guys might have this need as well, so I did the research and the work and I have some solutions for you! Solution #1-Something to buy
It is very interesting to me that when I searched on line for ways to store flash drives, I mostly found boxes to hold a single drive or little contraptions to hold 1 flash drive. That was weird to me. They are such little things, there had to be a way to store them in a group! Finally on Etsy, I found a few options such as this one that I found in the shop M3is3D. I haven't gotten permission from them yet to use their picture, so click over to it through that link and you will see this cool device that would be great to have standing on a computer desk to have all of your flash drives or SD cards handy whenever you need them.
Solution #2-DIY your own solution
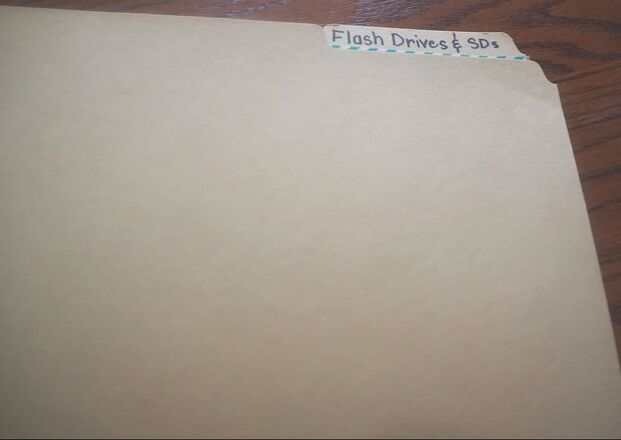
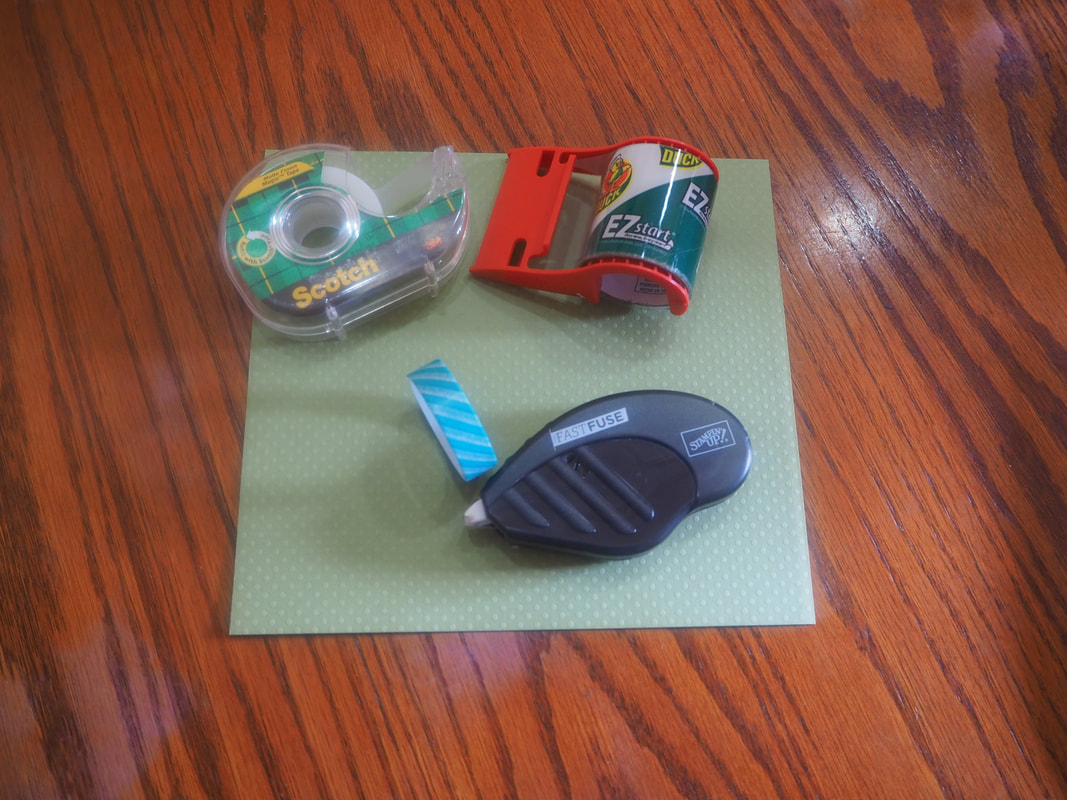
For my personal use, I thought I would like to be able to put a folder in our filing cabinet that would hold the cards and drives in one place until I need them on occasion. I decided to craft one with little pockets that my cards and drives could slip into and I could label them to help me remember what is on them. Here is what I used:
First, I covered the inside of the folder with a decorative base card stock. I bordered it with a decorative washi tape.
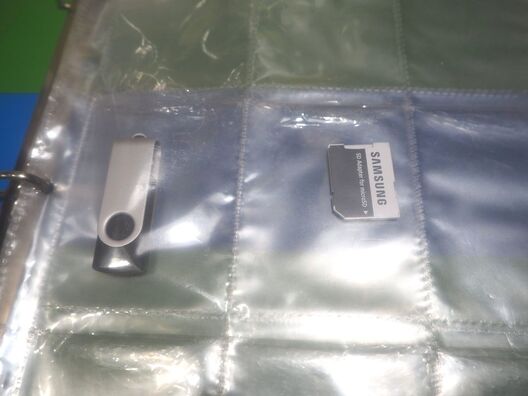
Then, I simply cut pockets in 3 1/4" squares out of card stock. and used the roll on adhesive to stick my decorative paper on them. I also cut smaller pockets for the SD cards. I measured how I wanted to arrange them inside the folder and attached them with roll on adhesive and then covered them with the wide cellophane tape to sort of laminate them in place. Here is how it turned out: 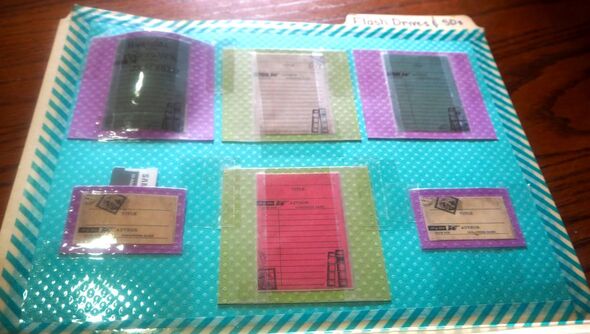
A couple tips: Slightly bow your pockets for the flash drives to help them fit in better and not lift the tape. Use a sharpie to label the pockets so that they can write on the cellophane.
When it's done, just fold it shut and put it in your filing cabinet!
Solution #3: Throw together this idea!
If you would rather keep your drives in a binder on a book shelf, here is one more idea.
Bonus Tip: I also use these pockets and a binder to hold and organize my grocery coupons!
Okay! There you have it! 3 ways to help you figure out how to store those flash drives and SD card! Did you even know that you had a need for this? You're welcome! Let me know if any of these ideas work for you. This post contains affiliate links. I will be compensated for purchases made through those links at no additional cost to you. All views expressed are my own. Thank you for your support With everyone trying to social distance themselves and, in our case, with my husband working from home, everyday can feel like a Saturday. This makes it difficult to keep a routine or even remember what day it is. To help my kids out I decided to make them a daily chart that they can mark off everyday to help them keep track of their days and prevent us from going stir crazy inside. If you subscribe to our email list you can get this printable for free! Plus any of our other subscriber only printables. To use our chart I filled in ten things they should do everyday, not chores necessarily but good habits I’d like them to get into doing everyday, like making the bed, brushing teeth, and playing outside. Then I put the chart in sheet protectors and taped them up where the kids can reach them. Whenever they finish something they can use a whiteboard marker to 'x' off what they've done. My son was really excited about the chart when I gave it to him. We'll see how his excitement continues from this point on. One thing I like about the chart is the kids can choose the order they want to do everything. This will help build autonomy and help them to understand how to prioritize their time eventually. For instance, when my son found it was too early to be playing outside, he turned to the chart to find something else he could do until playing outside was an option. The chart also allows for the kids to feel a sense of accomplishment as they mark off each thing everyday. But the chart doesn’t have to just be for kids, I tried to design it in a way that it’s pretty enough to be used by adults too to track their habits/goals. I hope this will help you guys during this time. It’s good to keep a sense of normalcy when things are a bit off kilter in the world. We’re thinking and praying for you all. Remember if you want a copy of the chart, subscribe to our email list.
This post contains affiliate links. If you make a purchase after clicking them, we will be compensated, but there is no additional cost to you. All opinions expressed are our own. Thank you for your support.

My husband and I accomplished a lot this past weekend. it was so great! It all started on Friday. I had been off doing a church assignment that morning and when I got home, he had left for work. But, before he left, he had gone on a shopping spree which is very unusual for him. He had been to Harbor Freight and sitting in the middle of my family room was a camp chair and a flashlight with a note that said "Happy Birthday!" He knew I needed a new chair for Girl's Camp this summer, so he picked me up one like he has, which is a favorite! (He had a coupon that made it cheaper!) Then, on the dining table, there was another package with a note that read, "Merry Christmas!" It was a heat gun! I am so excited because I had told him about a craft that my daughter-in-law is doing and I want to give it a try. It requires a heat gun and the one he got me is really nice, with variable speeds and temperatures! (Once again, a coupon!) More to come on that project!
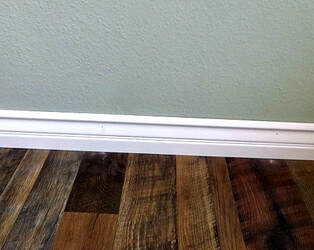
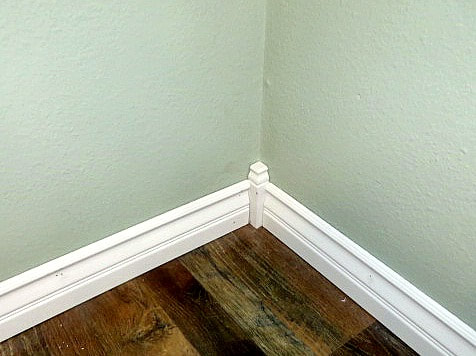
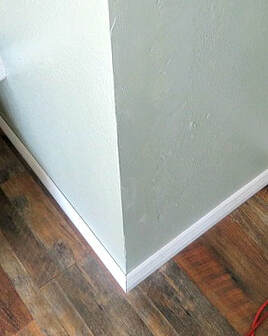
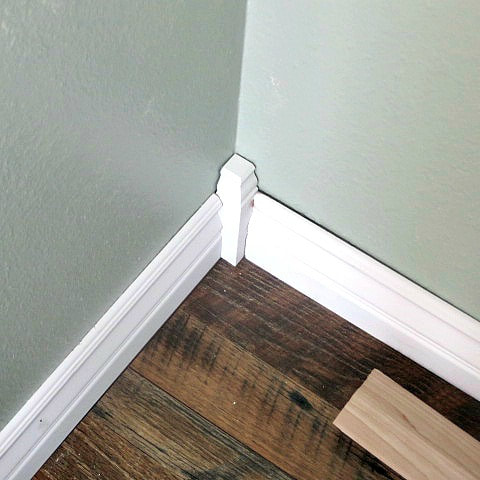
Well, I don't really know what has gotten into him, but later that evening, after Awesome Husband was home from work, we were talking about various projects around the house, I mentioned that I wanted to get some tomatoes and basil planted in one of the garden boxes that we have out in our backyard. Well, the next morning he went out there and dug up the soil in that box and got it ready to plant in and we went off to the home improvement store and purchased the plants that we needed. They are now planted and growing and looking good so far. I hope you will later be seeing some recipes with the produce from that garden box! You got to love a man who does something to make one of your wants come true so quickly! The fun didn't stop there! This man of mine then went into my craft room and finished putting up all of the moldings, miter cuts and all, and even along the top of my sewing desk! All there is left to do is the caulking and paint touch-ups. It is looking so wonderful! Meanwhile I was doing some fancy cooking for him that I will blog about on another day, and the not so fancy laundry. But, today I will show you how the craft room is coming along at this stage of the game!
You can see my last updatehere. On that post I made a list of the things that still need to be done. We can just about cross off the trim moldings because all we have left to do is caulk and paint! Look how beautiful they are!
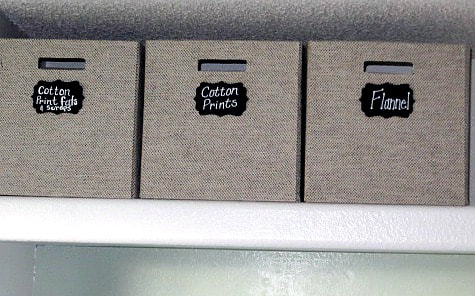
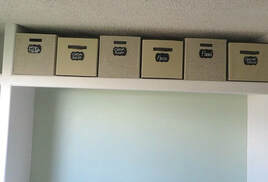
Another thing that I have started on, but have by no means completed, is the organization process. Since I have shelves in there that are available for use and it won't be in my husband's way if I start to fill them, I have begun going through things and putting them on these shelves.
A few years ago, I found some fabric boxes that are 13 x 13 inches on clearance at Target and they fit on my long shelf just right! I was able to get a super good deal on them at the time, so keep your eyes open for those clearance sales and weekly ads. I only had 3 and I needed 6 in all, so I ordered these from Amazon. But, there are a number of options available. My husband is going to add another long shelf below the original one for me and I will store my fabric boxes on that shelf when it is finished, saving the top shelf for less used items.
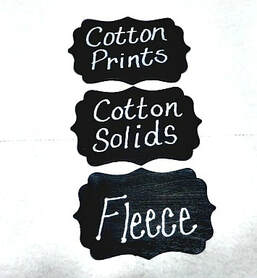
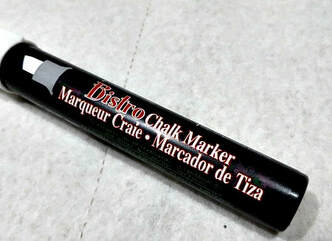
I decided that I needed a way to label the boxes with the type of fabrics that they are holding. I had some little wooden shapes that we had decorated with chalkboard paint at our Christmas in July party this past year. I thought they would look great on my boxes and I do really like them. I simply painted them with black chalkboard paint and used a chalk marker to hand letter them with the types of fabrics that I have.

I am loving the look, but looking forward to the lower shelf so that they will be easier to reach!
All in all, it was a pretty productive weekend that left us feeling satisfied with life around here! How about you? What projects are you working on? I would love to hear about them. Of course, I may end up giving my husband something else to do for me if I like them too much, ha ha! Thanks for stopping by! |
Creators of Hot Cocoa Bombs! (copyrighted)

Author
Helen Reynolds: Mother of six children , grandmother to eleven! I love to cook, craft and create things and I especially love doing that with my family, So, when my lawyer daughter, Lindsey, my artist daughter, Madalynn, and I came up with the idea of Hot Cocoa Bombs, this blog was born. Then, one more daughter, with her technical and science skills, plus creativity has joined in to round us out! Read more about us here! 
Click this link and visit 3WinksDesignShop on Etsy. Find our Hot Cocoa Bomb Idea Book, our For the Love of PIe e-book and more of our creations!

Amazon Gift Cards are the Perfect Gift!
    Archives
April 2024
|

 RSS Feed