|
This post contains affiliate links. If you make a purchase after clicking them, we will be compensated, but there is no additional cost to you. All opinions expressed are our own. Thank you for your support.  In September, my husband and I were able to get away from it all and spend some time with old friends at a time share in Park City, UT. It was so much fun! I hadn't spent a lot of time in Park City, except to go snow mobiling with a friend in 1978! Other than that, we had always driven past it and said, "There's Park City! I went snow mobiling there once!" Trust me, the place had changed since the 70s. We spent some time on main street, we rode on the Heber Creeper (a train), and ate at some really good restaurants. We spent a lot of time finding places to park because Park City does not live up to its name in that department. Mostly we played games and talked and caught up with our friends. 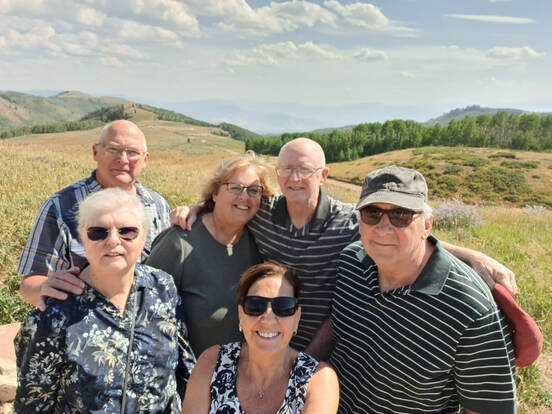 My friend Kathy, on the left, is quite the seamstress, quilter and other handcrafter! When we entered the time share condo, (my husband and I were the last ones to arrive), she had placed in our room some beautiful handsewn baskets, bags and pouches as little gifts! I was so touched and appreciative! All of the items are perfect for traveling, and I particularly loved the long, sort of boat shaped basket that ties up with ribbon, or unties to lay flat for packing. It was a perfect spot to hold my glasses at night and I have continued to use it for that on my bedside table at home. It is also the perfect size to hold a pen and some post-it notes! I am not above using it for my glasses and a pen and note paper all at once! 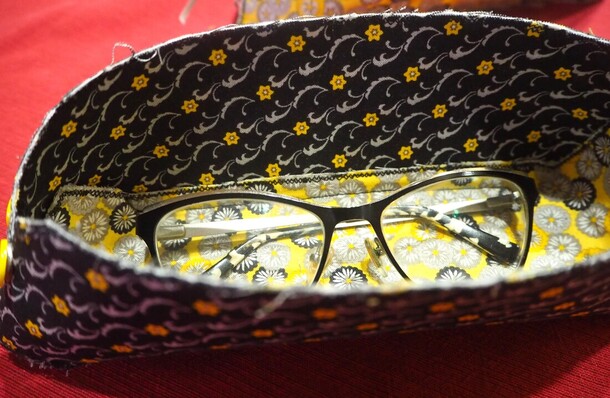 I asked Kathy if she thought it would be okay for me to replicate the basket and tell you guys about it on the blog! She said that she didn't mind, so I am finally getting to it today! I didn't have a pattern, so I had to look at Kathy's and figure it out. It seemed simple enough and I think that this may be my go to handmade gift this Christmas now that I see how easy these little baskets come together. It will be easy to personalize them in colors that people love or do their bedrooms in. I can add pens and note paper to them, or cocoa bombs, or chap stick and nail polish, or whatever I feel like the recipient will love! So, I got into my scrap baskets and starting finding fabric to use. 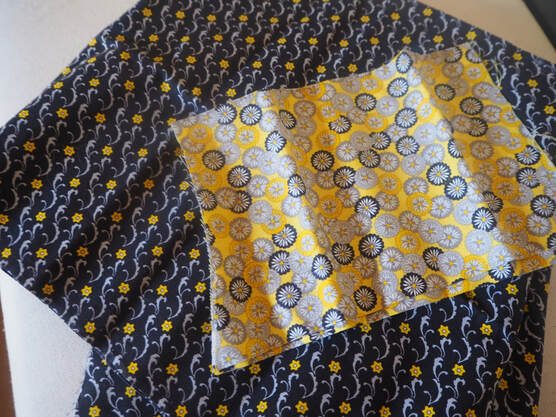 Because I loved these two prints together, I decided to make a coordinating set of baskets! Here are the supplies that you will need: Supplies:
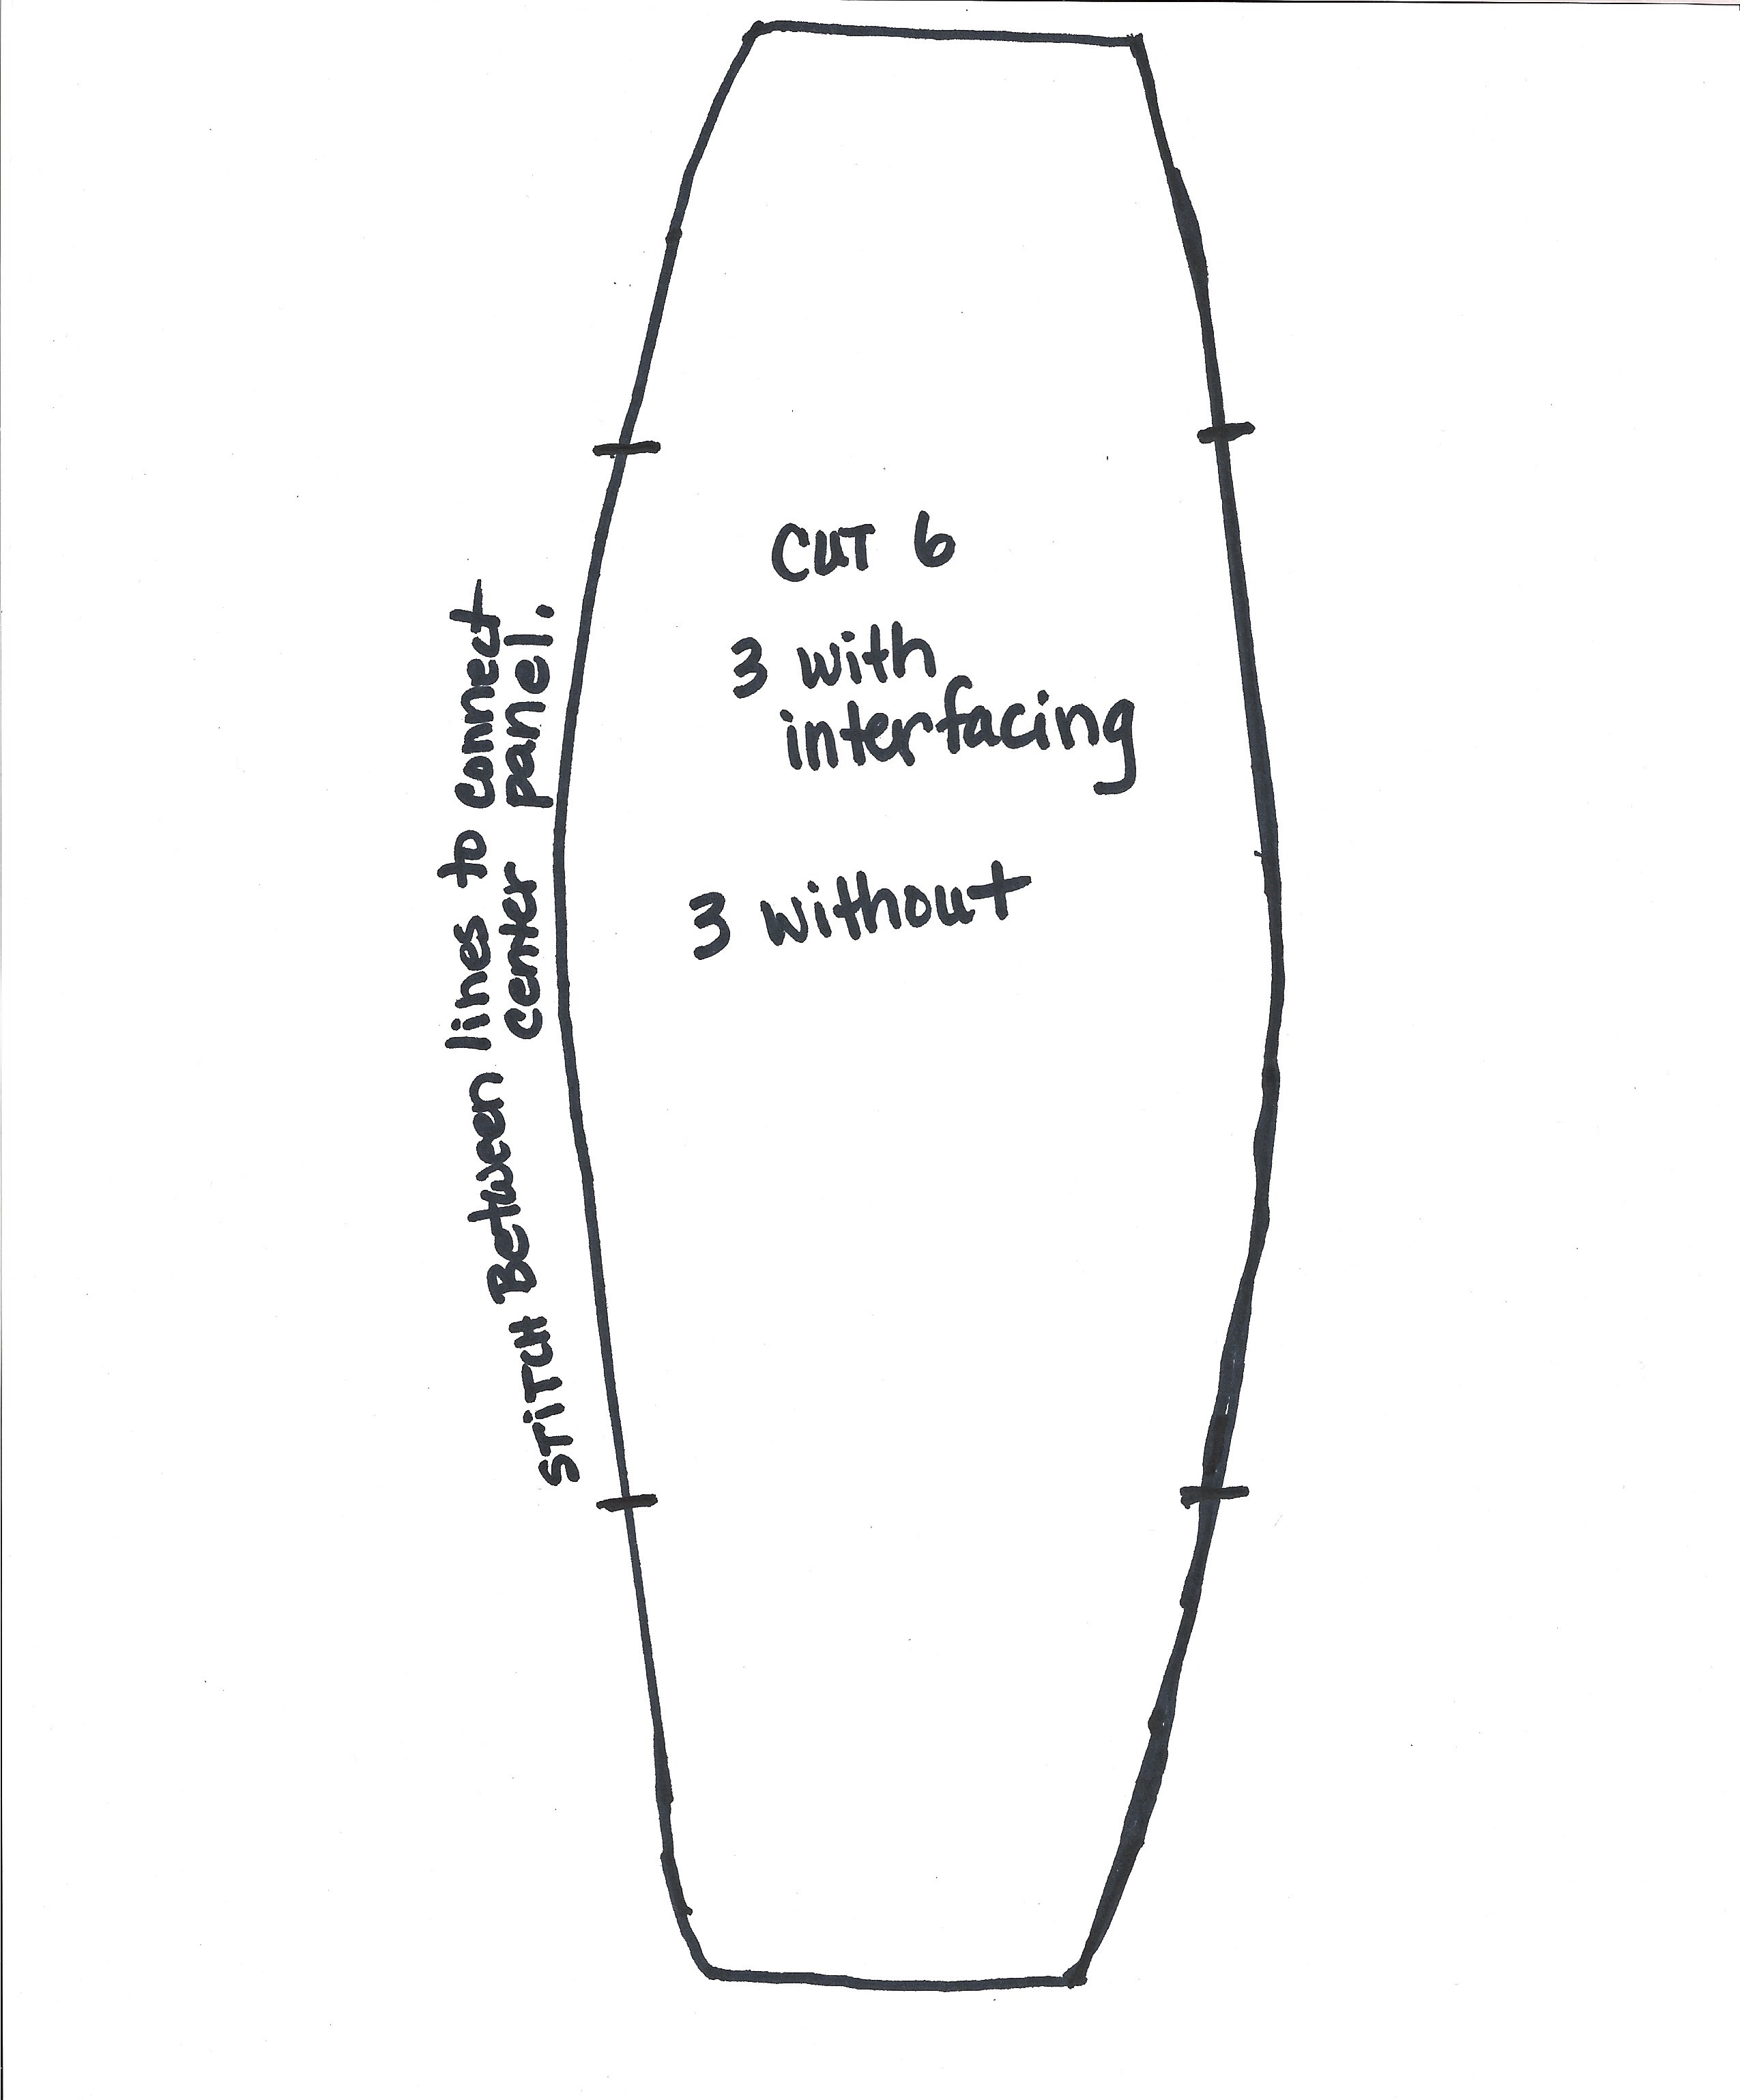 Click on this pattern piece to open the file to print off the pattern. Step 1: Choose your fabric. Because I decided to use two coordinating fabrics, I alternated the bottom part of the basket to be the other print from the sides. You will need to cut 6 of the pattern shapes for each basket. Iron your fabric flat and then iron on the interfacing to half of the fabric, enough to cut out half of your shapes with the interfacing attached. Cut out the other half of the shapes without the interfacing. Step 2: With wrong sides together, match up the shapes so that the right side of the fabric shows on both sides. The beauty of this method is that you don't need a serger to finish off the edges of your shapes, and there is no turning of shapes. With your pieces together, do a tiny zig-zag stitch all around the perimeter of your shapes. Stitch around the shape twice. Every machine is different, but make your zig-zag as tiny as possible while still getting that zig-zag effect. Then, trim the edge of the shape very close to the stitches. 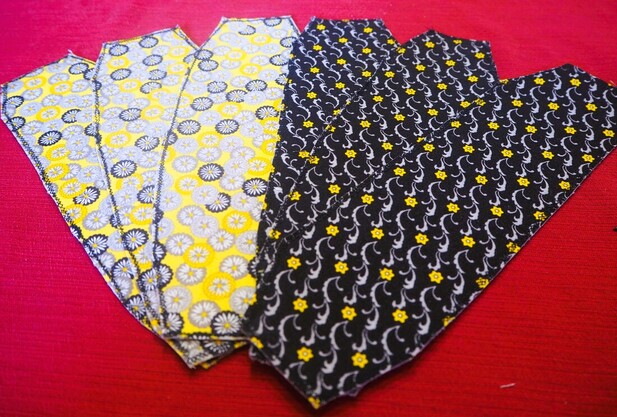 Here are my six shapes for two baskets all stitched up. I went back and trimmed them even closer after this. Step 3: Now choose 3 of the shapes and form your first basket by over lapping the basket bottom on the sides like this: 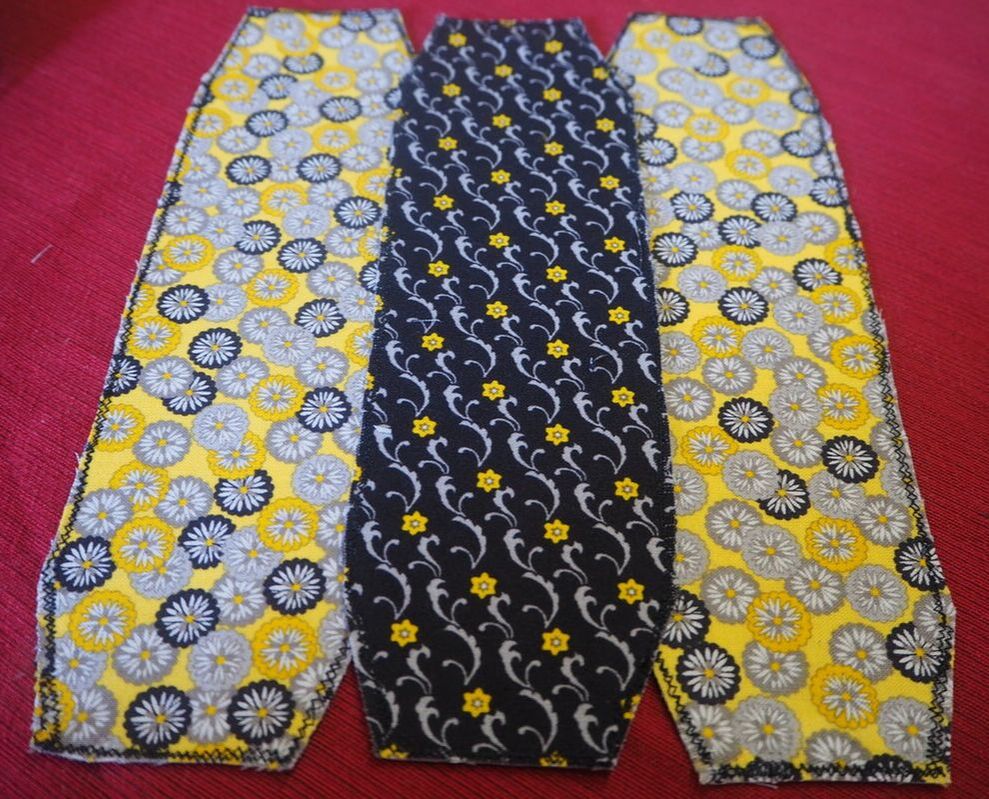 These are my first tries, so I'm confident that they will get better and better with the more that I make! Here is how Kathy's looks when it is flat: 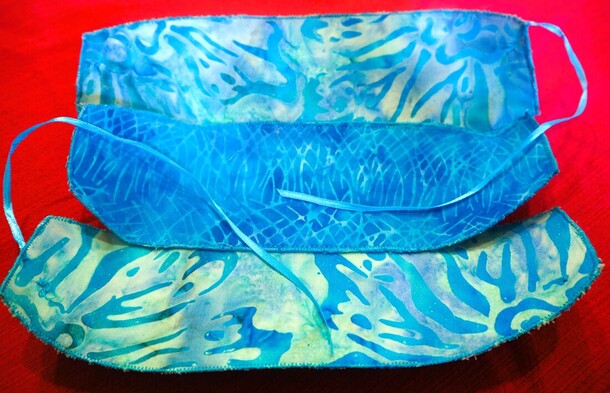 Pin the bottom in place so that you can stitch it altogether. Step 4: Use the markings on the pattern to help you know where to stitch the basket bottom to the sides. Stitch evenly on each side. Step 5: Fold the basket into the shape it will be in when it is a basket. I sort of creased up the sides and fold the ends towards each other with the ends meeting behind the bottom flap. They can overlap a bit if desired. 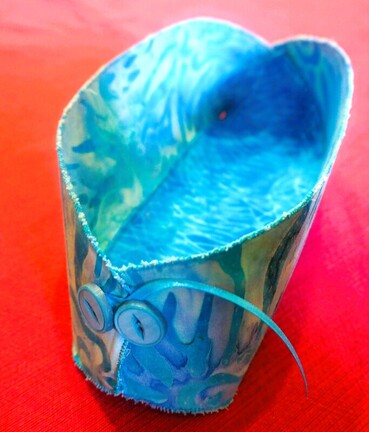 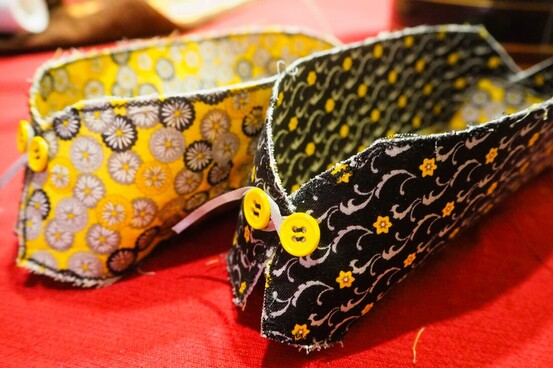 Sew a coordinating button on the upper corners of each end of the basket. Attach the ribbon under one of the buttons when you sew it on. Then, to hold the basket together, simply wrap the ribbon a round the buttons a few times These baskets are so simple, cute and handy! I'm excited to whip them up for everyone on my list! What would you fill them with? Give me ideas in the comments! Other Sewing Projects That Will Make Great Gifts!

2 Comments
Jaci Hibshman
11/6/2022 08:03:29 pm
So cute! You did a great job! Love the colors! 11/7/2022 10:44:46 am
Thanks Jaci! I'm excited to go through my scraps and find more combinations! Your comment will be posted after it is approved.
Leave a Reply. |
Creators of Hot Cocoa Bombs! (copyrighted)

Author
Helen Reynolds: Mother of six children , grandmother to eleven! I love to cook, craft and create things and I especially love doing that with my family, So, when my lawyer daughter, Lindsey, my artist daughter, Madalynn, and I came up with the idea of Hot Cocoa Bombs, this blog was born. Then, one more daughter, with her technical and science skills, plus creativity has joined in to round us out! Read more about us here! 
Click this link and visit 3WinksDesignShop on Etsy. Find our Hot Cocoa Bomb Idea Book, our For the Love of PIe e-book and more of our creations!

Amazon Gift Cards are the Perfect Gift!
    Archives
July 2024
|
 RSS Feed