|
This post contains affiliate links. If you make a purchase after clicking them, we will be compensated, but there is no additional cost to you. All opinions expressed are our own. Thank you for your support. 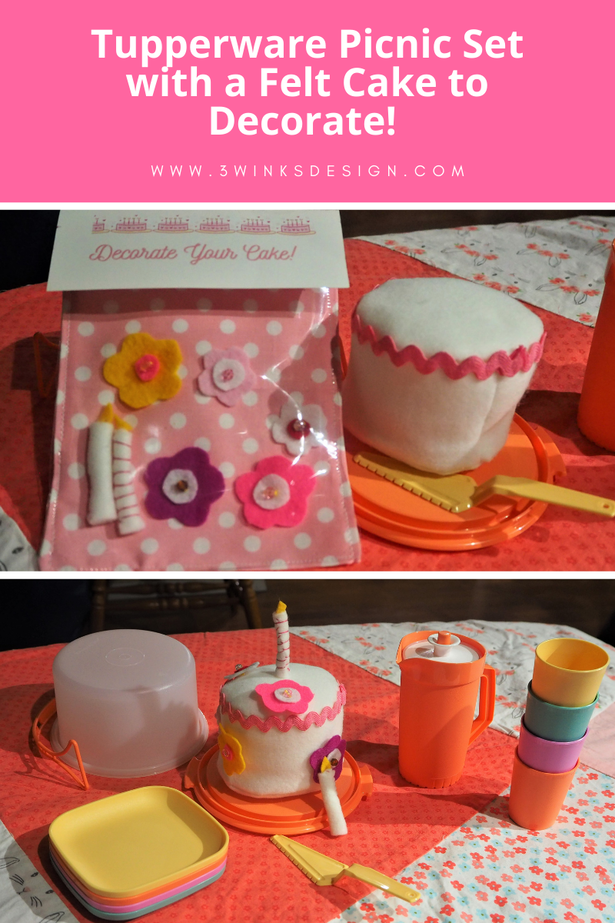 Last Spring, which feels like a million years ago, Tupperware was running a special on this adorable Party Set for Kids! At the time it was only $19.99! I fell in love with it. Look at the adorable tiny pitcher and that mini version of the classic cake taker! I purchased 3 sets to give to my 3 youngest granddaughters. I gave my granddaughter Emily a set first. She loved it and I actually decorated a mini cake so that we could have a little party with her parents and my husband. It was so cute and fun! 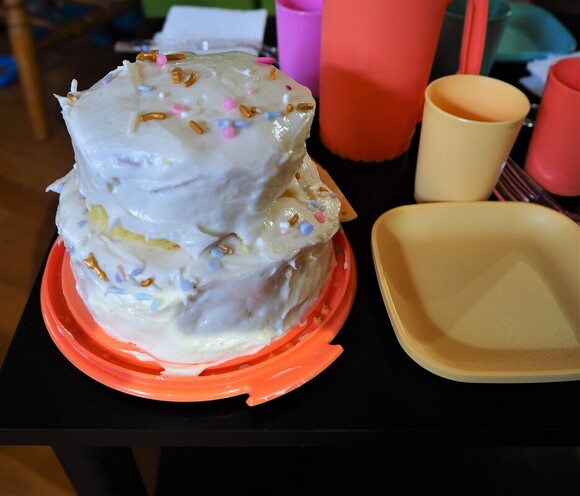 Of course we had to have sprinkles! It was a little messy, but still very tasty. I got to thinking that it would be a lot of work to make a real cake every time the girls wanted to play with these sets. Wouldn't it be great if I made a play cake that they could use when a real little cake wasn't available? Well, I kept thinking and thinking about that idea as Emily played with her little set, and then I gave the second set to Amelia and I still thought it would be a good idea. Now, the time has come for me to give the final set to Sofia, and I have finally taken my idea and turned it into reality! I don't know why I waited so long to create this little cake and the decorations to go with it. I even made a couple of little candles! Then, because you know that those little decorations will be easily misplaced, I made a cute little bag to keep them in. It all came together very quickly, too! Which is good since I need to go back and make these cakes for the first 2 girls! Here is how it all came together! For the Cake You Will Need:
Cut 2 circles of felt, 4 inches in diameter. Then, cut the strip to go around the outside of the cake about 2.5 inches tall and 15.5 inches around. If your felt isn't long enough for the 15.5 inches, it is okay to piece it into a long strip. Stitch the ends of that strip together in to a loop. Pin the strip to the edge of one of the circles all around. 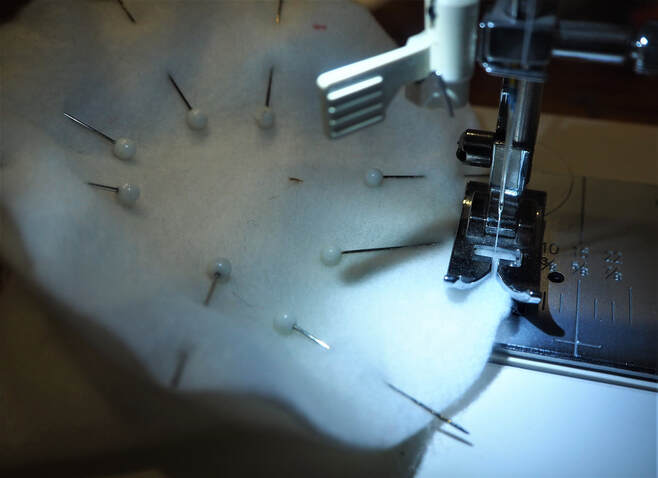 Sew the circle all around, catching the strip and the top together. 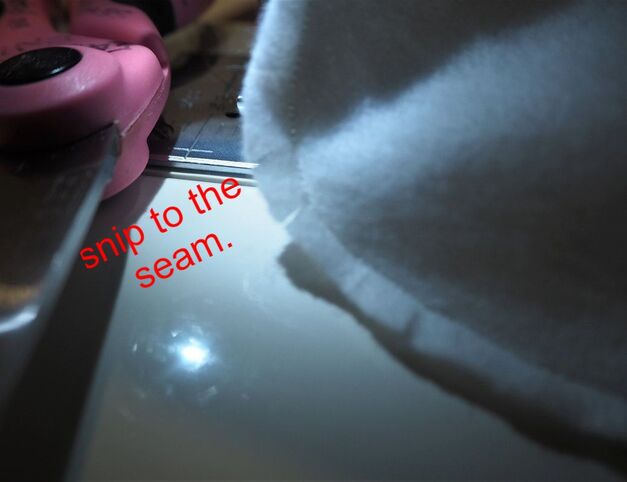 Snip the seams all around when you are finished. Next, pin the bottom circle to the band and stitch again, this time leave a few inches open to leave room for turning right side out. Snip the seam again. Now, turn the cake right side out and stuff with fiber fill. Hand stitch the opening closed. 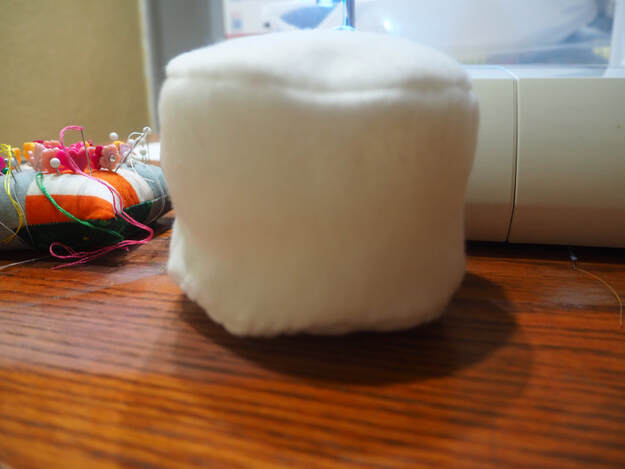 You will end up with a cake that looks like this. I decided that the cake was too plain, so I glued rick rack around it to give the decorating a start. 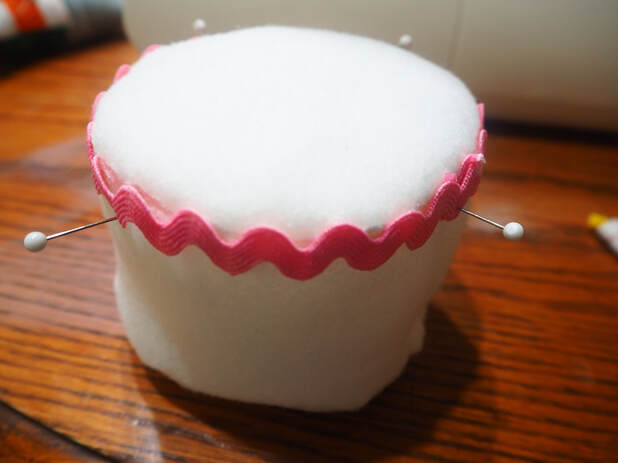 I simply used white glue and pinned the rick rack in place until the glue dried. Finally, I made some little decorations out of felt scraps for Sofia to use to decorate her cake. Felt sticks to felt very well. I simply used embroidery floss to stitch together some flowers and add a bead in the center, (like a sprinkle)! My granddaughters are over 3 and won't put the beads into their mouths. If your children are younger or tend to put things into their mouths, you may not want to use the beads. I also made some candles by rolling up some felt and adding a yellow triangle at the top as a flame. 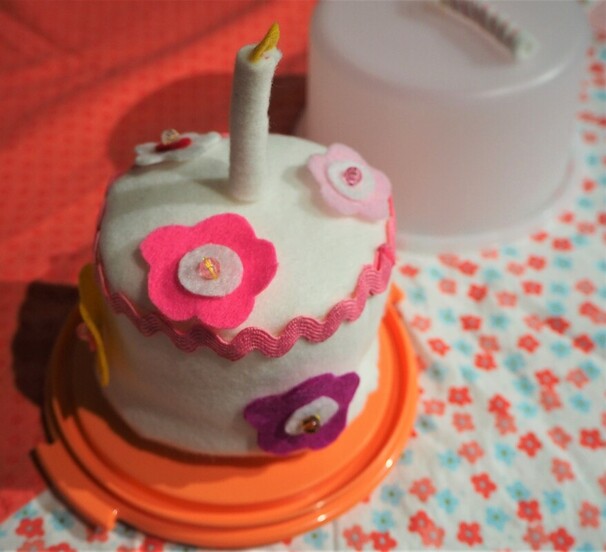 I also decided that the decorations needed a little bag to hold them so that maybe they won't get lost so quickly. First, I designed the flap and printed it on 4 x 6 inch photo paper. Here is the pdf that you can print for yourself. Be sure to click the button that fits it to your size of paper. For the rest of the bag I used:
I made my bag 6 inches wide and 8 inches tall, including the top printed flap. Cut your fabric 6.5 inches by 14 inches. Fold it in half, right sides together, so that you end up with a rectangle like this: 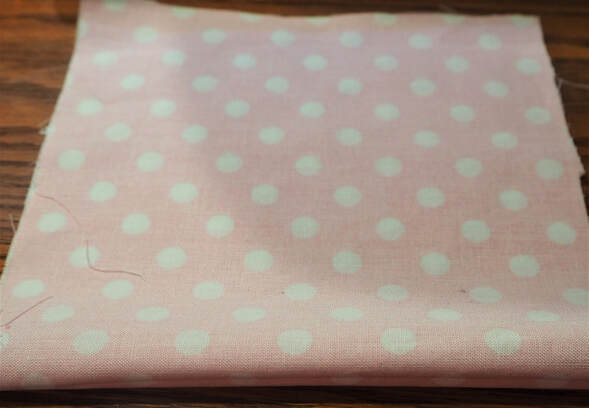 Sew down the left and the right sides, leaving the top open. Trim the corners by the fold and flip the fabric right side out, pushing out the bottom corners. This will cause your bag to look good through the vinyl and from the back! 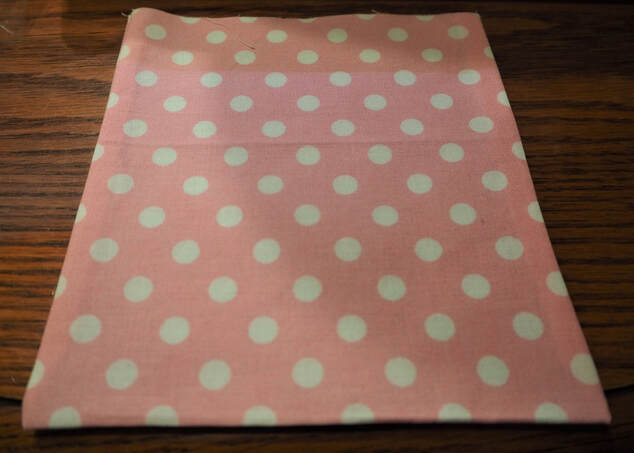 Now, take your label and zig zag it to the upper part of this fabric. Make sure you sew it so you will be able to fold the flap down and the words will show.  This is how it looks on the back of the bag. The fabric's unfinished edge is to the inside. 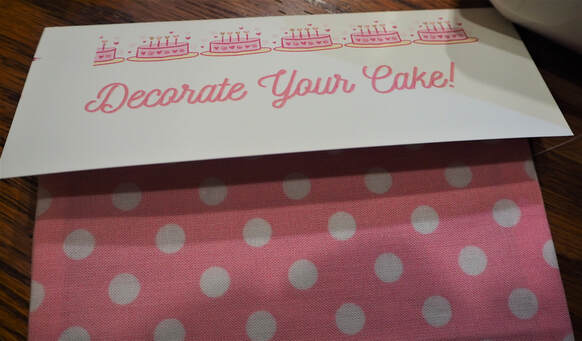 This is how the front will look when you fold the flap over. Finally, you measure your clear vinyl to match the size of the fabric and stitch it down the side, across the bottom and then up the last side. Leave the top open to slip in your decorations. 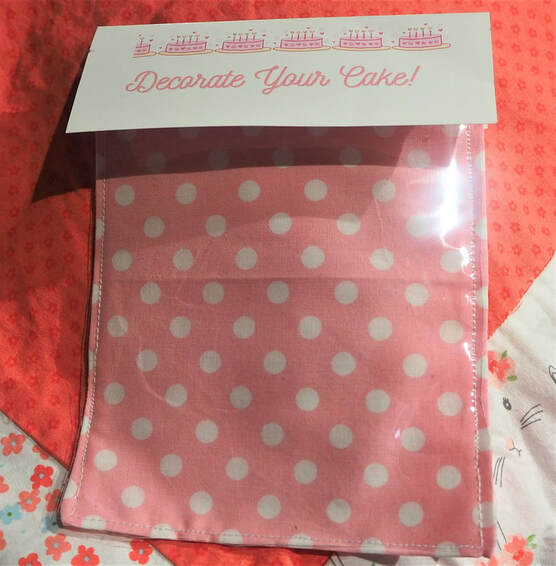 The vinyl is stitched on. 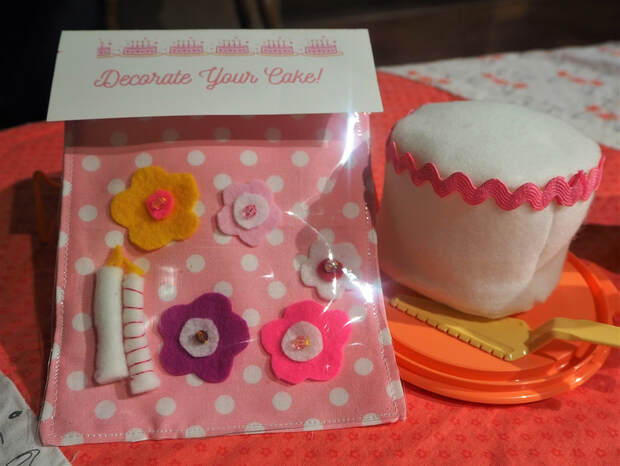 All ready to give as a gift! I think my little Sofia is going to love it, as well as the other girls when I get theirs made! Of course, you can make a lot of other things to decorate the cake with, like butterflies or rosettes. Wouldn't a Christmas Cake be fun for this holiday season? Of course, a real cake every so often needs to happen as well!

0 Comments
Your comment will be posted after it is approved.
Leave a Reply. |
Creators of Hot Cocoa Bombs! (copyrighted)

Author
Helen Reynolds: Mother of six children , grandmother to eleven! I love to cook, craft and create things and I especially love doing that with my family, So, when my lawyer daughter, Lindsey, my artist daughter, Madalynn, and I came up with the idea of Hot Cocoa Bombs, this blog was born. Then, one more daughter, with her technical and science skills, plus creativity has joined in to round us out! Read more about us here! 
Click this link and visit 3WinksDesignShop on Etsy. Find our Hot Cocoa Bomb Idea Book, our For the Love of PIe e-book and more of our creations!

Amazon Gift Cards are the Perfect Gift!
    Archives
July 2024
|
 RSS Feed