|
This post contains affiliate links. We will be compensated for purchases made through those links at no extra cost to you. All views expressed are our own.
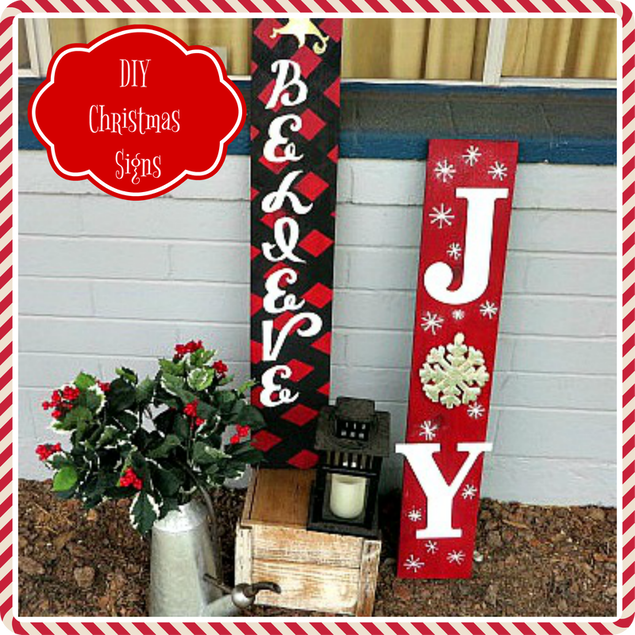
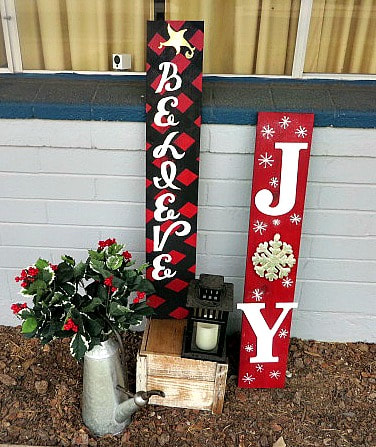
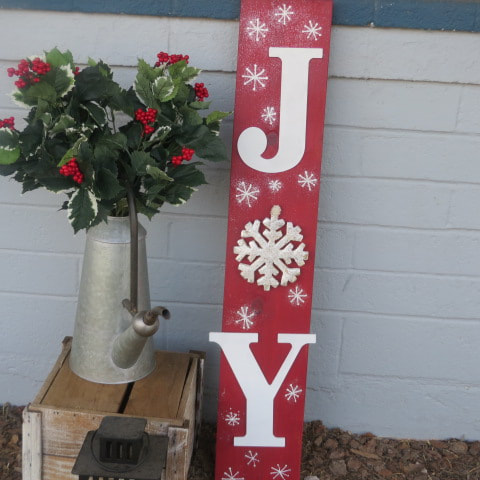
I love all of the word art signs that spell out Christmas messages and I really wanted some for the front of my house. I found one similar to the JOY sign at a retailer, but it was in excess of $17 and of course I thought, I can make that for much less! So, I did!
The JOY Sign: Step 1: Go to your husband and tell him how good you were about not spending that much money on a sign you can probably make yourself. Ask him if he happens to have some scrap wood that you can use to make your own signs. He is so proud of you for not spending the money, he goes right out and finds you a board that he cuts in half so that you can make 2 signs! (If he doesn't have a board, you could always go to Home Depot or Lowe's and look in their reject pile for an inexpensive board. They are pretty cheap and you don't want a perfect board for this anyway). Step 2: Find some leftover red paint and paint your boards your base color. If you don't have leftover paint, you can use a bottle of acrylic craft paint, but it will take a lot. Step 3: Go to Hobby Lobby or Michael's and find wooden letters in the size you want for your board. For the "O" in Joy, I found a snowflake ornament at Hobby Lobby that worked great. I was a little worried about the fact that may "Y" extended over the sides of my board, but now I love the interest it adds to the board. Step 4: Paint the letters white. Glue them on with 2 kinds of glue. Gorilla glue or E6000 will hold them for the long haul and a glue gun will keep them in place until the stronger glue dries. Step 5: Use white paint to make snowflakes and sprinkle them with glitter! Now you're ready to put your sign it its festive place!
The Believe Sign
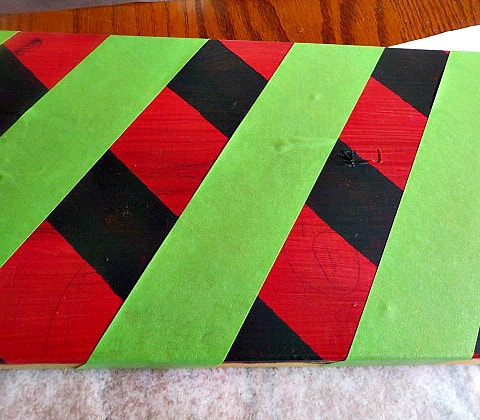
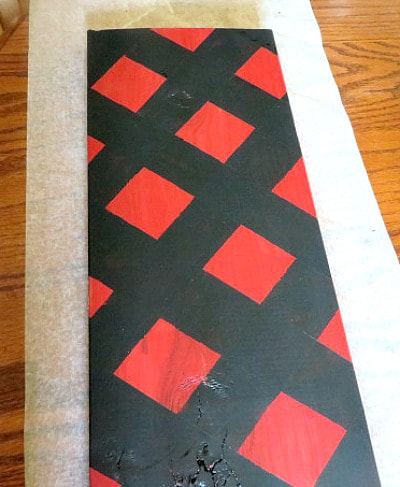
Repeat steps 1 & 2 above. Step 3: Use painter's tape to create a diagonal buffalo plaid design. Use left over black interior house paint or acrylic paint. I used house paint for the red and acrylic for the black.
Step 4: Use your Cricut machine to cut out letters and a star in a size that looks pleasing on your board. I used 4.5 inches.
Step 5: Place your letters and star. Then decide that you don't want the letters to be gold like the star and paint over them with white acrylic paint. Step 6: Arrange your signs where you want them and add some Christmas foliage to set them off, as well as a few other accessories! Take a picture and admire your work! Easy Peasy! 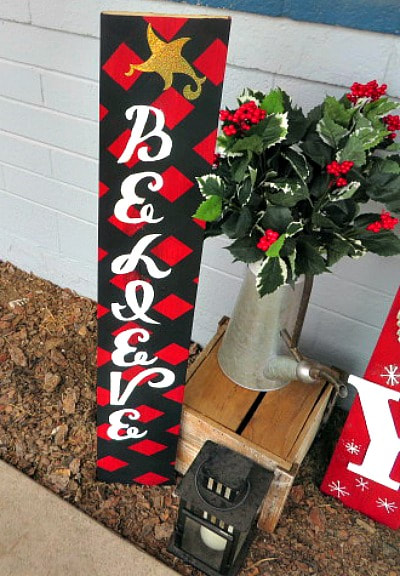
3 Comments
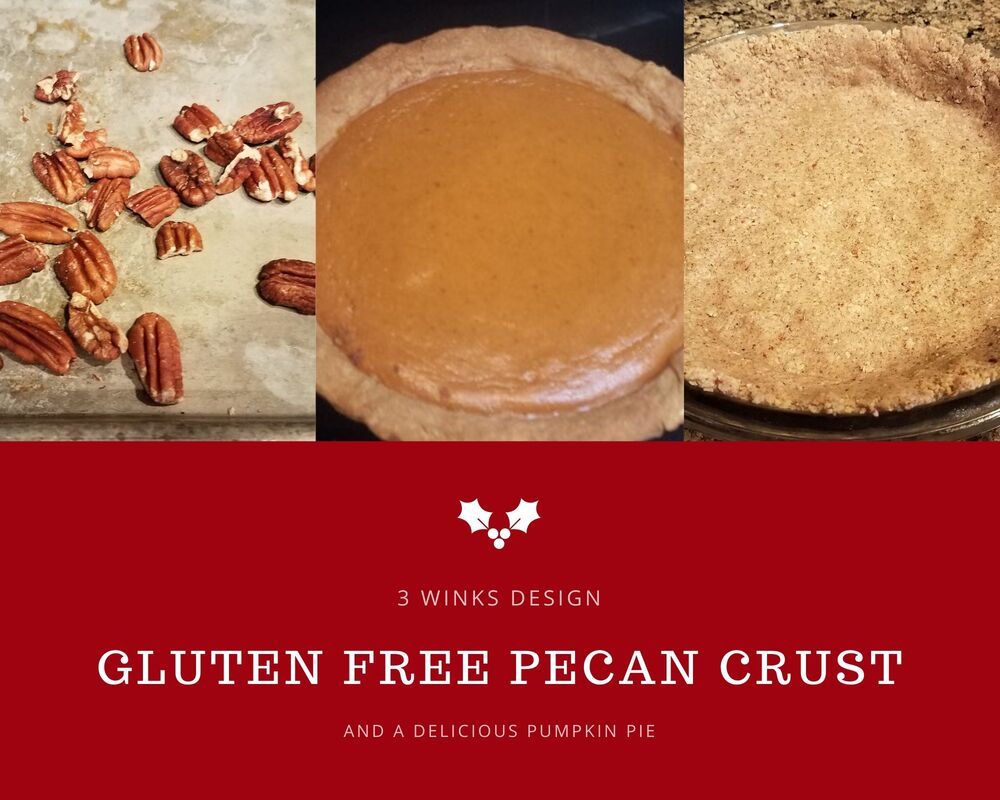 Hey guys, it's not too late to keep posting recipes that include pumpkin is it? I mean, I eat it all year round so... IT'S NOT! Ever since my PH went gluten free I've been exploring the world in gluten free baking. The one thing I've been holding off on trying is a gluten free pie crust. Our pie crust recipe is so easy! Plus it is always flakey and perfect. So the idea of trying out a gluten free crust which would likely turn out very poorly the first few times around worried me quite a bit. (Fun fact, the first few I tried out were terrible) However, we had a big family party yesterday and I was bringing the pumpkin pie. PH loves pumpkin pie and I was determined to make a crust he could eat. I tried almond flour but my crust was greasy and crumbly. Then, I decided to try to use pecans. I felt like it'd be a great marriage of pecan pie and pumpkin pie. What sounds bad about that? (Nothing!) 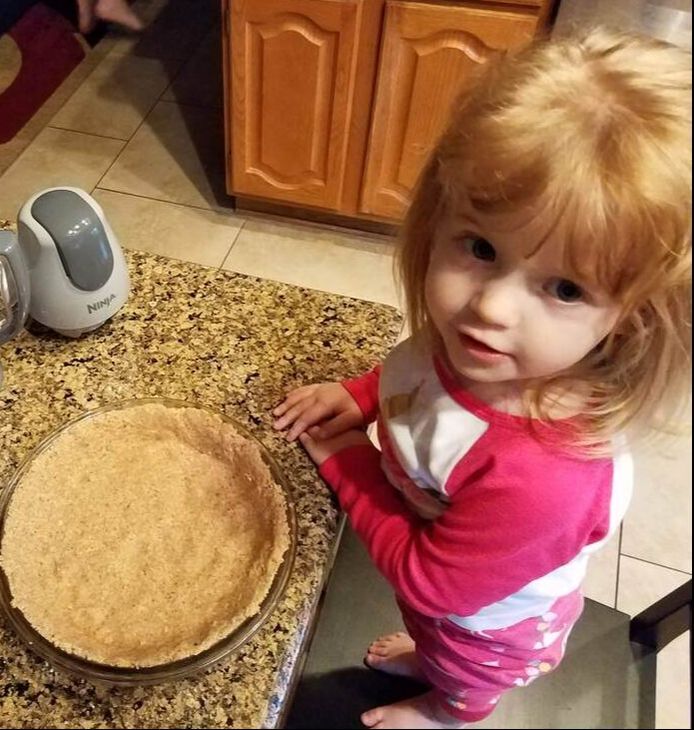 My little helper chef This crust really came together so easily. Everyone who had a piece at the party told me they thought it was really good. I felt like it did work well together. I'm really happy with this foray into gluten free pie crust, and I think you will be too! If you want to keep it vegan you could easily replace the honey for maple syrup, or even agave nectar! One warning I will give is that my crust didn't come up as far around the plate. When I poured my pumpkin filling in it overflowed a bit. To remedy this you'll want to use a little less filling, or try to get the crust further up the plate. Or use a deeper pie plate. I forgot to take a picture of my finished pie. So here is a photo of one of my regular pumpkin pies.  I am also attaching the link to my favorite pumpkin pie recipe. This pie is perfectly spiced, and I love the depth of flavor from adding brown sugar instead of just using white sugar. Happy holidays everybody! I hope you enjoy your gluten free pies as much as your regular ones!
This post contains affiliate links. We will be compensated for purchases made through those links at no extra cost to you. All views expressed are our own.
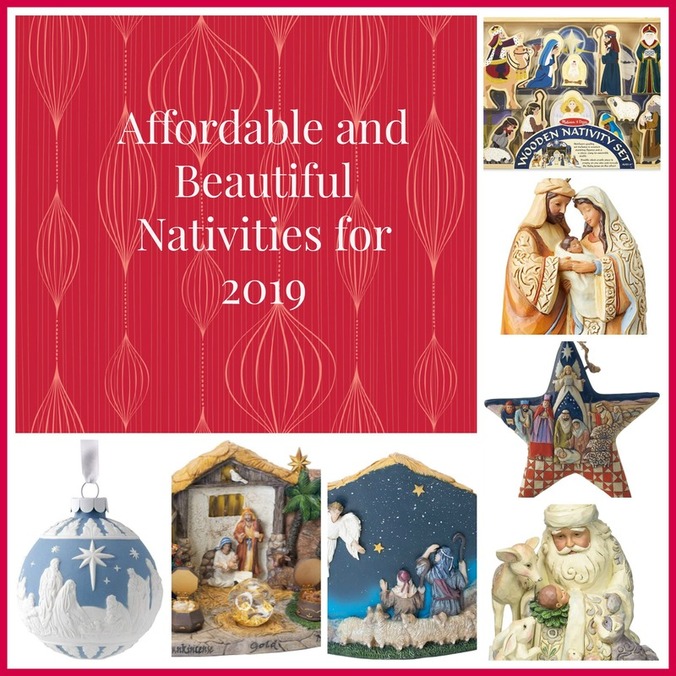
I love looking for new nativity scenes during the Christmas Season. I have a small collection of nativities, including a special on from Ecuador and a handmade one from Maddy which are treasures, that I put out each year. So, this blog post is one of my favorites to write during the Christmas season because I get to spend time "researching" what nativities are out there that I havent seen. (By researching, I may mean shopping for my own collection.)
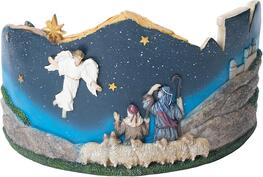
I am going to start this year's collection of my favorite finds with one figurine that is not a nativity, but it does remind me of the Savior and I love it so much that I had to add it to today's collection. It is called "White Woodland Santa with Baby Jesus." It is so sweet. When my children were little, I would tell them that Santa would never have begun bringing gifts if it hadn't been for Jesus' birth. Now that they are all adults and have outgrown Santa, they believe in Jesus more than ever so, this figure really spoke to me when I saw it and I want it! It is a Jim Shore piece.

I am a big fan of Jim Shore's work, so it is no wonder that I included a couple more of his pieces. Here are two nativity ornaments that I love.
I also enjoy nativities that keep you gazing at them because they are so intricate or detailed.
I always like to make sure that there is a nativity set that my grandchildren are allowed to touch and play with. What better way for them to learn the true story of the birth of Jesus Christ? This year, I am looking at this set by Melissa and Doug! Melissa and Doug products are always good quality. This set looks sturdy and durable. There is a simple to assemble stable and 11 wooden figures. I know my grandchildren would love it!

. This year I am again participating in #LIghtTheWorld. It is a way of "transforming Christmas into a season of service." If you participate, you can receive a text each day reminding you of small acts of service that you can perform each day until Christmas. Today I just finished Day 4. I have been able to do each act of service so far and my heart is full of love for my Savior and for my fellowman today! If you would like to take part,just click this link and find out what you can do and how easy it is. It will change you and you will feel joy!
You may also enjoy...
Favorite Nativities from 2018
This post contains affiliate links. If you make a purchase after clicking them, we will be compensated, but there is no additional cost to you. All opinions expressed are our own. Thank you for your support. 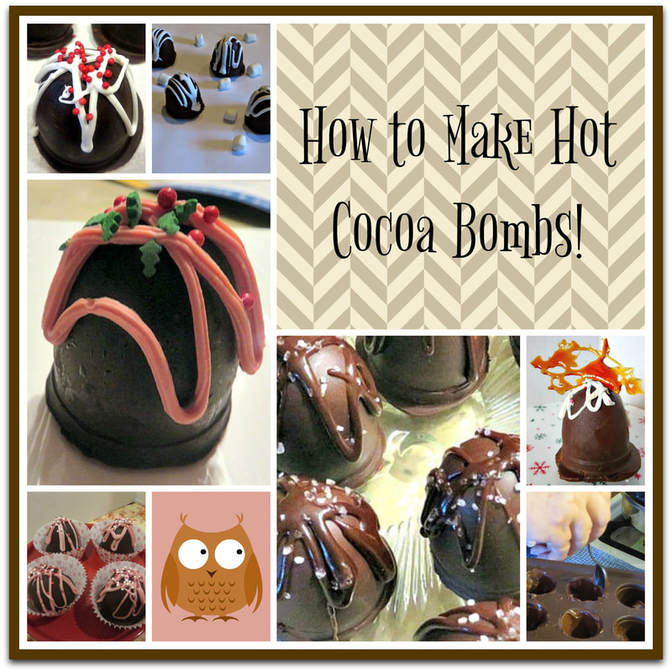 This is the first year in many years that we haven't participated in a craft show and sold our beloved Hot Cocoa Bombs. So many of our past customers have contacted me wanting to know where we are! Many are discovering our Hot Cocoa Bomb Idea booklet on Etsy. So, I thought today I would re-post our original tutorial that shows how to make the best and most entertaining Hot Cocoa ever! The time has come! I am going to introduce the method we use to make our Hot Cocoa Bombs with all of their chocolaty goodness and hidden surprises! Believe me, it took a lot of trial and error to get them to come out the way we imagined them. Today, I am going to start you out with the basic Chocolate Marshmallow Bomb. After that, the flavors and decorating ideas are endless. To begin, here are the tools and supplies I use: Tools and Supplies
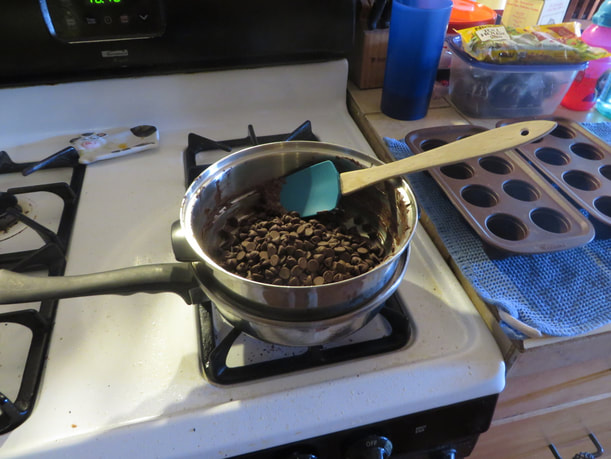 How to Make Your Hot Cocoa Bombs Begin by using a double boiler to melt the chocolate chips over hot water. That is the best way to melt the chocolate to a creamy consistency and to avoid burning it. (Don't let the water run out in the bottom, or you will burn it.) If you temper the chocolate correctly, it will make the chocolate shine when it cools. * I want to note here that you may be tempted to try to melt flavored chips to make the shell of your bombs. My experience has been that the cinnamon, mint and other flavored chips do not harden as well to make a firm shell. If you want to use those flavors in your cocoa, you may use them inside the shell as I will show you in future tutorials. So, melt the chips until they are smooth and silky chocolate! After the Chocolate has melted nicely, use the soup spoon filled as pictured below to put chocolate into the cavity of the mold. 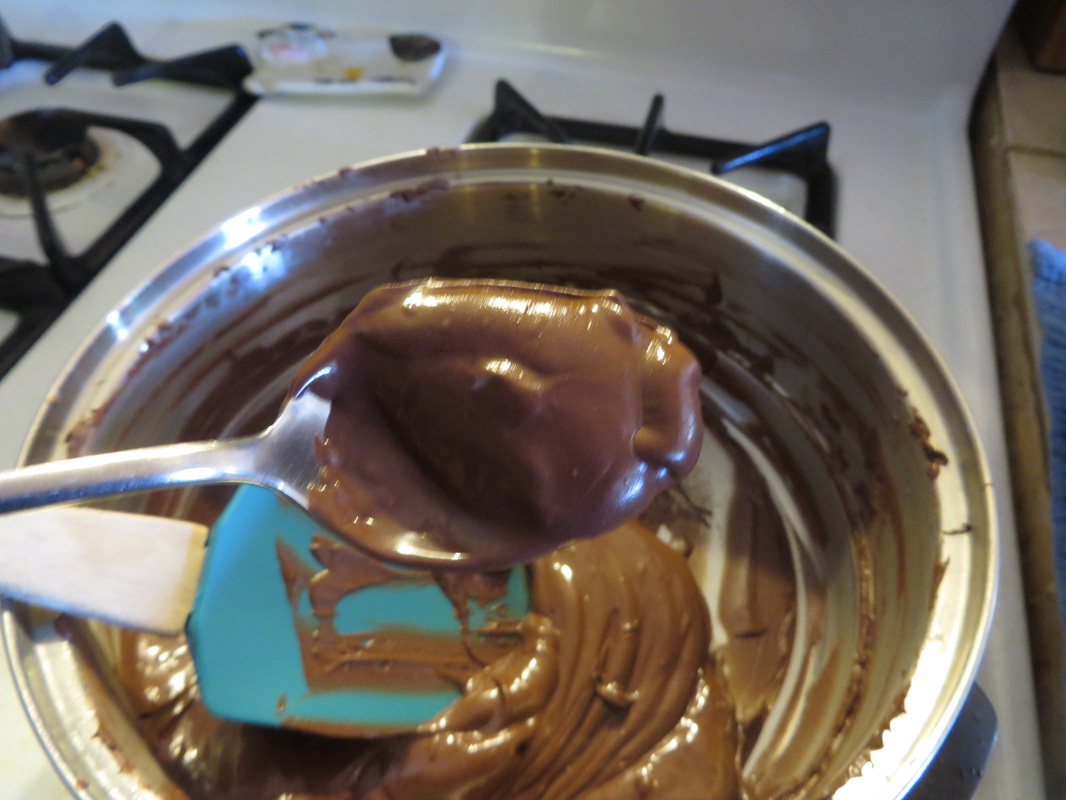 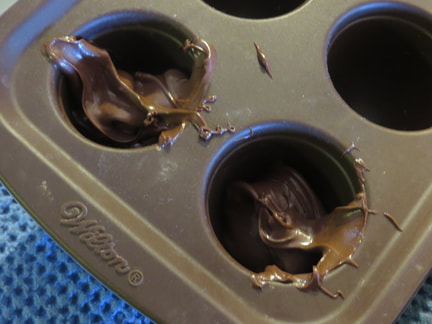 I know, I am kind of messy. 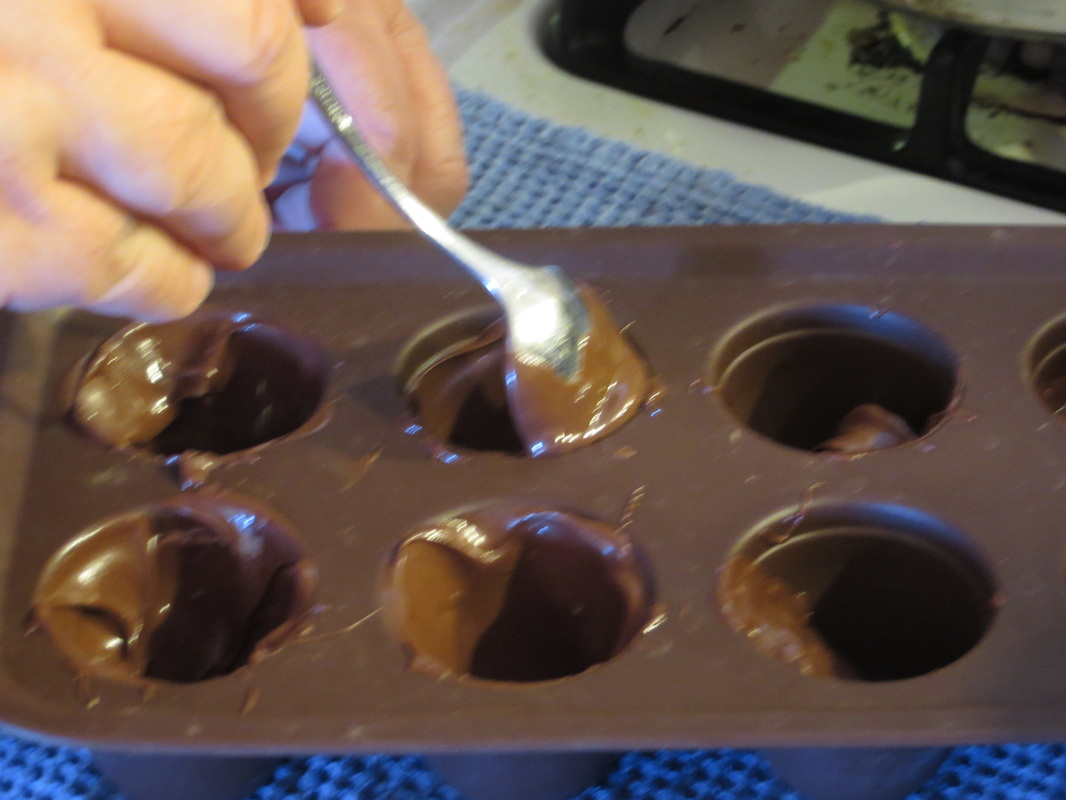 After filling all of the molds, use the teaspoon to swirl the chocolate around to form the shells.  Next, I put them in the freezer to harden for at least 20 min. (Usually I get busy and forget to get them out to finish hours later, but either way works). Anyway, after they are hardened, take them out of the freezer. The next step is very important if you do not want to break most of your shells. After a lot of broken bombs and frustration, we discovered this method. Pop the shells out of the mold like this:
DO NOT ATTEMPT TO FILL THEM BEFORE POPPING THEM OUT THE FIRST TIME. THIS WILL ONLY FRUSTRATE YOUR LIFE! 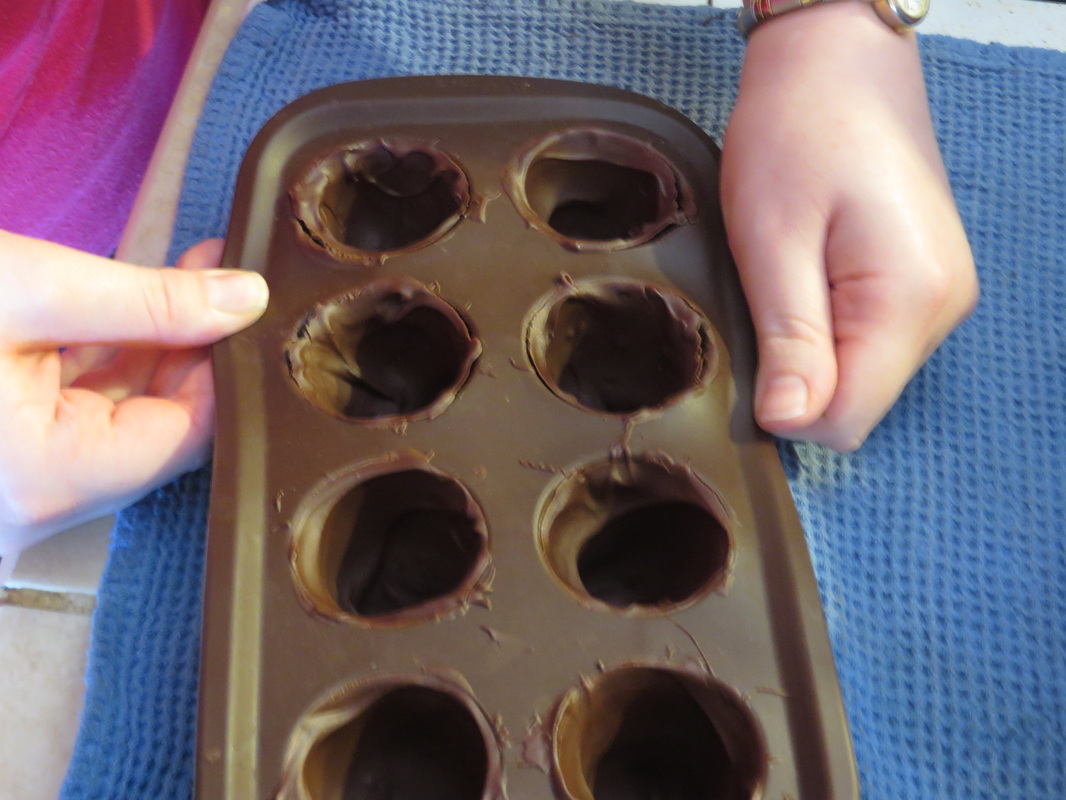 Stretch the mold gently. 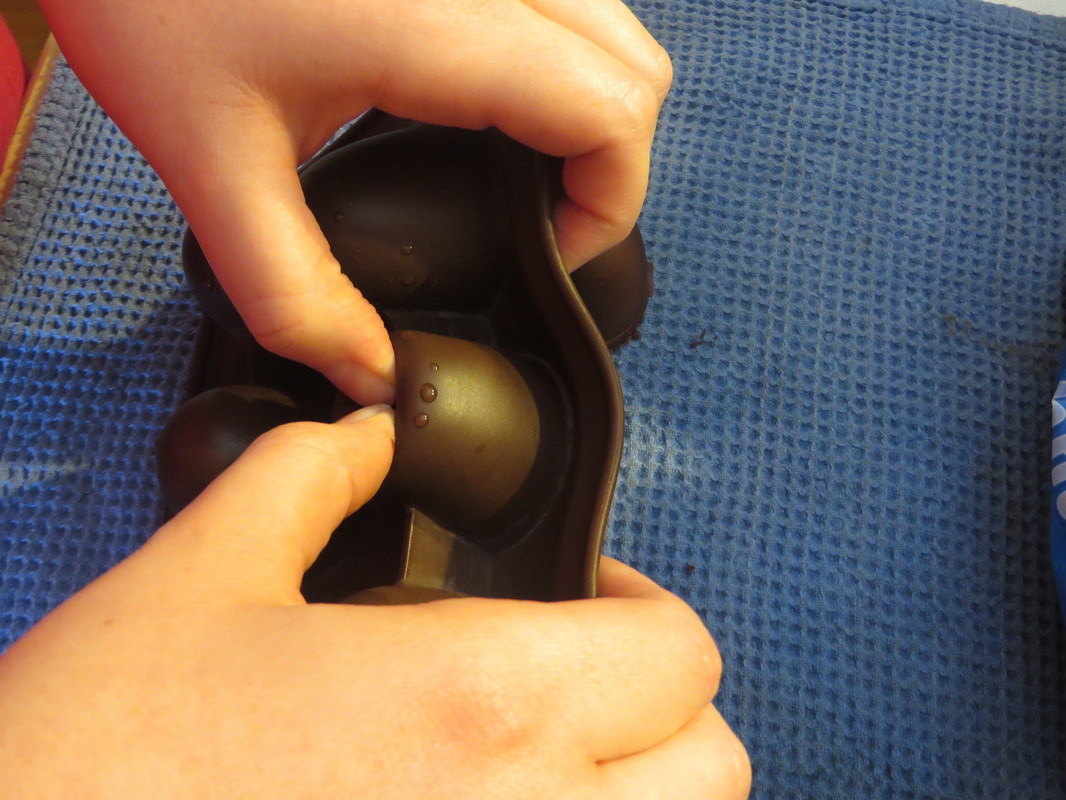 Push them out, gently. 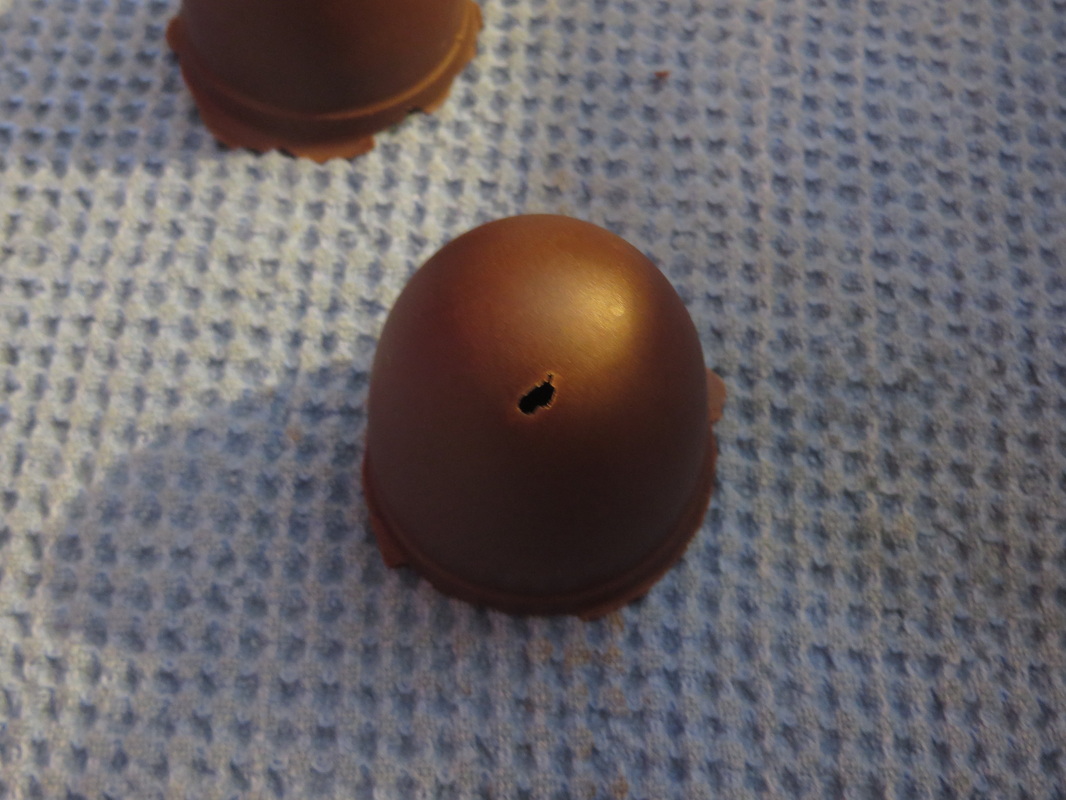 Oops, this one has a little hole. That is okay, just patch it up with a quick dot of chocolate from the chocolate that is left over for the tops. If you aren't quick the hot chocolate will just melt the hole bigger, so it takes a quick touch and pop it back into the mold.  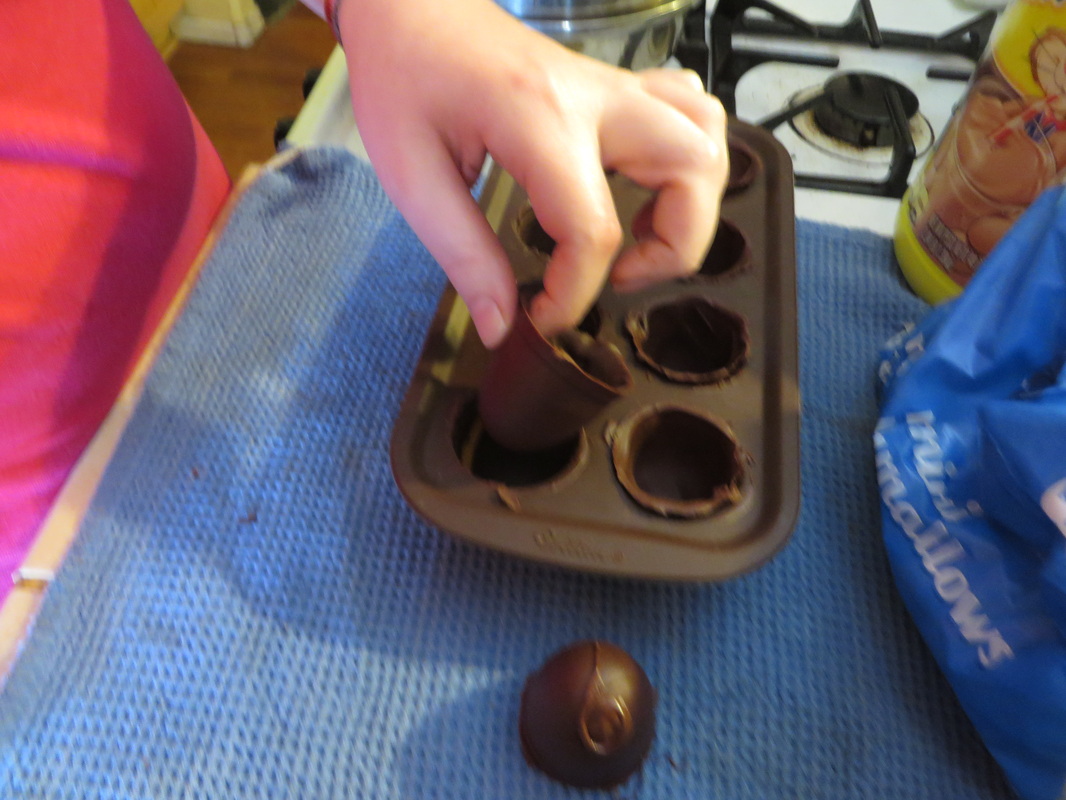 Remember: If you are just making these for your family to enjoy, gloves are not necessary. Please wear food safe gloves if you intend to sell these. Now, it is time to fill them! One of the best things about these Hot Cocoa Bombs is that the marshmallows pop up from them when it is time to melt and drink your bomb! So, the first thing we do is pack them with 5 or 6 mini marshmallows. Then, we put about a tsp and a half of Nesquick in with the marshmallows. We have used the store brand of chocolate milk mix, but we have discovered that the Nestle brand, Nesquik, really does dissolve more smoothly. 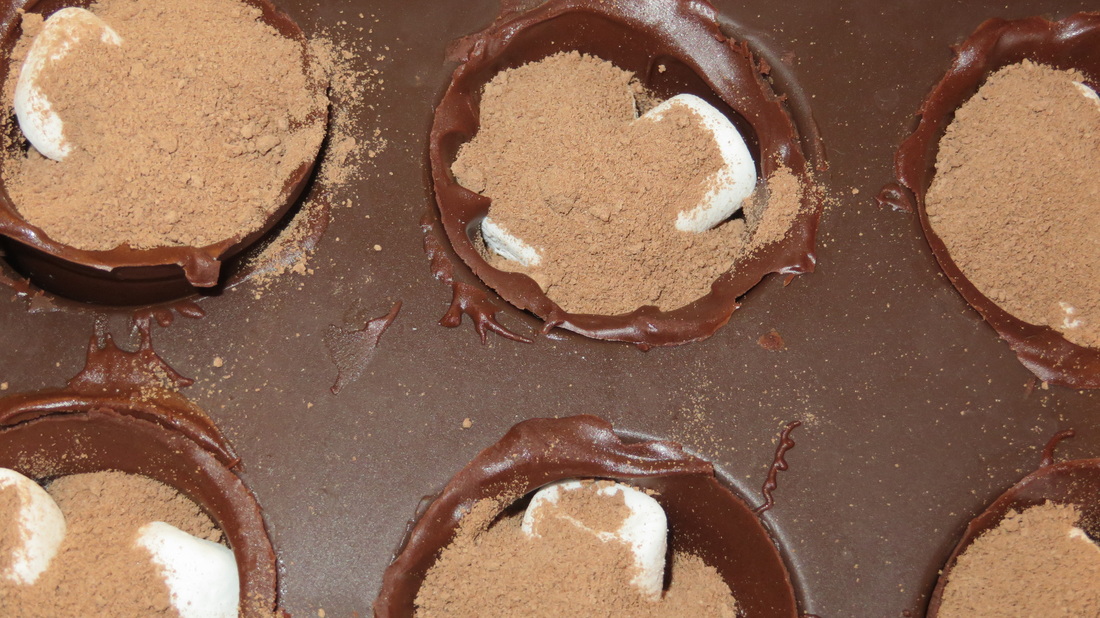 Finally, we top them with a last layer of melted chocolate! 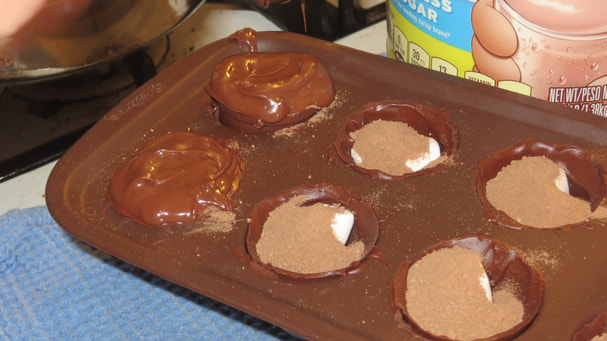 Use just a teaspoon full of the chocolate. Slide it on top with the spatula and then use the spoon to tap it out to the edges to cover the entire top with chocolate, sealing it to the edges. 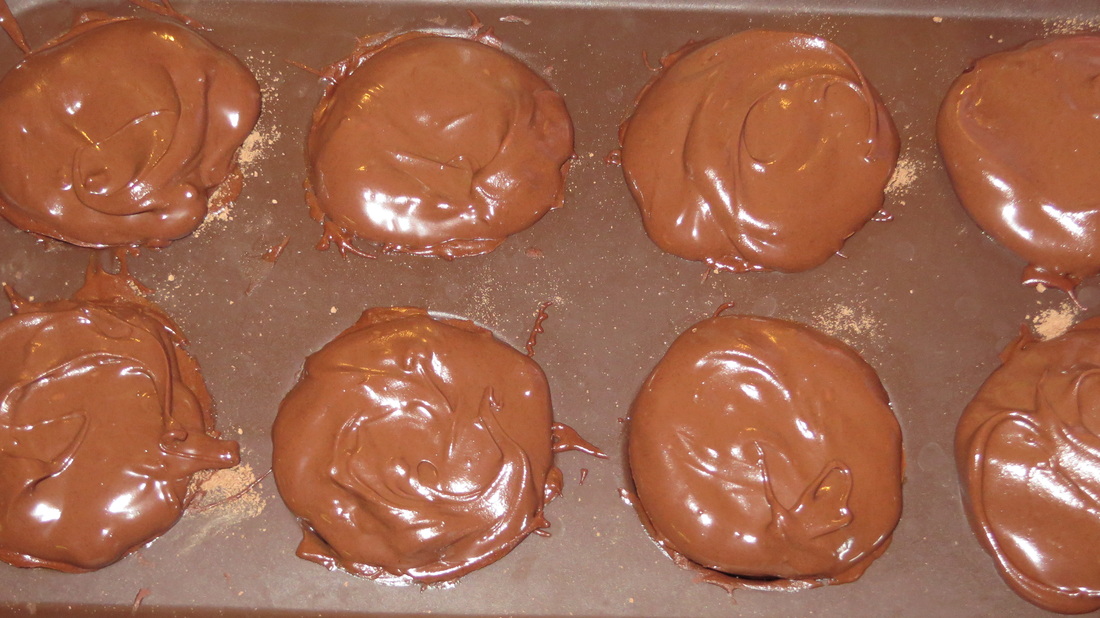 Back in the freezer they go for another 20 minutes or more. Then you pop them out and the decorating begins! 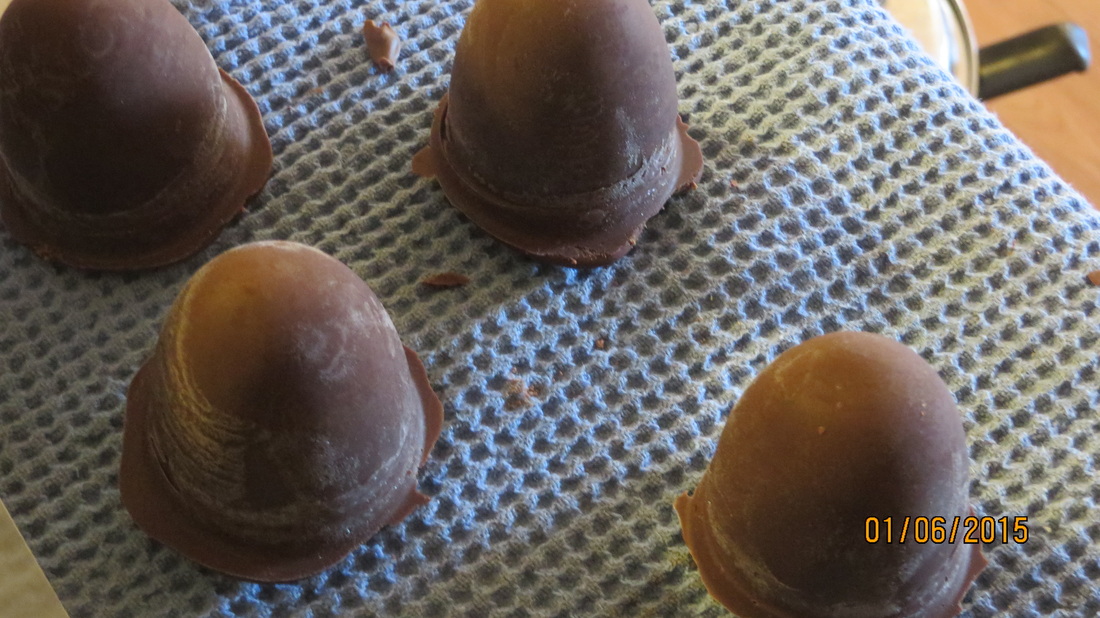 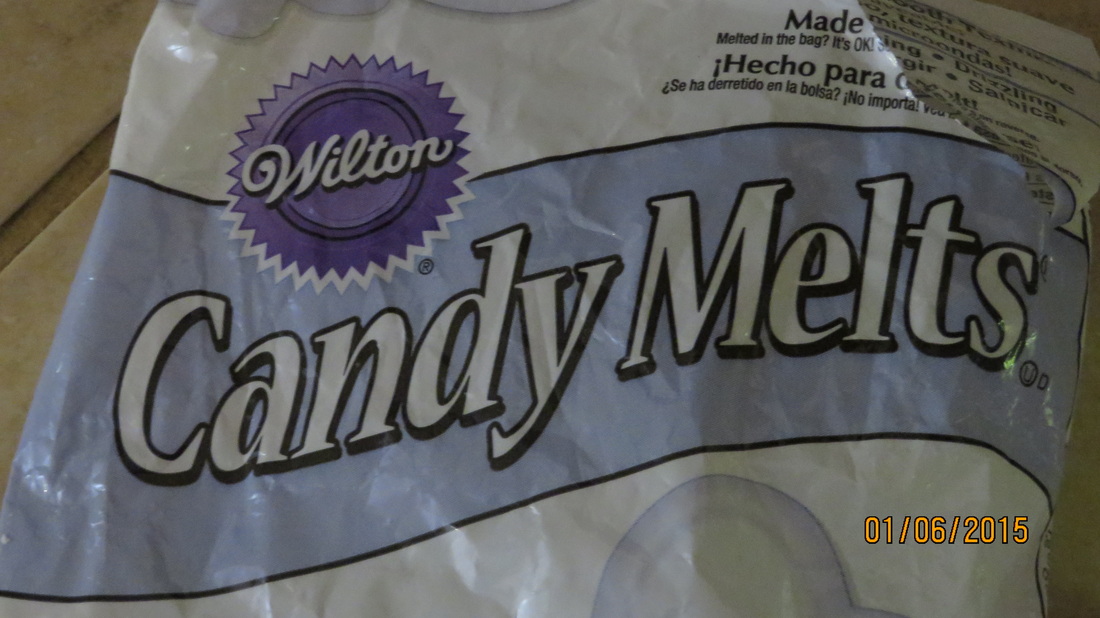 I kept these simple using a little white topping. The candy melts harden quickly on the frozen cocoa bombs. 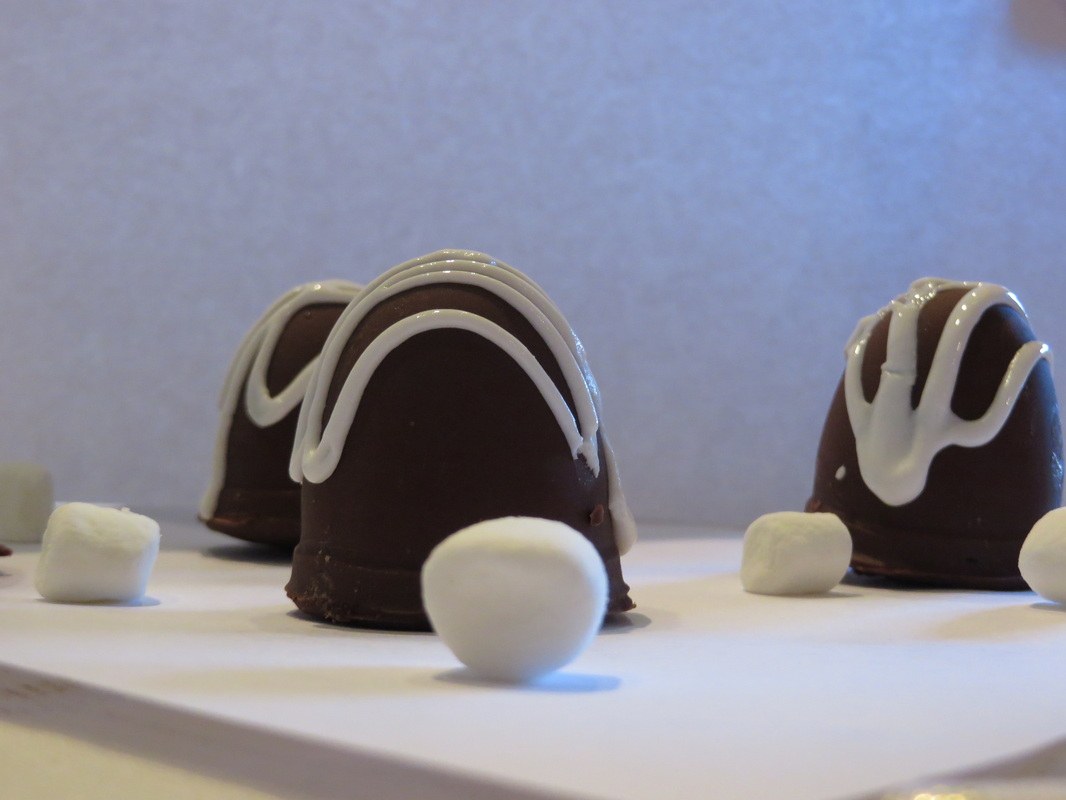 Time to taste them! Make some nice, hot milk. I love real cocoa made in milk rather than the water kind. Don't you? Fill your mug about 3/4 full of the hot milk, drop in your Hot Cocoa Bomb, and stir! You will love it! 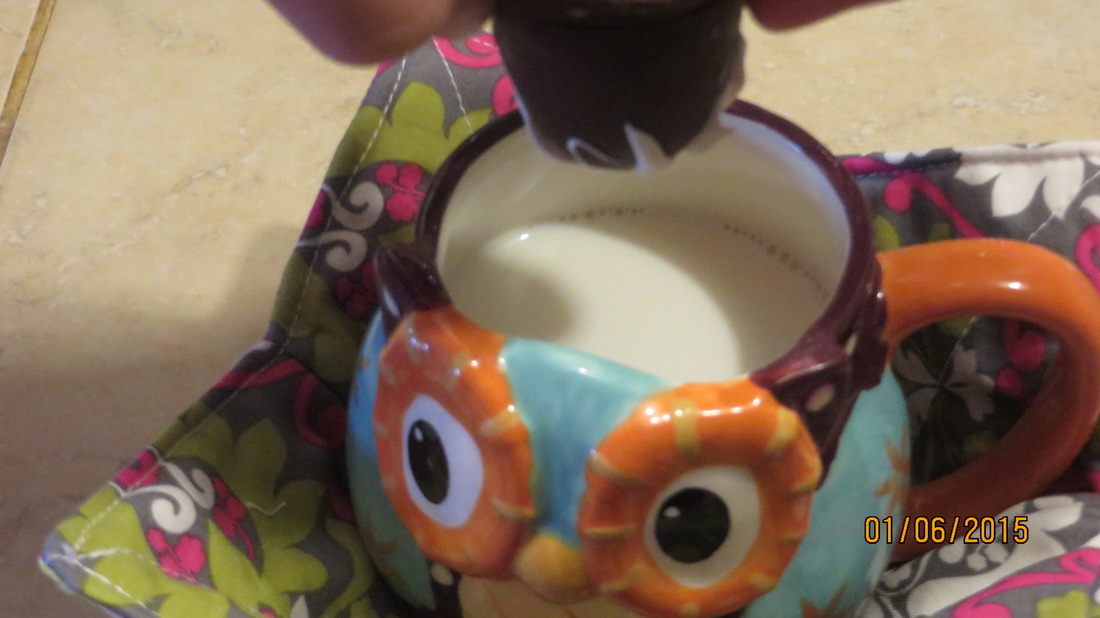 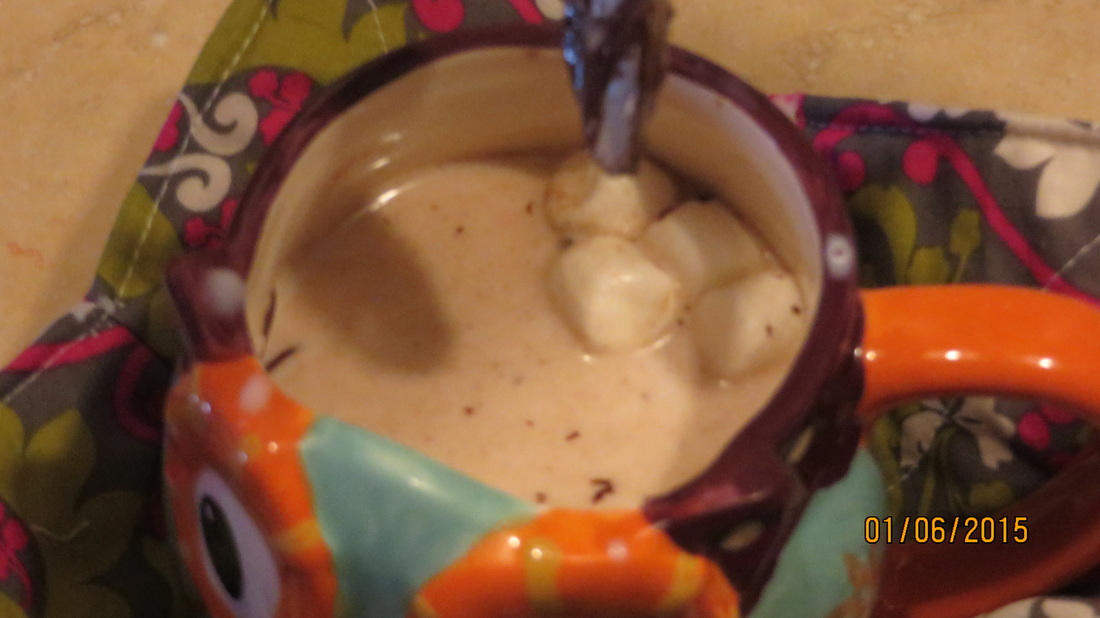 Up pops the mallows! Yum!
* Since we first came up with the Hot Cocoa Bomb Idea, we have developed many flavors and ideas as we have progressed! We have a Hot Cocoa Bomb Recipe and Idea book available for purchase here! If you would like to watch a video that shows how to make Hot Cocoa Bombs, go here to our YouTube Channel and watch! Be sure to follow us there and here as well. Thanks! |
Creators of Hot Cocoa Bombs! (copyrighted)

Author
Helen Reynolds: Mother of six children , grandmother to eleven! I love to cook, craft and create things and I especially love doing that with my family, So, when my lawyer daughter, Lindsey, my artist daughter, Madalynn, and I came up with the idea of Hot Cocoa Bombs, this blog was born. Then, one more daughter, with her technical and science skills, plus creativity has joined in to round us out! Read more about us here! 
Click this link and visit 3WinksDesignShop on Etsy. Find our Hot Cocoa Bomb Idea Book, our For the Love of PIe e-book and more of our creations!

Amazon Gift Cards are the Perfect Gift!
    Archives
April 2024
|


 RSS Feed