|
This post contains affiliate links. I will be compensated for purchases made through those links at no additional cost to you. All views expressed are my own. Thanks for your support!
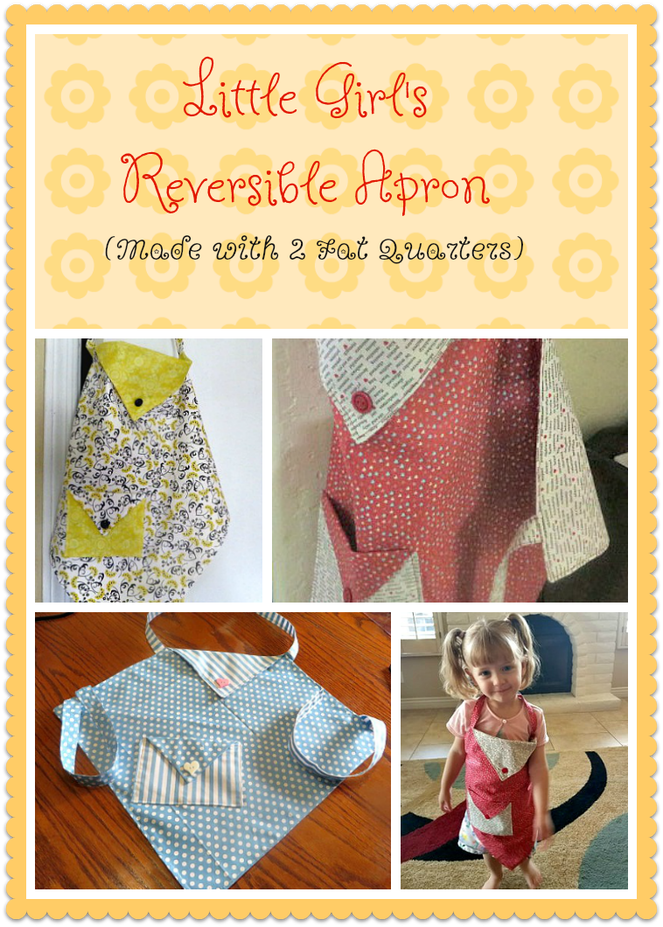
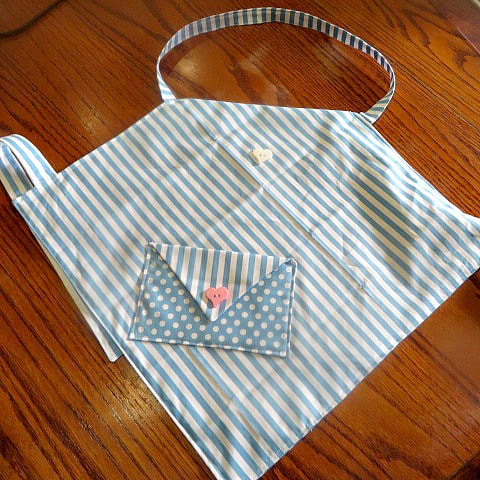
This project began when Lindsey sent me a video of her daughter and herself baking banana bread together. My SIL was doing the filming and he asked my granddaughter if she was wearing an apron. She replied, "Yes, I'm wearing Mommy's apron." I knew right then that I wanted to make an apron for her and the rest of my granddaughters. Maybe some of my grandsons, too. A couple of them enjoy cooking as well. But, so far I've only made them for the granddaughters, so that is why my post is directed to little girls.
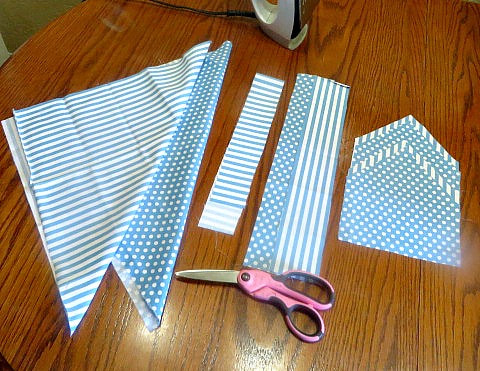
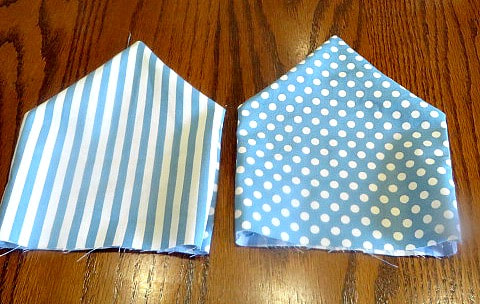
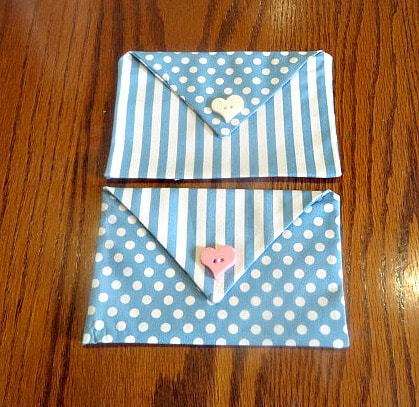
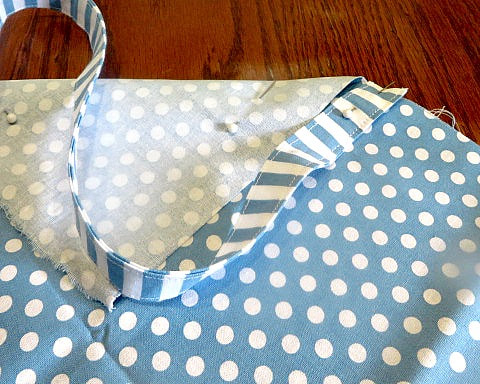
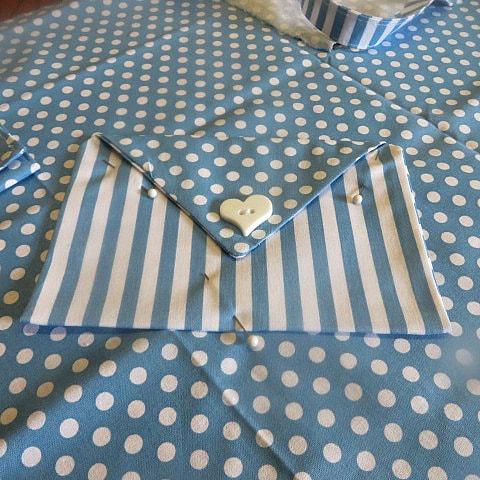
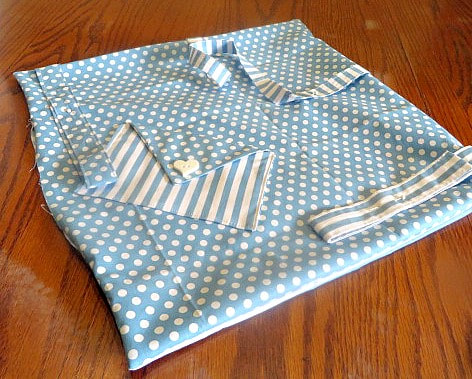
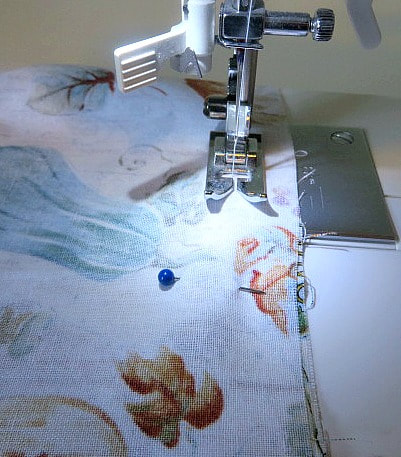
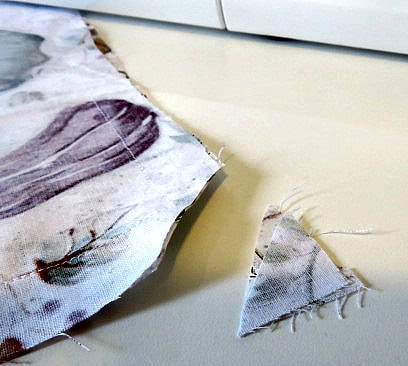
I began by scanning Pinterest for patterns for kids, but nothing stuck out to me. Then, I looked at one of my aprons that my DIL Jessica had made me for Christmas a few years ago. Mine is made from about a yard of fabric on each side (it is totally reversible), it has a pocket on each side and it is super cute! I figured that I could use that as my starting point and just reduce the size for my grandchildren. They came out adorable if I say so myself. I have three of them finished with just 2 to go for my older girls. Those may take a little more than 1/4 yard fats if I want them to be able to wear them for any amount of time. So, for now I'm going to show you how I've done the 1/4 fat aprons. Click on the photos for instructions:
These aprons are very quick and easy to make and a good project to be doing while in quarantine! Fat quarters aren't as easy to find now because everyone has also been making masks, which is a great thing to be doing. Luckily, my niece was getting rid of some fabric during a move that was passed on to me! So, I have plenty of fabric to do both and the prints are so cute. Thanks Laura! My granddaughters are going to love these! (I hope)
Let me know if anyone gives this project a try. Oh, and here are the buttons for the pocket patterns. You can adjust the sizes to how big of small you wan them to be. 
3 Comments
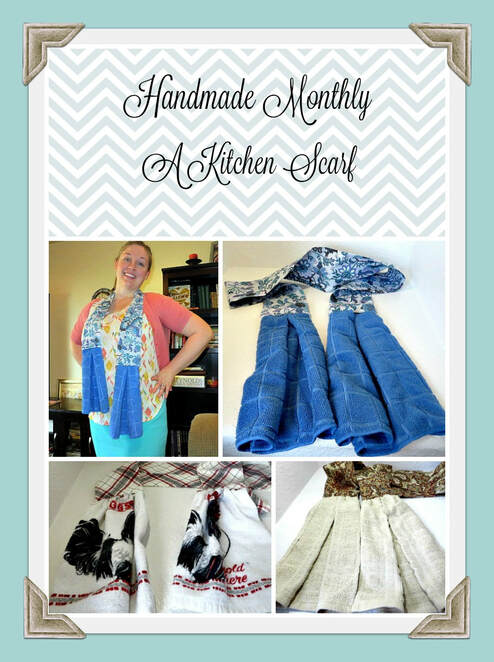
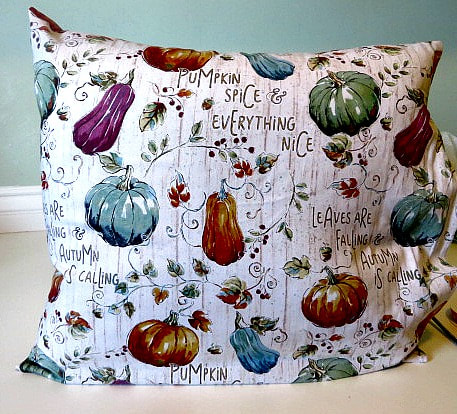
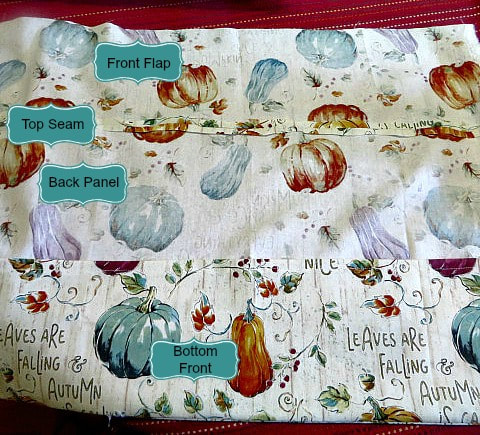
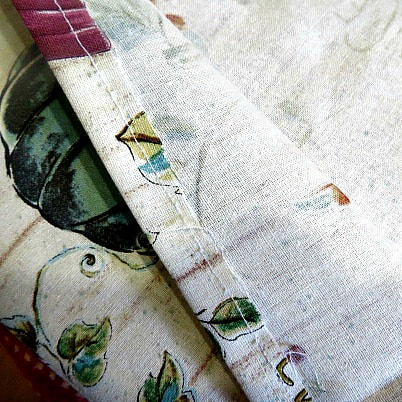
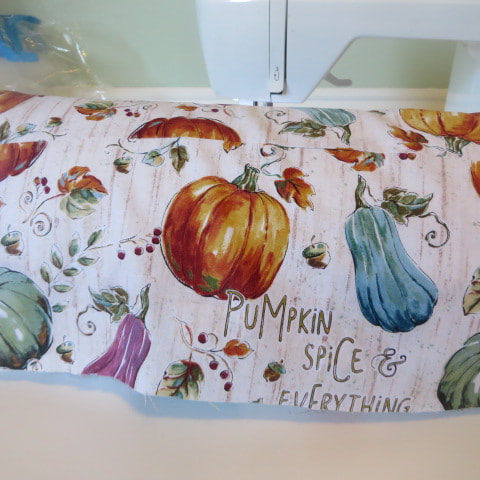
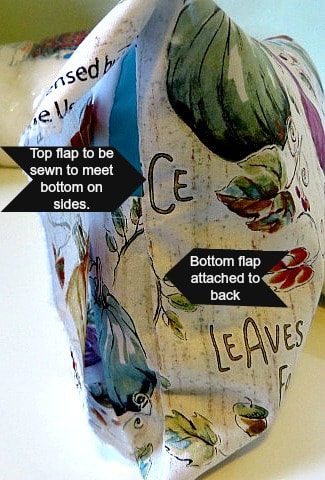
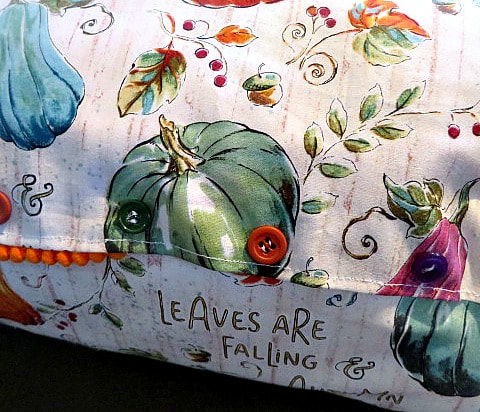
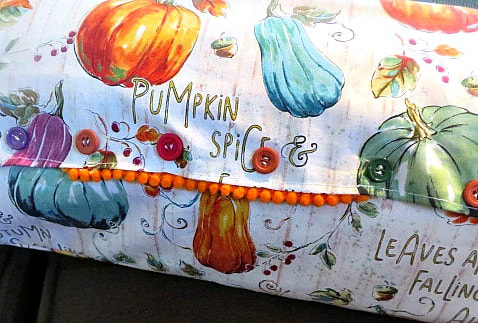
his post contains affiliate links. I will be compensated for purchases made through those links at no additional cost to you. Thank you for your support!  When my husband and I took off on our road trip to Wyoming this past summer, we left without any bedding or pillows! We knew that we were going to be spending one night in our son's new apartment in Kemmerer, WY sleeping on the floor, so this was bad. When we got to Kemmerer, our son took us to one of the few stores in that little town, Family Dollar, where we purchased a blanket and a couple of $6.00 pillows. We survived the night, but I knew that the pillows wouldn't get much use after that trip and I started wondering if I could turn them into sofa pillows. As you can see from the collage of pictures above, I did it! Sofa pillows are pretty simple to make, they cost much less than department store prices when they are handmade, and you can make them for any decor. So, if you know the taste and colors of your recipient, they can make a lovely gift as well. I decided to make some seasonal pillows for the Fall. The pumpkin print fabric that I found at Walmart would be perfect to gift to Lindsey anytime of the year! I love that the colors of pumpkins and gourds on this fabric match many colors and can be easily integrated with the pillows that I already have. For today's Handmade Monthly, you will actually be getting 3 different sets of instructions. These include how to make the forms, How to make a square pillow with trim and a cute idea for a coordinating neck roll pillow. Making the Pillow Forms: From one pillow I made an approximately 19" square pillow and one neck roll. You will have to measure your pillow and decide the size you want your sofa pillow to be. I used a quilter's erasable marker to draw a cutting line. 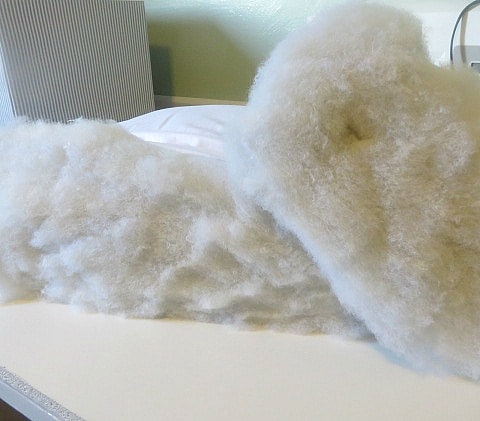 Here they are, cut apart! Very fluffy! Once the pillows are marked, cut them apart. You will have to cut them a layer at a time because they are so thick. Next, push the fluffy insides into the pillow covering and pin the open side closed. Then, sew the open ends together. 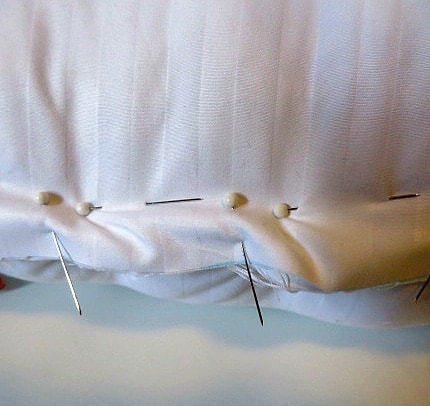 This is how I pinned them closed. I removed the pins as I sewed along. 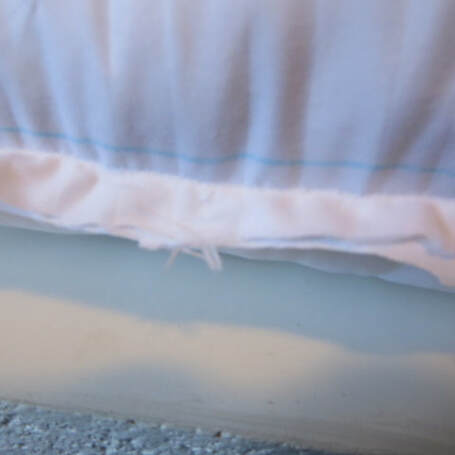 All sewn. Now I had 2 nice pillow forms that only cost about $3.00 a piece! All I needed to do was cover them. Large Square Pillow with Trim: I found the fabric for the pillows at Walmart. You will also need a sewing machine, a tiny bit of fiber fill, thread and trim. You will need to cut 2 pieces of fabric, one for the front and one for the back. Measure them to the size of your pillow. Measure over the fat part of the pillow to get the right measurement. Then, add about 5/8" all around for a seam allowance. Click on the photos below to get directions: I bought some orange mini pom-pom trim. Generally, when adding trim, I put it on the seam line, facing inward and sew it into the seam line. When you flip the fabric right side out, the trim will show on the edge. But, this time, there wasn't very much sewing room on my trim, so I decided to add it on the outside. OH MY GOODNESS, I had such a time of it! I even made a collage about it! Add one more thing to your supplies, a glue gun! 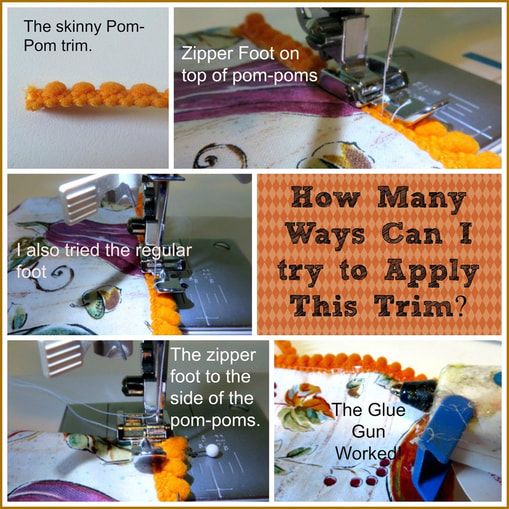 I usually hate it when I hear the term "no-sew" pillows, etc. because to me sewing things makes them more lasting and better quality. But, this time I gave myself permission to use the glue gun for this tiny trim! After you glue it around the 3 sewn sides of the pillow, put the form into the pillow cover. Then, for nice crisp corners, take some bits of fiber fill and stuff it into the corners of the pillow. It will fill in where the form cannot go. It looks so much nicer in the final product. Trust me! When that is done, whip stitch the open side closed. 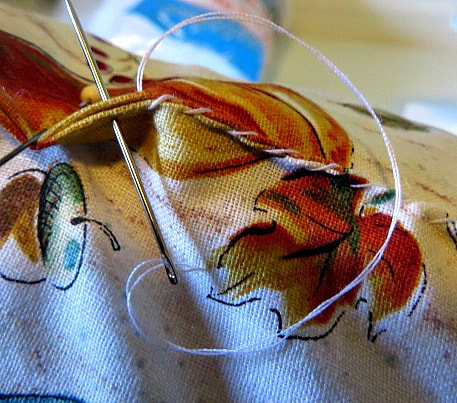 Just whip it shut. Then, glue on the trim. The trim will hide the stitching and strengthen it as well. Et Voila! You have an adorable pillow! 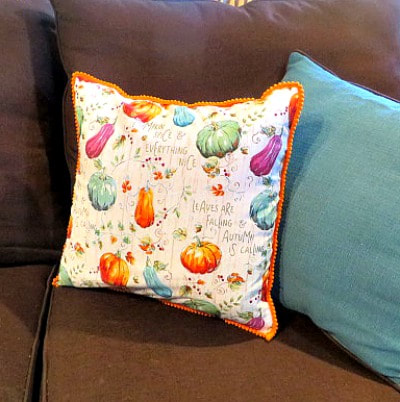 That trim was worth the trouble! And, see how my corners are nice and perky? It's the fiber fill. An Envelope Neck Roll PIllow: When I started this pillow, I had something else in mind, but it kind of evolved as I went along. For this pillow, you will need to cut a back according to the width and height of your pillow form, just like you did with the square pillow. For the front, you will need a bottom pocket and an overlapping top flap. Here are some pictures to show you how it is done: By the way, I also tucked some fiber fill into the corners of this pillow as well. I am in love with the cuteness! I have one more pillow that I plan to use for Christmas pillows! I can hardly wait to get started! 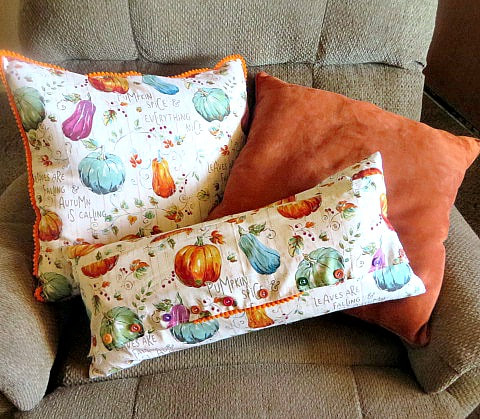
This Post Contains Affiliate Links. I will be compensated for purchases made through those links at no additional cost to you. All views expressed are my own. Thank you for your support!
For Handmade Monthly in September I made some bookmarks on Canva. But it's not getting posted until October, because well life! I'm sorry! But I do have it here for you and I think it turned out pretty cute!
The fun thing about this DIY is even if you feel like you are not good at crafting or artsy things, it's actually easy to get a good result. And I think the bookmark would make a great gift for the book lovers in your life. Or a fun thing to give to your book club members. It's an inexpensive gift that can be personalized a million different ways, and surely loved by the voracious readers in your life. 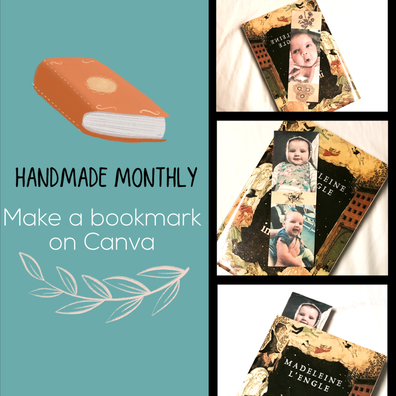
Making a Bookmark on Canva
We aren't sponsored or endorsed by Canva in any way but I like to use their site to design little things like this because it's easy and I like the variety of templates, stickers, and fonts. I love how things are customizable without being difficult to use. To help you out I have made this video describing how to make a bookmark on Canva.
I only used pictures and digital stickers on my bookmark, but it would also be cute to have a favorite book quote or reference to a favorite book on the bookmark as well.
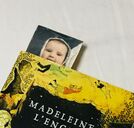
Once your bookmark is finished being created you can print it off on cardstock, photo paper, or regular paper, and get it laminated. I actually used regular paper and clear packing tape to laminate mine! I think it turned out pretty cute. I love how Sofía's cute little face is peeking out of the top of the book.
If you're going to print it at home you will want a good printer. I love my Canon because it does wireless printing from the computer and my phone. AND it does automatic double sided printing, so I don't have to go figure out which way to reload the paper in to make sure it prints correctly on both sides. It's my favorite feature.
So hopefully you found this tutorial helpful and a great way to make your book gift giving a little more personal this year!
PS for What to Read Wednesday, consider this your recommendation for A Wrinkle in Time by Madeleine L'Engle. It's an amazing book and a classic for a reason, you will not regret this read!
This post contains affiliate links and I will be compensated if you purchase through them. This does not cause any additional cost to you! Thank you for your support!   I have finally figured out, after years of sewing, what the point of having a needlebook is. I have seen many sweet little needlebooks but always thought, "Why do I need that when I have a pin cushion?" but then, the other day, while searching for a needle and realizing that it was probably lost inside my pin cushion, a light bulb went on and I knew why a needlebook would be so great to have.
I have a few pin cushions, including the tomato with a strawberry on a string. (Who came up with that design anyway?) Most of the pin cushions are too soft and the pins stab through to the bottom. I like my sawdust filled tomato because it is firmer and I think the sawdust is supposed to keep the pins sharp, or else the strawberry is an emery that sharpens needles. But, my pin cushion must be old because I can't find sawdust filled ones anywhere. This one says it has high quality cotton filling. I have looked at some in stores lately and realized that some of these newer replicas are actually merely filled with Styrofoam! Not a good substitute if you ask me. So, watch for quality. Anyway, the idea came to my mind that I could simply recover my old tomato pin cushion and instead of a strawberry on a string, I could have my needlebook on a string so that they would always stay together. I whipped my idea up and I think it came out kind of sweet. I will tell you how I did it and what I might do differently when I make more as gifts. |
Creators of Hot Cocoa Bombs! (copyrighted)

Author
Helen Reynolds: Mother of six children , grandmother to eleven! I love to cook, craft and create things and I especially love doing that with my family, So, when my lawyer daughter, Lindsey, my artist daughter, Madalynn, and I came up with the idea of Hot Cocoa Bombs, this blog was born. Then, one more daughter, with her technical and science skills, plus creativity has joined in to round us out! Read more about us here! 
Click this link and visit 3WinksDesignShop on Etsy. Find our Hot Cocoa Bomb Idea Book, our For the Love of PIe e-book and more of our creations!

Amazon Gift Cards are the Perfect Gift!
    Archives
April 2024
|


 RSS Feed