|
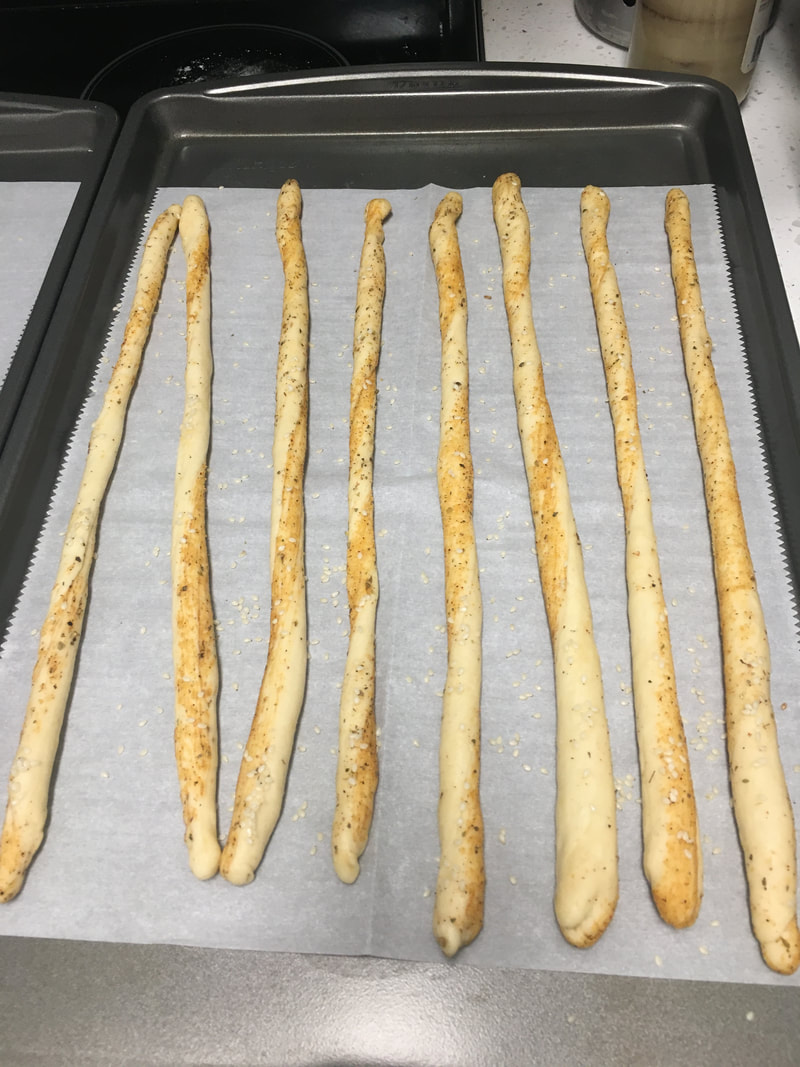
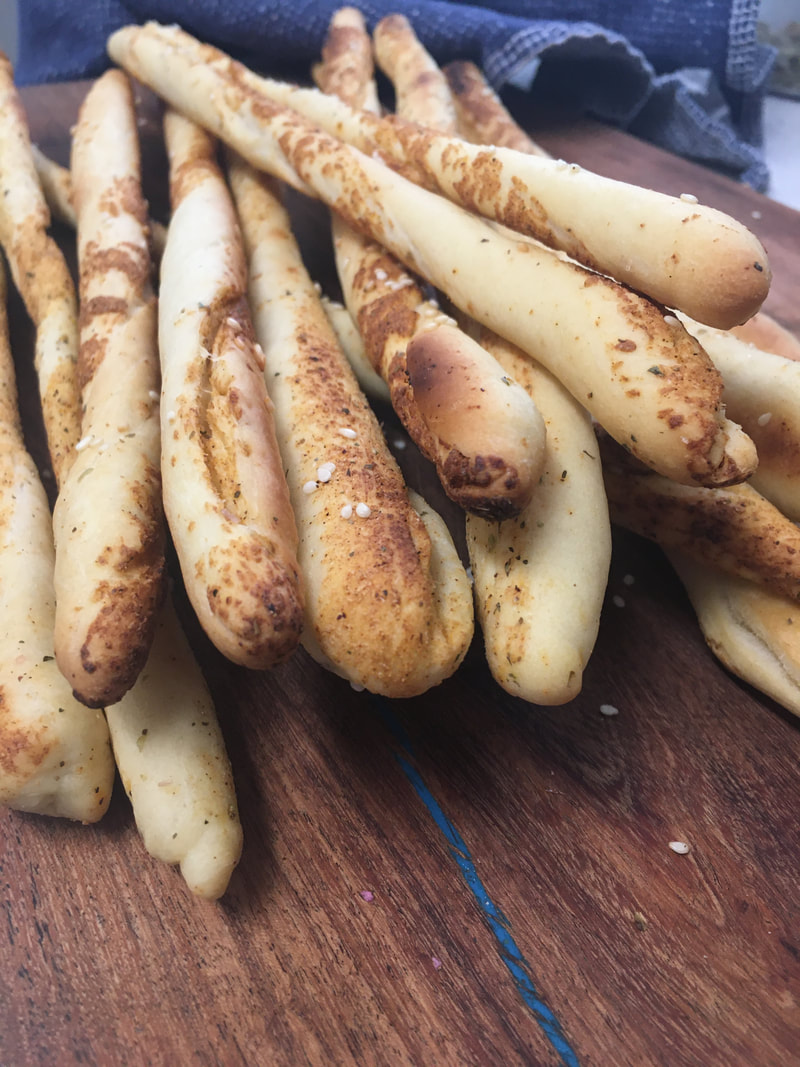
This post contains affiliate links. If you make a purchase after clicking them, we will be compensated, but there is no additional cost to you. All opinions expressed are our own. Thank you for your support. On the 12th day of Christmas my true love gave to me 12 Drummers Drumming... so I made breadstick drumsticks! Garlic Sesame Grissini in fact. Actually Maddy made them for me because my original plan didn't work out. Sometimes recipe testing is just like that, nothing turns out the way you want, but it helps to have a great team around you who can help you out and come up with something even better in the end. Well I'm so glad she took over because her breadsticks came out much more beautiful and tasty than mine. And we're sharing the recipe with you now! 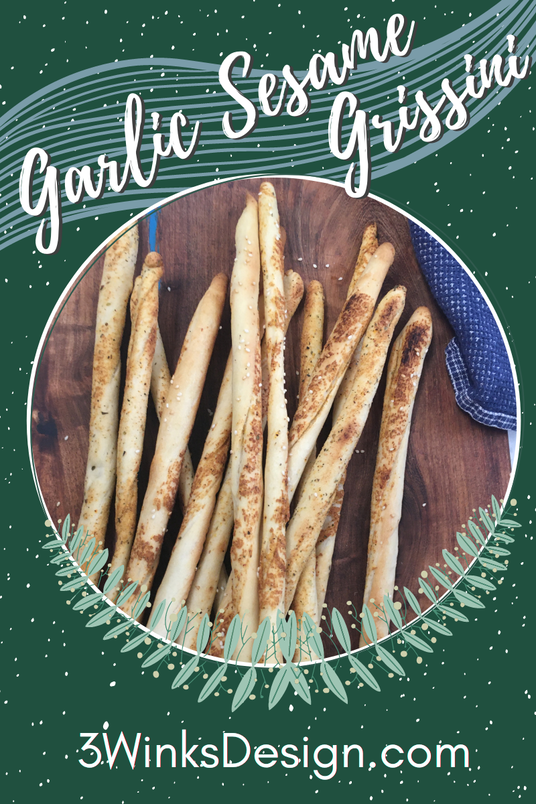 Garlic Sesame GrissiniGrissini is a long, crunchy breadstick that originated in Italy. They're great for appetizers, snacks, or eating with soups. They're also beautiful and would be a great addition to a charcuterie board or a table spread. Because Maddy made these that means they're actually vegan friendly (just substitute agave for the honey), which means all your friends and family can happily munch away on these tasty treats. Make sure to make extra because these are sure to go fast! You want to get these nice and long (at least 16 inches) so having even portions of dough is helpful. I love to use my bench scraper to help me cut and shape dough easily. Plus it has a little ruler on it which is helpful for measuring out portions of dough! And when it comes time to clean up, the scraper easily scrapes up any dough stuck to my counter (just be careful not to scratch your countertop if you don't have stone countertops). 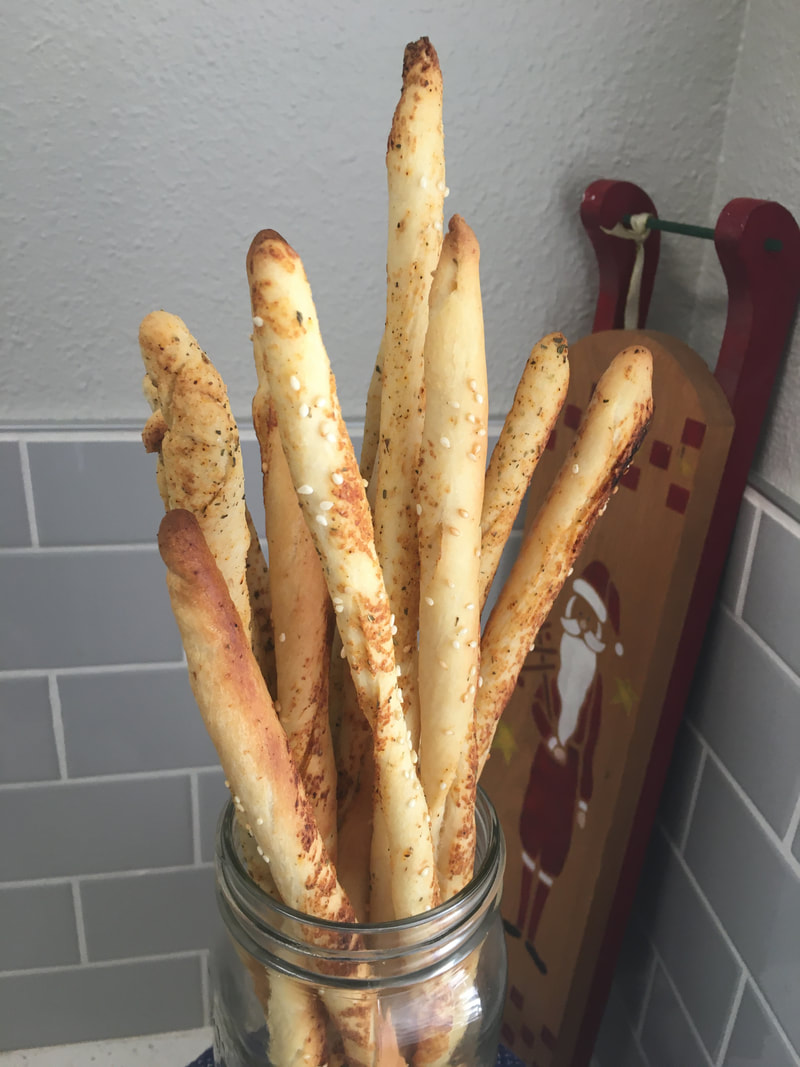 This concludes our 12 Days of Christmas Recipes series, but don't worry we have more fun posts planned for this week. If you're wondering what we made for the other 11 days I'll link them below.
1 Comment
This post contains affiliate links. If you make a purchase after clicking them, we will be compensated, but there is no additional cost to you. All opinions expressed are our own. Thank you for your support.
On the ninth day of Christmas my true love gave to me nine ladies dancing...so I used the lady fingers to make tiramisu! This is a recipe I originally posted as part of my international recipes series. I thought it would be perfect to repost for our 9th day of Christmas because it's my favorite recipe that uses lady fingers.
This would be a lovely dessert to share on Christmas. And it freezes beautifully! 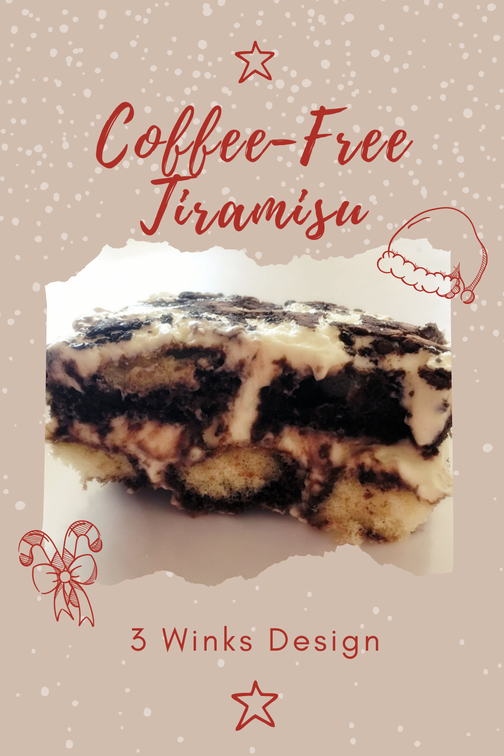
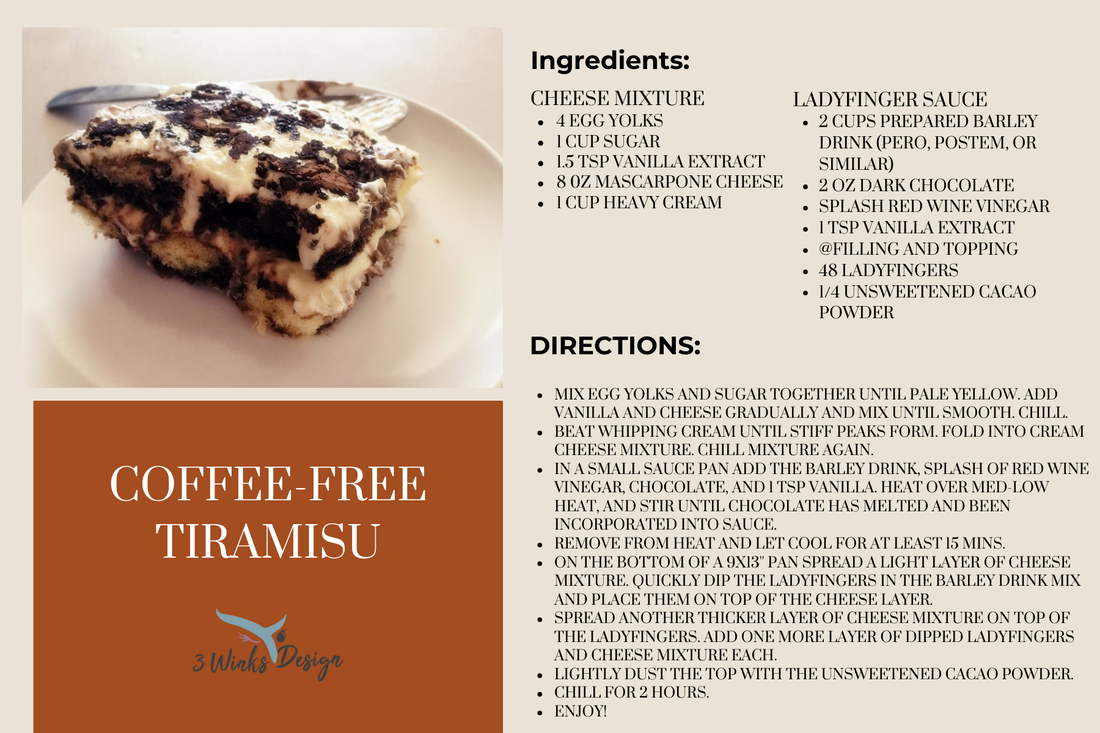
I have a sister-in-law who is part Italian, her mother is from Italy (born and raised). They kindly shared their recipe for Tiramisu with us. It is also a coffee-free version "for those Mormons." It uses hot chocolate and it's very delicious. They made a lot of individual servings for my brother and sister-in-law's wedding, it was so good! My husband told me he loves tiramisu, but he likes the kind made with the fake coffee. So this led me on a hunt for a recipe that would work for his desires (since he wanted it for his birthday and Father's Day). Well all the recipes I found used coffee and liquor. In the end I adapted both recipes I had to create this tiramisu that still has the coffee bite without the coffee. The drink I used is called Pero and is actually barley based. It comes in other brands as well such as Postum, Inka, Cafix, and others. It has a very strong flavor but is caffeine free. It's a very popular drink in other countries. My husband said he had it in Chile often when he lived there. 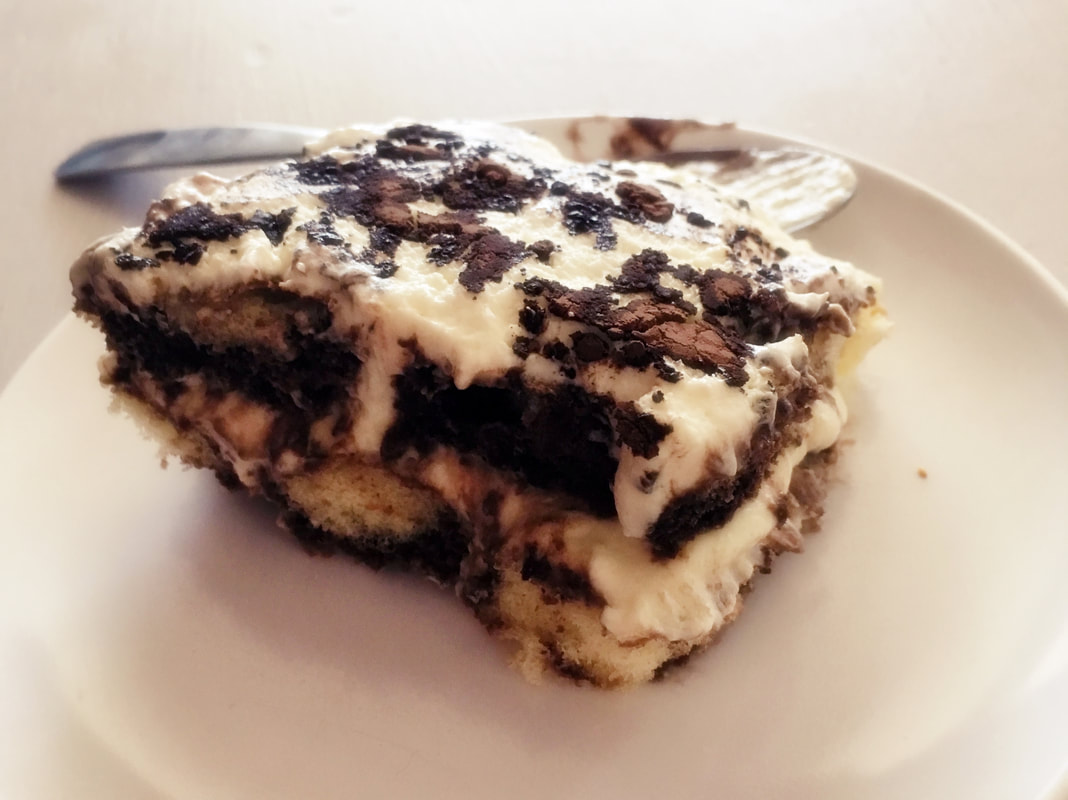
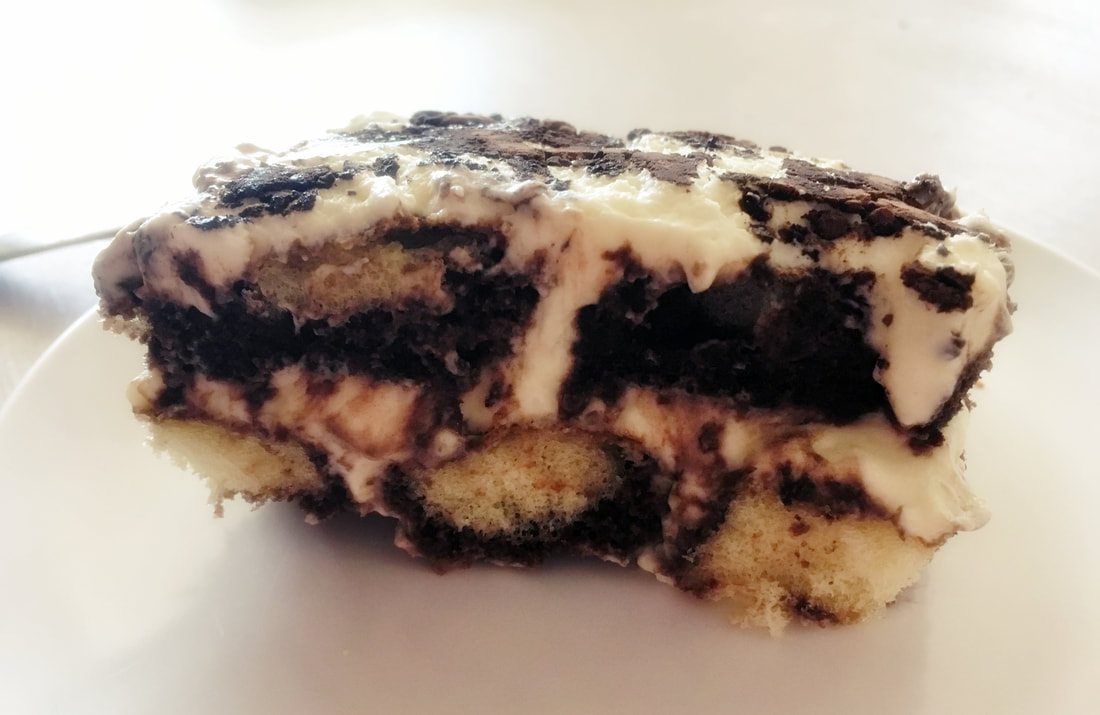
If Mascarpone Cheese is too out of your price range (I was blessed to find it on sale), cream cheese can be substituted.
I hope you'll enjoy this coffee-free tiramisu! It's pretty simple to make and really delicious! It was all eaten at the Father's Day dinner we went to. Check out our other 12 Days of Christmas Recipes:
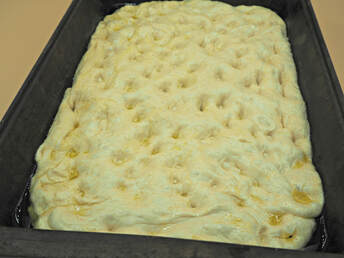
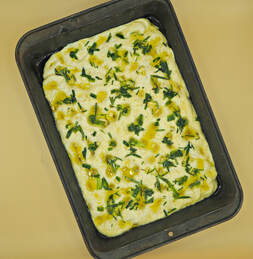
This post contains affiliate links. I will be compensated for purchases made through those links at no additional cost to you. All views expressed are my own. Thanks for your support! 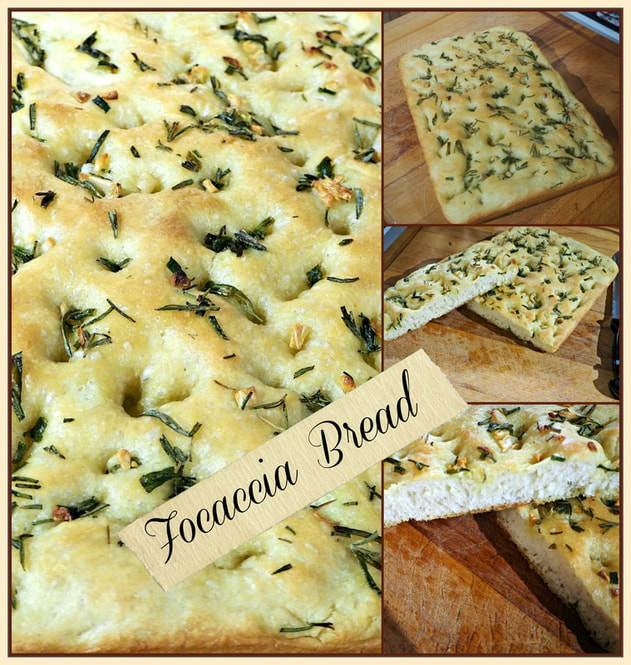 My son baked some focaccia Bread, and then his SIL did as well. The pictures looked so delicious. I had never made focaccia bread myself and decided to give it a try. I have a number of herbs that I have been growing and this was the perfect opportunity to use them in a new way. Focaccia Bread is very easy to make and is a lot of fun! You really get to put your hands in the dough. The outcome is so delicious because the olive oil is definitely the star of the show. In addition, there are so many topping choices that a variety of flavors are possible if you are making more than one loaf. Wouldn’t that be nice on a luncheon table? Many people use focaccia for sandwiches or for pizza, and of course, just to eat all by itself. As I mentioned, focaccia bread is very easy to make. My first attempt came out so good! I was nervous because there was so much olive oil! But, when it came out of the oven that was all incorporated into a bread that was crispy on the outside and soft on the inside. The olive oil and the herbs with that sprinkle of salt were an explosion of flavor in my mouth. 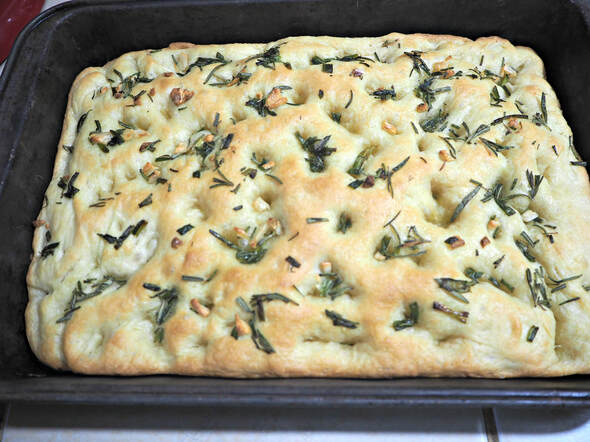 One tip to get the most flavor from the herbs is to make sure that they are coated with the olive oil. I watched some Italian You Tubers who gave that suggestion. I guess the oil helps to bring out the flavor and convey it to the bread dough. So, you will notice in the recipe that I soaked my herbs in the olive oil that I used in the bread dough and also drizzled over the bread. Another tip is about the kneading technique for this bread. Not everyone does this method, but a number of bakers do and I decided to try it. It is the stretching and pulling method. I like it because the dough is pretty sticky and needs to be in order to get the texture that you want in focaccia bread. With the stretch and pull method of kneading, you are elongating the gluten without adding too much flour to the mix as you would with a regular kneading method. Here is how you do it:

My final tip pertains to dimpling the top of the bread. Focaccia is supposed to have lots of lumps, bumps and crannies where the oil and toppings can gather. Adding the dimples also keeps the bread from rising too quickly. Focaccia is a flat bread and this is a way of keeping it that way! Putting water on your fingers helps them not to stick in the dough. Then, use those fingers to push into the dough to form the dimples. It is the fun part of making this bread! Don’t be afraid to push in until you feel the bottom of the pan.
My recipe is a conglomeration of various recipes and videos that I watched as I tried to glean information about making focaccia. Some of the videos weren’t even in English! But, my main source was probably from Immaculate Bites who also gave me the instruction to infuse the oil with the herb flavor, although she did it differently than I did. You may want to go to her site to see how she did it. She used her machine to do the kneading and didn’t do the stretching and pulling method, so you can choose to do it whichever way you prefer. Focaccia seems to be a hands on bread though. Many people mixed all of it by hand from start to finish! But, here is the recipe that I ended up adapting to my preferences. I hope you enjoy it! One last tip! Focaccia Bread tastes the very best when it is still warm on the first day it is made, so have some friends over or get all of your kids to the table and eat it all up! You can warm up the leftovers in the microwave, but I still think the first moments after it cools slightly out of the oven is the best time to gobble it down! Other Bread Recipes you may enjoy!    This post contains affiliate links. I will be compensated for purchases made at those links at no additional cost to you. All views expressed are my own. Thank you for your support! 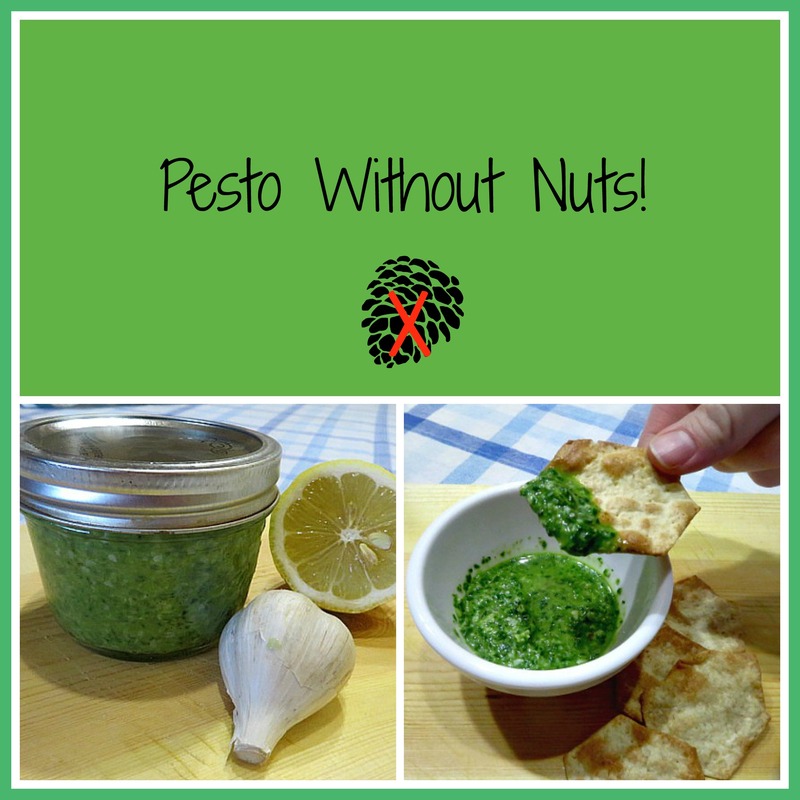 In my small backyard garden this year I grew two things: Tomatoes and Basil! They have given me a robust harvest this summer and that makes me so happy! One of my goals for my basil was to make fresh pesto. I have wanted to do it for so long, but the price of pine nuts, a usual ingredient in pesto, is outrageously expensive! But, I realized that there are people who are allergic to nuts and who must find a way to eat pesto! Then, I read a few comments from people who make pesto without nuts who have said that in their Italian roots that the nuts in pesto are merely filler and they are unnecessary to the recipe. That made me get excited and I began to experiment. Here is the recipe that I came up with! 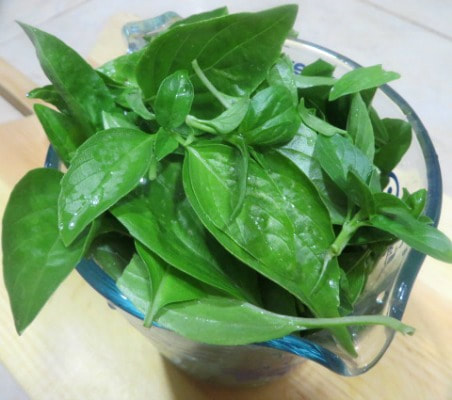 This is how much of my beautiful fresh basil that I used. It is so aromatic! 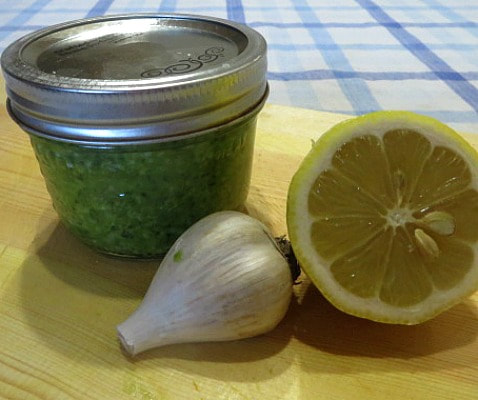 That garlic bulb was freshly grown by my friend Andrew Maki in the upper peninsula of Michigan! There is a lot of home grown stuff in this batch of Pesto! We tried the pesto on some gluten free sea salt crackers. It was delicious. Most of the pesto fit into a 1/2 pint jar, but the little bit that was extra we ate like a dip. Tomorrow I am going to show you how I am going to use this delicious stuff for Fun Friday, so come back and see! In the meantime, whip up some wonderful Fresh Pesto, it is so easy and worth the trouble, which is barely any trouble at all!  Take $50 Off Your Gobble Order |
Creators of Hot Cocoa Bombs! (copyrighted)

Author
Helen Reynolds: Mother of six children , grandmother to eleven! I love to cook, craft and create things and I especially love doing that with my family, So, when my lawyer daughter, Lindsey, my artist daughter, Madalynn, and I came up with the idea of Hot Cocoa Bombs, this blog was born. Then, one more daughter, with her technical and science skills, plus creativity has joined in to round us out! Read more about us here! 
Click this link and visit 3WinksDesignShop on Etsy. Find our Hot Cocoa Bomb Idea Book, our For the Love of PIe e-book and more of our creations!

Amazon Gift Cards are the Perfect Gift!
    Archives
April 2024
|
 RSS Feed