|
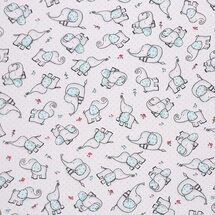
This post contains affiliate links. I will be compensated for purchases made through those links at no additional cost to you. All views expressed are my own. Thank you for your support! 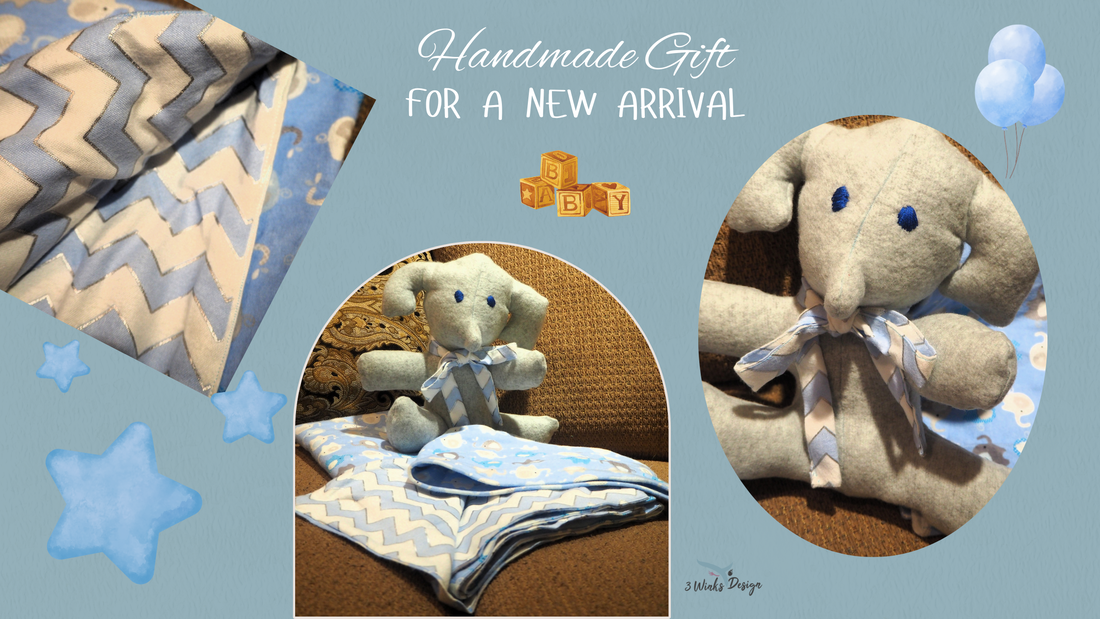 As you already know, Alicia recently had a baby a number of weeks early. He is doing great! Just after he was born, I flew off to go and give her and her family a hand while the little guy was in the NICU getting stronger. (Lindsey gave some tips about how to help NICU parents on this post!) Before I left, my granddaughter pulled out her sewing machine and we worked together to create a special gift for the baby. Here is what we made! We got into my stash of flannel fabric and found an adorable elephant print and a chevron stripe that coordinated with it. We wanted to make a receiving blanket with a matching burp cloth. My granddaughter loves elephants, so it was the perfect choice. Here are some other choices you might love:
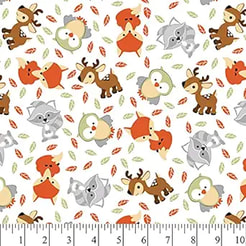
...And don't forget a solid or coordinating stripe or print for the back of the receiving blanket !
REMINDER: Be sure to prewash and preshrink your fabric before sewing your items. Flannel is notorious for shrinking and getting a little misshapen and you want that to happen before you cut it out and sew it together. Plus, you will want nice clean fabric to give as a gift to a baby! To Make The Blanket, we used a little over a yard to cut matching sized squares of the main color fabric, (the elephants) and the backing fabric, (the stripe).
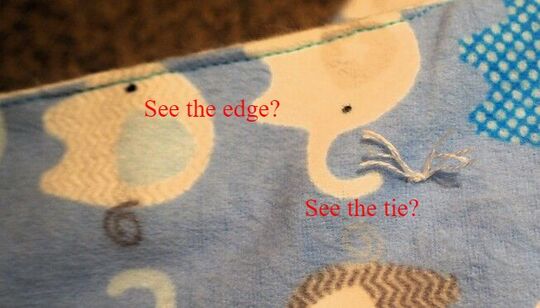 The burp cloth was made much like the blanket only on a smaller scale. But, instead of tying the fabric together, we simply sewed them right sides together and flipped them right side out before finishing the edge the rest of the way and top stitching around. The burp cloth fabric measures about 8 inches wide and about 18 inches long. You can adjust these measurements according to how much fabric you have and the way it lays on your shoulder. Burp cloths are very forgiving and can be sized according to your personal preference. 6 inches by 12 inches could also work! I like to make the burp cloth with double flannel fabric to help it be nice an absorbent. It can't be simply cute, it has to be functional! I may have added, (I can't remember), and extra layer of flannel on the inside of the burp cloth just to give it more thickness and absorbency. 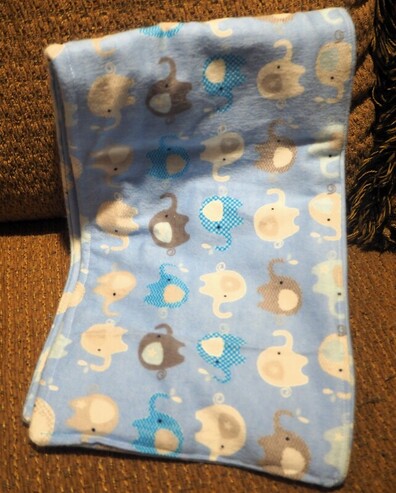 The Stuffed Elephant: We used Simplicity Pattern 2613 to sew the elephant from gray fleece. 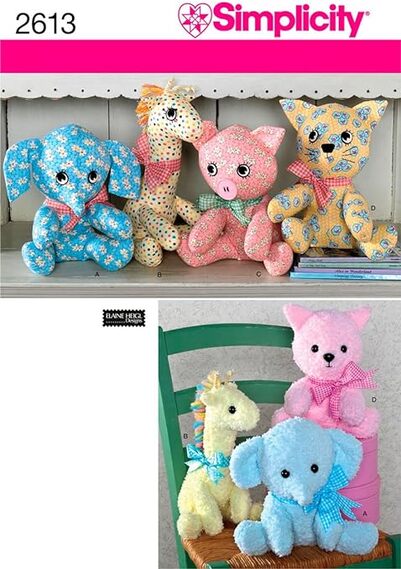 The pattern was so simple to make that my granddaughter did most of the sewing by herself and she is an age 13 beginner! I was very proud of her. That girl has no fear of trying new things! We didn't want the eyes to be able to be pulled off and choked on by the baby, so we embroidered them on with embroidery floss. Then, we used some of the left over fabric from the blanket to make a bow for his neck. We loved how it turned out! As the baby gets older, I'm sure that he will love it as well!  The entire set all together! There is something especially special about handmade baby gifts, I think. These little works of art can become heirlooms one day, or a cherished blanket that the child adores. Not only are handmade gifts nice and helpful for mom and baby, I know that my granddaughter felt a lot of pride and happiness, a sense of accomplishment from making it for them. When I came home from my trip, she asked me if it was appreciated. I know it was and will continue to be loved by her aunt and cousin. I hope you will have reasons to give these special gift ideas a try. More baby gift ideas:  For quilt patterns, check out Connecting Threads
0 Comments
THIS POST CONTAINS AFFILIATE LINKS. WE WILL BE COMPENSATED FOR PURCHASES MADE THROUGH THOSE LINKS AT NO ADDITIONAL COST TO YOU. ALL VIEWS EXPRESSED ARE OUR OWN. 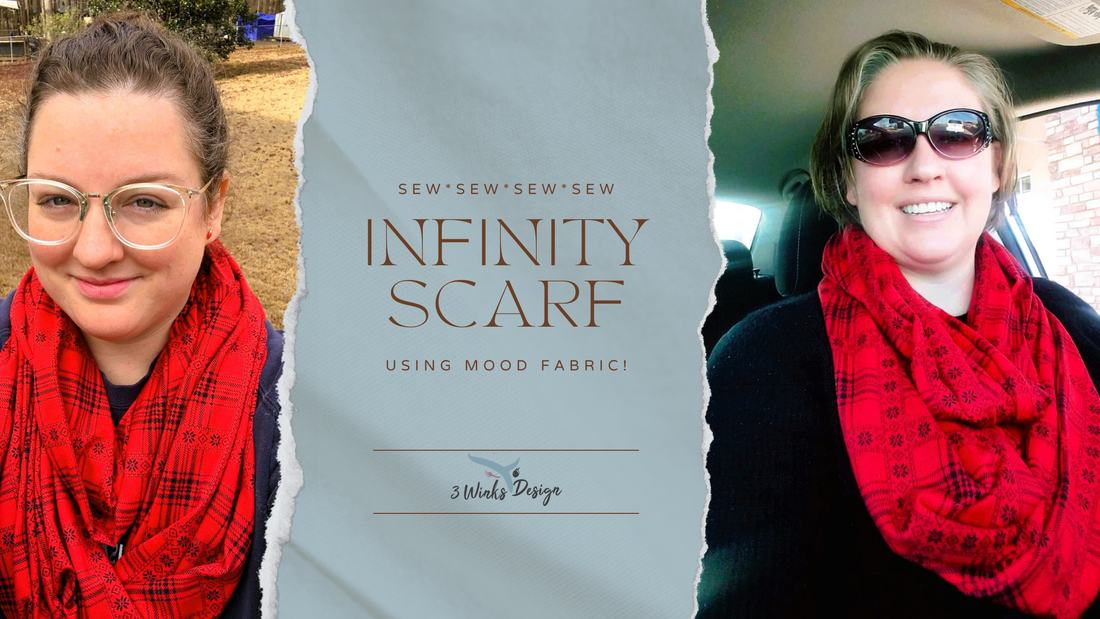 I have long been a fan of Project Runway with Heidi Klum and Tim Gun. They always take the contestants to Mood Fabric to purchase their supplies. So, when Mood invited us to be affiliates for them, I jumped at the chance! First, I hopped on their website and ordered this gorgeous knit fabric. I've been on an infinity scarf kick over the holidays, crocheting a bunch of them for the women in my family. I decided to try my hand at sewing a couple of them for Lindsey and Alicia as well. (Maddy says that she doesn't wear scarves.) 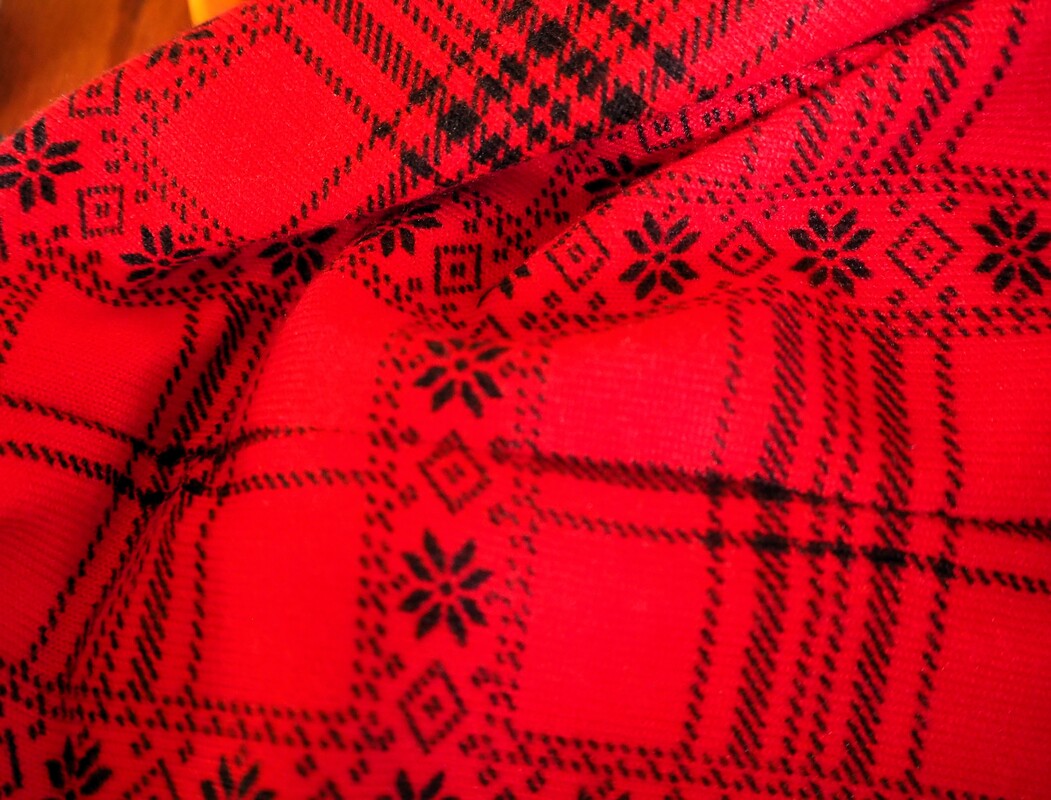 Even though it looks holiday-ish, it also seems simply wintery to wear after Christmas. The nice thing about making infinity scarves is that from 2 yards, you can get two scarves, so they make an inexpensive gift. You can give to two people or keep one for yourself and give one away. Supplies Needed:
Directions:
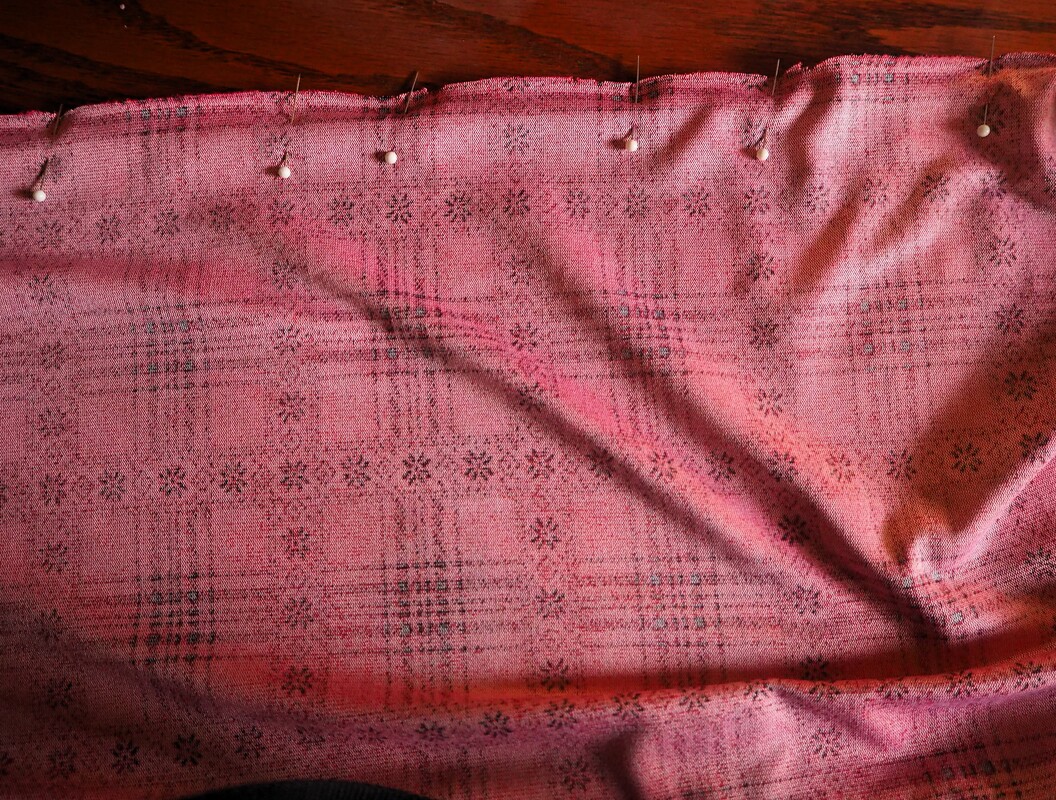 Pin the side, leaving both ends open. 3. Stitch 5/8th of an inch along the edges. I was able to use lines on the fabric to help me keep my lines straight.  4. After stitching the side, reach your hand through an end and pull the other end up to match raw edges together. This will cause the right sides to be together. Pin around the top of the edges to sew the ends together, but leave a 4 to 5 inch opening on one side for turning. 5. Sew around the pinned area, starting and stopping at the opening, then turn the scarf right side out through the opening. 6. Use a needle and thread to stitch the opening closed, folding in the seam allowance. 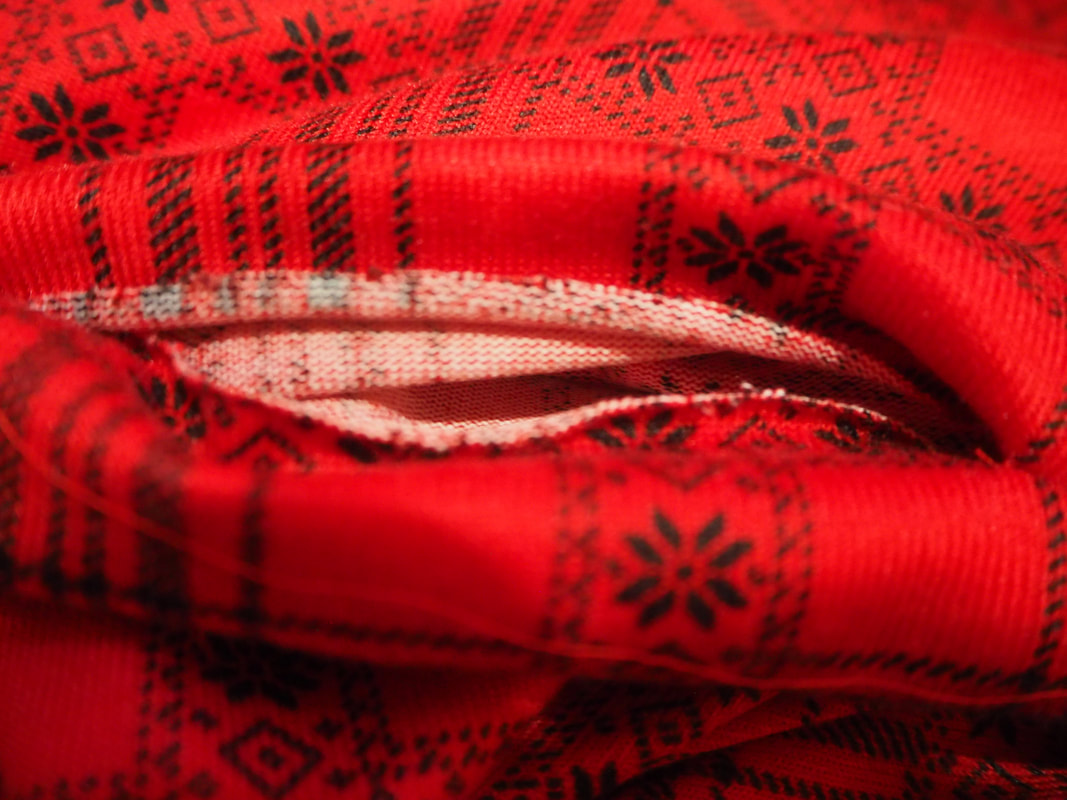 Stitch this opening shut as blindly as possible. 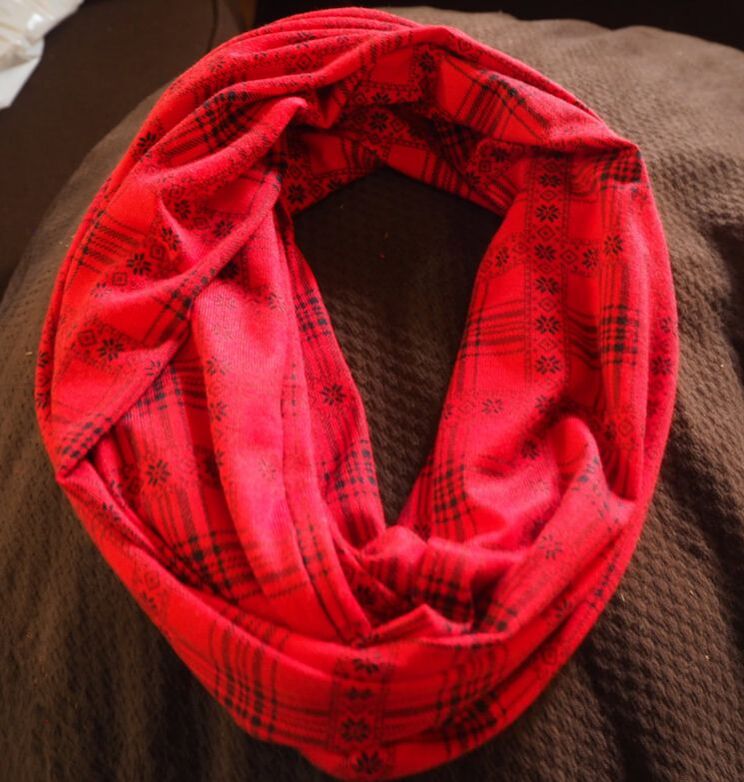 Voila! The finished scarf! This fabric from Mood is so soft and has such a nice drape to it! Wear the scarf by putting it over your head, give it a twist and then put it over again. Then, arrange and fluff the cowl around your neck. Lovely! A scarf can really complete an outfit and add warmth to your neck that helps to keep the rest of you warm through the chilly winter months. I'm pretty excited to try out some other fabrics to match some outfits of my own and I know just where to shop! The first time you log onto Mood, they will offer you a 15% discount. And, when they sent me my order, I received a coupon for my next order! There is also a sale button that you should check out on their site! It is so much fun shopping for fabric from the comfort of my computer chair! Check out this print that I just found on sale! Later, I'll share my crochet pattern for an infinity scarf. They make up so quickly and depending on the type of yarn you use and the stitch you use, they have so many different looks. If you start now, you can sew and crochet all of your gifts for next year in no time!
This post contains affiliate links. If you make a purchase after clicking them, we will be compensated, but there is no additional cost to you. All opinions expressed are our own. Thank you for your support.  In September, my husband and I were able to get away from it all and spend some time with old friends at a time share in Park City, UT. It was so much fun! I hadn't spent a lot of time in Park City, except to go snow mobiling with a friend in 1978! Other than that, we had always driven past it and said, "There's Park City! I went snow mobiling there once!" Trust me, the place had changed since the 70s. We spent some time on main street, we rode on the Heber Creeper (a train), and ate at some really good restaurants. We spent a lot of time finding places to park because Park City does not live up to its name in that department. Mostly we played games and talked and caught up with our friends. 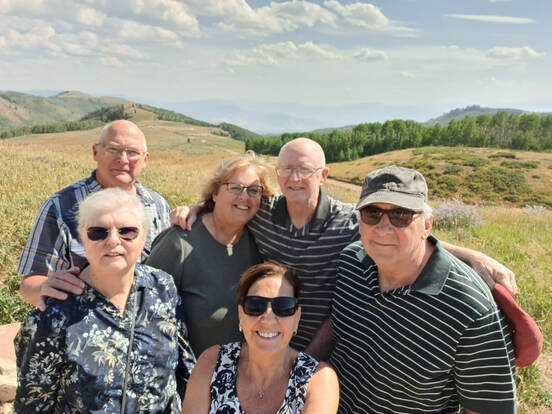 My friend Kathy, on the left, is quite the seamstress, quilter and other handcrafter! When we entered the time share condo, (my husband and I were the last ones to arrive), she had placed in our room some beautiful handsewn baskets, bags and pouches as little gifts! I was so touched and appreciative! All of the items are perfect for traveling, and I particularly loved the long, sort of boat shaped basket that ties up with ribbon, or unties to lay flat for packing. It was a perfect spot to hold my glasses at night and I have continued to use it for that on my bedside table at home. It is also the perfect size to hold a pen and some post-it notes! I am not above using it for my glasses and a pen and note paper all at once!
This post contains affiliate links. I will be compensated for purchases made through those links at no additional cost to you. All views expressed are my own. Thank you for your support!
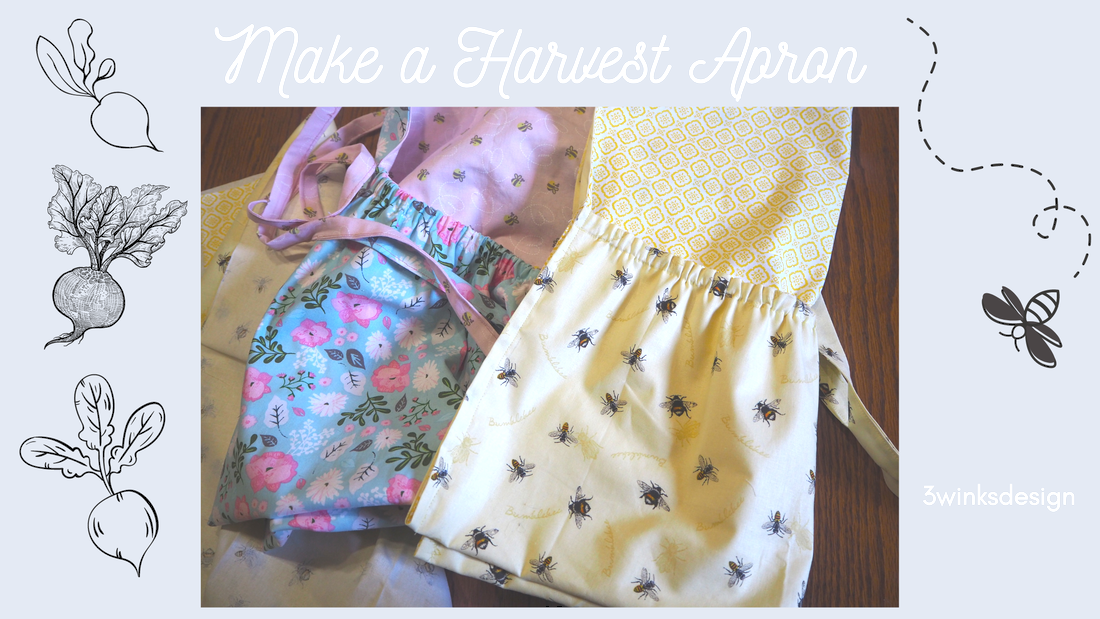
Last week I gave you some ideas for Mother's Day gifts. One of the items was a harvest apron that you can order from Amazon. But, I knew that I could easily make one and it would look a lot cuter! So, I dug into my fabric stash and found some fabric that I thought would be perfect for my apron. Then, I figured out what I needed to do to make it and now I am passing it on to you!
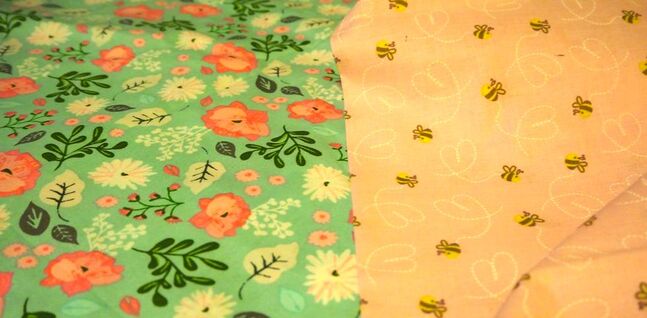
If you look at the picture above, the blue floral print and the pink with the tiny bees are the fabrics I chose. You can be matchy-matchy if you would like, but I thought for working out in my garden, these two fabrics would be perfect and it was going to be fun to break the rules. One fun thing about this apron is that it is reversible so you can switch it up when you want to, plus, of course, it is washable!
The yellow apron above is the one I made for Alicia after I figured out what I was doing on my first one. There were a few minor changes, and as I continue telling you how I did things, you may see pictures of my apron or hers.
I purchased her yellow fabric at Walmart! I stayed with the bee theme and then decided on the coordinating fabric that reminded me of honeycomb. I couldn't find it on the website, but it is $4.44 per yard in the store. I bought 3/4 of a yard of the honeycomb fabric and the bee fabric came precut as a yard. I have enough left to make another apron, maybe just slightly shorter to give me enough fabric for the ties. 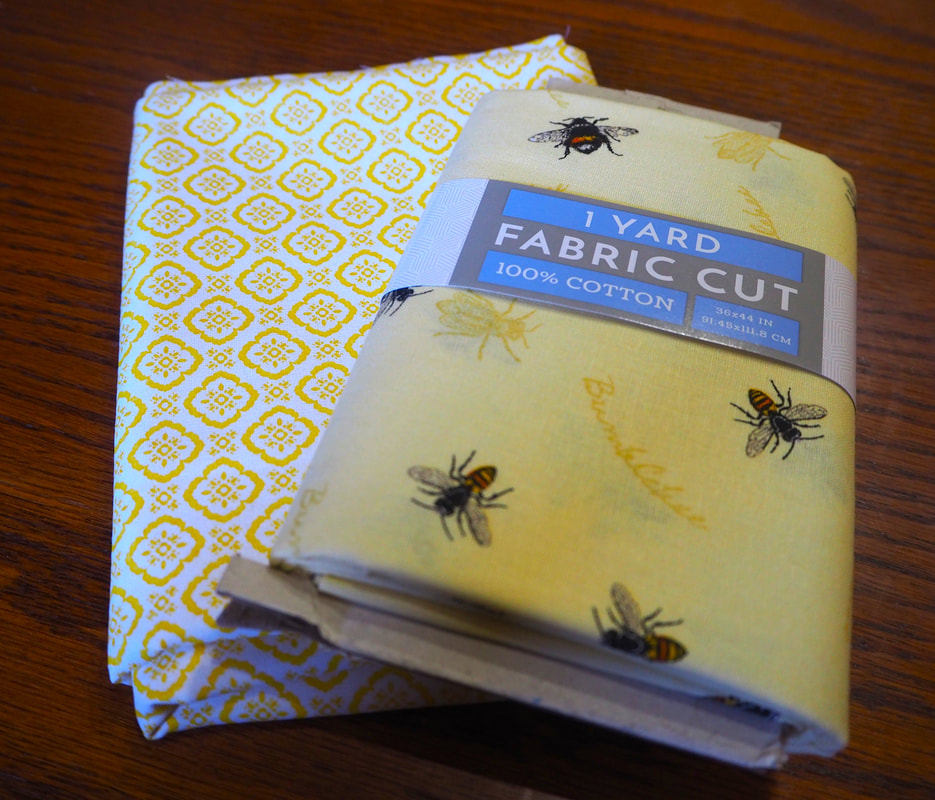
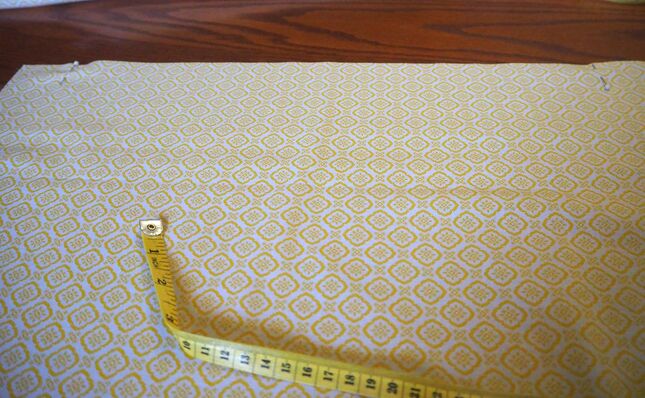
Begin by cutting both of your fabrics in half down the crease. Put one half of the fabric away for a future apron or other use. The length of the fabric should be about 27 inches if you bought 3/4ths of a yard. If you have a longer length of fabric, cut it to that length. The width at this point should be about 22 inches, especially if you cut away the salvage edge.
On the top of the fabric, where the width is 22 inches, measure over 2 inches from each side and mark it with a pin.
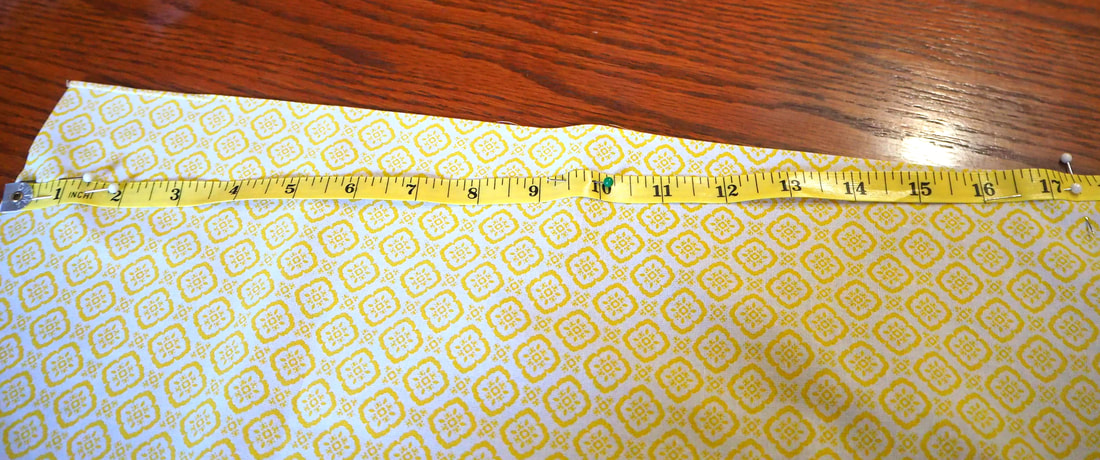
Measure up from the bottom 10 inches and put a pin there. Then, mark an angle from the top pin to the lower pin as shown. Use a straight edge and draw the angled line. Cut along the line on each side.
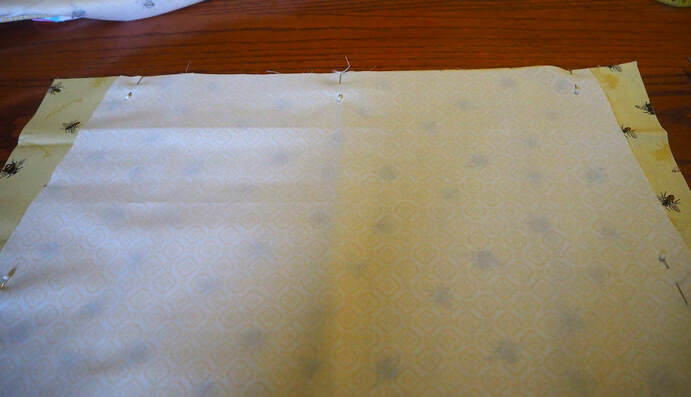
Pin the fabric that you just cut face down on top of the other fabric and cut that fabric to match. By pinning the fabric right sides together, you are ready to start sewing them!
There are multiple ways that you can attach the ties. On my apron, I made the front a little wider and gathered it slightly to add the ties. Then, I used leftover fabric that I had cut away and pieced together the ties and waistband. On Alicia's apron, I decided that it was nicer to have a flat front apron, so I didn't gather it. I also simply cut three 3 inch pieces of fabric and put them together to form the waistband and ties. You could also just cut one long piece to form the waistband and ties all in one piece. I'm always trying to conserve fabric and use the last bits, that is why I cut the three pieces. You could also make your waistband wider that I did. It is all up to you, there are no rules.
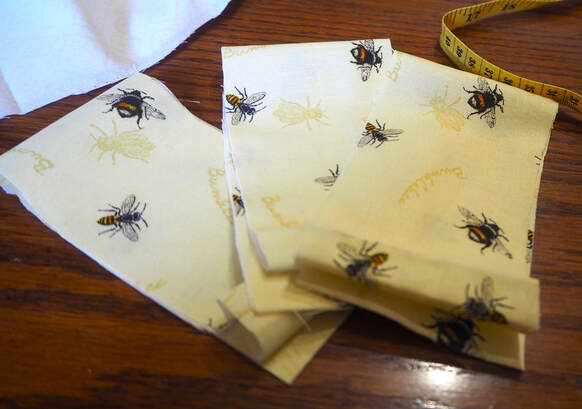
Since I had 1 yard of the bee fabric, I used the excess quarter of a yard to form the ties.
Now that your pieces are all cut and the main body of the apron is pinned together, begin stitching it around. Start at the top side, taking a 1/2 inch seam and sew down until 1-1/4 inches from the bottom. Stop and then turn the apron and sew the seam along the bottom. Turn, skip 3/4 of an inch and then sew all of the way back to the top. Do not stitch across the top. Trim your seam to 1/4 inch wide
The reason you left a gap at the bottom is because you will be making a casing down there for your elastic to go through.
Flip the apron right side out. Press the seams all around to make the apron flat.
Find the holes that you left when you were sewing. Make sure that the seam is tucked in and that the opening is 3/4 of an inch. From the top of the first opening, sew straight across the apron, 3/4 of an inch from the bottom. This forms the casing. 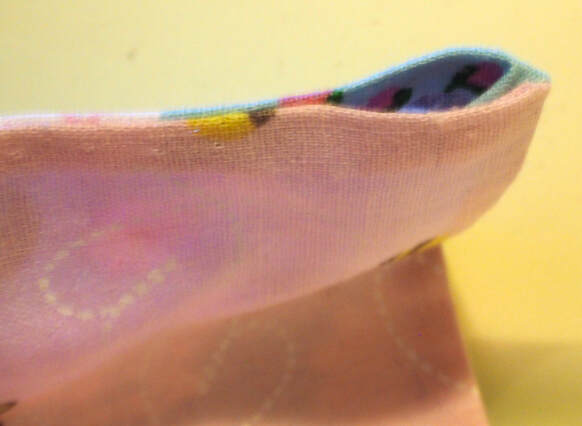
This is the opening to the casing.
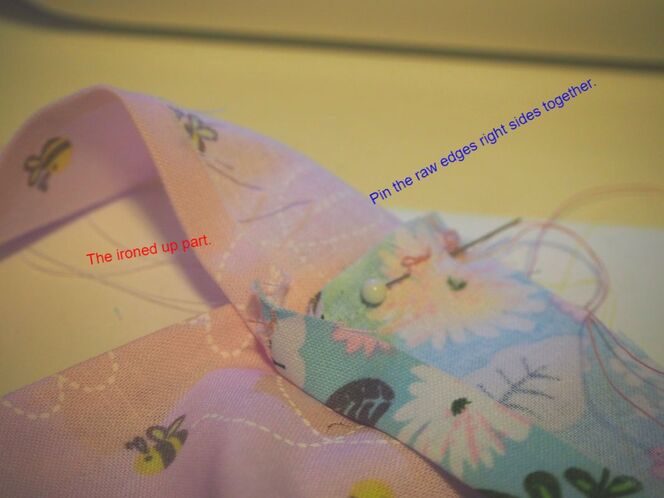
Before we put in the elastic, let's put on the waistband. If you have cut your waistband in sections, first sew them together into a long piece. Next, iron down your seam. Now, whether you pieced your waistband or not, iron down 1/4 of an inch on one of the long sides and on the 2 ends.
Center and pin on the waistband to the top of the apron. Then stitch it across the top.
After you stitch on the waistband, fold it up and press it, the fold it over to cover the raw edges. This will also fold the tie ends over, hiding all raw edges. Stitch close to the edge of the fold from one end of a tie end, along the waistband to the other end of the tie end. This will work best if you press it all over first, pin and then stitch.
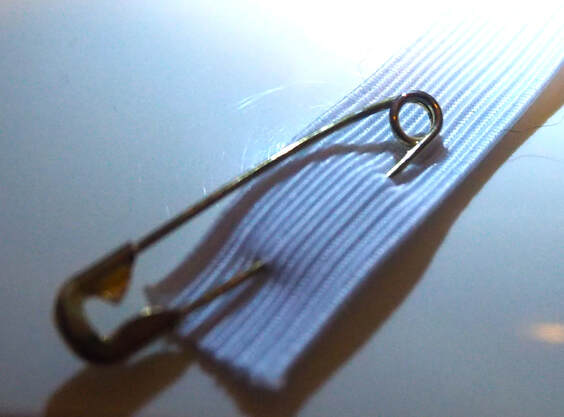
Now it is time to thread your elastic through.
Cut a piece of 1/2 inch elastic about 20 inches long. Use a safety pin to thread the elastic through the casing. Leave a 1 inch tail sticking out at both ends and stitch the casing ends closed, sewing the elastic into the seam. Trim the elastic even with the apron fabric.
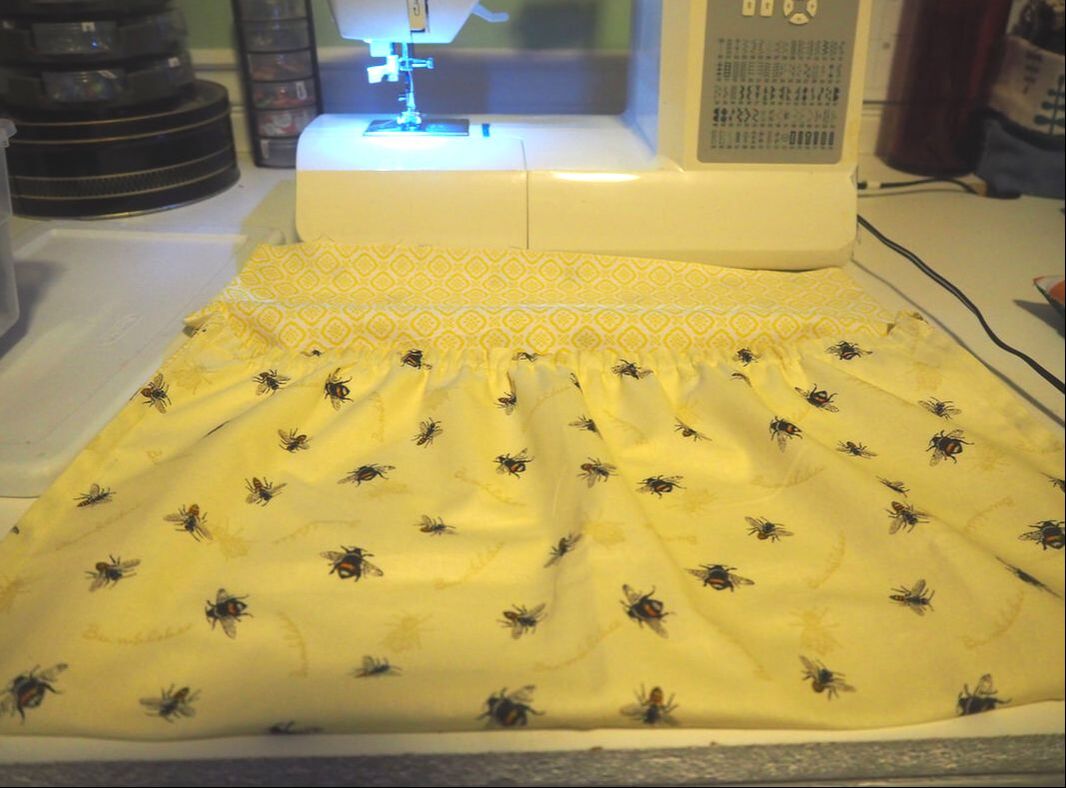
I folded up the pocket and sewed it in place before I put on the waistband. You can do it either way.
Fold up the fabric 10 inches to form the pocket. Pin it in place, stretching the elastic a bit if needed. Stitch in place close to the edge.
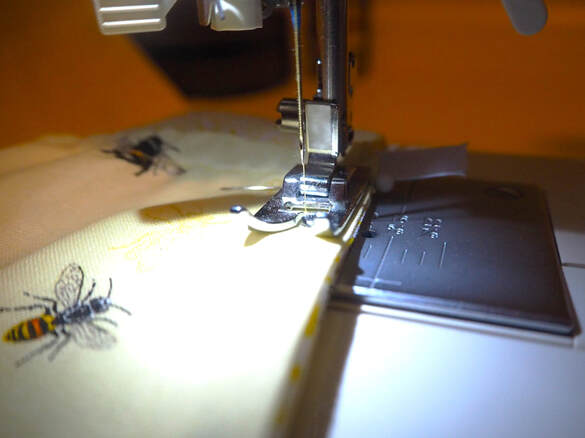
You can sew it closer than this if you want.
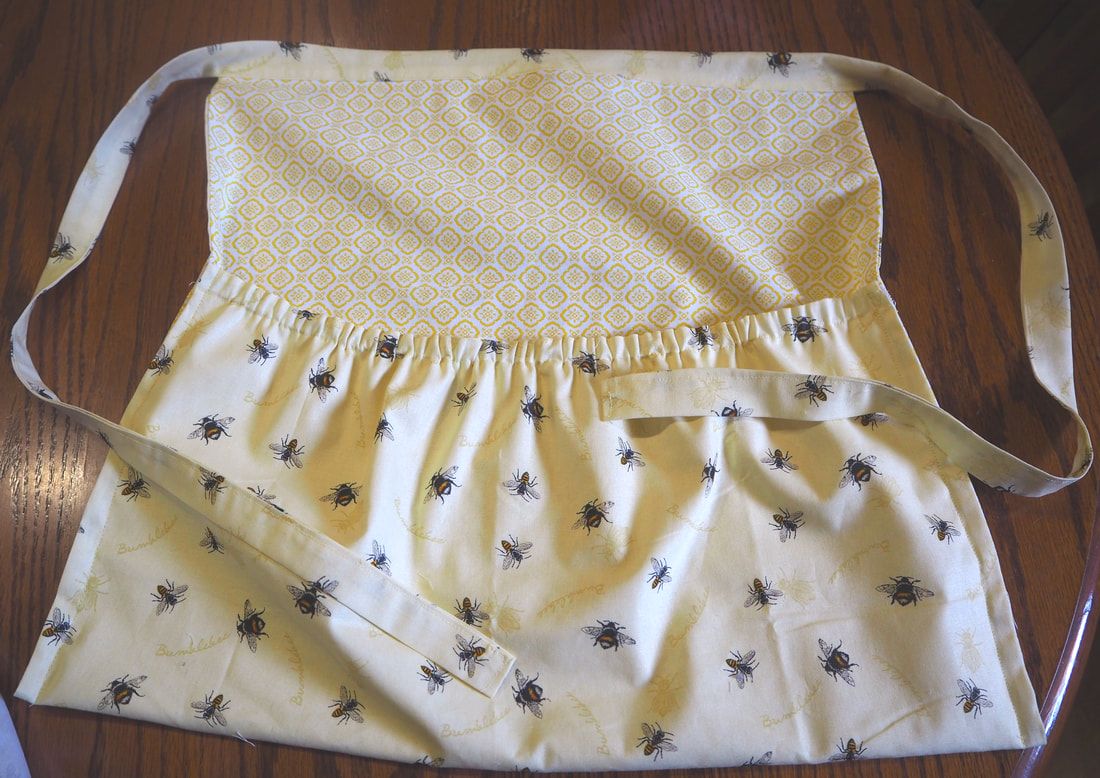
And now you are all ready to fill your pocket with your garden harvest! You will look adorable while you do it!

So proud of my beets!
Other Really Cute Fabric Choices!
|
Creators of Hot Cocoa Bombs! (copyrighted)

Author
Helen Reynolds: Mother of six children , grandmother to eleven! I love to cook, craft and create things and I especially love doing that with my family, So, when my lawyer daughter, Lindsey, my artist daughter, Madalynn, and I came up with the idea of Hot Cocoa Bombs, this blog was born. Then, one more daughter, with her technical and science skills, plus creativity has joined in to round us out! Read more about us here! 
Click this link and visit 3WinksDesignShop on Etsy. Find our Hot Cocoa Bomb Idea Book, our For the Love of PIe e-book and more of our creations!

Amazon Gift Cards are the Perfect Gift!
    Archives
April 2024
|


 RSS Feed